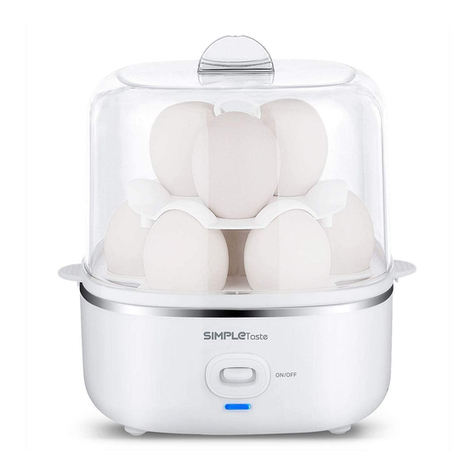
1 BY ONE SIMPLETsate User manual

1byone Products Inc.
1230 E Belmont Street, Ontario,CA, USA 91761
Customer Service: +1 909-391-3888
www.1byone.com
Egg Cooker
Instruction Manual

1
Introduction
Thank you for purchasing SimpleTaste Egg Cooker. This instruction manual
contains important information about safety, usage and disposal. Use the
product as described and keep this manual for future reference. If you sell this
egg cooker or pass it on, also give this manual to the new owner.
Important Safeguards
When using an electrical product, basic safety precautions should always be
followed:
1. READ ALL INSTRUCTIONS.
2. Unplug from the outlet when not in use, before putting on or taking o
parts and before cleaning.
3. Do not touch hot surfaces. Use the handles or wear oven gloves.
4. To protect against risk of electrical shock, do not immerse the egg cooker in
water or any other liquid. If the base falls into liquid, unplug the power cord
from the outlet immediately. DO NOT reach into the liquid.
5. To avoid possible accidental injury, close supervision is necessary when the
egg cooker is used by or near children or people with special needs.
6. Do not operate the egg cooker if the power cord is damaged or if the egg
cooker has been dropped or damaged. To avoid risk of electric shock, do not
disassemble the cooker. Take it to a qualied service person for examination
and repair or contact our customer service. Incorrect reassembly can cause
risk of electric shock when the cooker is used.
7. Use of attachments not recommended by the manufacture may cause re,
electrical shock or risk of injury.
8. Do not use outdoors or anywhere the power cord or the base might come
into contact with water while in use.
9. Do not use the egg cooker for anything other than its intended use.
10. To avoid the possibility of the egg cooker being accidentally pulled o
its work area, which may result in damage to the product or in personal
injury, do not let the power cord hang over the edge of the table, sink or
countertop.
11. To avoid damage to the power cord and possible re or electrocution
hazard, do not let the power cord contact hot surfaces, such as stoves.

2 3
12. Do not place the cooker on or near a hot gas or electric burner or in a
heated oven.
13. Do not put your hands or other objects into the egg cooker while it is in
operation. If food spills onto the heating plate, make sure the egg cooker is
turned o and cool before cleaning.
14. Use extreme caution when handling the measuring cup as it contains a
sharp pin on the bottom of the cup, which may cause injury.
15. Do not operate the egg cooker base in water or under running water.
16. Do not open the lid when the egg cooker is in operation.
17. To disconnect, turn any control to "o" status, then remove plug from wall
outlet.
18. An appliance other than a slow cooker provided with a exible cord less
than 4-1/2 feet (1.4m) in length shall be provided with the following
information:
a) A short power-supply cord (or detachable power-cord) is provided to
reduce the risk resulting from becoming entangled in or tripping over a
longer cord.
b) Longer detachable power-supply cord or extension cords are available
and may be used if care is exercised in their use.
c) If a longer detachable power-supply cord or extension cord is used:
1) The marked electrical rating of the cord set or extension cord should
be at least as great as the electrical rating of the appliance;
2) The cord should be arranged so that it will not drape over the
countertop or tabletop where it can be pulled on by children or
tripped over unintentionally; and
3) If the appliance is of the grounded type. The cord set or extension cord
should be a grounding-type 3-wire cord.
19. An appliance provided with a 2-wire polarized attachment plug shall
include the following or equivalent wording:“This appliance has a polarized
plug (one blade is wider than the other). to reduce the risk of electric shock,
this plug is intended to t into a polarized outlet only one way. If the plug
does not t into the outlet, reverse the plug. If it still does not t, contact a
qualied electrician. Do not attempt to modify the plug in any way.”
SAVE THESE INSTRUCTIONS
FOR HOUSEHOLD USE ONLY
Product Description
1. Lid
2. Upper Egg Holder
3. Lower Egg Holder
4. Heating Plate and Base
5. Power Button
6. Power Indicator
7. Power Plug
8. Poaching Tray
9. Omelet Tray
10. Measuring Cup
11. Pin with Stopper
12. Small Egg Holders
18
9
10
11
2
3
4
5
6
712
Included Items
1 x Egg Cooker
1 x Upper Egg Holder
1 x Lower Egg Holder
2 x Small Egg Holders
1 x Poaching Tray
1 x Omelet Tray
1 x Measuring Cup with Pin
1 x Instruction Manual
Before using the Egg Cooker for the rst time, check the package contents to
ensure all parts are free of visible damage.
Getting Started
1. Unwrap the packaging.
2. Check whether the voltage indicated on the rating label is consistent with
your outlet's voltage and that you're using a safe, grounded outlet.
3. Rinse all removable components thoroughly before the rst usage of the
egg cooker after unboxing.

4 5
Caution: The piercing pin on the bottom of the measuring cup is
extremely sharp! When not in use, always cover the pin with included
stopper to avoid injuring your hands.
DO NOT submerge the base of the cooker in water or liquid. Wipe the
base clean with a damp cloth.
Water Volume for Dierent Numbers of Eggs
The following water volume guidelines are for cold large eggs around 60g. You
can adjust water volume to achieve the desired results. If you tend to like your
eggs cooked a bit more well done, ll to the higher end of the water range. If
you prefer your eggs slightly runnier, ll to the lower end of the water range.
Doneness Number of Eggs Water Volume (ml)
Soft
1 95
3 80
5 75
7 65
10 55
Medium
1 120
3 105
5 95
7 85
10 75
Hard
1 180
3 160
5 150
7 130
10 110
Operating Instructions
CAUTION! Hot steam will escape from the steam hole during cooking and
upon opening the lid. Never lift the egg holder before opening the lid!
Danger of Scalding! Always open the lid by lifting up with the top grip
and removing it to the side. Avoid letting the escaping steam contact
your hand and arm.
For Hard, Medium or Soft Cooked Eggs
1. Place the egg cooker on a clean, dry surface.
2. Remove the lid and all other removable parts.
3. Decide how you want the eggs cooked. Find the markings for Hard, Medium
or Soft on the measuring cup and ll with cold water to the center of your
desired range. For best results, use distilled water, as tap water has minerals
that can cause eggs to discolor.
Note: The provided ranges are a guide and water levels may need to be
adjusted to achieve desired doneness.
4. Pour cold water into the heating plate.
5. Rinse the number of eggs desired. Up to 10 eggs can be cooked at a time.
6. Place the lower egg holder over the base. The grooved sides of the handles
should face upward.
7. Pierce the larger end of each egg with the pin attached to the bottom of the
measuring cup. Wash and dry the pin after use. Place each egg in the holder
with the pierced side facing up.
Note: To cook more than 7 eggs (up to 10 total), place the upper egg holder
over the center of the lower egg holder, resting the raised edges carefully on
the tops of the eggs below. Eggs placed on the upper egg holder should also
have their large ends pierced with the pin.
8. Place the lid on top of the cooker and plug the egg cooker in. Press down
on the Power button to switch on the cooker. The power indicator light will
switch on.
9. The cooking cycle has ended when the water has completely evaporated.
An audible tone will sound and the indicator light will switch o.
Note: Cooking time will vary depending on number of eggs and consistency.
10. Press down on the Power button to turn o the cooker.
Note: Once the cooker cools o, it will automatically turn on again if the
Power button is not manually turned o.
11. Remove eggs immediately and run them under cold water to prevent
overcooking.

6 7
12. The eggs will now be ready to serve.
For Poached Eggs
1. Place the egg cooker on a clean, dry surface.
2. Remove the lid and all other removable parts.
3. Fill the measuring cup with cold water to the center of the Poached range.
For best results, use distilled water, as tap water has minerals that can cause
the eggs to discolor.
Note: The provided range is a guide and water levels may need to be
adjusted to achieve desired doneness.
4. Pour cold water into the heating plate.
5. Lightly butter or spray vegetable oil on the poaching tray.
6. Break an egg into each poaching section. Up to 3 eggs can be poached at a
time.
7. Place the lower egg holder over the base. The grooved sides of the handles
should face upward.
8. Place the poaching tray on top of the lower egg holder.
9. Cover the lid and plug the egg cooker in. Press down the Power button to
switch on the cooker. The power indicator light will switch on.
10. The eggs will be poached when the water has completely evaporated.
11. When cooking is complete, an audible tone will sound and the indicator
light will switch o.
12. Press down on the Power button to turn o the cooker.
Note: Once the cooker cools o, it will automatically turn on again if the
Power button is not manually turned o.
13. Remove the eggs immediately to prevent overcooking.
14. Use a small spatula to remove the poached eggs.
For Omelets
1. Place the egg cooker on a clean, dry surface.
2. Remove the lid and all other removable parts.
3. Fill the measuring cup with cold water to the center of the Omelet range.
For best results, use distilled water, as tap water has minerals that can cause
eggs to discolor.
Note: The provided is a guide and water levels may need to be adjusted to
achieve desired doneness.
4. Pour cold water into the heating plate.
5. Lightly butter or spray vegetable oil on the poaching tray.
6. Break 1 to 3 eggs into a separate bowl and mix with water or milk as you
desired. Pour the beaten mixture into the omelet tray.
7. Place the lower egg holder over the base. The grooved sides of the handles
should face upward.
8. Place the omelet tray on top of the holder.
9. Cover the lid and plug the egg cooker in. Press down on the Power button
to turn on the cooker. The power indicator light will switch on.
10. The omelet will be ready when the water has completely evaporated.
11. When cooking is complete, an audible tone will sound and the indicator
light will switch o.
12. Press down the Power button to switch o the cooker.
Note: Once the cooker cools o, it will automatically turn on again if the
Power button is not manually turned o.
13. Remove the omelet immediately to prevent overcooking.
14. Use a small spatula to remove the omelet from the tray.
Tips and Hints
• Refrigerate eggs until ready for use. Always use cold eggs; do not bring them
to room temperature before use or the eggs will be slightly overcooked.
• Eggs should be stored in the carton in which they were purchased to keep
them from drying out and absorbing refrigerator odors.

8 9
• The eggs should be in the carton large end up; this will help them stay
fresher longer and will keep the yolks centered. This is a suggested method
for storing eggs.
• Before cooking soft, medium or hard eggs, pierce one side of each egg to
prevent the shell from cracking during the cooking process. Always pierce
the top of the egg; this is the same side that should be facing up when
stored in the refrigerator.
• Don’t know if your eggs are fresh? Place them in a bowl of cool salted water.
If they sink, they are fresh; if they oat, they are not.
• Always wash the eggshells prior to soft, medium or hard cooking.
• You should always cool hard cooked eggs immediately after cooking to
prevent them from cooking further and causing a dark green ring to form
around the yolk. First use tongs to remove cooked eggs and carefully place
in a large colander or strainer. Allow cold water to pour over the eggs until
the eggs are cool enough to handle. Alternatively, you can place the eggs in
a large bowl of ice water.
• To more easily crack and peel hard cooked eggs, gently roll them on the
counter using the palm of your hand. Begin peeling from the larger end of
the egg.
• Hard cooked eggs that have been decoratively colored and displayed should
not be consumed; discard them after use.
• To serve soft or medium-cooked eggs in a cup, place the egg in a cup with
the small end down. Slice o the large end, about one inch from the top,
using a knife or egg scissors. Eat from the shell with a teaspoon or serve with
toast strips to dip in the soft yolk.
• Use our provided measuring cup as a guide. If you tend to like your eggs
cooked a bit more well done, ll to the higher end of the water range. If you
prefer your eggs slightly runnier, ll to the lower end the water range. You
will nd changing water levels useful when preparing poached eggs and
other types of eggs as well.
• Poached eggs may be made in advance and then reheated prior to use.
When doing so, undercook the eggs slightly by using less water, and then
immediately cool by placing in the refrigerator. To re-warm, place in a bowl
of warm water, and then drain on a plate lined with paper towels.
• Before using either the poaching tray or the omelet tray, always brush with
butter or lightly coat with oil or a nonstick cooking spray.
• We provide recipes for a variety of omelets. Be creative and use your favorite
llings. Start with 3 eggs, 2–3 tablespoons of milk or water, and then up to 3
tablespoons of any vegetables, cheeses and/or seasonings you desire.
• The omelet pan is for more than just omelets. We provide a delicious recipe
for chocolate chip bread pudding; you can also cook bread puddings of
other avors, savory or sweet, using the same amount of ingredients. For
a sweet breakfast treat, try making an individual French toast with sliced
or cubed bread, and other tasty ingredients (eggs, milk, cinnamon, vanilla
extract, etc).
Maintenance and Care
• Always unplug the egg cooker from the electrical outlet before cleaning.
• Wash all removable parts in hot, soapy water or in a dishwasher.
• Clean the heating plate with a damp cloth.
• Remove any mineral deposits left behind from water by wiping the plate
with a paper towel moistened with one tablespoon white vinegar. This also
works as an antibacterial agent.
CAUTION: The cooker base will be extremely hot after use. Allow the cooker
to cool before handling or cleaning.
NOTE: If the heating plate is not cleaned with white vinegar on a regular
basis, minerals naturally occurring in the water will build up and cause
discoloration of cooked eggsheels. However, discoloration of the eggshells
does not aect the taste of the eggs.
• Wipe the main body housing with a damp cloth. DO NOT immerse in water.
• Use the cord wrap feature located on the bottom of the cooker to store
additional length of the power cord.
• Store the clean cooking holders, omelet and poaching trays, measuring cups
and egg holders inside the egg cooker when not in use.

10 11
Troubleshooting
Issue Solution
The indicator
light does not
switch on.
Ensure that the power cord is plugged into the power outlet.
Check to make sure the power outlet is operating correctly.
Press down on the power button.
Determine if a power failure has occurred in your home,
apartment or building.
The eggs are
overcooked or
undercooked.
Use the measuring cup to determine the appropriate amount
of water needed to cook the eggs.
Observe the recommended cooking times for soft, medium
and hard-boiled eggs.
If the eggs are overcooked, make sure to remove the eggs from
the egg cooker immediately after the tone sounds.
Make sure the heating plate, lid and accessories are completely
dry before adding the appropriate amount of water to the
heating plate and cooking the eggs.
The audible
tone keeps
sounding.
Press down the Power button to turn o the cooker manually.
Specications
Rated Voltage: AC 120V~60Hz
Rated Power: 600W
Maximum Egg Volume: 10
Disposal
Disposal of the Product
Under no circumstances should you dispose of the product in
normal domestic waste.
This product is subject to the provisions of European Directive
2012/19/EU.
Dispose of the product via an approved disposal company or your municipal
waste facility. Please observe currently applicable regulations.
Please contact your waste disposal center if you need any further information.
This product’s packaging is made from environmentally friendly
material and can be disposed of at your local recycling plant.
Recipes
Deviled Eggs
Make 20 servings
10
1⁄3
1¼
1¼
1¼
2½
½
2
large hard-boiled eggs, cooled just enough to handle
cup mayonnaise
teaspoons Dijon mustard
teaspoons fresh lemon juice
teaspoons Worcestershire sauce
tablespoons capers, drained
teaspoon kosher salt
pinches freshly ground white or black pepper
1. Peel the cooked eggs and carefully slice in half lengthwise. Place the egg
white halves on a clean work surface.
2. Put the yolks into the work bowl of a food processor tted with the metal
chopping blade; process until no longer grainy, about 45 to 60 seconds.
3. Pulse in the remaining ingredients and process until smooth, about 45
seconds to 1 minute. Taste and adjust seasoning accordingly.

12 13
4. You may either carefully scoop the lling into the whites, or for a beautiful
presentation, t a pastry bag with a small star tip. Fill the pastry bag with
the egg lling and pipe a large rosette onto each white in place of the yolk.
Sprinkle with paprika before serving.
Nutritional information per serving:
Calories 63 (77% from fat) • carbohydrate 0g
• protein 3g • fat 5g • saturated fat 1g • cholesterol 94mg
• sodium 135mg • calcium 14mg • ber 0g
Egg Salad
This basic egg salad is great for sandwiches. It can be“dressed up” by adding
chopped green onion or shallot, chopped pickles, chopped sun-dried
tomatoes or chopped fresh herbs.
Makes about 3 cups
10
1
½
3
¼
1⁄8
hard cooked eggs, completely cooled
stalk celery, about 4 inches,
cut into 1-inch pieces
cup mayonnaise
teaspoons Dijon mustard
teaspoon kosher salt
teaspoon freshly ground white or black pepper
Note: The egg salad can be made two ways, either pulsed in a food processor
for a creamier version, or diced as traditionally served in sandwiches. Both are
delicious – you decide which way you prefer.
Food Processor Instructions
1. Remove shells from eggs and discard. Cut eggs into quarters and reserve.
2. Place the celery in the work bowl of a food processor tted with the metal
chopping blade. Pulse to chop, about 5 to 10 times; scrape the work bowl.
Add the quartered eggs to the work bowl; pulse 3 to 4 times to roughly
chop.
3. Add mayonnaise, mustard, salt and pepper.
Pulse until mayonnaise and mustard are completely mixed in and desired
texture is reached, 10 to 20 times.
For Dicing Instructions
1. Remove shells from eggs and discard.
First halve eggs, and then cut each half into ¼- to ½-inch dice. Reserve in a
large mixing bowl.
2. Cut the celery into the same size as the diced eggs, ¼ to ½-inch dice. Put in
the bowl with the eggs.
3. Add the remaining ingredients, stir gently to combine. Taste and adjust
seasonings as desired.
Nutritional information per serving (½ cup):
Calories 256 (81% from fat) • carbohydrate 1g
• protein 11g • fat 23g • saturated fat 5g • cholesterol 317mg
• sodium 349mg • calcium 50mg • ber 0g
Eggs Benedict
A brunch staple, this dish is sure to please all of your guests.
Makes 4 servings
4
4
2
½
slices Canadian bacon
poached eggs
English muns, split and toasted
cup hollandaise sauce
1. Heat a large sauté pan over medium-high heat. Sauté the Canadian bacon,
turning once, until browned, about 2 to 4 minutes per side. Keep warm.

14 15
2. On each mun half, place one slice of the Canadian bacon. Top with a
poached egg; nish with about 2 tablespoons of hollandaise sauce.
Nutritional information per serving:
Calories 293 (61% from fat) • carbohydrate 15g
• protein 14g • fat 19g • saturated fat 10g • cholesterol 318mg
• sodium 634mg • calcium 69mg • ber 1g
Eggs Florentine
Escarole is a great replacement for the spinach in this breakfast favorite.
Makes 4 servings
4
½ – 1
4
2
½
cups spinach, packed
tablespoon olive oil
poached eggs
English muns, split and toasted
cup hollandaise sauce
1. In large sauté pan, heat the oil over medium heat. Add the spinach, a little
bit at a time.
Cook until bright and just wilted. Keep warm.
2. On each mun half, evenly distribute the spinach. Place one poached egg
on top; nish with the hollandaise sauce (about 2 tablespoons per serving).
3. Serve immediately.
Nutritional information per serving:
Calories 291 (64% from fat) • carbohydrate 15g • protein 11g
• fat 21g • saturated fat 10g • cholesterol 308mg
• sodium 461mg • calcium 121mg • ber 1g
Hollandaise Sauce
This sauce is for more than just eggs, serve it over a plate of steamed
vegetables like asparagus.
Makes about 1 cup
4
1
½
½ to ¾
egg yolks
tablespoon lemon juice
cup melted butter, kept warm
teaspoon kosher salt
pinch ground white pepper pinch cayenne water, to thin if necessary
1. In a medium bowl, whisk yolks and lemon juice until just thickened. Place
the bowl over a pot of simmering, NOT boiling, water; while whisking
constantly, whisk the mixture until it has increased in volume and has
thickened, about 8 to 10 minutes. The eggs must not cook, so if it seems as
though the mixture is getting above body temperature, whisk the mixture
o of the heat a bit, and, then place back onto the pot of water.
2. Once thickened, slowly whisk in the melted butter until completely
combined. Stir in spices. If sauce is too thick, thin out with some water or
extra lemon juice.
3. Use immediately.
Nutritional information per serving:
Calories 128 (94% from fat) • carbohydrate 0g • protein 1g
• fat 13g • saturated fat 8g • cholesterol 122mg
• sodium 152mg • calcium 11mg • ber 0g

16 17
3-Egg Omelets
We give you the formula for the perfect uy omelet. While there are a few
types listed, be creative and throw in your favorite vegetables or cooked meats.
Each make 1 serving
Plain Egg Omelet
3
¼
nonstick cooking spray
large eggs
cup reduced fat milk
pinch kosher salt
pinch freshly ground black pepper
Cheese and Chives
3
3
2
1
nonstick cooking spray
large eggs
tablespoons reduced fat milk
tablespoons shredded cheese
tablespoon chopped chives
pinch kosher salt
pinch freshly ground black pepper
Spinach and Goat Cheese
3
2
5 – 6
1
2
nonstick cooking spray
large eggs
tablespoons reduced fat milk
large spinach leaves, nely chopped pinch kosher salt
pinch freshly ground black pepper
tablespoon goat cheese, crumbled
teaspoons grated Parmesan
Pepper and Onion
3
2
2
1
1
nonstick cooking spray
large eggs
tablespoons reduced fat milk
tablespoons nely chopped bell
pepper
tablespoon nely chopped onion
pinch kosher salt
pinch freshly ground black pepper
tablespoon shredded Cheddar
Ham & Swiss
3
2
1
2
nonstick cooking spray
large eggs
tablespoons reduced fat milk
pinch freshly ground black pepper
tablespoon chopped, cooked ham
tablespoons shredded Swiss
1. Lightly coat the omelet tray with nonstick cooking spray.
2. Whisk together the eggs, milk, salt (if using) and pepper.
3. If using vegetables or meat, put those in the greased omelet tray. Top with
the egg mixture, then nish with any fresh herbs and/or cheese.
4. Fill the included measuring cup with water up to the Omelet line; pour into
the egg cocker base, tted with the egg holder.
Place the lled omelet tray on top of the holder. Cover and switch on the
cooker.
5. Once the tone sounds, omelet is ready to enjoy.
6. Switch o and carefully remove cover. Serve immediately.

18 19
Nutritional information per omelet (plain):
Calories 243 (58% from fat) • carbohydrate 4g • protein 21g
• fat 15g • saturated fat 5g • cholesterol 563mg
• sodium 337mg • calcium 152mg • ber 0g
Nutritional information per omelet
(cheese and chives):
Calories 301 (61% from fat) • carbohydrate 4g • protein 24g
• fat 20g • saturated fat 8g • cholesterol 577mg
• sodium 425mg • calcium 257mg • ber 0g
Nutritional information per omelet
(spinach and goat cheese):
Calories 297 (60% from fat) • carbohydrate 4g • protein 25g
• fat 19g • sat. fat 8g • cholesterol 571mg
• sodium 452mg • calcium 222mg • ber 0g
Nutritional information per omelet
(pepper and onion):
Calories 280 (58% from fat) • carbohydrate 6g • protein 23g
• fat 18g • saturated fat 7g • cholesterol 570mg
• sodium 382mg • calcium 207mg • ber 0g
Nutritional information per omelet
(ham and Swiss):
Calories 310 (59 % from fat) • carbohydrate 5g • protein 27g
• fat 20g • saturated fat 8g • cholesterol 581mg
• sodium 406mg • calcium 259mg • ber 0g
Chocolate Chip Bread Pudding
Bread pudding for two – this is delicious when paired with vanilla ice cream or
freshly whipped cream.
Makes 2 servings
1 cup ½-inch
½
1
½
1
2 – 3
nonstick cooking spray (or 1 tablespoon softened butter)
cubed challah bread (or you may use a sweet roll, such as
brioche, or a croissant if you do not want to purchase an
entire loaf of challah bread)
cup reduced fat milk
large egg
teaspoon pure vanilla extract pinch table salt
tablespoon granulated sugar
tablespoons semisweet chocolate chips
1. Lightly coat the omelet tray with nonstick cooking spray or butter.
2. Place bread cubes in a medium bowl. Reserve.
3. In a large liquid measuring cup, combine the milk, egg, vanilla, salt and
sugar. Whisk to combine. Pour mixture over the reserved bread cubes. Add
chocolate chips; stir to combine.
4. Fill the included measuring cup with water up to the Omelet line; pour into
the egg cooker base, tted with the egg cooker.
Carefully pour the bread pudding ingredients into the prepared omelet tray.
Place the omelet tray on the egg holder, cover and switch on the cooker.
5. Once the tone sounds, the bread pudding is ready to enjoy. Switch o and
carefully remove cover. Serve immediately.
Note: The bread pudding will deate some when the cover is removed; this
is normal.
Nutritional information per serving:
Calories 270 (31% from fat) • carbohydrate 38g • protein 9g
• fat 9g • saturated fat 4g • chol. 116mg
• sodium 225mg • calcium 122mg • ber 1g

Customer Service/Kundenservice/Service Clients
Atención al cliente/Assistenza Clienti/ カスタマーサービス
US
To ensure speedy handling of your
issue, please call or email us for
assistance.
Phone: +1 909-391-3888
(Mon-Fri 9:00am - 6:00pm PST)
Email: ushelp@1byone.com
UK
To ensure speedy handling of your
issue, please call or email us for
assistance.
Phone: +44 158 241 2681
(Mon-Fri 9:00am - 6:00pm UTC)
Email: ukwebhelp@1byone.com
FR
Pour vous assurez une assistance
rapide en cas de problème, veuillez
envoyer un e-mail.
Email: euhelp@1byone.com
IT
Per supporto immediato in caso di
bisogno, la invitiamo a contattarci via
email.
Email: euhelp@1byone.com
CA
To ensure speedy handling of your
issue, please email us for assistance.
Email: cahelp@1byone.com
DE
Für eine zügige Bearbeitung ihres
Problems, melden Sie sich bei uns
wie folgt.
Email: euhelp@1byone.com
ES
Para garantizar una rápida atención
de su problema, favor envíenos un
email para ayudarle.
Email: euhelp@1byone.com
JP
お客様の問題が直ちに解決され
るため、ぜひメールにて弊社ま
でご連絡ください。
Eメール:jphelp@1byone.com
Table of contents
Other 1 BY ONE Egg Cooker manuals
Popular Egg Cooker manuals by other brands
Cuisinart
Cuisinart CEC10E instructions
Fritel
Fritel EC 1475 instruction manual
Kalorik
Kalorik EK 35321 operating instructions

Elite Gourmet
Elite Gourmet EGC-007 Instruction manual & recipe guide

Salton
Salton EG2LT Looney Tunes Use and care guide
Focus Electrics
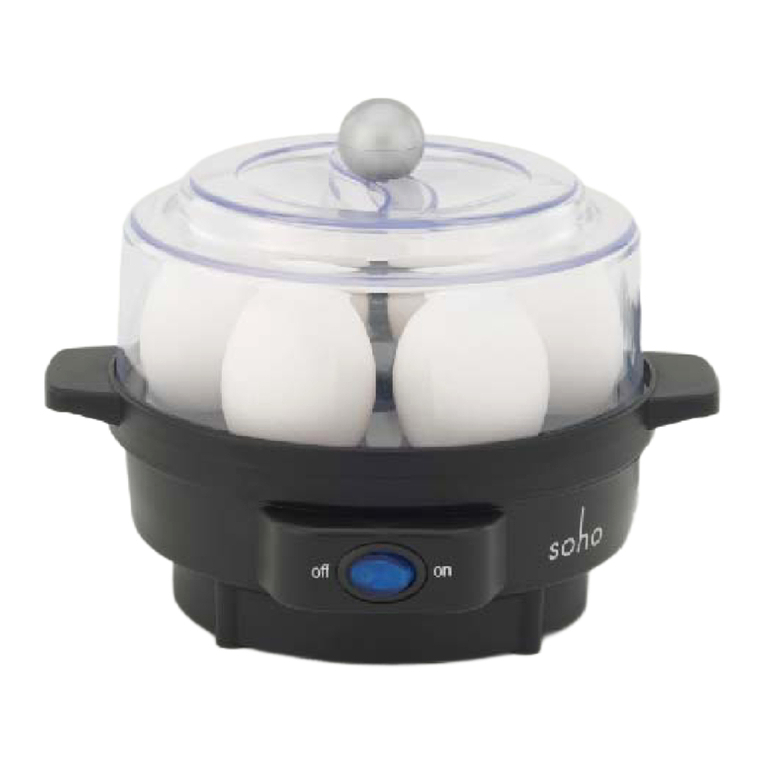
Focus Electrics WestBend Soho 86675 user manual
