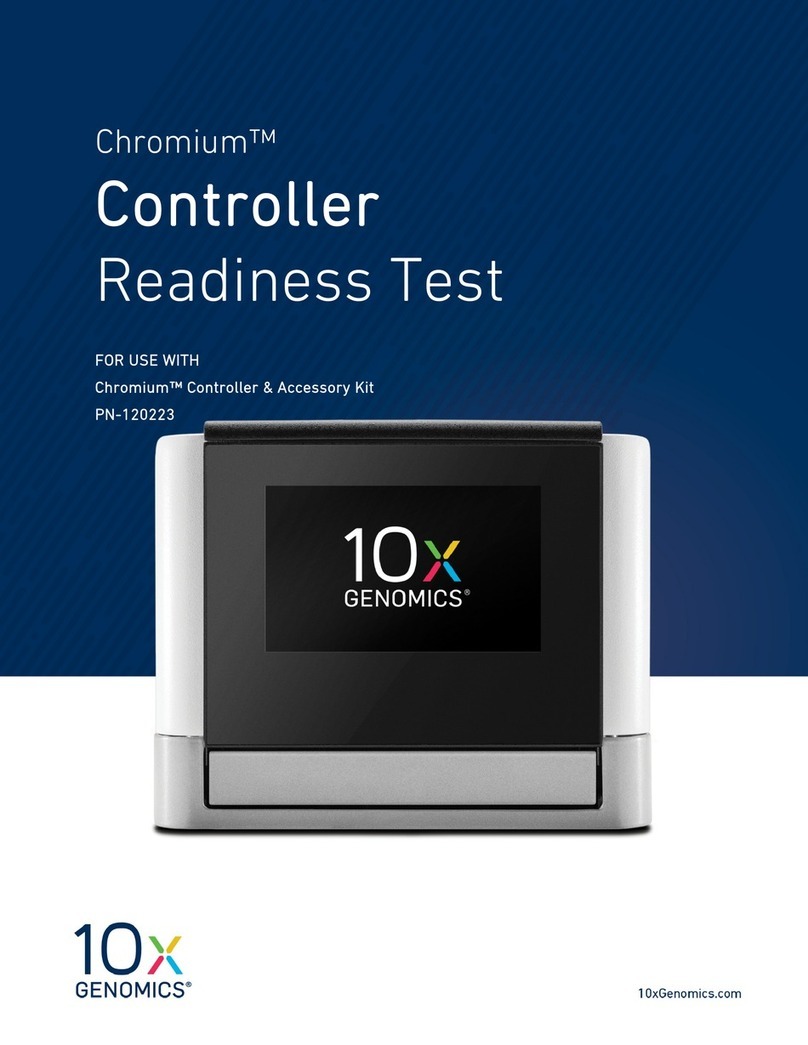
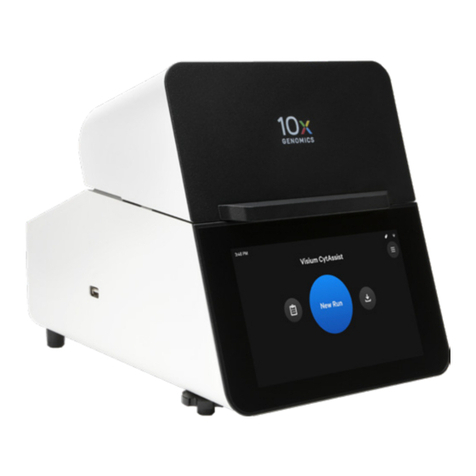
10x Genomics Visium CytAssist User manual

10xgenomics.com
User Guide | CG000542 | Rev A
Visium CytAssist
with Readiness Test
For use with:
Visium CytAssist & Accessory Kit, 12-Month Warranty, PN-1000441
Visium CytAssist Instrument Accessory Kit, PN-1000433
Visium CytAssist & Accessory Kit, 24-Month Warranty, PN-1000442
Visium CytAssist Instrument Accessory Kit, PN-1000433

2
CG000542 | Rev A
User Guide | Visium CytAssist Instrument | Notices
Link to TOC | 10xgenomics.com
Notices Document Number
CG000542 | Rev A
Legal Notices
© 2022 10x Genomics, Inc. (10x Genomics). All rights reserved. Duplication and/or reproduction of
all or any portion of this document without the express written consent of 10x Genomics, is strictly
forbidden. Nothing contained herein shall constitute any warranty, express or implied, as to the
performance of any products described herein. Any and all warranties applicable to any products
are set forth in the applicable terms and conditions of sale accompanying the purchase of such
product. 10x Genomics provides no warranty and hereby disclaims any and all warranties as to the
use of any third-party products or protocols described herein. The use of products described
herein is subject to certain restrictions as set forth in the applicable terms and conditions of sale
accompanying the purchase of such product. A non-exhaustive list of 10x Genomics’ marks,
many of which are registered in the United States and other countries can be viewed at:
www.10xgenomics.com/trademarks. 10x Genomics may refer to the products or services offered
by other companies by their brand name or company name solely for clarity, and does not claim
any rights in those third-party marks or names. 10x Genomics products may be covered by one
or more of the patents as indicated at: www.10xgenomics.com/patents.The use of products
described herein is subject to 10x Genomics Terms and Conditions of Sale, available at
www.10xgenomics.com/legal-notices, or such other terms that have been agreed to in writing
between 10x Genomics and user. All products and services described herein are intended FOR
RESEARCH USE ONLY and NOT FOR USE IN DIAGNOSTIC PROCEDURES.
Instrument & Licensed Software Updates Warranties
Updates to existing Instruments and Licensed Software may be required to enable customers to
use new or existing products. In the event of an Instrument failure resulting from an update, such
failed Instrument will be replaced or repaired in accordance with the 10x Limited Warranty,
Assurance Plan or service agreement, only if such Instrument is covered by any of the foregoing
at the time of such failure. Instruments not covered under a current 10x Limited Warranty,
Assurance Plan or service agreement will not be replaced or repaired.
Support
Email: support@10xgenomics.com
10x Genomics
6230 Stoneridge Mall Road
Pleasanton, CA 94588 USA

3
CG000542 | Rev A
User Guide | Visium CytAssist Instrument | Document Revision Summary
Link to TOC | 10xgenomics.com
Document
Revision
Summary
Document Number
CG000542 | Rev A
Title
Visium CytAssist Instrument User Guide with Readiness Test
Revision
Rev A
Revision Date
July 2022

4
CG000542 | Rev A
User Guide | Visium CytAssist Instrument | Table of Contents
Link to TOC | 10xgenomics.com
Table of
Contents
Introduction
Introduction
Product Identification Label
Product Specifications
Safety & Compliance Information
Safety
Regulatory
System Components
System Components
Accessory Kits
Tips & Best Practices
Icons
Check Tissue Placement on Slide
Tissue Slide Placement on Tissue Slide Stage
Visium Slide Placement on Visium Slide Stage
x Genomics Cloud
Menu Options
Menu Options
Firmware Update Procedure
System Operation
Step : Installation
Step : First-Time Use
Step : Readiness Test
Step : Main Operation
Maintenance
System Maintenance
Moving & Shipping the Instrument
Troubleshooting
Troubleshooting
Error Screens

Introduction
Introduction
Product Identification
Product Specifications

6
CG000542 | Rev A
Link to TOC | 10xgenomics.com
User Guide | CytAssist Instrument | Introduction
The Visium CytAssist is a compact, bench top instrument that automates
the transfer of transcriptomic analytes from standard microscope slides
to Visium slides, enabling spatial profiling insights from more samples.
Compatible with hematoxylin and eosin (H&E)- or immunofluorescence
(IF)-stained FFPE tissue sections, the CytAssist instrument allows pre-
sectioned tissues to be used for the Visium workflow and eliminates the
need to directly section onto Visium slides.
Further optimization of Visium experiments can be achieved by pre-
screening tissue sections using standard histological techniques to find
biologically significant sections, then using the CytAssist instrument
workflow to precisely align those sections within the Visium Capture
Areas. Using Visium Cytassist, analytes from up to two FFPE tissue
sections can be captured on CytAssist specific slides in less than one
hour per run.
Highlights
• Simplify sample handling with automated transfer of transcriptomic
analytes from standard slides onto the Capture Area of a Visium slide
• Eliminate the need to section directly onto the Visium slide, and
expand sample compatibility to pre-sectioned slides
• Maximize insights from Visium experiments by pre-screening tissue
sections with standard histological techniques to select the most
biologically significant sections
• Precisely capture analytes from up to two FFPE tissue sections per run
in less than one hour using CytAssist specific slides and reagents
Product Compatibility
The Visium CytAssist is designed for compatibility with the Visium
CytAssist Spatial Gene Expression for FFPE assay:
• For Mouse or Human tissues
• With 6.5 mm or 11 mm Capture Area options
2 Tissue Slides
with H&E or
IF stained
sections
Visium
CytAssist Slide
6.5 mm or
11 mm
Visium CytAssist Visium
CytAssist Slide
with target molecules
captured by oligos
2 Images
with spatial orientation
for mapping
sequencing data
Introduction

7
CG000542 | Rev A
Link to TOC | 10xgenomics.com
User Guide | CytAssist Instrument | Introduction
Product
Identification Label
Parameter Specifications
Weight ~ lb ( kg)
Instrument Dimensions with:
Lid closed
Lid open
Maximum height
W D H
”[ mm] ”[ mm] ”[ mm]
” [ mm]
Electrical Requirements
Nominal
from a standard -prong wall receptacle
that includes a safety ground pin
- VAC, / Hz, W
- V operational range (/- of nominal)
Over voltage Category II (standard receptacle)
Pollution Degree (Indoor Use Only)
Ventilation Requirement Minimum ” [ cm]
Around all sides
Operating Temperature -°F [-°C]
Use in a typical indoor laboratory environment.
Extreme temperature conditions will aect the
sensitive reagents used with the instrument.
Humidity - R.H. non-condensing
Power Cable Length
Power cables will be in accordance
with regional specifications
- ft [ m] Standard
Product
Specifications
9.76”
8”
12.3”
13.1” max height
21
© 10X GENOMICS, INC. 2020 | CONFIDENTIAL – DO NOT DISTRIBUTE.
Visium CytAssist LBL-00042-01 Regulatory Label
● Must be legible from 18
inches
● Electrical shock warning not
required, but included. Must
be in English and French if
certified for Canada
● Instrument SN: CA is an approved
product code, starting SN will be
CAVG10001
Image of label for reference only
Instrument Serial Number
21© 10X GENOMICS, INC. 2020 | CONFIDENTIAL – DO NOT DISTRIBUTE.
Visium CytAssist LBL-00042-01 Regulatory Label
● Must be legible from 18
inches
● Electrical shock warning not
required, but included. Must
be in English and French if
certified for Canada
● Instrument SN: CA is an approved
product code, starting SN will be
CAVG10001
The instrument requires a
~20min cool down between runs.

Safety & Compliance
Information
Safety
Regulatory

9
CG000542 | Rev A
User Guide | CytAssist Instrument | Safety & Compliance Information
Link to TOC | 10xgenomics.com
Safety Before operation, ensure that all potential users have received:
• Instruction in general safety practices for laboratories.
• Instruction in specific safety practices for the instrument.
• All related Safety Data Sheet (SDS) documents.
Precautions are illustrated in the following way:
Symbols Description
The general Warning symbol indicates the possibility of
damaging the instrument or compromising the results of
a method.
The Electrical Hazard symbol indicates the presence of
electrical components that can be harmful to the operator
if handled incorrectly.
The Mechanical Hazard symbol indicates the presence
of moving mechanical parts that can be harmful to the
operator if handled incorrectly.
The Hazardous Materials symbol indicates the presence
of materials that are toxic or otherwise harmful to the
operator if handled incorrectly.
The Biohazard symbol indicates the presence of biological
samples that can be harmful to the operator if handled
incorrectly.
Ensure ground is reliably connected before plugging the instrument’s
power cord into the power source (receptacle). Grounding is required to prevent
electric shock. If the power source is not grounded, qualified personnel must first install a
reliable safety ground.
Pinch risk: Ensure no obstructions or fingers present near closing lid.
Warning: Avoid using the Visium CytAssist in a manner not specified
by 10x Genomics. The Visium CytAssist has been designed to protect the user. If used
improperly, the intended user protections can be impaired.

10
CG000542 | Rev A
User Guide | CytAssist Instrument | Safety & Compliance Information
Link to TOC | 10xgenomics.com
Regulatory The Visium CytAssist has been designed, tested, and certified to be in
compliance with the following standards:
Certification Standards
TUV Certification only for Visium CytAssist
UL - and CAN/CSA C No. -- with a cTUVus mark to indicate
that the product has been tested and certified to Canadian and US standards by TUV
Rheinland and can be legally installed in those countries.
IEC/EN - (rd Edition): Safety Requirements for Electrical Equipment for
Measurement, Control, and Laboratory use.
EN -: Electrical Equipment for Measurement, Control and Laboratory Use.
EMC Requirements.
The RCM mark indicates an electrical product complies with all the requirements of the
electrical and EMC regulations of Australia and New Zealand in accordance with
AS/NZS Standards
CE Mark indicates that assembly is covered by a Declaration of Conformity, and has been
declared in conformity with the provisions of all applicable directives in the European
Union.
UKCA Mark indicates that assembly is covered by a Declaration of Conformity, and has
been declared in conformity with the provisions of all applicable directives in the United
Kingdom.
EN --: Specifies minimum requirements for immunity and emissions regarding
electromagnetic compatibility for in vitro diagnostic medical equipment, taking into
account the particularities and specific aspects of this electrical equipment and their
electromagnetic environment.
EN --: Electromagnetic compatibility (EMC) - Part -: Limits - Limits for
harmonic current emissions (equipment input current A per phase).
EN --: Electromagnetic compatibility (EMC) - Part -: Limits - Limitation of
voltage changes, voltage fluctuations and flicker in public low-voltage supply systems, for
equipment with rated current A per phase and not subject to conditional connection.
RoHS Directive (//EU) and amendment (EU) /: Restriction of the use of
certain hazardous substances in electrical and electronic equipment.
WEEE Directive (//EU): Waste Electrical and Electronic Equipment.
FCC ID: NC-SDPAC, IC: A-SDPAC
FCC Part Class A. NOTE: This equipment has been tested and found to comply with
the limits for a Class A digital device, pursuant to part of the FCC Rules. These limits
are designed to provide reasonable protection against harmful interference when the
equipment is operated in a commercial environment. This equipment generates, uses, and
can radiate radio frequency energy and, if not installed and used in accordance with the
instruction manual, may cause harmful interference to radio communications. Operation
of this equipment in a residential area is likely to cause harmful interference in which case
the user will be required to correct the interference at his own expense.
This device complies with part of the FCC Rules. Operation is subject to the following
two conditions: () This device may not cause harmful interference, and () this device
must accept any interference received, including interference that may cause undesired
operation.
ICES- (Canada): This Class A digital apparatus complies with Canadian ICES-. Cet
appareil numérique de la classe A est conforme à la norme NMB- du Canada.
System Components
System Components
Accessory Kits

12
CG000542 | Rev A
User Guide | CytAssist Instrument | System Components
Link to TOC | 10xgenomics.com
System Components
Back
Power Switch
Ethernet Port
USB Port
Shipping Bolt
Secures the camera during transportation;
removed during installation
Interior
Tissue Slide Stage
Tissue Slide Clips
Slide Alignment Guides
Visium Slide Lock
Visium Slide Stage
Tissue Alignment Windows
Visium Alignment Windows
Exterior
USB Port Touchscreen
Lid
Handle
Base
Adjustable Feet
Corner Bumper
Corner Bumper Non-adjustable Back Foot

13
CG000542 | Rev A
Link to TOC | 10xgenomics.com
User Guide | CytAssist Instrument | Introduction
Product # Part Number (Item)
Universal Power Cord, Amp- V
(IEC C-, with C- Detachable Adapters)
USB, GB
The Visium CytAssist instrument is compatible with
VFAT and exFAT formatted USBs.
Visium CytAssist Quick Reference Cards – for
Accessory Kit Instruction
CG
Visium CytAssist Training Kit
Visium CytAssist Training Slide Assembly
Blank Slides
Visium CytAssist Calibration Kit
Visium CytAssist Calibration Slide Assembly
Blank Slides
Product # Part Number (Item)
Shipping Bolt
Located in the back of the instrument during
transportation; removed during installation and
stored apart from the instrument
Visium CytAssist
Instrument
Accessory Kit
PN-1000433
Additional Items
Accessory Kits

Tips &
Best Practices
Icons
Check Tissue Placement on Slide
Tissue Slide Placement on Tissue Slide Stage
Visium Slide Placement on Visium Slide Stage
x Genomics Cloud

15
CG000542 | Rev A
User Guide | CytAssist Instrument | Tips & Best Practices
Link to TOC | 10xgenomics.com
Check Slide Dimensions
While slides are specified as being 25 mm x 75 mm, manufacturing
tolerances may lead to dimensions that are too small or large to be
compatible with Visium CytAssist. Tissue slide dimensions must be
within 24.8 mm - 25.3 mm in width and 74.4 mm - 76.2 mm in length to
fit the Visium CytAssist Tissue Slide Cassette.
• Minimum slide dimensions: 24.8 x 74.4 mm
• Maximum slide dimensions: 25.3 x 76.2 mm
Check Tissue Placement on Slide
Use this section to determine if the tissue section is located in an area that results in
successful analyte transfer and imaging. The Visium CytAssist Quick Reference Cards –
for Accessory Kit Instruction (CG), located within the Instrument Accessory Kit
(laminated document with concise instructions).
a. Ensure that the tissue region of interest will fit within the Capture
Area of a Visium CytAssist Spatial Gene Expression Slide. Overlay the
slide, centering the tissue on either the 6.5 mm or 11 mm square.
b. If the slide has no frosted areas, overlay on this diagram. The tissue
should lie within the green allowable area:
• 15 mm from the short sides
• 5 mm from the long sides
Ensure that the slide
surface with the tissue
is facing the user.
11 mm
Capture Area
6.5 mm
Capture Area
15 mm
15 mm
5 mm
Tissue outside this region cannot
be analyzed
5 mm
If printing this page:
Select “actual size” or
“100%” to print to scale.
The slide diagram should
measure 25 mm x 75 mm.
Icons
Tips & Best Practices section
includes additional guidance
Signifies critical step
requiring accurate execution
Troubleshooting section
includes additional guidance
Check Tissue
Placement on Slide

16
CG000542 | Rev A
User Guide | CytAssist Instrument | Tips & Best Practices
Link to TOC | 10xgenomics.com
15 mm
align bottom edge
of frosted area* to the
horizontal black line
( 1 )
5 mm
5 mm
+ +
15 mm
( 2 )
5 mm
5 mm
If the slide has a frosted end or frosted marks along the bottom,
overlay on diagram 1 and then on diagram 2.
Due to variability in the dimensions of frosted areas across slide brands, the allowable
area for tissue placement is also variable across slide brands.
Check the allowable area from both the top (1) and bottom (2) to
ensure the tissue lies within the green allowable area:
• 15 mm from edge of frosted area/marks
• 5 mm from the sides
c. Refer to the examples of good and bad tissue placement.
Refer to the Visium CytAssist Training Kit User Guide (CG) for further guidance.
If printing this page:
Select “actual size”
or “100%” to print
to scale. The slide
diagrams should each
measure 25 mm wide.
Examples of Good Tissue Placement
Blank Slide
++++++++++++++++
Frosted Slide
Examples of Bad Tissue Placement
Blank Slide
++++++++ ++++++++ ++++++++
Frosted Slide
Check Tissue
Placement on Slide
contd.
align bottom edge** to
the horizontal black line
*If text is present below frosted area of slide,
align bottom of the letters to the line
**If markings are present at bottom edge
of slide, align markings to the + signs

17
CG000542 | Rev A
User Guide | CytAssist Instrument | Tips & Best Practices
Link to TOC | 10xgenomics.com
Position Tissue Slide on the Tissue Slide Stage
Use this section to determine if the tissue section is located in an area that results in
successful analyte transfer and CytAssist-mediated imaging. The Visium CytAssist Quick
Reference Cards – for Accessory Kit Instruction (CG), located within the Instrument
Accessory Kit, contain a concise and cleanable version of this content.
d. Ensure the tissue on each slide fits within the allowable area of the
Tissue Slide Stage.
e. Align tissue to the center of the alignment guides for 6.5 mm
(rectangles) or 11 mm (lines) Capture Areas on either the left or right
side of the stage. Align the center of the tissue region of interest to the
center of the Capture Area, rather than aligning the edge of the region
to the edge of the Capture Area.
If printing this page:
Select “actual size”
or “100%” to print
to scale. The blue
Capture Area should
measure 11 mm and
the green capture
area should measure
6.5 mm.
The dotted outlines of the Capture Areas that are shown in diagram are not present on the
instrument’s surface.
Slides should not overlap the center line.
Left Side of Stage Right Side of Stage
Center Line
No frosted glass
within dashed zone
11 mm slide
alignment guides
6.5 mm slide
alignment guides
Tissue Slide
Placement on
Tissue Slide Stage

18
CG000542 | Rev A
User Guide | CytAssist Instrument | Tips & Best Practices
Link to TOC | 10xgenomics.com
f. If necessary, rotate the slide 180° as shown to better place off-center tissues
closer to the center line. Slides should not cross/overlap the center line.
Refer to the Visium CytAssist Training Kit User Guide (CG) for further guidance.
Load Tissue Slides onto the Tissue Slide Stage
a. Press down on the wide end of clip to lift and pivot the narrow end of
the clip. Pivot the clips to their outermost position.
Examples of Good Slide Placement on the Tissue Slide Stage
right side of the stage
rotated & still on the
right side of the stage
OR
F
F
Slide “F” shown with a 6.5 mm section:
left side of the stage
OR
rotated & still on the
left side of the stage
G
G
Slide “G” shown with a 11 mm section:
Tissue Slide
Placement on
Tissue Slide Stage
contd.
Overlay of a 11 mm fiducial frame
and the alignment guides
Note that the outside of the
alignment guides mark the
boundary of the fiducial frame on
a Visium CytAssist Slide Capture
Area.
When placing a tissue slide on
the Tissue Slide Stage, tissue may
come up to the edge of the 11 mm
alignment guides.
boundary
Press down on the wide
end of the clip

19
CG000542 | Rev A
User Guide | CytAssist Instrument | Tips & Best Practices
Link to TOC | 10xgenomics.com
b. Lay the tissue slide flat against the stage surface. Both hands needed:
use one hand to hold the slide in place and the other to pivot the clips
and overlap the slide. Ensure that at least one clip secures the slide
before adjusting the position further.
c. Use fingers to finely adjust the position of the tissue within the
alignment guides. DO NOT touch the tissue section.
d. If only one tissue on one slide will be loaded, use a blank slide for the
second position on the Tissue Slide Stage.
B C
Secure slide
Pivot clip
Tissue Slide
Placement on
Tissue Slide Stage
contd.
CORRECT
Tissue lies completely within alignment guides
INCORRECT
Tissue is intersected by alignment guides
6.5 mm Capture Area used as an
Tissue Slide Stage is Empty Tissue Slide Stage is Loaded Correctly
with Two Slides
A blank
slide may be
used when
processing
only one
tissue slide

20
CG000542 | Rev A
User Guide | CytAssist Instrument | Tips & Best Practices
Link to TOC | 10xgenomics.com
e. Secure the slide by pivoting the Visium Slide Lock gently to the left,
ensuring that the slide is not impacted. The lock will partially
obscure the slide label when correctly secured.
f. Secure the slide by pivoting the Visium Slide Lock gently to the
left, ensuring that the slide is not impacted. The lock will partially
obscure the slide label when correctly secured.
Visium Slide Stage is Empty Visium Slide Stage is Loaded
Correctly with One Slide
CORRECT
Slide fits inside the grooves.
Label on the right is partially
obscured by the lock.
Capture Areas line up with
alignment windows.
INCORRECT
Slide does not fit inside the
grooves.
Capture Areas do not line up
with alignment windows.
INCORRECT
Label is on the left.
Capture Areas do not line up
with alignment windows.
Visium Slide
Placement on
Visium Slide Stage
contd.
Other manuals for Visium CytAssist
1
This manual suits for next models
3
Table of contents
Other 10x Genomics Laboratory Equipment manuals

10x Genomics
10x Genomics Chromium X Series User manual

10x Genomics
10x Genomics Chromium Next GEM User manual

10x Genomics
10x Genomics Chromium X Series User manual

10x Genomics
10x Genomics Chromium Single Cell Controller Readiness... User manual

10x Genomics
10x Genomics Chromium X Series Reference guide

10x Genomics
10x Genomics Chromium X Series User manual

10x Genomics
10x Genomics Visium CytAssist User manual

10x Genomics
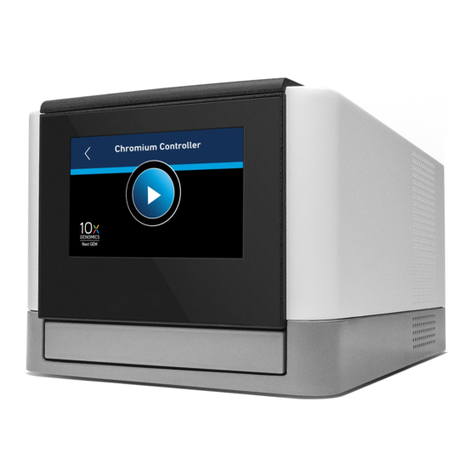
10x Genomics Chromium Controller Readiness Test User manual