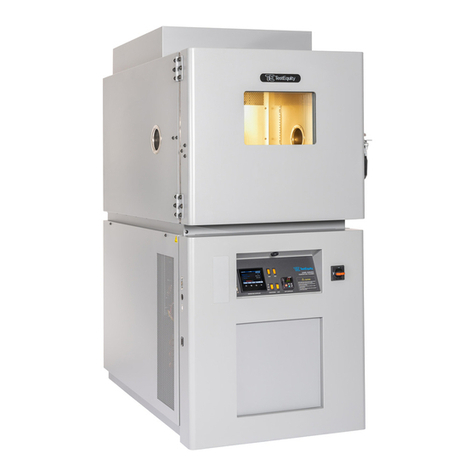
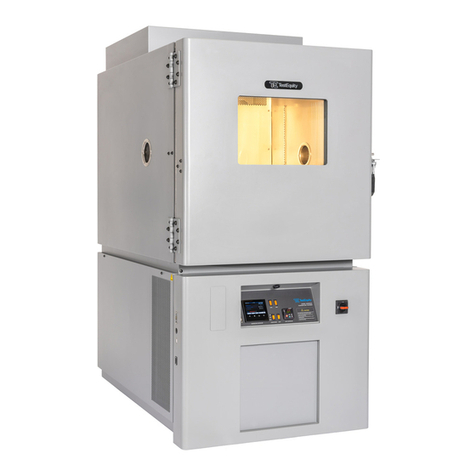
TestEquity 106 Operation manual

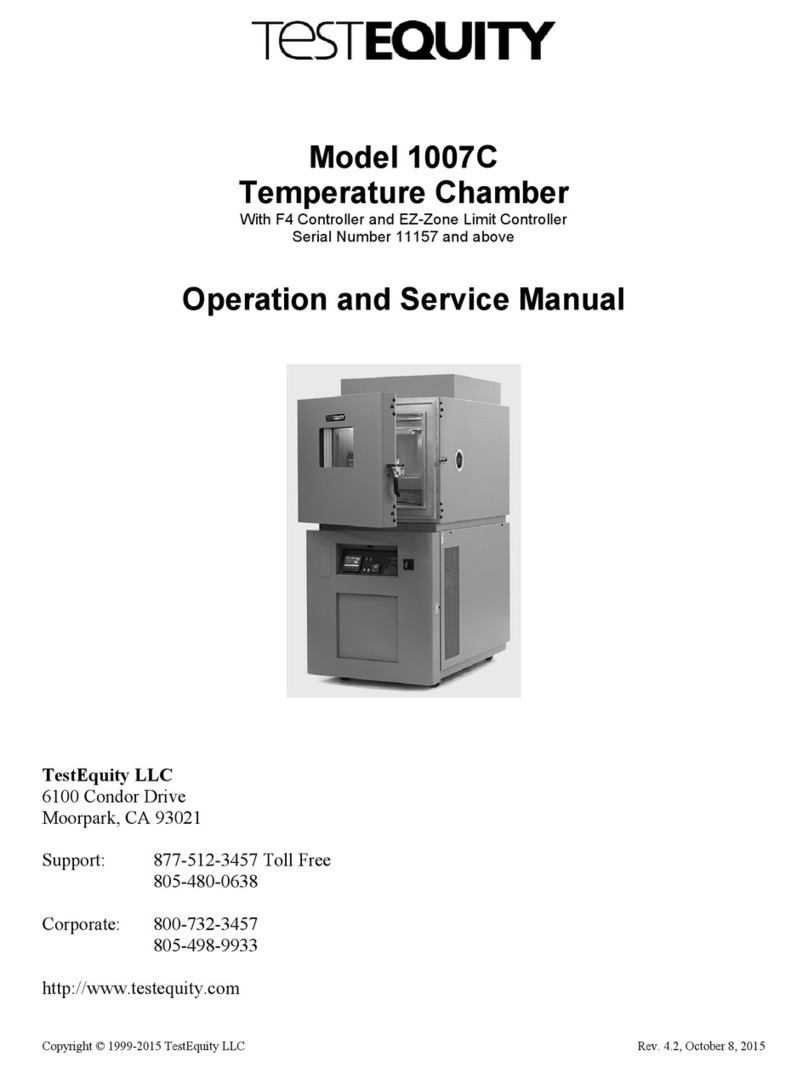
Model 106 & 107
Temperature Chamber
Operation and Service Manual
TestEquity LLC
6100 Condor Drive
Moorpark, CA 93021
Support: 877-512-3457 Toll Free
805-480-0636
Corporate: 800-732-3457
805-498-9933
http://www.testequity.com
Copyright © 2008-2017 TestEquity LLC Rev. 2.1 – February 13, 2017
Model 107 Model 106


Table of Contents
Chapter 1 – Safety Instructions................................................................................................ 1-1
Introduction ____________________________________________________________________________ 1-1
Installation Safety Notices_________________________________________________________________ 1-1
Operation Safety Notices__________________________________________________________________ 1-1
Chapter 2 – Installation............................................................................................................. 2-1
Unpacking______________________________________________________________________________ 2-1
Preparation For Use _____________________________________________________________________ 2-1
Installation Location _____________________________________________________________________ 2-1
Condensate Drain _______________________________________________________________________ 2-2
Reversible Chamber Door (Model 107 only)__________________________________________________ 2-2
Chapter 3 – Operation............................................................................................................... 3-1
Introduction ____________________________________________________________________________ 3-1
Summary of Chamber Operation___________________________________________________________ 3-1
Front Panel Switches _____________________________________________________________________ 3-1
POWER Switch................................................................................................................................................ 3-1
TEMP Switch – ON Mode............................................................................................................................... 3-1
TEMP Switch – EVENT 1 Mode..................................................................................................................... 3-1
Loading the Chamber ____________________________________________________________________ 3-2
Performance Considerations ............................................................................................................................ 3-3
Avoiding Moisture ........................................................................................................................................... 3-3
Internal Test Fixtures ....................................................................................................................................... 3-3
Chapter 4 – Limit Controller.................................................................................................... 4-1
Introduction ____________________________________________________________________________ 4-1
Limit Controller Keys and Displays................................................................................................................. 4-2
How to Set the High and Low Temperature Safety Limits .............................................................................. 4-2
Resetting an Out of Limit Condition................................................................................................................ 4-2
Chapter 5 – Frequently Asked Questions................................................................................ 5-1
Chapter 6 – Specifications......................................................................................................... 6-1
Model 106 & 107 Chamber Specifications____________________________________________________ 6-1
Chapter 7 – Maintenance .......................................................................................................... 7-1
Preventive Maintenance Schedule __________________________________________________________ 7-1
Daily or As Needed.......................................................................................................................................... 7-1
Every 6 Months................................................................................................................................................ 7-1
Every 12 Months.............................................................................................................................................. 7-1
How to clean the chamber interior and exterior ............................................................................................... 7-2
How to listen for abnormal noise or vibration ................................................................................................. 7-2
How to inspect the door seal ............................................................................................................................ 7-2
How to clean the condenser ............................................................................................................................. 7-2
How to inspect the electrical/refrigeration compartment ................................................................................. 7-3
How to verify the chamber performance.......................................................................................................... 7-4
How to verify the calibration ........................................................................................................................... 7-5
Theory of Operation _____________________________________________________________________ 7-6
Overview.......................................................................................................................................................... 7-6
Heating System ................................................................................................................................................ 7-6
Refrigeration System........................................................................................................................................ 7-6
Troubleshooting _________________________________________________________________________ 7-7
Refrigeration System Charging Instructions _________________________________________________ 7-8
R-410A Charge ................................................................................................................................................ 7-8
Recommended Spare Parts ________________________________________________________________ 7-9
Major Electrical Parts____________________________________________________________________ 7-9
Major Refrigeration Parts ________________________________________________________________ 7-9
General Parts ___________________________________________________________________________ 7-9

Table of Contents
EZ-Zone Limit Controller Setup Parameters ________________________________________________ 7-10
Setup Menu .................................................................................................................................................... 7-10
Operations Menu............................................................................................................................................ 7-10
Chapter 8 – Warranty ............................................................................................................... 8-1
Chapter 9 – Drawings................................................................................................................ 9-1

Chapter 1 – Safety
TestEquity 106 & 107 Temperature Chamber Page 1-1
Chapter 1 – Safety Instructions
Introduction
Follow all CAUTION notices to prevent damage to the chamber or your test sample. Failure to
follow all CAUTION notices may void your warranty. CAUTION may also indicate a
potentially hazardous situation which, if not avoided, may result in minor or moderate personal
injury.
WARNING indicates a potentially hazardous situation which, if not avoided, could result in
death or serious injury.
The safety alert symbol !precedes a general CAUTION or WARNING statement.
The electrical hazard symbol 2precedes an electric shock hazard CAUTION or WARNING
statement.
Installation Safety Notices
2WARNING: The power cord is equipped with a NEMA 5-15P grounded/polarized plug. To
prevent a shock hazard, DO NOT defeat the ground or polarization feature.
This device MUST be plugged into a properly grounded and polarized outlet.
!CAUTION: The minimum clearance you should allow for proper ventilation must be at
least 12" from the rear of the chamber.
!CAUTION: This chamber is designed for operation in a conditioned laboratory
environment. Operation above 30°C (85°F) or below 16°C (60°F) ambient
room temperature is NOT recommended.
Operation Safety Notices
!CAUTION: The Temperature Controller’s “Alarm 1” function is NOT used in the
chamber’s safety system and is NOT connected. The independent EZ Zone
Limit Controller functions as the main protection device.
!CAUTION: The Temperature Controller’s “Alarm 2” is configured to lock the
refrigeration control system in “full cooling” mode at temperatures below
–35°C.This alarm setting must NOT be changed under any circumstances!
!CAUTION: Always verify that the EZ Zone Limit Controller settings for high and low
limits are set to temperatures that are appropriate for your test sample.
!WARNING: Do NOT put items in the chamber that could burn or explode at high
temperatures. This chamber uses open wire heating elements which generate
surface temperatures over 1000ºF. This is NOT an explosion-proof chamber.

Chapter 1 – Safety
Page 1-2 TestEquity 106 & 107 Temperature Chamber
!WARNING: Do NOT put items in the chamber that can emit corrosive vapors or
substances.
!WARNING: This chamber is NOT a curing oven. There are NO provisions for venting
fumes.
!WARNING: The chamber door must remain closed while the chamber is operating. If you
need to open the door while the chamber is operating, wear safety goggles to
prevent the high velocity airflow from blowing particles or objects into your
eyes.
!WARNING: This chamber operates at extreme temperatures. Avoid contact with air,
objects, and surfaces that are hot or cold to prevent severe burns or frostbite.
Protective gloves are recommended.
!CAUTION: If your test sample is energized, it may be capable of raising the workspace
temperature beyond safe limits. This could occur if your test sample exceeds
the live load rating of the chamber or if the chamber’s refrigeration system
fails. You are responsible for providing thermal protection devices to your test
sample.
!CAUTION: To prevent damage to your test sample and the chamber’s compressor, do not
exceed the live load rating of the chamber.

Chapter 2 – Installation
TestEquity 106 & 107 Temperature Chamber Page 2-1
Chapter 2 – Installation
Unpacking
Inspect the shipping container for any signs of visible damage. Notify the carrier and TestEquity
immediately if there are signs of shipping damage.
1. Cut the bands that hold the packaging together.
2. Remove the top cover and top foam inserts.
3. Remove the outer box.
4. Carefully lift the chamber off the pallet. This should be done with at least two people.
Preparation For Use
1. Inspect the chamber for signs of shipping damage.
2. Read this entire manual.
3. Select a suitable location to install the chamber.
4. Hand-tighten one of the supplied barbed fittings to the drain connection on the rear of the
chamber. Put a container under the condensate drain. Alternatively, attach the supplied hose
to the barbed fitting and run the hose to a remote container, drain, or condensate pump.
NOTE: Not all applications will result in condensate flowing through the drain.
5. Connect to a 120 VAC, 60 Hz power source with a minimum 15 Amp breaker.
6. Perform following the procedure “How to verify the chamber performance” in the
Maintenance chapter of this manual to make sure that no damage has occurred in shipment.
Installation Location
The chamber will produce a moderate amount of heat during normal operation. Locate the
chamber in an area with adequate ventilation to prevent excessive heat build-up. The chamber
must be on a solid and level surface that is rated to hold at least 100 pounds.
2WARNING: The power cord is equipped with a NEMA 5-15P grounded/polarized plug. To
prevent a shock hazard, DO NOT defeat the ground or polarization feature.
This device MUST be plugged into a properly grounded and polarized outlet.
!CAUTION: The minimum clearance you should allow for proper ventilation must be at
least 12" from the rear of the chamber.
!CAUTION: This chamber is designed for operation in a conditioned laboratory
environment. Operation above 30°C (85°F) or below 16°C (60°F) ambient
room temperature is NOT recommended.

Chapter 2 – Installation
Page 2-2 TestEquity 106 & 107 Temperature Chamber
Condensate Drain
The condensate drain connection is located on the rear of the chamber. This provides a way to
remove condensate that may accumulate on the evaporator (cooling coil) during temperature
cycling or when the refrigeration system runs to maintain moderate temperatures.
Any time the ambient air is subjected to temperatures below the dew point, moisture will
condense out of the air. The effect is ice or frost during low temperature operation. When the
chamber is heated above 0°C or the cooling system turns off, the ice or frost will turn into water.
The drain fitting accommodates a 1/4-inch male pipe thread. Right angle and straight barbed
adapters are provided so you can easily connect 3/8-inch I.D. flexible tubing to it. The chamber
drain water is not under pressure and is fed by gravity. Therefore, it must empty into a container
or open floor drain. Alternatively, the chamber drain can empty into a condensate pump. You can
purchase a condensate pump from suppliers such as Grainger (www.grainger.com).
Under most circumstances, you will not see any water coming out of the drain.
Reversible Chamber Door (Model 107 only)
The chamber door can be mounted to open from the left or right side. The chamber cabinet has
mounting holes on both sides for the hinges and door latch. If you reverse the door, see “How to
inspect the door seal” in the Maintenance chapter of this manual to make sure the hinges and
door latch are adjusted correctly.

Chapter 3 – Operation
TestEquity 106 & 107 Temperature Chamber Page 3-1
Chapter 3 – Operation
Introduction
The Front Panel Switches control power to the temperature controller and all chamber functions.
The Temperature Controller controls the temperature of the chamber. The Temperature
Controller automatically turns the refrigeration system on or off as required based on the
deviation from temperature set point.
Refer to the separate F4 or F4T Temperature Controller manual for details on how to use the
Temperature Controller.
Summary of Chamber Operation
1. Turn the POWER Switch ON.
2. Enter the desired temperature set point on the Temperature Controller.
3. Load your test sample in the chamber.
4. Turn the TEMP Switch ON. Alternatively, turn the TEMP Switch to the EVENT 1 position
and turn EVENT 1 on the F4 controller or the Power button on the F4T controller ON.
Front Panel Switches
POWER Switch
The POWER Switch controls power to the entire chamber. The POWER Switch illuminates
when it is ON.
TEMP Switch – ON Mode
The TEMP Switch enables all chamber functions. When the TEMP Switch is OFF and the Power
Switch is ON, only the Temperature Controller and Limit Controller are operational. When both
the TEMP and POWER Switches are ON, the chamber’s temperature conditioning system will
function to maintain the temperature set point. The TEMP Switch does not illuminate.
TEMP Switch – EVENT 1 Mode
When the TEMP Switch is in the EVENT 1 position, you can enable and disable all chamber
functions through Event 1 (Digital Output 1) of the F4 Temperature Controller or the Power
button on the F4T Temperature Controller.

Chapter 3 – Operation
Page 3-2 TestEquity 106 & 107 Temperature Chamber
Loading the Chamber
!WARNING: Do NOT put items in the chamber that could burn or explode at high
temperatures. This chamber uses open wire heating elements that generate
surface temperatures over 1000ºF. This is NOT an explosion-proof chamber.
!WARNING: Do NOT put items in the chamber that can emit corrosive vapors or
substances.
!WARNING: This chamber is NOT a curing oven. There are NO provisions for venting
fumes.
!WARNING: The chamber door must remain closed while the chamber is operating. If you
need to open the door while the chamber is operating, wear safety goggles to
prevent the high velocity airflow from blowing particles or objects into your
eyes.
!WARNING: This chamber operates at extreme temperatures. Avoid contact with air,
objects, and surfaces that are hot or cold to prevent severe burns or frostbite.
Protective gloves are recommended.
!CAUTION: If your test sample is energized, it may be capable of raising the workspace
temperature beyond safe limits. This could occur if your test sample exceeds
the live load rating of the chamber or if the chamber’s refrigeration system
fails.
!CAUTION: To prevent damage to your test sample and the chamber’s compressor, do not
exceed the live load rating of the chamber.
Live Load Rating
Temp
+23°C
0°C
–30°C
–40°C
Watts
200 W
155 W
100 W
35 W

Chapter 3 – Operation
TestEquity 106 & 107 Temperature Chamber Page 3-3
Performance Considerations
The performance of all chambers is significantly affected by the characteristics of your test
sample. Factors include size, weight, material, shape, and power dissipation if energized.
The test sample should be placed in the chamber in a manner that allows for air circulation. The
air plenum is located on the back wall of the chamber, where air is sucked in from the bottom
and exits from the top. You should not place the test sample directly on the chamber floor. It
should be placed on the shelf. Multiple test samples should be distributed throughout the
chamber to ensure even airflow and minimize temperature gradients. If necessary, an additional
shelf should be used to evenly distribute the load. Verify that the temperature gradients are
within acceptable limits, by measuring the chamber temperature at strategic points using a
multipoint thermocouple meter or data logger.
You may find that the temperature throughout the chamber is even, but always different from
what the temperature controller indicates. The correct way to adjust what the temperature
controller “displays” compared to what is measured at some point other than the controller’s
sensor is with the “Calibration Offset” parameter. See F4 or F4T Temperature Controller User’s
Manual for details.
Avoiding Moisture
Any time the ambient air is subjected to temperatures below the dew point, moisture will
condense out of the air. The effect is ice or frost during low temperature operation. When the
chamber is heated above 0°C, the ice or frost will turn into water.
To avoid moisture condensation, make sure the port plugs are inserted at all times. Also, avoid
opening the chamber door while the chamber is operating at temperatures below room ambient.
When a low temperature test is completed, warm the chamber to at least room ambient before
opening the chamber door and before removing your test sample.
Internal Test Fixtures
Some applications require internal fixtures to support test samples and provide a convenient
method of connecting wires and sensors. Fixtures must be designed to minimize their impact on
chamber functionality and performance.
Fixtures should be designed for easy removal to permit maintenance and cleaning of the
chamber. The chamber liner should never be drilled or screwed into. This will compromise the
integrity of the liner and permit moisture migration due to condensation into the insulation,
which will eventually impact performance and lead to premature rusting of the outer cabinet.
Fixtures should be constructed of stainless steel. This also applies to all screws and fasteners. All
welds should be passivated. To prevent rust and corrosion, never use iron or mild steel even if it
is painted or plated. Aluminum may be used. However, since the specific heat of aluminum is
double that of steel, it represents a greater load and will have more impact on the chamber
performance.
Make sure that all connectors, wiring, pc boards, and auxiliary components can withstand the
temperature extremes that they will be subjected to. In some cases, these components may not be
able to last after repeated tests and should be considered expendable.


Chapter 4 – Limit Controller
TestEquity 106 & 107 Temperature Chamber Page 4-1
Chapter 4 – Limit Controller
Introduction
The EZ-Zone Limit Controller is a protection device. It turns the chamber OFF if the workspace
temperature exceeds either a high temperature or low temperature limit. You can set these limits
to correspond to the maximum and minimum temperature that your test sample can safely
withstand. This provides protection against someone setting the temperature controller to a
condition that is unsafe for the test sample. It also provides protection in the unlikely event of a
chamber system component failure. The Limit Controller has its own temperature sensor
(thermocouple) and functions completely independent of the temperature controller.
This section provides a brief overview on how to operate the Limit Controller. For more detailed
instructions, see the “EZ-Zone User’s Manual”.
!CAUTION: The “EZ-Zone User’s Manual” is a general manual and is written by the
manufacturer, Watlow, for a wide variety of applications and configurations.
Not all features or functions are applicable. Only the capabilities of a model
PM3L1AJ-AAAABAA are applicable.
!CAUTION: The EZ-Zone Limit Controller has been properly configured by TestEquity to
match the chamber’s system requirements. Improper modifications to these
setup values can result in unreliable and unsafe operation. Do not attempt to
modify the setup values, unless you thoroughly understand what you are
doing. The correct values are documented in the “EZ-Zone Limit Controller
Setup Parameters” section of this manual.
!CAUTION: Always verify that the Limit Controller’s high and low limits are set to
temperatures that are appropriate for your test sample.
!CAUTION: If your test sample is energized, it may be capable of raising the workspace
temperature beyond safe limits. This could occur if your test sample exceeds
the live load rating of the chamber or if the chamber’s refrigeration system
fails. You are responsible for providing thermal protection devices to your test
sample.

Chapter 4 – Limit Controller
Page 4-2 TestEquity 106 & 107 Temperature Chamber
Limit Controller Keys and Displays
Figure 4.1 – Limit Controller Keys and Displays
How to Set the High and Low Temperature Safety Limits
1. Press the ‰key once to get the [`LL;s] prompt in the right display. This is the Low Limit
Set Point prompt.
2. Press the ▲or ▼ key to enter the desired Low Limit Set Point in the left display. Make sure
it is lower than your actual chamber temperature set point, and at least below room
temperature to prevent nuisance tripping.
3. Press the ‰key once again to get the [`lh;s] prompt in the right display. This is the High
Limit Set Point prompt.
4. Press the ▲or ▼ key to enter the desired High Limit Set Point in the right display. Make
sure it is higher than your actual chamber temperature set point to prevent nuisance tripping.
5. Press the RESET Key to return to the Home Page.
6. The left display will show the actual chamber temperature while the right display will show
[SAFE] as long as the limits are not exceeded.
Resetting an Out of Limit Condition
If the limit is exceeded, the Limit Controller will flash [Li;h1] (high limit) or [Li;L1] (low
limit) in the right display and [Attn] in the left display, alternating with the actual chamber
temperature in the upper display and [FAiL] in the right display. It will also shut down all
chamber functions. The Limit Controller cannot be reset until the temperature returns to within
the limit set points. Then, you must press the RESET Key to resume normal operation.

Chapter 5 – Frequently Asked Questions
TestEquity 106 & 107 Temperature Chamber Page 5-1
Chapter 5 – Frequently Asked Questions
Why does my chamber heat or cool slower than the published specifications?
Performance is significantly affected by the characteristics of your test sample. Factors include
size, weight, material, shape, and power dissipation if energized. The test sample should be
placed in the chamber in a manner that allows for air circulation. You should not place the test
sample directly on the chamber floor. It should be placed on the shelf. Multiple test samples
should be distributed throughout the chamber to ensure even airflow and minimize temperature
gradients. If necessary, an additional shelf should be used to evenly distribute the load. You can
determine if the chamber is operating properly by following the procedure in “How to verify the
chamber performance”.
How can I modify the chamber to cool faster or colder?
Unfortunately, there is nothing you can do to improve upon the designed-in performance.
TestEquity does NOT recommend using CO2or LN2in this chamber to achieve colder or faster
cooling due to reliability and safety considerations, so it is NOT an available option. Modifying
the chamber to add CO2or LN2 will permanently damage the chamber and void the warranty.
Why is there water/ice/snow in the chamber?
Any time the ambient air is subjected to temperatures below the dewpoint, moisture will
condense out of the air. The effect is ice or frost during low temperature operation. When the
chamber is heated above 0°C, the ice or frost will turn into water. To avoid moisture
condensation, make sure the port plugs are inserted at all times. Also, avoid opening the chamber
door while the chamber is operating at temperatures below room ambient. When a low
temperature test is completed, warm the chamber to at least room ambient before opening the
chamber door and before removing your test sample. A condensate drain is provided to remove
condensate from the chamber.
My test specification requires convection heat only. Can I turn the circulator motor off?
NO! This will damage the heating and refrigeration systems and void the warranty. You need a
“gravity convection oven” for that kind of test.
How accurate is the chamber?
That’s a loaded question! There is no “chamber accuracy” specification as such. The answer
requires an understanding of several performance parameters.
Control Tolerance – The Temperature Controller uses a thermocouple control sensor, which is
located in the intake airflow within the air plenum. Control tolerance is a measure of how much
the temperature varies after stabilization at the control sensor. It is a measure of the relative
variations, NOT the absolute accuracy of the readout. The control tolerance specification for this
chamber is ±0.5°C, or a total of 1°C. For example, the temperature set point may be –10.0°C.
The actual temperature varies between –9.9°C and –10.6°C. This corresponds to –0.6°C and
+0.1°C or a total of 0.7°C of RELATIVE variations. These specifications are for an empty
chamber. The addition of a test sample may affect the control variations. In some instances, the
test sample will reduce these variations.

Chapter 5 – Frequently Asked Questions
Page 5-2 TestEquity 106 & 107 Temperature Chamber
Uniformity – Also known as Gradients. This is a measure of variations in temperature at
different locations throughout the chamber interior, at the same time, after stabilization. The
uniformity specification for this chamber is ±1.0°C or a total of 2°C, when measured at least 2"
away from the chamber interior walls. These specifications are for an empty chamber. The
addition of a test sample may affect the temperature uniformity. For example, an energized test
sample will produce a higher temperature near the sample.
Controller Accuracy – This is the ability of the temperature controller to accurately display a
temperature measurement when compared to a standard. The controller display accuracy is
±1.55°C. However, the total measurement accuracy in the chamber includes the thermocouple
sensor wire accuracy. Thermocouple wire accuracy is ±1°C or 0.75% of reading, whichever is
greater. Therefore, total system accuracy over the chamber’s operating range can be as much as
±2.55°C, although the typical accuracy is often better than ±1.0°C.
Can I operate or transport the chamber on its side?
No, the chamber can only be operated or transported in the upright position. Operating or
transporting the chamber on its side will cause permanent damage to the refrigeration system and
void the warranty.
I’m not going to use the chamber for a while. Is there anything I should do to prepare it for
storage?
Perform ALL the steps in the Preventive Maintenance Schedule before placing the chamber into
storage. This will ensure that the chamber will be ready to operate when it is taken out of storage.
If the chamber has a problem and is still under warranty, these problems should be resolved
before being placed into storage, since the warranty period starts from the date of shipment. The
chamber should be stored in a conditioned environment. Do not store it outside or where it will
be subjected to dirt or excessive moisture.
I haven’t used the chamber for a while. Is there anything I should do to prepare it for
operation?
Perform ALL the steps in the Preventive Maintenance Schedule before placing the chamber back
into service. This will ensure that nothing has been damaged and that a leak has not developed.
Can/Should I put a filter in front of the condenser air inlet?
No, TestEquity does not recommend this. Just follow the maintenance procedures and clean the
condenser fins periodically.
How often should I charge the refrigeration system?
This chamber uses a closed-loop refrigeration system. Just like your refrigerator at home, it does
not need periodic charging. If the charge is low, this means that there is a leak. Leaks should be
repaired before recharging.
What kind of Freon does the chamber use?
The word Freon®is a DuPont registered trade name for their CFC-based refrigerants and is
incorrectly used as a generic term for refrigerants. TestEquity chambers do not use CFC-based
refrigerants. The system uses R-410A, which is also known as DuPont Suva® 410A.

Chapter 6 – Specifications
TestEquity 106 & 107 Temperature Chamber Page 6-1
Chapter 6 – Specifications
Model 106 & 107 Chamber Specifications
Temperature Range –42°C to +130°C
Control Tolerance ±0.5°C, ±0.2°C Typical (Measured at the control sensor after stabilization)
Uniformity ±1.0°C, ±0.5°C Typical (Variations throughout the chamber after stabilization)
Live Load Capacity @ +23°C 0°C –30°C –40°C
(Watts) 200 W 155 W 100 W 35 W
Heat Up Transition Time 8.5°C/minute (empty chamber, typical)
Cool Down Transition Time (empty chamber, typical)
End Temp
Start Temp to +23°C 0°C –10°C –20°C –30°C –35°C –40°C
+23°C ----- 7 min 11 min 15 min 19 min 23 min 30 min
+85°C 13 min 20 min 24 min 28 min 32 min 36 min 45 min
*Note: Transition times are measured after a 30 minute soak at the start temperature. To calculate rate of change for
a particular condition, take the difference between the Start Temp and End Temp and divide by the Transition Time.
Cool Down Example (empty): From +85°C to –20°C = 105°C / 28 min = 3.75°C/min.
Power Requirements
Input Voltage 120 VAC nominal (110 to 126 VAC), Single Phase, 60 Hz
Current Draw 10 A maximum; Recommended Service 15 A
Heat of Rejection 3,000 BTUH
(maximum rated chamber load at maximum cooling rate from high temperature soak)
Workspace Dimensions Model 106: 9" W x 9" H x 13.25" D (0.62 cubic feet)
Model 107: 12" W x 9" H x 11.25" D (0.7 cubic feet)
Outside Dimensions Model 106: 23" W x 26" H x 16" D (nominal)
Model 107: 16.5" W x 26" H x 23" D (nominal), Door latch adds 2" to width.
Min. Installed Clearance 12" from the rear
Access Ports Model 106: 4" (2.83" ID) Port on left side, Supplied with foam plug
Model 107: 3" (3.83" ID) Port on left and right side (two total), Supplied with foam
plugs
Weight 124 pounds
Sound Level 52 dBA in cooling mode
(A-weighted, measured 36" from the front surface, 63" from the floor, in a free-standing environment)
NOTE: Performance is typical and based on operation at 23°C (73°F) ambient and nominal input voltage. This
product is designed for use in a normal conditioned laboratory. Operation at higher ambient temperatures will result
in decreased cooling performance. Low end limit derates to -38°C when operating above 27°C (80°F) ambient.
Operation above 30°C (85°F) or below 16°C (60°F) ambient is not recommended.


Chapter 7 – Maintenance
TestEquity 106 & 107 Temperature Chamber Page 7-1
Chapter 7 – Maintenance
Preventive Maintenance Schedule
Daily or As Needed
•Clean chamber interior and exterior.
•Listen for abnormal noise or vibration.
Every 6 Months
•Inspect the door seal.
•Clean the condenser.
•Inspect the electrical/refrigeration compartment.
•Verify the chamber performance.
Every 12 Months
•Verify the calibration.

Chapter 7 – Maintenance
Page 7-2 TestEquity 106 & 107 Temperature Chamber
How to clean the chamber interior and exterior
•Wipe or vacuum out all debris.
•Clean surfaces with a damp cloth, mild detergent, or stainless-steel cleaner. Avoid cleaners
that are abrasive or leave a residue. NEVER use steel wool.
•If you clean the interior with something other than water, you may want to operate the
chamber at high temperature (approximately +85°C) after cleaning. This helps to “bake out”
any residue. Remove the port plugs to permit the residual vapors to escape.
•Clean the silicone door gaskets with a damp cloth or mild detergent.
•Clean the exterior painted surfaces with a damp cloth or mild detergent. If you are using a
detergent, test a small inconspicuous area to make sure it does not damage the finish.
How to listen for abnormal noise or vibration
You should become familiar with normal operating noises. Being able to recognize changes from
normal operating noises can be a valuable way to identify problems and prevent further damage.
Examples of noises to be aware of include:
•Circulator motor noise (with compressor off).
•Compressor start-up and running noise.
•Condenser fan noise.
•Valve cycling noise.
How to inspect the door seal
The door and chamber opening have silicone gaskets to minimize thermal losses and moisture
migration.
•Inspect the gaskets for dirt and tears.
•Repair minor tears with a high quality RTV silicone such as GE RTV167.
•Check the integrity of the door seal by closing the door on a sheet of paper. With the door
closed, slowly pull the paper. You should feel the resistance. Repeat this all around the door
at several places.
•If the seal is not tight on the latch side, adjust the latch bracket. The latch bracket is mounted
to the chamber, and has slotted holes to permit adjustment.
•If the seal is not tight on the hinge side, adjust the door hinge. The hinges have a slotted hole
on the door side to permit adjustment.
How to clean the condenser
1. Unplug the chamber from the power source.
2. Remove the condenser grille from the front of the chamber.
3. Clean the condenser fins with a vacuum cleaner.
NOTE: You may need to clean the condenser more frequently if the chamber is in a dusty
environment. You may be able to clean the condenser less frequently if the chamber is in a very
clean environment.
This manual suits for next models
1
Table of contents
Other TestEquity Laboratory Equipment manuals
Popular Laboratory Equipment manuals by other brands

Intellinet
Intellinet 561488 instructions

Thermo Scientific
Thermo Scientific Varioskan user manual

Four E's Scientific
Four E's Scientific Overstar60 quick start guide

Teledyne
Teledyne Princeton Instruments IsoPlane 81 manual

Velp Scientifica
Velp Scientifica AREX 5 instruction manual

Buchi
Buchi Sepiatec SFC-50 Operation manual