3M 33579 Operator's manual

1Translation of Original Instructions
English
TABLE OF CONTENTS
TABLE OF CONTENTS .................................................................1
IMPORTANT SAFETYINFORMATION...................................................3
SUMMARY OF DEVICE LABELS CONTAINING SAFETYINFORMATION ...................3
EXPLANATION OF SIGNAL WORDCONSEQUENCES ....................................4
GENERAL POWER TOOL SAFETYPRECAUTIONS: .......................................4
WARNING........................................................................5
CAUTION ....................................................................... 6
NOTICE ............................................................................. 6
INTENDEDUSE....................................................................... 6
PRODUCTCONFIGURATION/SPECIFICATIONS........................................ 6
EXPLODED TOOL PARTSVIEW .......................................................7
PARTSLIST ...........................................................................7
MAINTENANCE/LUBRICATING AND OPERATINGINSTRUCTIONS ...................... 8
DECLARATION OFCONFORMITY.....................................................10
3M LIMITED ONE YEARWARRANTY ..................................................11

3Translation of Original Instructions
IMPORTANT SAFETYINFORMATION
Please read, understand, and follow all safety information contained in these instructions prior to the use of this device. RETAIN THESE
INSTRUCTIONS FOR FUTUREREFERENCE.
Exposure to DUST generated from workpiece
and/or abrasive materials can result in lung
damage and/or other physical injury.
Use dust capture or local exhaust as stated in
the SDS. Wear government-approved
respiratory protection and eye and skin
protection.
Failure to follow this warning can result in
serious lung damage and/or physical injury.
Read the Safety Data Sheets (SDS)
before using any materials.
Contact the suppliers of the workpiece
materials and abrasive materials for
copies of the SDS if one is not
readily available.
SDS
WARNING
HEALTH HAZARD BY DUST – CALIFORNIA PROPOSITION 65 STATEMENT
! WARNING! Various dust created by power sanding, sawing, grinding, drilling and other construction activities contains chemicals
known [to the State of California] to cause cancer, birth defects or other reproductive harm. Some examples of these chemicalsare:
• Lead from lead-basedpaints,
• Crystalline silica from bricks and cement and other masonry products,and
• Arsenic and chromium from chemically treatedlumber.
Your risk from exposure to these chemicals varies, depending on how often you do this type of work. To reduce your exposure to
thesechemicals:
• Work in a well-ventilated area,and
• Work with approved safety equipment, such as those dust masks that are specially designed to filter out microscopicparticles.
• Wash hands afterhandling
SUMMARY OF DEVICE LABELS CONTAINING SAFETYINFORMATION
Markings Description
! WARNING: READ AND UNDERSTAND INSTRUCTION MANUAL BEFORE
OPERATINGTOOL.
! WARNING: ALWAYS WEAR APPROVED EYE PROTECTION.
! WARNING: ALWAYS WEAR APPROVED HEARING PROTECTION
Direction of rotation
WARNING: HAND/WRIST/ARM INJURY CAN OCCUR WITH PROLONGED
EXPOSURE TO VIBRATION
20,000 RPM Maximum rotational speed
90 PSIG / 6.2 BAR MAX Maximum air pressure

4
EXPLANATION OF SIGNAL WORDCONSEQUENCES
! WARNING: Indicates a potentially hazardous situation, which, if not avoided, could result in death or serious injury and/or
property damage.
! CAUTION: Indicates a potentially hazardous situation, which, if not avoided, may result in minor or moderate injury and/
or property damage.
NOTICE: Indicates a potentially hazardous situation, which, if not avoided, may result in property damage.
GENERAL POWER TOOL SAFETYPRECAUTIONS:
For multiple hazards, read and understand the safety instructions before installing, operating, repairing, maintaining or changing
accessories on, or working near the power tool. Failure to do so can result in serious bodily injury.
WORK AREA SAFETY
a) Keep work area clean and well lit. Cluttered or dark areas inviteaccidents.
b) Dust can be highly combustible. Keep work areaclean.
c) Keep bystanders away while operating a power tool. Distractions can cause you to lose control.
PERSONAL SAFETY
• As compressed air is used as the power source, it must be remembered that compressed air can be dangerous when used
incorrectly. The user should take time to read and understand these operating instructionsfully.
• Immediately release the start trigger in the event of any disruption of pressure. Do not attempt to restart until the disruption
has beencorrected.
• Do not use the power tool if it has beendamaged.
• The tool RPM should be checked on a regular basis to ensure proper operatingspeed.
• Never operate the tool with loose, broken or missingparts.
• Do not carry the tool by the air hose. Always be careful to prevent the tool from being started when carrying the tool with the
air supplyconnected.
• Do not use damaged abrasives or wrong type ofaccessories.
• Take care to avoid entanglement with the moving parts of the tool with clothing, ties, hair, cleaning rags or loose hanging
objects. If entangled, stop air supply immediately to avoid contact with moving toolparts.
• Always use personal protective equipment. Always wear eye protection. Protective equipment such as gloves, dust mask,
non-skid safety shoes, hard hat or hearing protection used for appropriate conditions will reduce personalinjuries.
• Do not overreach. Keep proper footing, balance and grip at all times. This enables better control of the power tool in
unexpectedsituations.
• Be aware of torque reaction developed by the Cut-Off WheelTool.
• Do not allow the tool to free spin without taking precautions to protect any persons or objects from the rupture of the
abrasive cut-offwheel.
• Keep hands clear of the spinning cut-off wheel duringuse.
• Fixture workpiece such that the cut slot is kept at a constant or increasing width duringoperation.
• Do not allow persons to use this power tool if unfamiliar with these instructions or operation of thetool.
• Always disconnect this tool from the air supply when attaching/adjusting/replacing abrasives and accessories or when
starting any maintenance/cleaningtasks.
• Whenever performing maintenance procedures, use care to avoid exposure to any hazardous substances deposited on the
tool as a result of workprocesses.
• If the tool appears to malfunction, remove from use immediately and arrange for service and repair.

5Translation of Original Instructions
!WARNING
To reduce the risks associated with impact from abrasive product or tool breakup, sharp edges, hazardous pressure, rupture,
vibration and noise:
• Read, understand and follow the safety information contained in these instructions prior to the use of this tool. Retain these
instructions for futurereference.
• If you notice any abnormal noise or vibration when operating the product, immediately discontinue its use and inspect for worn
or damaged components (mounting hardware, abrasive product, etc.). Correct or replace the suspect component. If abnormal
noise or vibration still exists, return the tool to 3M for repair or replacement. Refer to warrantyinstructions.
• Only personnel who are properly trained should be allowed to service thistool.
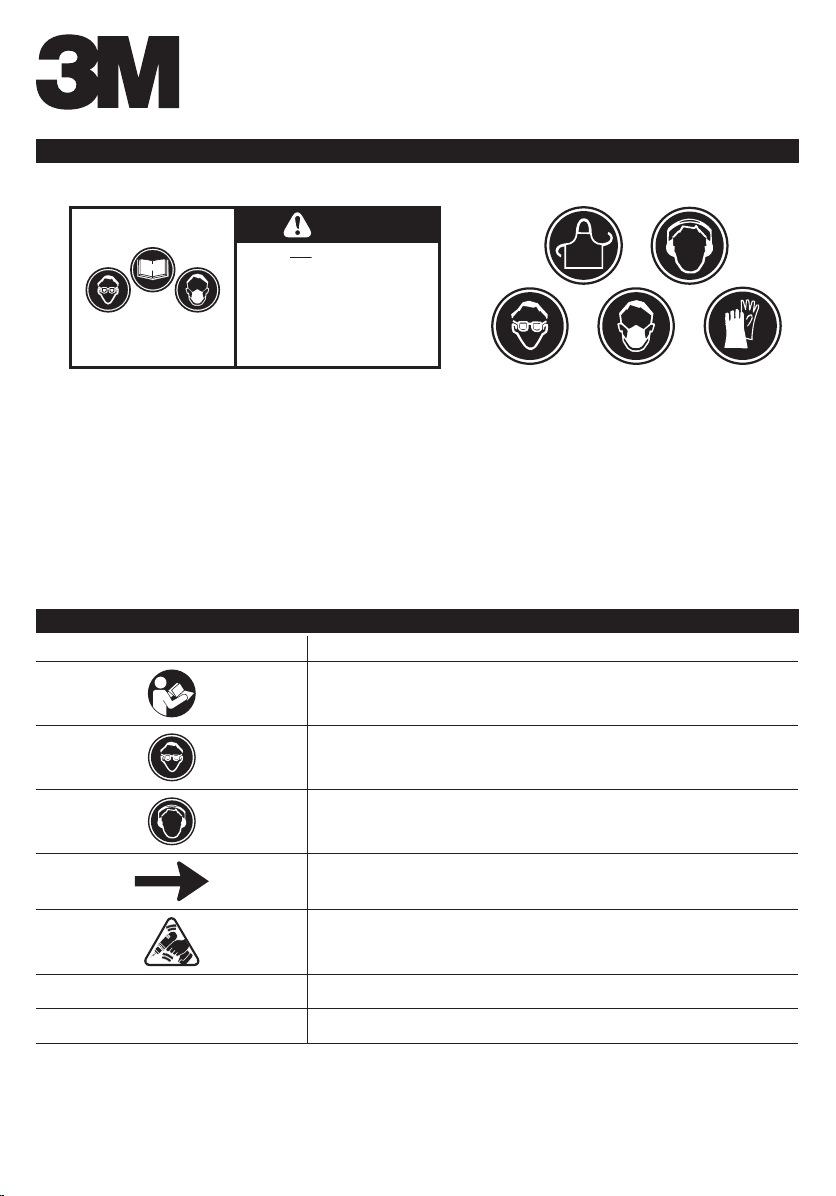
• Operators and other personnel must always wear protection for eyes, hearing (or ears), and respiratory system, when in the work
area or while operating this product. Follow your employer’s safety policy for Personal Protective Equipment (PPE) and/or ANSI
Z87.1 or local/national standards for eyewear and other personal protective equipmentrequirements.
• Proper eye protection must be worn at alltimes.
• Tool shall not be operated in the presence ofbystanders.
• Wear leather apron or other protective apparel, taking into consideration the type of work beingdone.
• Never exceed marked maximum input pressure (90 psi / 0.62Mpa / 6.2 Bars). Exceeding maximum marked pressure rating will
result in device operating at an unintended speed and therefore enhances the possibility of seriousinjury.
• Make sure the tool is disconnected from its air source before servicing, inspecting, maintaining, cleaning, and before changing
abrasiveproduct.
• Practice safety requirements. Work alert, have proper attire, and do not operate tool under the influence of alcohol ordrugs.
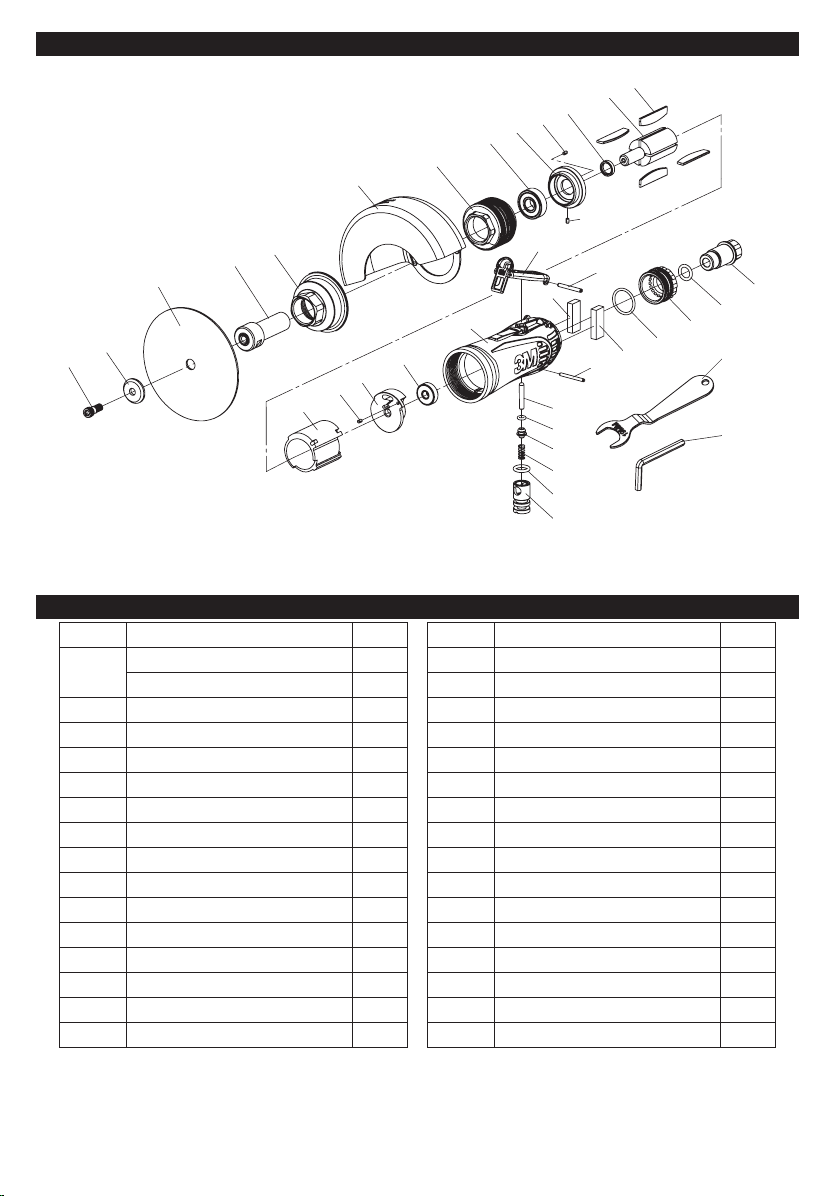
• Only use wheel retainers (flanges) and wheel arbors supplied by3M.
• Never use this tool with Depressed Centerwheels.
• Prior to use, or if dropped or jammed, inspect wheel retainers and wheel arbors and abrasive product for possible chips, cracks
or other damage and ensure the abrasive product is correctly secured. If damaged, or if safety labels cannot be read, replace
with new abrasive product, wheel retainers, wheel arbor, and/or labels available from3M.
• Never use a damaged Cut-Off tool unit until it has beenrepaired!
• Never over-ride or disable the safety features of the start-stop control such that it is in the onposition.
• Never operate this tool without all guards or safety features in place and in proper workingorder.
• Prior to use, ensure guard is oriented to protect the operator from flying fragments and is properlysecured.
• If the tool is jammed, shut off the tool and ease it free. Ensure the abrasive product is correctlysecured.
• Use only with mounting hardware recommended by 3M; check with 3M for mounting hardwarerequirements.
• Do not use cut-off wheel tool for sidegrinding.
• Never install and use router bits in a Cut-Offtool.
• Never allow this tool to be used by children or untrainedpeople.
• Do not leave an unattended tool connected to an air source.
To reduce the risks associated with skin abrasion, burns, cuts, or entrapment:
• Keep hands, hair, and clothing away from the cutting part of thetool.
• Wear suitable protective gloves while operatingtool.
• Never install cut-off wheels in a tool which isunguarded.
• Do not touch the rotating parts during operation for anyreason.
• Do not force tool or use excessive force when using tool.
To reduce the risk of all hazards associated with vibration:
• If any physical hand/wrist discomfort is experienced, work should be stopped promptly to seek medical attention. Hand, wrist
and arm injury may result from repetitive work, motion and overexposure to vibration.
To reduce the risks associated with loud noise:
• Always wear hearing protection while operating this tool. Follow your employer’s safety policy or local/national standards for
personal protective equipment requirements.
To reduce the risks associated with fire or explosion:
• Do not operate the tool in explosive atmospheres, such as in the presence of flammable liquids, gases or dust. The abrasives are
able to create sparks when working material, resulting in the ignition of the flammable dust orfumes.
• Refer to SDS of material being worked as to potential for creating fire or explosion hazard.
To reduce the risks associated with hazardous dust inhalation or eye/skin exposure:
• Use appropriate respiratory and skin protection, or local exhaust as stated in the SDS of the material being workedon.
• Exposure to dust generated in the workplace and/or abrasive materials can result in lung damage and/or other physicalinjury.
• Use dust capture or local exhaust as stated on the SDS. Wear government approved respiratory protection and eye and
skinprotection.
•Failure to follow this warning can result in serious lung damage and/or physical injury.
To reduce the risk of foot injury from dropped tools:
• Wear safety shoes with a reinforced toe to help protect your feet from injury caused by a dropped tool. Safety footwear comes
in a variety of styles and is widely available. Choose footwear that offers traction for your work site.
To reduce the risks associated with hazardous voltage:
• Do not allow this tool to come into contact with electrical power sources as the tool is not insulated against electrical shock.

6
!CAUTION
To reduce the risk associated with whipping or hazardous pressure‑rupture:
• Ensure supply hose is oil resistant and is properly rated for required workpressure.
• Do not use tools with loose or damaged air hoses orfittings.
• Be aware that incorrectly installed hoses and fittings might unexpectedly come loose at any time and create a whipping/
impacthazard.
To reduce the risk associated with fly off of abrasive product or parts:
• Use care in attaching abrasive product and mounting hardware; follow the instructions to ensure that they are securely attached
to the tool before use orfree-spinning.
• Never point this product in the direction of yourself or another person, or start toolunintentionally.
• Never over-tighten accessory fasteners.
NOTICE
To maximize the life of the system:
• Do not operate tool without a properly attached 3M™abrasive.
• Reference Maintenance/Lubricating and Operating Instructions section for proper lubrication procedures.
INTENDEDUSE
The 3M™ Cut-Off Wheel Tool is intended for use in industrial locations, and used only by skilled, trained professionals in accordance
with the instructions in this manual. The 3M™ Cut-Off Wheel Tool optimizes the performance of 3M™ Cut-Off Wheels (sold
separately) by delivering a fast, smooth, cut and the power needed to cut through metal including carbon and stainless steel. It should
only be used for such applications and within its marked capacity and rating. PN 33579 uses a 76 mm (3 in) diameter abrasive, while
PN 33581 uses a 101 mm (4 in) diameter abrasive. Only accessories specifically recommended by 3M should be used with this tool.
Use in any other manner or with other accessories could lead to unsafe operating conditions.
• Do not operate tool in water or in an excessively wetapplication.
• Do not use abrasive products that have a Max RPM less than the Max RPM rating marked on thetool.
• Maintain labels and nameplates. These carry important information. If unreadable or missing, contact a 3M service facility for a
free replacement.
At the end of its useful life, recycle or dispose of tool according to federal, state, and local regulations.
PRODUCTCONFIGURATION/SPECIFICATIONS
Model
No.
WheelSize
In. (mm)
Spindle
Thread
Product
NetWt
lb (kg)
Height
In.
(mm)
Length
In.
(mm)
Width
In.
(mm)
Motor
hp (W)
Noise
LeveldBA
Pressure
(Power)
Vibration
Level
m/s2
Uncertainty
Km/s2
33579 3 (76) 1/4 in –
28
1.94
(0.88)
3.14
(79.6)
7.73
(196)
3.50
(89)
0.70
(522) 86.0 (97.0)
17.5
3.02 (If
cut-off
wheel
used)
5.50
33581 4 (101) 1/4 in –
28
2.03
(0.92)
3.42
(86.9)
7.73
(196)
4.65
(118)
0.70
(522) 84.5 (95.5)
27.8
5.36 (If
cut-off
wheel
used)
8.81
* Declared noise level; measurements carried out in accordance with EN ISO 15744. It is recommended to wear ear protection while
using thistool.
** Declared vibration level in accordance with standard EN ISO 28927.
IMPORTANT NOTE: The noise and vibration values stated are from laboratory testing in conformity with stated codes and standards
and are not sufficient risk evaluation for all exposure scenarios. Values measured in a particular work place may be higher than the
declared values. Exposure to high noise levels can cause permanent, disabling hearing loss and other problems, such as tinnitus
(ringing, buzzing, whistling or humming in the ears). Therefore, risk assessment and the implementation of appropriate controls
for these hazards are essential. The actual exposure values and amount of risk or harm experienced to an individual is unique to
each situation and depends upon the surrounding environment, the way in which the individual works, the particular material being
worked, work station design, as well as upon the exposure time and the physical condition of the user. 3M cannot be held responsible
for the consequences of using declared values instead of actual exposure values for any individual risk assessment.

7Translation of Original Instructions
EXPLODED TOOL (PARTS)VIEW
56
7
16
25
8
26
10
9
27
11
13
12
28
29
30
31
32
18
23
20
19
21
22
24
14
15
17
1
2
3
10
10
27
Wheel
20
PN 33579 (3 in.) AND PN 33581 (4 in.)
CUT - OFF TOOL
ITEM DESCRIPTION QTY
13 in. Wheel Guard 1
4 in. Wheel Guard 1
2 Hex. Screw 1
3 Spacer 1
5 Spindle 1
6 Housing Cap 1
7 Lock Ring 1
8 Ball Bearing (6000ZZ) 1
9 Front End Plate 1
10 Spring Pin (Ø 2.5×4) 3
11 Spacer 1
12 Rotor 1
13 Rotor Blade 4
14 Cylinder 1
15 Rear End Plate 1
16 Housing 1
ITEM DESCRIPTION QTY
17 Ball Bearing (626ZZ) 1
18 Spring Pin (Ø 2.5x26) 1
19 Valve Screw 1
20 O-Ring 2
21 Spring 1
22 Throttle Valve 1
23 O-Ring 1
24 Valve Shaft 1
25 Safety Lever Assembly 1
26 Spring Pin (Ø 3x25) 1
27 2
28 O-Ring 1
29 Exhaust Sleeve 1
30 Inlet Bushing 1
31 Wrench (19 mm) 1
32 Wrench,3/16" L-Key 1
PARTSLIST
ITEM DESCRIPTION QTY ITEM DESCRIPTION QTY
13 in. (76mm) Wheel Guard 1 17 Ball Bearing (626ZZ) 1
4 in. (101mm) Wheel Guard 1 18 Spring Pin (ø 2.5×26) 1
2Hex. Screw 119 Valve Screw 1
3Spacer 120 O-Ring 2
5Spindle 121 Spring 1
6Housing Cap 122 Throttle Valve 1
7Lock Ring 123 O-Ring 1
8Ball Bearing (6000ZZ) 124 Valve Shaft 1
9 Front End Plate 1 25 Safety Lever Assembly 1
10 Spring Pin (ø 2.5×4) 3 26 Spring Pin (ø 3×25) 1
11 Spacer 127 Muffler 2
12 Rotor 128 O-Ring 1
13 Rotor Blade 429 Exhaust Sleeve 1
14 Cylinder 130 Inlet Bushing 1
15 Rear End Plate 1 31 Wrench (19 mm) 1
16 Housing 132 Wrench, 3/16"L-Key 1

8
MAINTENANCE/LUBRICATING AND OPERATINGINSTRUCTIONS
PRIOR TO THEOPERATION
The tool is intended to be operated as a hand held tool. It is always recommended that while using the tool, operators stand on a
solid floor, in a secure position with a firm grip and footing. Be aware the cut-off wheel tool can develop a torque reaction. Reference
“GENERAL POWER TOOL SAFETY PRECAUTIONS” section.
Use a clean lubricated air supply that will give a measured air pressure at the tool of 6.2 bar (90 psig) when the tool is running
with the trigger fully depressed. It is recommended to use an approved 9.52 mm (3/8 in) x 8 m (25ft) maximum length airline. It is
recommended that the tool be connected to the air supply as shown in Figure A.
Do not connect the tool to the airline system without incorporating an easily accessible air shut off valve. It is strongly recommended
that an air filter, regulator and lubricator (FRL) be used as shown in Figure A as this will supply clean, lubricated air at the correct
pressure to the tool. In any case appropriate air pressure regulators shall be used at all times while operating this tool where the
supply pressure exceeds the marked maximum of the tool. Details of such equipment can be obtained from your tool distributor.
Adjust airline lubricator equipment such that two drops of 3M™ Air Tool Lubricant PN 20451 (or equivalent 10 centistoke oil) per
minute are provided through the hose to the air inlet of the tool. If excessive oil is noted in the exhaust air, reduce the drip rate of the
airline lubricator equipment accordingly. If such equipment is not used, the tool should be manually lubricated.
To manually lubricate the tool, disconnect the airline and put two to three drops of 3M™ Air Lubricant PN 20451 (or equivalent
10 centistoke oil) into the air inlet of the tool. Reconnect tool to the air supply and run tool slowly for a few seconds to allow air to
circulate the oil. If the tool is used frequently, lubricate it on a daily basis or lubricate it if the tool starts to slow or lose power. It is
recommended that the air pressure at the tool be 6.2 bar (90 psig) while the tool is running so the maximum RPM is not exceeded.
The tool can run at lower pressures but should never be run higher than 6.2 bar (90 psig). If run at lower pressure the performance of
the tool is reduced.
Recommended Airline Size –
Minimum
Recommended Maximum Hose
Length Air Pressure
9.52 mm (3/8 in) 8 meters (25 feet) Maximum Working Pressure 6.2 Bar 90 psig
Recommended Minimum N/A N/A
Closed Loop Pipe System
Sloped in the direction of air flow
Drain Leg
Ball Valve
To Tool Station
Filter
Drain Valve
Regulator
Lubricator
Ball
Valve
Ball Valve Air Flow
Air Dryer
Air Compressor
and Tank
Air Hose
To Coupler
at or near Tool

9Translation of Original Instructions
GENERAL SET UP ANDUSE:
• Read all instructions before using this tool. All operators must be fully trained in its use and aware of all safety rules. All
service and repair must be carried out by trainedpersonnel.
• The tool RPM should be checked on a regular basis to ensure proper operatingspeed.
• Make sure the tool is disconnected from the airsupply.
• Select a suitable abrasive cut-off wheel and secure it to the mounting shaft using the wheel retainer and wheel arbor
supplied with the tool. Be careful to center the cut-off wheel on the wheel arbor before tightening the wheel retainer nut. Do
not over tighten the wheel retainer or you will crack thewheel.
• Always wear required safety equipment when using thistool.
• Always disconnect the air supply to the tool before fitting, adjusting or removing the abrasive cut-offwheel.
• Use only 3M approvedparts.
• Prior to installing any abrasive cut-off wheel, always check that its marked maximum operating speed is equal to or higher
than the rated speed of thistool.
• If the tool has been serviced or rebuilt, check to ensure that the maximum tool RPM is not exceeded and that there is no
excessive tool vibration.
Cut‑Off Wheel MountingInstructions.
1. Disconnect tool fromairline.
2. Remove Hex Screw (item 2) and the Spacer (item 3), using the 3/16” L-Key (item 32) and using the 19 mm wrench (item 31) to
hold the Spindle (item5).
3. After the old cut-off wheel has been removed from the tool, inspect Spindle to ensure that the threads are free of debris
andundamaged.
4. Place a new cut-off wheel on Spindle. Ensure center hole of new cut-off wheel engages properly with the lip on the Spindle.
Place Spacer onto the new cut-off wheel and align with center hole. Reinsert HexScrew.
5. Use the 19 mm wrench to hold the Spindle and tighten the Hex Screw using the 3/16” L-Key.
SETTING & TESTING TOOLSPEED:
1. Ensure the Trigger is notdepressed.
2. Connect the compressedairline.
3. Press the Trigger slowly and increase force until tool is at fullspeed.
4. Use a Rotary Tachometer to check thespeed.
5. Check speed regularly.
This manual suits for next models
1
Table of contents
Popular Cutter manuals by other brands

Textron
Textron Klauke Mini+ ES 32-L instruction manual

Technoflex
Technoflex Rozadora Castor 2300 instruction manual

Rockford Fosgate
Rockford Fosgate Detect-A-Finger Drop Probe Device installation manual

Royal Catering
Royal Catering RCGS 550 user manual

D-CUT
D-CUT LX-340 Operation manual

D-CUT
D-CUT LP-650 Operation manual