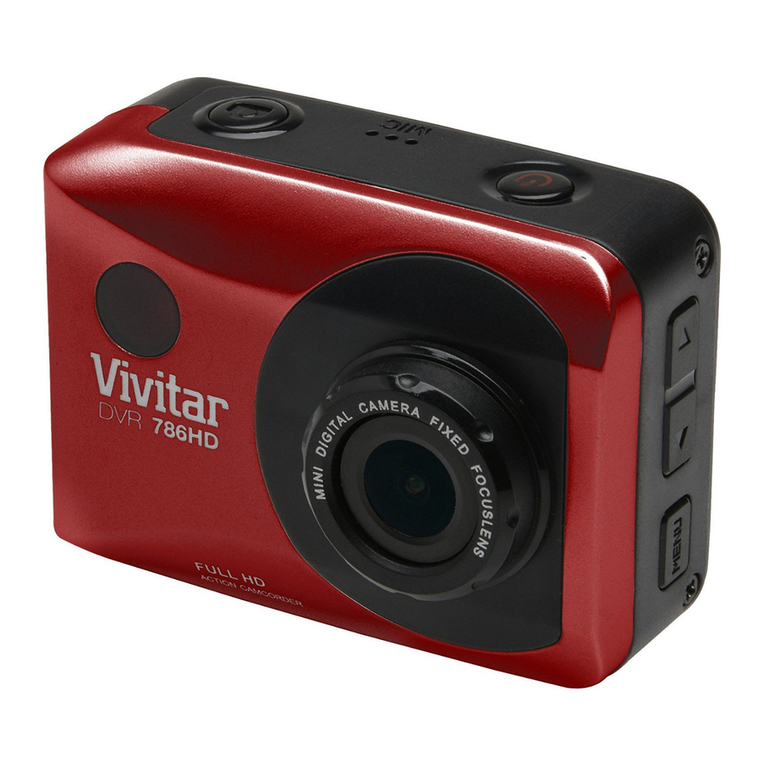
3SIXT 3S-0683 User manual

HD SPORTS
ACTION CAMERA
3S-0683
USER GUIDE

2
IMPORTANT SAFETY INFORMATION
Please read the instructions carefully before using this
camera for proper and safe operation.
•Using a wall/car charger other than a 5V 1A Charger can
damage the camera baery and could result in fire or
leakage. Only use chargers marked: Output 5V 1A.
•Please check the camera operates normally before use.
•Do not expose the camera to direct sunlight, or point its lens to
sunlight - the image sensor may get damaged.
•Take good care of the camera and prevent water or sand
particles from entering the housing when it is used on the
beach or in water. Water, sand particles, dust or composites
containing salt may cause damage.
•Keep the camera free of dust and chemical materials. Place
it in a cool, dry and well ventilated environment. Do not place
the camera in a high temperature, moist or dusty place.
•If dust or dirt is accumulated on the camera or on its lens -
use a so, clean and dry cloth to wipe away gently.
•Do not use a cloth to wipe sand particles. Blow them away
gently then wipe the camera gently with a cloth suitable for
optical devices.
•Do not use solvents to clean the camera.
•Do not touch the lens’ surface with your fingers.

3
TABLE OF CONTENTS
The Basics .....................................................................................................4
Installing and Charging the Baery.................................................6
Installing the microSD Card..................................................................8
Turning the Camera ON/OFF...............................................................9
Capture/Playback Modes.................................................................... 10
Camera Seings Menu..........................................................................14
In-Vehicle Seings..................................................................................16
Connecting to a PC or MAC................................................................17
Included Accessories..............................................................................18
System Requirements..........................................................................22
Technical Specifications......................................................................22
Limitation of Liability and Indemnity...........................................23
Warranty .....................................................................................................24

4
THE BASICS
1
3
5
2
4
Power/Mode Buon
Lens
Microphone
microSD Slot
Micro USB Port
1
2
3
4
5

5
Screen
Up
Down
Speaker
Charge Status Light
Shuer/Select Buon
Indicator Light
Baery Door
13
6
8
9
7
10
12
13
11
6
7
9
8
11
10
12

6
INSTALLING AND
CHARGING THE BATTERY
INSTALLING THE BATTERY
1. First, make sure that the camera
is OFF when inserting or removing
the baery.
2. Remove the camera from
it’s housing.
3. Li up the baery door with
your fingernail. Remove the baery
door and place the baery door in
a safe location.
4. Insert the lithium-ion baery into
the baery compartment. Make
sure the contacts of the baery
are corresponding to the symbols
on the camera body.
5. Return the baery door in it’s
original location until it clicks
into place.
13

7
CHARGING THE BATTERY
1. Make sure that the camera is
switched OFF.
2. To start charging the baery,
connect the supplied micro USB
cable into the camera’s micro
USB port into a PC, MAC or
wall adaptor’s USB 2.0 port
(1A only). The Charging Status
Light will be lit red while
charging and will disappear when
charging is completed.
WARNING: Using a wall/car
charger other than a 5V 1A
Charger can damage the camera
baery and could result in fire
or leakage. Only use chargers
marked: Output 5V 1A.
Charging Status Light
Micro USB Port
Micro USB cable
5
3

8
INSTALLING THE
MICROSD CARD
It is recommended to use
32GB Class 10 microSD cards for
maximum performance.
1. Make sure the camera is OFF
when inserting or removing the
microSD card.
2. Make sure the memory card is
inserted in the correct direction (the
gold contacts of the microSD card
should face the front of the camera)
into the microSD card slot . Failure
to do so may lead to damaged or
lost data.
3. To remove the microSD card, press
down on the card with your fingernail
until it clicks and pops up.
4. If a microSD card is removed or
power supply is interrupted when
the camera or computer is connected
to the card (i.e. during reading,
writing and formaing), your
captured images and video may be
lost or damaged.
microSD Slot
4

9
TURNING THE CAMERA
ON/OFF
Install the baery, charge fully
and insert the microSD card as
described on page 8.
TURNING ON THE CAMERA
•Press and hold the Power/Mode
Buon for 2 seconds until the
LCD Screen displays ON and a
sound is heard.
TURNING OFF THE CAMERA
•Press and hold the Power/Mode
Buon for 2 seconds until the
LCD Screen displays OFF.
•Aer 5 minutes of inactivity the
camera will be automatically shut
down to conserve baery life.
Power/Mode Buon
Startup screen
6
1

10
CAPTURE/PLAYBACK MODES
Cycling through and selecting capture and playback modes
VIDEO IPHOTO IPLAYBACK
Turn camera ON and repeatedly press the Power/Mode Buon to
cycle through camera modes and seings. The modes will appear in the
following order:
Mode Description
Video Record video
Photo Capture a single photo
Playback Video and Photo playback
Seings Seings
1
2016/01.01 17:51:34
720P
VIDEO PHOTO
SETUP PLAY BACK
2016/01.01 17:51:34
5M
9999

11
2016/01.01 17:51:34
720P
2016/01.01 17:51:34
720P
VIDEO MODE
To record a video, make sure the camera
is in Video mode which should be
displayed on the LCD Screen . If not,
short press the Power/Mode Buon
repeatedly until appears.
TO START RECORDING
•Short press the Shuer/Select
Buon . A red recording icon
will appear on the LCD Screen. The
Indicator Light will illuminate, flash
red and emit a short beep to indicate
recording is in progress.
•While in Video Recording mode, the
LCD Screen will display:
∙elapsed recording time
(top right);
∙video resolution
(below elapsed recording time);
∙date and time stamp
(boom); and
∙the baery level indicator
(boom right).
LCD Screen in ‘Video’ mode
00:00:00
LCD Screen in Video ‘Recording’ mode
6
1
11
12

12
TO STOP RECORDING
•Short press the Shuer/Select Buon .
•The red recording icon on the LCD Screen
will disappear. The Indicator Light will
also stop flashing which indicates that a
recording has ceased.
•When the microSD card is full or the
baery is drained, recording will cease
automatically. The recorded video will be
saved before the camera switches o.
PHOTO MODE
To take a photo, make sure the camera is
in Photo mode which should be
displayed on the LCD Screen. If not, short
press the Power/Mode Buon repeatedly
until appears.
TO TAKE A PHOTO:
•Press the Shuer/Select Buon. The
camera will make a short beep then emit
the camera shuer sound.
11
12
1

13
2016/01.01 17:51:34
5M
9999
LCD Screen in ‘Single Image’
photo mode
•While in Single Image mode, the LCD
Screen will display:
∙number of images taken
(top right);
∙image resolution
(below number of images taken);
∙date and time stamp
(boom centre); and
∙the baery level indicator
(boom right).
PLAYBACK/REVIEW MODE
To view your videos and photos make
sure the camera is in Video or Photo
Playback mode which should be
displayed on the LCD Screen by
short pressing the Power/Mode
Buon repeatedly until the Playback
icon appears.
•Use the Up /Down Buons on
the side of the camera to scroll
through your videos or photos. Press
the Shuer/Select Buon to review
a video.
•To return to the playback menu, press
the Power/Mode Buon.
LCD Screen when ‘Playback’
is selected
6
1
7 8
11

14
CAMERA SETTINGS
Turn camera ON and repeatedly
press the Power/Mode Buon
to cycle through camera modes
and stop at the Seings screen.
•To scroll through the main
seings menu, press the Up /
Down Buons.
•To select one of the main menu
seings, press the Shuer/Select Buon .
•To select or change one of the seings, use the Up/Down Buons to
choose an option and press the Shuer/Select Buon to change
the seing.
•Once a menu option has been changed you will be returned to the
main seings menu.
•To exit the sub-menu seings options menu without changing any
of the seings options press the Power/Mode Buon . You will be
returned to the main seings menu.
•To exit the main seings menu and return to camera mode, press
the Power/Mode Buon.
LCD Screen when ‘Seings’
is selected
1
1
7
11
8

15
Seing Description Options Default
Video
Resolution
Set the Video Resolution to your
preferred output 720P/VGA 720P
Time Stamp Turn the Date & Time Stamp ON/OFF OFF/ON ON
Motion Detect Turn the Motion Detection function
ON/OFF OFF/High/Normal/Low OFF
Looping Video Set the recording time for Looping Video
when used in car 1/3/5/10min OFF
Voice Record Turn the Audio Recording ON/OFF ON/OFF ON
EV Set the camera aperture exposure level +1/3/+0.0/-1.0/-4/3/
-5/3/-2.0 +0.0
Photo
Resolution
Set the Photo Resolution to your
preferred output
12MP/8MP/5MP/3MP/
1.3M/VGA 5M
Delete Delete Images or Videos Delete One, Delete All
Lock/Unlock Protect Images or Videos from deletion Lock One, Lock All,
Unlock One, Unlock All
Volume Set the volume of sounds 0/1/2/3/4/5/6/7 7
Format Format the microSD card Cancel/Execute
Language Set the language EN/SC/TC/DU/FR/GR/IT/
PO/SP/PL/SL/AR EN
Auto OFF Set the camera Auto OFF time OFF/1 min/3 min/5 min OFF
LCD Set the camera LCD OFF time OFF/1 min/3 min/5 min 5 min
System Reset Reset the camera to the Factory
Default Seings Cancel/Execute
Light Frequency Set the Screen Refresh rate 50Hz/60Hz 50Hz
Date Input Set the Date & Time Set the Date & Time
Version Current Firmware and Batch Number Firmware Version/
Batch Number
CAMERA SETTINGS MENU GUIDE

16
IN-VEHICLE SETTINGS
To set your camera up for in-vehicle
crash cam recording:
•In the seings menu turn on the
“Loop Recording” seing and
choose the looping recording time.
•Join the Suction Mount and the
Camera Clip Housing together.
Tighten the screw. Insert the camera
into the Camera Clip Housing. Place
the Suction Mount and camera in a
suitable position on windscreen of
your vehicle.
+
LCD Screen when ‘Loop Recording’
is selected

17
CONNECTING TO A PC OR MAC USING SUPPLIED
MICRO USB CABLE
•Turn the camera ON and connect it to a PC or MAC’s USB 2.0 port
via the supplied micro USB cable.
For PC: Your captured videos and images will be located in
My Computer > Removable Disc.
For MAC: Your captured videos and images will be located in
the desktop item No Name.

18
INCLUDED ACCESSORIES
HANDLEBAR/
POLE MOUNT
CLIP HOUSING
MOUNT
HELMET STRAPS
HANDLEBAR/
HELMET
MOUNT ADAPTER
CAMERA CLIP
HOUSING
ADHESIVE CLIP
BASE
WATERPROOF
HOUSING MOUNT
SUCTION MOUNTWATERPROOF
HOUSING

19
WATERPROOF HOUSING
The camera is submersible
up to 30m if the camera
is correctly sealed in the
Waterproof Housing.
To fit and test Waterproof Housing:
1. Release the secure clasp of the
Waterproof Housing.
2. Inspect the water sealing gasket (the
rubberised material) to be sure it’s in
good condition.
3. Test the integrity of the seal by closing
the Waterproof Housing without
inserting the camera. Submerse the
Waterproof Housing completely in a
bowl of water for about a minute.
4. Remove the Waterproof Housing from
the water, dry o and then open.
5. If the entire interior is dry, the
Waterproof Housing is safe for
under water use.
6. Make sure to put the camera in
the desired recording position
before inserting the camera in the
Waterproof Housing.

20
+
+
=
=
WATERPROOF HOUSING
ACCESSORY ASSEMBLY
CLIP HOUSING
+
+
+
+ +
=
=
Option 1
Option 2
HANDLE BAR MOUNT
Table of contents
Other 3SIXT Action Camera manuals
