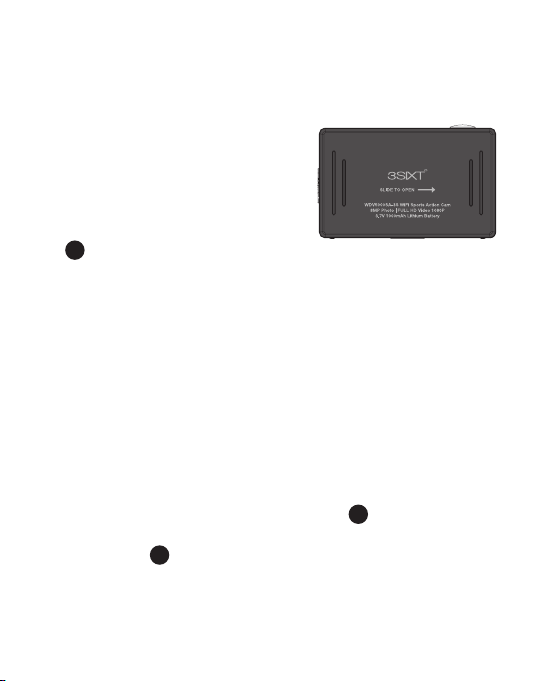
3SIXT WDV5000SA-3S User manual

WIFI CAMERA
FULL HD SPORTS
USER MANUAL

2
Thank you for purchasing the 3SIXT Full HD Sports Action
WiFi Camera Before getting started, please read this User
Manual* FULLY and carefully to ensure correct operation
and optimised performance.
Important information to keep your
camera and captured videos/images safe
• Please check the camera operates normally before use.
• Do not expose the camera to direct sunlight, or point its
lens to sunlight - the image sensor may get damaged.
• Take good care of the camera and prevent water or
sand particles from entering the housing when it is used
on the beach or in water. Water, sand particles, dust or
composites containing salt may damage the camera.
*The screen display and images used in this User Manual are
for illustration purposes only and may differ on actual unit.
WIFI CAMERA
FULL HD SPORTS

3
Please see page 19 for more information on correct use of
supplied Waterproof Case.
• Keep the camera free of dust and chemical materials. Place
it in a cool, dry and well ventilated environment. Do not place
the camera in a high temperature, moist or dusty place.
• If dust is accumulated on the camera or on its lens - use a
soft, clean and dry cloth to wipe away the build-up gently.
• Do not use a cloth to wipe dirt or sand particles. Blow
them away gently then wipe the camera gently with a cloth
suitable for optical devices.
• Do not use solvents to clean the video camera.
• Do not touch the lens surface with your ngers.
• This camera supports a microSD Memory Card (not
included) up to 32GB. For best results, we recommend
using Lexar Class 10 microSD cards. Please insert a
microSD card before use. A microSD card is not included
with this product and needs to be purchased separately.
• Memory cards are manufactured from precise electronic
components. Data may be lost or damaged if the card is
taken out or power supply is interrupted when the camera
or computer is connected to the memory card (i.e. during
reading, writing and formatting).

4
1Shutter Button
2Built-in microphone
3LCD Panel
1
7
23
4 5
6
12
13
4Lens
5WiFi Button/Status Indicator
6Power/Mode Button
Buttons, Connections and LCD Panel
See page 6 for
more detail

5
8
9
10
11
4
1
2
3
7Infrared Light
8micro USB Port
9Mini HDMI port
10 microSD Card Slot
11 External Microphone Port
12 Battery Cover Switch
13 Status LED
See page 6 for
more detail

6
* In camera mode - HI = 8MP, Lo = 5MP. In video mode - HI = FullHD (1920 x 1080 @ 30fps),
HILo = 1280 x 720 @60fps, LO = HD (1280 x 720 @ 30fps)
1 32 4
7
9
6
5
1Camera Mode
2Video Mode
3WiFi (displayed when enabled)
4microSD card (displayed when card inserted)
5Photo resolution/video size*
6Mute mode (displayed when enabled)
7Photo counter (displays up to 999)
8Video recording timer (displays hrs and mins)
9Battery power status
7Numbers in black circles refer to diagrams on pages 4 & 5
Installing and charging the battery
Installing the battery
First make sure that the camera is
off when inserting or removing the
battery.
1. Slide up the battery cover switch
12 while sliding the back open in
the direction of the arrow to open the battery cover.
2. Insert the lithium battery into the battery compartment.
Make sure the contacts of the battery are corresponding
to the symbols on the camera body.
3. Return the battery cover by placing it back then sliding it
rmly in the opposite direction of the arrow until it clicks
into place.
Charging the battery
1. Make sure that the camera is switched off.
If the camera is switched on, the battery will not charge.
2. Connect the camera’s micro USB port 8with a PC or
MAC via the USB cable to start battery charging. The
status LED 13 will be lit blue while charging and will
disappear when charging is completed.

8Numbers in black circles refer to diagrams on pages 4 & 5
Installing a microSD memory card
Use memory cards with speeds faster than
Class 4 and up to 32GB. We recommend
Lexar Class 10 microSD memory cards
for FullHD video capturing.
1. Make sure the cameras is off when inserting
or removing the microSD card.
2. Make sure the memory card is inserted in
the correct direction (the gold contacts of the microSD
card should face the front of the camera) into the microSD
card slot 10 . Failure to do so may lead to damaged or lost
data.
3. To remove the memory card, press down on the memory
card until it clicks and pops up.
If a microSD card is removed or power supply is interrupted
when the camera or computer is connected to the memory
card (i.e. during reading, writing and formatting) your captured
images and video may be lost or damaged.

Turning On/Off and Mode Selection
Install the battery, charge fully and insert the microSD card as
described on pages 7 & 8.
Turning on the camera
Press and hold the Power/Mode Button ( 6) for 4
seconds until the LCD panel 3displays ON and a beep
sound is heard.
Turning off the camera
Press and hold the Power/Mode Button for about 4
seconds until the LCD panel 3displays OFF and a beep
sound is heard.
The camera will be automatically shut down after 5 minutes if
not used to save power.
Scrolling through modes
After the camera is turned on, press the Power/Mode
Button to switch through modes:
1. HI Video (FullHD @ 30fps)
2. Lo Video (HD @ 30fps)
3. HILo Video (HD @ 60fps)
4. HI Camera (8MP)
5. Lo Camera (5MP)
6. Back to HI Video
Numbers in black circles refer to diagrams on pages 4 & 5 9

10 Numbers in black circles refer to diagrams on pages 4 & 5
To record a video, make sure the camera is
in video recording mode which should be
displayed on the LCD panel 3. If not, short
press the button repeatedly until appears.
To START recording
Short press the Shutter ( 1) button. The video icon
and the [ : ] on the LCD panel 3will ash. The Infrared
Light 7will ash red which indicates that a recording is in
progress.
To STOP recording
Short press the Shutter ( 1) button. The video icon
and the [ : ] on the LCD panel 3will STOP ashing. The
Infrared Light 7will also stop ashing which indicates that a
recording has ceased.
When the microSD memory card is full or the battery is
drained, recording will cease automatically. The recorded
video will be saved before the camera goes off.
Video Mode

11Numbers in black circles refer to diagrams on pages 4 & 5
To take a still image, make sure the camera
is in photo capture mode which should be
displayed on the LCD panel 3. If not, short
press the button repeatedly until appears.
To capture an image
Short press the Shutter ( 1) button. There will be a
beep sound and the Infrared Light 7will ash red which
indicates that an image is being processed by the camera.
Sound Setting Mode
Sound is enabled by default. In video or photo
mode, press and hold the Shutter
(1) button to mute sound. The mute icon
will be displayed on the LCD panel 3when the
sound is muted.
Long press the Shutter ( 1) button to activate
the sound.
Photo Capture Mode
Numbers in black circles refer to diagrams on pages 4 & 5
12 Numbers in black circles refer to diagrams on pages 4 & 5
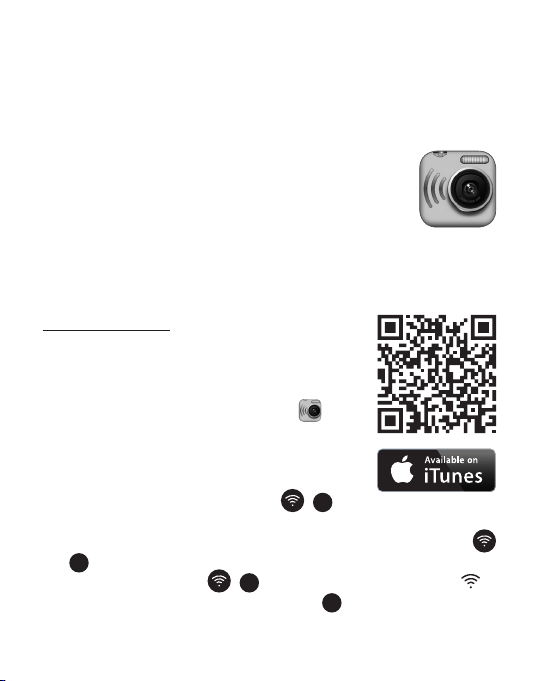
You can view, record, playback and download
your captured videos and images using the
cameras in-built WiFi, connected to compatible
iOS and Android devices using the dedicated
app, SYMAGIX.
Getting SYMAGIX and connecting to your device
For iOS devices
1. Find the SYMAGIX app at the iTunes app
store on your device or scan this QR
Code - and install it. When installation is
completed, the SYMAGIX icon will
show on your home/menu screen.
2. Make sure a microSD card is in your
camera and turned ON.
3. Press the WiFi/Status Button ( 5) on
the side of the camera to active the camera’s WiFi. When
the camera’s WiFi is starting up, the WiFi/Status Button
(5) will be ashing. When the camera’s WiFi is ready, the
WiFi/Status Button ( 5) will stay red and WiFi icon
will be displayed on the LCD panel 3.
Enabling WiFi Connection for viewing,
recording, playback and download*

13
1. Go to Settings > WiFi on your iOS device, then scan or
wait until 3SIXT5000 becomes available in your list of
available networks.
2. Select 3SIXT5000 from the list and when prompted enter
the password 1234567890 and wait for conrmation of a
connection.
3. Exit iOS Settings, then select the SYMAGIX icon on
your home/menu screen.
What you should see on your iOS device while SYMAGIX
app is open and connected to your camera’s WiFi:
1Battery power status
2Video resolution
3White balance
4Setup menu
5Playback mode
6Shutter
7Photo mode
8Video mode
1
2
5
6
3
4
7
8
*Playback may not be supported on some devices.

14 Numbers in black circles refer to diagrams on pages 4 & 5
For Android devices*
1. Find the SYMAGIX app at the Google
Play store on your device or scan this QR
Code - and install it. When installation is
completed, the SYMAGIX icon will
appear on your home/menu screen.
2. Make sure a microSD card is in your
camera and turned ON.
3. Press the WiFi/Status Button ( 5) on
the side of the camera to active the camera’s WiFi. When
the camera’s WiFi is starting up, the WiFi/Status Button
(5) will be ashing. When the camera’s WiFi is ready, the
WiFi/Status Button ( 5) will stay red and WiFi icon
will be displayed on the LCD panel 3.
4. Go to Settings > Connections > WiFi then scan or wait
until 3SIXT5000 becomes available in your list of available
WiFi networks. Please see your Android’s device user
manual for specic instructions.
5. Select 3SIXT5000 from the list and when prompted enter
the password 1234567890 and wait for conrmation of a
connection.
6. Exit Settings, then select the SYMAGIX icon on your
home/menu screen.

15
What you should see on your Android device while SYMAGIX
app is open and connected to your camera’s WiFi:
15
1Video resolution
2White balance
3Setup menu
4Playback mode
5Shutter
6Photo mode
7Video mode
8WiFi signal
9Battery power status
1
2
3
4
5
6
7
8
*Playback may not be supported on some devices.
16
Downloading captured videos and
images to external devices via cable
Connecting to a PC or MAC
using supplied micro USB cable
1. Turn the camera ON and connect
it to PC or MAC via supplied micro
USB cable.
2. will be then be displayed on the
LCD panel 3.
3. For PC: Your captured videos and images will be
located in My Computer >Removable Disc.
For MAC: Your captured videos and images will
be located in the desktop item No Name.
Playback and delete captured videos
and images on a HDTV via cable
Connect to a HDTV using a HDMI cable
(not supplied)
1. Before connecting or removing the HDMI cable, stop
any recording and disconnect the WiFi connection.

17
2. Connect the a HDMI cable (Mini HDMI) between the
camera and a HDTV.
3. For playback mode, short press the Power/Mode Button
(6) to switch between videos and photos. When there
are several videos or photos, press the WiFi/Status Button
(5) to select the desired video or photo. When a video
clip is selected, press the Shutter ( 1) button to
start playback and press the Shutter ( 1) button
again to stop playback.
4. When the camera is connected to a HDTV the LCD panel
3will show the following:
1Playback Mode (e.g camera is currently in Playback Mode)
2File Number (e.g There are 31 les and the current le is 19)
3File Type (Video Clip or Still Image)
1
3
2
Numbers in black circles refer to diagrams on pages 4 & 5

18
Downloading captured videos and
images to external devices via cable
5. In Playback Mode, press and hold the Shutter
(1) button and a prompt for le deletion and memory
formatting will appear.
6. Press the WiFi/Status Button ( 5) to switch between
le deleting and memory formatting. Press the Power/
Mode Button ( 6) to select YES or NO.
7. Press the Shutter ( 1) to conrm and exit.
Capturing video and images using
Remote Control
You can use the remote control to record
videos, take photos and turn OFF the
camera. When using the remote
control, make sure that the
signal emission port
on the remote control is
pointing to the infrared light
7on the camera.
1. Press the video button to record a video and
stop the recording.
2. Press the photo button to take a photo.
3. Press the Power button to turn camera OFF.
19
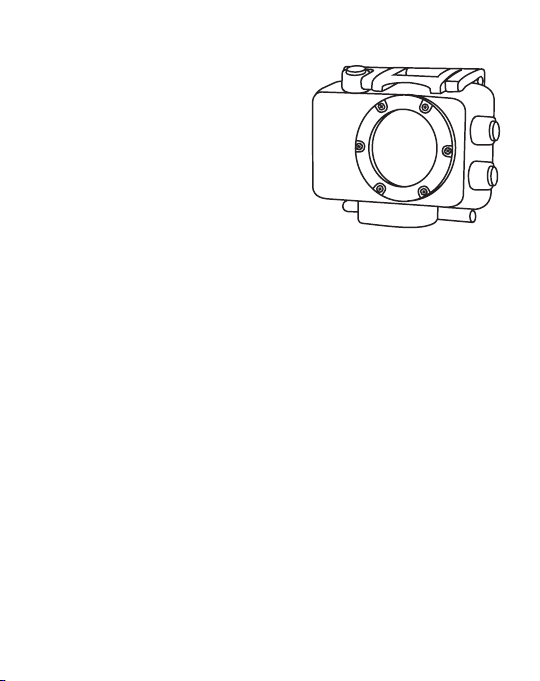
Special instructions
for Waterproof Case
The camera is only
submersible up to 2M if it is
correctly sealed within the
supplied Waterproof Case.
Before sealing the Waterproof Case, keep the camera
housing’s rubber seal clean. A single hair or grain of sand can
cause leaking. You must test it by closing the case without
inserting the camera. Submerse the case completely in water
for about one minute. Remove the case from the water, dry off
its exterior with a towel, and then open the case. If the interior
is dry, the case is safe for use under water.
• After use in salt water you will need to rinse the case
appearance parts with fresh water and dry it. This will
prevent corrosion of the hinge pin, which can cause failure.
• To clean the seal, rinse in fresh water and wind dry (drying
with a cloth may cause lint to compromise the seal).
Re-install the seal into the grooves in the backdoor of the
housing.
Failure to test the Waterproof Case before use
may lead to subsequent damage of your camera
and void warranty.

Limitation of Liability and Indemnity
Intended use
To the maximum extent permitted by applicable law, 3SIXT
shall not be liable for any damages suffered as a result of using,
modifying, contributing, copying, distributing, or downloading the
materials, use of the 3SIXT FullHD Sports Action WiFi Camera
User Manual or use of any 3SIXT product and/or related apps.
In no event shall 3SIXT be liable for any indirect, extraordinary,
exemplary, punitive, special, incidental, or consequential damages
(including, without limitation, loss of data, revenue, prots, use or
other economic advantage) however arising, whether for breach
of contract or in tort, even if 3SIXT has been previously advised
of the possibility of such damage. You agree that you have sole
responsibility for adequate protection and backup of data and/
or equipment used in connection with the product and software
and will not make a claim of any nature against 3SIXT for lost
data, inaccurate output, work delays or lost prots resulting
from the use of the materials. You agree to indemnify, hold
harmless and defend 3SIXT, together with its afliates, parent
and subsidiary entities, successors, assigns, partners, managers,
members, employees, ofcers, directors and shareholders,
from and against any and all damages, liens, liabilities, losses,
demands, actions, causes of action, claims, costs and expenses
(including, without limitation, reasonable attorneys’ fees, charges
and disbursements, as well as the cost of in-house counsel and
appeals) arising from or related to 3SIXT, the use of the 3SIXT
FullHD Sports Action WiFi Camera User Manual or any 3SIXT
Table of contents
Other 3SIXT Action Camera manuals


