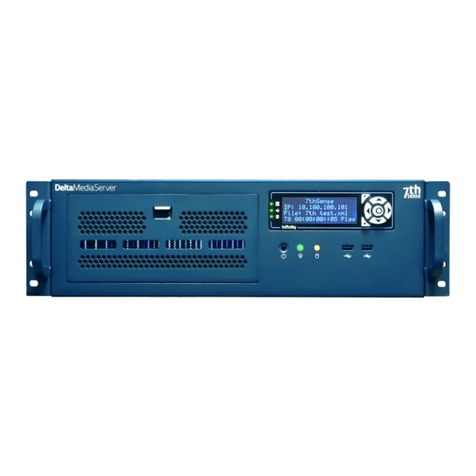
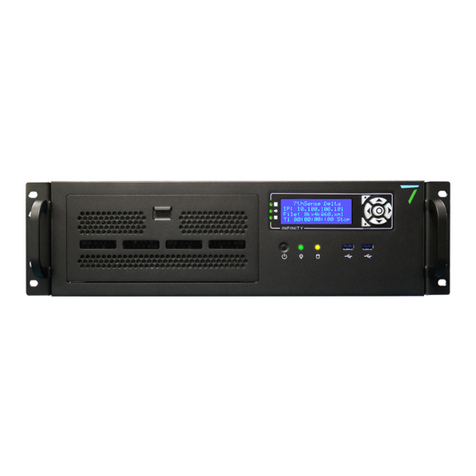
7th Sense DeltaServer User manual

Delta Media Server
Device Control with
DeltaServer
MC258-2
User Guide

2
MC258-2 Device Control with DeltaServer : User Guide © 2023 7thSense
The 7thsense logo, and various hardware and software product names are trademarks of 7thSense Design
Ltd. Product or company names that may be mentioned in 7thSense publications are tradenames or
trademarks of their respective owners, and such trademarks may also be registered in their respective
countries. Windows is a registered trademark of Microsoft Corporation in the United States and other
countries.
Device Control with DeltaServer : User Guide
Trademark Information
Copyright Information
All Rights Reserved. This document is copyrighted © by 7thSense Design Ltd and shall not be reproduced
or copied without express written authorisation from 7thSense Design Ltd.
The information in this document is subject to change without notice. 7thSense Design Ltd assumes no
responsibility for errors, and/or omissions contained in this information.
Printed: March 2023
This edition is for software version Delta 2.5 and above
Document ref.: MC258-2
7thSense Design LLC
7thSense Design Ltd
E: info@7thsense.one
W: 7thsense.one
2 The Courtyard, Shoreham Road
Upper Beeding
Steyning
West Sussex
BN44 3TN
UK
T: +44 (0) 1903 812299
4207 Vineland Rd
Suite M1
Orlando, FL 32811
USA
T: +1 407 505 5200

3
MC258-2 Device Control with DeltaServer : User Guide © 2023 7thSense
Contents
Introduction 4
Art-Net/DMX Control 4
Addressing DMX Devices 5
ENTTEC Node Management 6
Configure Art-Net Output in DeltaGUI 8
Create DeltaGUI Resource 9
Using Art-Net Timeline Resources 12
Configure Art-Net Input in DeltaGUI 14
Art-Net Recording 16
Using Serial Events for Device Control 18
Create Serial Event in Delta Timeline (Direct Method) 19
Trigger Serial Commands on Demand (Sequence Method) 24
UDP Serial Events 31
PJLink 34
Using 7thUDP2TCP for Device Control 34
Setup Instructions for 7thSense 3D Sync using Labjack 36
Hardware Connectivity 36
Software Configuration 37
Verifying Operation 39
LabJack 7thSense Pinout and Connections 41
DeltaShowControlInterface 43
Workflow 44
Configure the ADAM-6060 Comms 45
Configure DeltaShowControlInterface 51
Control Logic for Direct Control (Mode=0) 52
Control Logic for Sequences (Mode=1) 54
Appendix: Sending ASCII to ADAM-6060 55
Document Information 55
56Index

4
MC258-2 Device Control with DeltaServer : User Guide © 2023 7thSense
Introduction
Introduction
DeltaServer offers a number of ways of controlling external devices, whether projectors, lighting,
stage and theatre effects machines, or playback devices including smart glasses, 3D synchronised
glasses and VR headsets.
See also: 7thConnect
A powerful, single application, used to connect multiple I/O feeds for use with Delta Media Server
system. Receive dynamic inputs to the Delta Timeline and send controls to switches over IP.
Ø
7thConnect User Guide
Art-Net/DMX Control
DMX is a serial protocol used to control many lighting systems, bubble, and smoke machines and
other stage effects devices.
Art-Net is DMX over Ethernet, the protocol that DeltaServer uses to interface with external devices,
so we need to convert the Art-Net signal into DMX.
An Ethernet cable carries the Art-Net signal to and from a converter (e.g. Enttec box), which converts
to DMX over XLR cable to the first device: other DMX devices can then be connected in a serial /
daisy-chain format, one to the next.

5
MC258-2 Device Control with DeltaServer : User Guide © 2023 7thSense
Art-Net/DMX Control
Addressing DMX Devices
Your devices receive messages from DeltaServer according to the DMX Base Address and their
respective Delta channels.
Each Base Address can be any number within range (0-511) but should be unique for independent
devices: it should not coincide with any other base/channel number unless this is the requirement
(e.g. multiple devices listening to the same part of the addressed block).
Plan your device requirements:
For example, Light 1 has base address of 1 and can have 4 Delta output channels:
·
Red channel 1 (values 0–255)
·
Blue channel 2 (values 0–255)
·
Green channel 3 (values 0–255)
·
Brightness channel 4 (values 0–255)
Light 2 can then start at base address 5 and take up 4 channels, and so on.
Further instructions for addressing specific devices may be found in its manufacturer’s user
manual.
DIP switch settings
The example below shows a DIP switch chart denoting that this light is ON (switch 10) with a base
address of 5 (switches 1 and 3):

6
MC258-2 Device Control with DeltaServer : User Guide © 2023 7thSense
Art-Net/DMX Control
A device set-up might look like this:
ArtNetominator is a free facility to help you to set up and troubleshoot your Art-Net devices:
http://www.lightjams.com/artnetominator/
ENTTEC Node Management
This page describes the ENTTEC OpenDMX Ethernet (ODE) MkI. Operation of the MkII is the same,
but the software app for configuration (v1.8 on) operates in a browser page.
The server must be set up with the correct software for the DMX converter – we use ENTTEC Node
Management Utility.
·
Connect the ENTTEC box to the server NIC (or via network) with an Ethernet cable.
·
Connect the first device to the ENTTEC box using XLR cable.
·
Connect each device to the next using XLR cables.
·
Open the Node Management software.
·
Click the ‘Discovery’ button:

7
MC258-2 Device Control with DeltaServer : User Guide © 2023 7thSense
Art-Net/DMX Control
The attached ENTECC box will show listed under Device Type with its IP Address, Device Name
and Mac Address.
·
Click to select the device and the ‘Configure’ button will become active. Click it.

8
MC258-2 Device Control with DeltaServer : User Guide © 2023 7thSense
Art-Net/DMX Control
·
The correct details should default in, but you should check:
·
IP Address is correct and is on the same range as the server (if it is on a different range, the
server can get confused and may show the device IP in its front panel instead of its own).
·
Protocol: Art-Net
·
Subnet and Universe can be set to what you want – the default for both is 00.
Check/set your Subnet and Universe here, and make sure they match in Delta.
·
Port Direction: Output DMX
Universes and Subnets
Each ENTTEC box is addressed to a Universe and Subnet (to allow for more physical channels if
required) on a network.
DeltaServer can read from up to 16 Universes (512 channels each), with up to 16 Subnets (512
channels each) for Art-Net INPUT via (for example) a Showtec console.
For Art-Net OUTPUT, DeltaServer outputs to a single Universe/Subnet as set in Preferences >
ArtNet & DMX.
Each independent output device (light, effects machine) should be addressed with a unique Base
Address + a Delta channel for each set of values it requires (e.g. R, G, B, Brightness for lights = 4
Delta Channels).
Each Delta device output can have a value of between 0 and 255 (8 bit) but this can be extended by
allocating 2 (16 bit) or 4 channels (32 bit) to match the device characteristics.
Some devices such as smoke or bubble machines only require a single Delta channel output: On =
255 and Off = 0.
Configure Art-Net Output in DeltaGUI
Check the configuration in DeltaGUI matches your set-up. In DeltaGUI, select Configure > Preferences
and go to ‘ArtNet & DMX’.
9
MC258-2 Device Control with DeltaServer : User Guide © 2023 7thSense
Art-Net/DMX Control
Tick to enable ‘Output ArtNet Data’.
Check that the Art-Net NIC IP is the correct NIC to the Enttec box
Type in the correct Universe and SubNet for which Art-Net output should be enabled.
Note: if you tick ‘Enable TestMode’, Delta will send a message out to ALL channels available and so
all your devices should respond. Untick this box to stop/reset.
Create DeltaGUI Resource
Set up a new DeltaGUI resource for each of the devices you are using:
From the top menu bar in DeltaGUI, select View > ArtNet & DMX Editor:

10
MC258-2 Device Control with DeltaServer : User Guide © 2023 7thSense
Art-Net/DMX Control
Click Create New and name your resource. Click OK and select your new resource:

11
MC258-2 Device Control with DeltaServer : User Guide © 2023 7thSense
Art-Net/DMX Control
·
Set the Base Address to that of the device (i.e. the first channel number)
·
Select between Instant, Fade or Tween where:
oInstant = immediate, single event within the chosen Tween Group
oFade = values (e.g. light colours) will fade down from current setting (note should not be
mixed with other Instant or Tweened devices)
oTween = values (e.g. light colours) will go between the previous and ‘this’ setting within the
chosen Tween Group
·
Click ‘Add Slider’ to add each channel required for that device.
·
Choose the Channel Count (1,2 or 4) for that slider and the Output Channel start. The Channel
Count allows the range to be expanded further for devices that support more than 8-bit; a single
channel can give values of 0–255 (8-bit) but 2 channels can give a range of 0–65535 (16-bit), 4
channels give a range of 0-4,294,967,295 (32-bit).
Name and Set Sliders
You can leave the Slider Names as their default names, or re-name them according to what they
relate to on the device. In this case, Light 1 has 4 channels, starting at Base Address 1:
·
Red (output ch 1)
·
Green (output ch 2)
·
Blue (output ch 3) and
·
Brightness (output ch 4)
RGB channels are usually consecutively numbered for most lights.

12
MC258-2 Device Control with DeltaServer : User Guide © 2023 7thSense
Art-Net/DMX Control
This light is set to switch on instantly to full (value 255) brightness and full green when it is triggered
in the timeline. Red and Blue are off (value 0). The grey sliders can also be dragged up or down with
the mouse.
A smoke or bubble machine would only have a single channel with values 255: On, 0:Off.
Some devices may behave in different ways, for example some lights have an uppermost limit of,
say, 210. If the slider goes above that limit it may tell the light to flash on-off, or to kill the output,
depending on device settings. This information should be found in the manufacturer’s user guide.
Using Art-Net Timeline Resources
Once you have set up your resources they will appear in the resource pool, available to the timeline.
As with other resources, drag and drop them onto the timeline, then right-click to configure them with
the Resource Editor:

13
MC258-2 Device Control with DeltaServer : User Guide © 2023 7thSense
Art-Net/DMX Control
Before any Art-Net resources are placed on the timeline, all values for a DMX device are 0.
Whilst an Art-Net resource can have a Fade duration, it is essentially just a start trigger to change the
current status of a DMX device to another status, using resource properties. In the example above,
the Light2 resource is set to a fade; it is moved down in the layer because a fade can have
overlapping duration with other events.
Fade Effect
·
The Fade effect fades to the colour selected over the set time.
·
If you want to fade down to a colour, set the first instance to the colour that you want, then set
another instance with sliders at the new values.
Remember that Fade type Art-Net resources are not compatible with Tween or Instant, so do not use
a mix of Fade with any other type.
Tween Effect
The Tween effect will gradually change a light from the colour of the current instance to that of the
next:
If the first instance of Light1 is set to RGB 0, 255, 0 (green) and the next instance of Light1 is set to
RGB 132, 41, 187 (purple), it will transition smoothly from green to purple over the time separation
between the two resources on the timeline.
All Tween and Instant type Art-Net resources can be placed in a Tween Group in order to separate
different tweening effects:

14
MC258-2 Device Control with DeltaServer : User Guide © 2023 7thSense
Art-Net/DMX Control
Configure Art-Net Input in DeltaGUI
Delta can also receive Art-Net input values from an external source (for example a control desk),
which can be used to trigger real-time commands for media playback. These commands could be to
adjust media colour, position on screen, rotation or any other Delta sequence command. Input Art-Net
resources can be configured to any universe / subnet (up to 16 of each).
In DeltaGUI, select Configure > Preferences and go to ‘ArtNet & DMX’.
15
MC258-2 Device Control with DeltaServer : User Guide © 2023 7thSense
Art-Net/DMX Control
The values from the selected DMX channels are substituted into placeholders in order to create the
command string sent into Delta.
In the example shown, the sliders are named Red, Green, Blue – the values from these input channels
(4, 5, 6) replace the placeholder strings %Red %Green %Blue, so the command sent within Delta in this
example is:
Mediacolor mymedia 100 101 102

16
MC258-2 Device Control with DeltaServer : User Guide © 2023 7thSense
Art-Net/DMX Control
This command will trigger real-time changes of the selected channels at any time: apply values to (for
example) colour, or rotation, of specific media resource, which will trigger as the control slider is
moved.
Note that you can also offset and scale the channel values using those edit boxes. The order of
execution is offset, then scale.
offset
add a fixed value every time to this input
scale
add a relative value every time to this input
Art-Net Recording
For recording in Delta, see the Delta User Guide on recording generally.
Art-Net recording enables Art-Net inputs to be recorded and then rerun in simulation scenarios. This
may be useful in optimising inputs, or to allow inputs to be simulated as shows are developed.
To set up recording, click the red Record button on the timeline controls:

17
MC258-2 Device Control with DeltaServer : User Guide © 2023 7thSense
Art-Net/DMX Control
Select Art-Net Recording:
Start
first DMX channel to record
End
last DMX channel to record (recording includes all channels between Start and End)
Universe
Universe being recorded
Subnet
Art-Net Universe being recorded
Save as
the number of bytes which make up a data point to be recorded
Input Network
The IP from which the recording is being listened to

18
MC258-2 Device Control with DeltaServer : User Guide © 2023 7thSense
Art-Net/DMX Control
Input Subnet
The IP subnet being listened from
Number of frames to record
This is the number of Art-Net frames to record (not movie frames).
ArtNet Input Enabled
This is essentially the same checkbox that can be found in Config > Preferences > ArtNet & DMX
to enable Art-Net input.
Loop playback at file end
Plays the Art-Net recording continuously until playback is cancelled.
Set Save file
Set the file to record to. When this is set, and Input is enabled, the Record button becomes
available.
Set Playback File
The file to be read from, in order to playback Art-Net. Once this is set and Art-Net input is
disabled, the PlayBack button becomes available.
External Controls
Use the External Control (listed under ‘Recording Commands’): ARTNET_RECORD.
With this control you can set any of the Art-Net recording parameters. Use Recording Mode to change
whether you’re recording, playing back or neither. Note, you will need to ensure you are in the correct
Art-Net input/output mode, See ARTNET external control (listed under ‘Media Commands’).
Example:
artnet_record StartChan=1 EndChan=13 Universe=3 Subnet=2 ByteRange=2 InputIP=192.168.71.10
InputIPSubnet=255.255.255.0 NumberFramesToRecord=80 SaveFile=C:\Movies\Record\art_test.txt
PlayBackFile=C:\Movies\Record\artnetrec.txt RecordingMode=Idle LoopPlayback=true
Note: Save and PlayBack files are .txt files.
Using Serial Events for Device Control
Delta has a range of pre-built serial events for to allow sending out serial codes to external devices at
set times on the timeline and additionally, you can write more complex serial commands within a
Delta Sequence, for example to enable real-time interaction. This document demonstrates how to set
up a projector using serial communications and trigger serial events using both direct and sequence
methods.

19
MC258-2 Device Control with DeltaServer : User Guide © 2023 7thSense
Using Serial Events for Device Control
Projector Setup
Connect your projectors using (in this example) RS232 or RS422 as required, for serial
communications to the relevant com port (available comports are listed in the Config > Preferences >
Communication > Serial tab).
Create Serial Event in Delta Timeline (Direct Method)
You may have some sample serial events already listed in your Delta Resource panel but for this
example of multiple projectors on separate comports, you will need to create a new set of commands
(using copy, paste, edit) for each projector that you want to control from within the timeline.
In the server C:\ drive, open the SerialEvents folder and select an appropriate event to copy/edit:

20
MC258-2 Device Control with DeltaServer : User Guide © 2023 7thSense
Using Serial Events for Device Control
Serial events are named .7SE files and are written in .xml, so can be edited in Notepad or similar text
editor. Delta relates each serial event to a specific com port, so you must create a new serial event
file for each of the com ports used (whether each port connects a single device or multiple).
The following example of serial event code offers a range of serial commands relating to Christie
Projectors. In the example, several projectors are daisy-chained together from the ‘left’ port, and
others from the ‘right’ port (where left and right simply relate to the positions of the projectors within
space).
Remember to edit the RESOURCENAME field to create a unique name for each one, e.g. ‘Left
Projectors’, ‘Right Projectors’, and to save each of the files back into the \SerialEvents folder under
appropriate names (e.g. LeftProjectors.7SE, RightProjectors.7SE).
<?xml version="1.0" encoding="ISO-8859-1"?>
<SERIALEVENT_ARCHIVE>
<COMMENT>Copyright(c) 2006 - 7thSense :
http://www.7thsense.one</COMMENT>
<COMMENT>Roadie 25k, Roadster S, Mirage S, Christie DS,DW,HD, Matrix
3000,4000, DLV1400-DX,DLV1920-DX</COMMENT>
<DATE>08.09.2006 14:20:00</DATE>
<VERSION>1.0</VERSION>
<BETA>Beta</BETA>
<FILENAME>C:\SerialEvents\leftprojectors.7SE</FILENAME>
<RESOURCENAME>Left Projectors</RESOURCENAME>
<SERIALEVENTS>
<CommandCount>7</CommandCount>
<SelectedCommand>0</SelectedCommand>
<InputOutput>Output</InputOutput>
<COMMAND0>
<NAME>Shutter Open Projector 1</NAME>
<DATA>(1SHU 0)</DATA>
</COMMAND0>
<COMMAND1>
<NAME>Shutter Close Projector 1</NAME>
<DATA>(1SHU 1)</DATA>
</COMMAND1>
<COMMAND2>
<NAME>Shutter Open All</NAME>
<DATA>(SHU 0)</DATA>
</COMMAND2>
<COMMAND3>
<NAME>Shutter Close All</NAME>
<DATA>(SHU 1)</DATA>
</COMMAND3>
<COMMAND4>
<NAME>Power On All</NAME>
<DATA>(PWR 1)</DATA>
</COMMAND4>
<COMMAND5>
<NAME>Power Off All</NAME>
Table of contents
Other 7th Sense Server manuals

7th Sense
7th Sense Delta User manual

7th Sense
7th Sense Delta Pico Installation manual

7th Sense
7th Sense Delta User manual

7th Sense
7th Sense Delta User manual

7th Sense
7th Sense VIOSO User manual

7th Sense
7th Sense Delta Pico Installation manual

7th Sense
7th Sense M101-4 User manual

7th Sense
7th Sense R 10 Series Installation manual

7th Sense
7th Sense R Series User manual

7th Sense
7th Sense Delta User manual