7th Sense R Series User manual

R-Series Media Servers
Operating R-Series
Media Servers
M750-1
User Guide

2
M750-1 Operating R-Series Media Servers : User Guide © 2023 7thSense
The 7thsense logo, and various hardware and software product names are trademarks of 7thSense Design
Ltd. Product or company names that may be mentioned in 7thSense publications are tradenames or
trademarks of their respective owners, and such trademarks may also be registered in their respective
countries. Windows is a registered trademark of Microsoft Corporation in the United States and other
countries.
Operating R-Series Media Servers : User Guide
Trademark Information
Copyright Information
All Rights Reserved. This document is copyrighted © by 7thSense Design Ltd and shall not be reproduced
or copied without express written authorisation from 7thSense Design Ltd.
The information in this document is subject to change without notice. 7thSense Design Ltd assumes no
responsibility for errors, and/or omissions contained in this information.
Printed: June 2023
This edition is for software version N/A
Document ref.: M750-1
7thSense Design LLC
7thSense Design Ltd
E: info@7thsense.one
W: 7thsense.one
2 The Courtyard, Shoreham Road
Upper Beeding
Steyning
West Sussex
BN44 3TN
UK
T: +44 (0) 1903 812299
4207 Vineland Rd
Suite M1
Orlando, FL 32811
USA
T: +1 407 505 5200

3
M750-1 Operating R-Series Media Servers : User Guide © 2023 7thSense
Contents
Introduction 4
Installation 5
Environment 7
Care and Maintenance 8
Rear Panel Connections 10
Power Supply 13
Front Panel 14
Front Panel Control and Display 15
Adding Custom Controls 22
Backup and Recovery 24
Media Storage (Delta) 28
Installation Records 29
R-Series 10 Physical Specifications 30
Warranty, Support and Service 31
Regulatory Compliance 32
Document Information 33
34Index

4
M750-1 Operating R-Series Media Servers : User Guide © 2023 7thSense
Introduction
Introduction
R-Series Servers are custom-built, configured to meet specific user requirements. This Guide covers
all the common hardware features. For user guides on Delta, Compere®, Actor® and Conjurer®
software and connectivity, media and server management, please see our Online-Help pages.
All servers are supplied with the appropriate Hardware User Guide. Copies of these can also be found
on the 7thSense User Portal
For Delta Media Servers, see Operating Delta Media Servers

5
M750-1 Operating R-Series Media Servers : User Guide © 2023 7thSense
Installation
Installation
Unpacking
Unpack your server carefully onto a clean and level surface and examine it for any signs of transit
damage. Contact your supplier immediately if anything appears to be damaged, or any parts missing.
Please retain all packaging in case of future need to return a server.
Supplied accessories
In your white accessories box, you will have:
·
power cable
·
server motherboard manual
·
spare pair of front panel air filters
·
2 × rack rails and screws
Depending on specification, HDMI / DVI adapters may be included.
Lifting
The weight of your R-Series 10 server is stated on the server’s product label and may require a two-
person lift, especially when manoeuvring one into a rack. Observe your internal manual handling
recommendations to avoid injury.
Rack Mounting
The front panel fascia must first be removed before mounting in a rack.
Note: Once mounted, sufficient finger access should be allowed in the rack sides to again remove
the fascia for maintenance.
R-Series media servers are supplied with rack mount slide rails and fixings. To fit the rails supplied,
follow the instructions included with the rails.
Remove the plastic front fascia before mounting. Two small cross-head screws retain the plastic
fascia panel, to the bottom left and right. Locate and remove these before attempting to remove the
fascia.
6
M750-1 Operating R-Series Media Servers : User Guide © 2023 7thSense
Installation
After removing the two screws, pull the fascia forwards and straight off the unit. It is retained by four
push-fit fasteners. Refit the fascia after mounting. Where side access is restricted for unracking, a
7thSense tool is available to insert into the grille. Take care not to damage the grille with other tools,
or force when removing.
Secure the unit to the rack using two rack bolts to each side. Ensure that each server is properly
secured to the rack cabinet.
Replace the fascia and secure using the two screws previously removed.
Rack Stability Precautions
·
Ensure the rack is stable (e.g. bolted to the floor) before sliding out the server.
·
Do not place objects on equipment projecting from a rack (e.g. do not use as a shelf).
·
Only slide out one piece of equipment from the rack at a time.
Connecting External Equipment
To ensure best performance from the server and compliance with relevant EMC regulations, this
equipment should only be used with high-quality shielded data and signal cables.
Only equipment and accessories approved to IEC 60950-1 and SELV circuits may be connected to the
server. All equipment and accessories shall comply to the relevant standard for the server’s port to
which it is connected.

7
M750-1 Operating R-Series Media Servers : User Guide © 2023 7thSense
Environment
Environment
·
R-Series media servers should be operated in a clean, dry, dust-free area.
·
The server is intended for operation in benign environments; that is, not subject to corrosive or
explosive atmospheres, moisture or flammable gases. The server is non-protected against
ingress of liquid (IPx0).
·
The server is not designed to be subject to excessive mechanical shock or vibration.
·
This equipment is not suitable for use in locations where children are likely to be present.
Only used at altitude not exceeding 2000 m
Only used in not-tropical climate regions
Thermal
Do not block any of the server’s air vents and ensure the ambient temperature around the server is
compatible with the environmental characteristics stated below.
Particularly when mounted in a rack cabinet with front or rear doors the ambient temperature around
the server may be higher than the ambient room temperature.
Electrical
Before connecting power to the server, ensure that electricity supply is compatible with the electrical
ratings stated on the server’s product label. The server shall not be connected to an IT (unearthed
neutral) power distribution system and the mains socket-outlet used shall connect to the building
installation ground.
The server is connected to and disconnected from the mains supply with the two IEC 60320 power
connectors on the rear of the unit.

8
M750-1 Operating R-Series Media Servers : User Guide © 2023 7thSense
Care and Maintenance
Cleaning
External casing and the front panel should be carefully wiped with a soft cloth and antistatic solution.
Air filters
User-serviceable air filters are located behind the server’s front panel fascia. It is important to remove
and clean or replace the filters periodically to avoid overheating. R-Series media servers are supplied
with one pair of spare filters, others can be supplied by 7thSense. Servers should not be run without
filters, since accumulations of dust inside the server can affect performance.
Before removing any filter, power the server down. This will avoid disturbing dust, which can then
be drawn back into the server.
Two small cross-head screws retain the plastic fascia panel, to the bottom left and right. Locate and
remove these before attempting to remove the fascia.
After removing the two screws, pull the fascia forwards and straight off the unit. It is retained by four
push-fit fasteners. If the fascia sides are inaccessible, plastic hooks are provided to pull the fascia off
(see Installation ).
The two filter pads can be lifted out for cleaning or replacement. One side has a cutout for the power
switch.
5

9
M750-1 Operating R-Series Media Servers : User Guide © 2023 7thSense
Care and Maintenance
Internal maintenance
There are no internal user-serviceable electrical parts.
Electrostatic discharge (ESD)
When handling electronic assemblies, take precautions to avoid electrostatic discharge (ESD) causing
damage. Precautions should include the wearing of an ESD protective wrist strap and using antistatic
bags for electronic assemblies when not installed in any equipment.
Warning: Do not operate the server with any covers removed as the air flow through the unit will be
compromised and may lead to overheating. The lid of the server forms an integral part of the cooling
circuit. Operation of the unit with the lid removed can cause overheating.
Any alterations to the product’s specification, e.g. additional/alternative components, may invalidate
the warranty or impact the unit’s performance. Additionally, such changes or modifications could
cause equipment no longer to comply with the relevant EMC regulations, and void the user’s authority
to operate the equipment. If in doubt, please contact your supplier.
End of Service Life
Dispose of the equipment and any components in accordance with all local and national
safety and environmental requirements.

10
M750-1 Operating R-Series Media Servers : User Guide © 2023 7thSense
Rear Panel Connections
Cables and Connectors
To ensure best performance from the server and compliance with relevant EMC regulations, this
equipment should only be used with high-quality shielded data and signal cables.
DisplayPort Adapters and Nvidia GPUs
Users are recommended to use VESA standard cables and adaptors only: https://vesa.org/about-
displayport. A maximum width of the moulding around DP connectors of 19.75 mm can be used for 4-
output Nvidia GPUs.
Audio connectors (3.5 mm TRS / mini stereo jack)
These are the Realtek® defaults as used in R-Series 10 servers.
Double-click a connector’s graphic in Realtek HD Audio Manager to enable the auto pop-up dialog.
This enables you to choose which device has been plugged in, for example to assign the blue socket
to ‘Side Speakers Out’ rather than ‘Line In’.
Audio (stereo) TRS plug connections
Tip = Left channel
Ring = Right channel
Sleeve = Ground (common)

11
M750-1 Operating R-Series Media Servers : User Guide © 2023 7thSense
Rear Panel Connections
Channel identifier
Socket colour
TRS connection
7.1 speaker config
5.1 speaker config
1
FL
Green
Tip+Sleeve
Front left
Front left
2
FR
Green
Ring+Sleeve
Front right
Front right
3
C
Orange
Tip+Sleeve
Centre
Centre
4
S
Orange
Ring+Sleeve
Sub
Sub
5
L
Blue
Tip+Sleeve
Side left
(unused)
6
R
Blue
Ring+Sleeve
Side right
(unused)
7
BL
Black
Tip+Sleeve
Rear left
Rear left
8
BR
Black
Ring+Sleeve
Rear right
Rear right
Note: if one of the motherboard audio channels is assigned to LTC, that motherboard channel
becomes unavailable for output.
Rear panel connections
R-Series media servers are custom-built, with additional cards and connectors as specified for the
user. These will be labelled.
R-Series 10 servers are fitted with dual redundant power supplies. Both should be connected, since
they operate in parallel. If one unit fails, the indicator light to the right of the failed socket will go to
yellow and emit a high-pitched beeping sound.
There is an LED light strip for the rear panel, which is operable when power is on.
If only one PSU is connected, the other's indicator will show amber. Green LEDs indicate healthy
PSUs.

12
M750-1 Operating R-Series Media Servers : User Guide © 2023 7thSense
Rear Panel Connections
Condition
LED status
Sound
Dual PSU, both good
Both green
none
Dual PSU, one PSU failed
Green-lit PSU good
Yellow-lit PSU failed
Audible alarm from the power distribution board
One PSU unplugged
This PSU unlit
Audible alarm from the power distribution board
One PSU removed
N/A
Audible alarm from the power distribution board

13
M750-1 Operating R-Series Media Servers : User Guide © 2023 7thSense
Power Supply
Power Supply
R-Series 10 servers are fitted with dual redundant removable power supply units (PSUs). These can
be replaced only with exactly matched units as follows:
·
To remove: Power down the server and then remove both IEC320 power connectors from the
unit’s PSUs.
·
Press the PSU’s release tab inwards and pull the handle to slide the power supply out of the
server:
·
To replace: Slide the replacement power supply into the server and push firmly until it fully clicks
home.
·
Refit the IEC320 power connectors and power on the server.
Warning: The IEC320 power connector should never be inserted into the PSU when the PSU is
not fitted in a server.

14
M750-1 Operating R-Series Media Servers : User Guide © 2023 7thSense
Front Panel
Front Panel
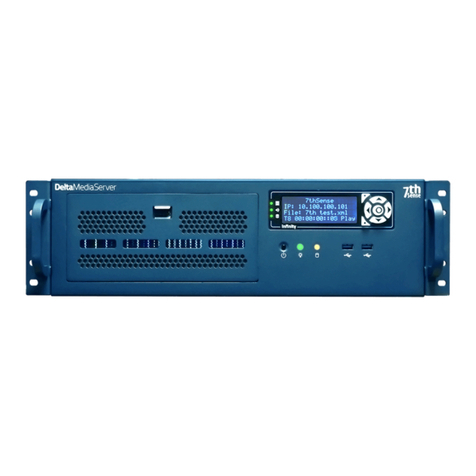
The front panel has a ‘7’ power push-button recessed into the fascia that lights when the unit is
powered and switched on. All other control is via the touch screen display. This will initially show a
landing page with information and options for the role the unit is playing: Delta, Actor or Conjurer.
The two USB 3 connectors can be used for peripherals (keyboard and mouse) or introducing software
updates.

15
M750-1 Operating R-Series Media Servers : User Guide © 2023 7thSense
Front Panel Control and Display
The front panel display is a touch-screen controller for the server, whether running as Delta, Actor or
Conjurer. It is used for configuration, monitoring and play control. Touch and swipe navigation
provides selection menus, and NDI media display in user-selectable layouts. The panel can itself be
tested and adjusted for sensitivity.
Landing Page
The home/landing page for the front panel display shows what software (Compere ‘performer’) is
running and in what role. For example, an Actor server will show this detail:
The other software that uses R-Series servers are Conjurer (a Compere ‘performer’) and Delta.

16
M750-1 Operating R-Series Media Servers : User Guide © 2023 7thSense
Front Panel Control and Display
Settings
Settings > Network configuration
This shows all IP addresses and allows manual NIC configuration:
The NIC naming follows the names given in the software.

17
M750-1 Operating R-Series Media Servers : User Guide © 2023 7thSense
Front Panel Control and Display
For manual edit of a selected NIC, select manual and click on the required field:
Edit the required octet(s) and save.
Settings > Test
The Test button has two functions, to cycle all outputs once through solid red/green/blue, and to
calibrate the touch function.

18
M750-1 Operating R-Series Media Servers : User Guide © 2023 7thSense
Front Panel Control and Display
The touch calibration simply requires a touch to be traced across the range of the display panel:
If insufficient data is collected you will be prompted to try again, otherwise a success message will
briefly be displayed.
Settings > Performer Install
This is a non-user service function for the configuration of the front panel to the installed Performer
software (Actor, Conjurer, Delta).
Settings > Preview Settings
All NDI feeds available to the unit will be listed. Delta has only one NDI feed representing timeline
playback, which will appear in the assigned position.

19
M750-1 Operating R-Series Media Servers : User Guide © 2023 7thSense
Front Panel Control and Display
Layout: The display can show up to four available NDI feeds. Choose between 1, 2 and 4 feeds, laid
out as shown:
Arrange Feeds: Allocate which NDI sources to assign to each part of the display.

20
M750-1 Operating R-Series Media Servers : User Guide © 2023 7thSense
Front Panel Control and Display
System
This service function provides some key hardware information about what is in the unit and how it is
performing:
Preview
Select the Preview button to see NDI feeds available in the server, arranged as in Settings > Preview
Settings > Layout.
Table of contents
Other 7th Sense Server manuals

7th Sense
7th Sense M101-4 User manual

7th Sense
7th Sense Delta User manual

7th Sense
7th Sense Delta User manual

7th Sense
7th Sense VIOSO User manual

7th Sense
7th Sense Delta Pico Installation manual

7th Sense
7th Sense Delta User manual

7th Sense
7th Sense DeltaServer User manual

7th Sense
7th Sense R 10 Series Installation manual

7th Sense
7th Sense Delta User manual

7th Sense
7th Sense Delta Pico Installation manual