© 2021 AAMP Global. All rights reserved. PAC is a Power Brand of AAMP Global.
PAC-audio.com
Pacific Accessory Corporation
Page 7
Rev: 2
Date:020922
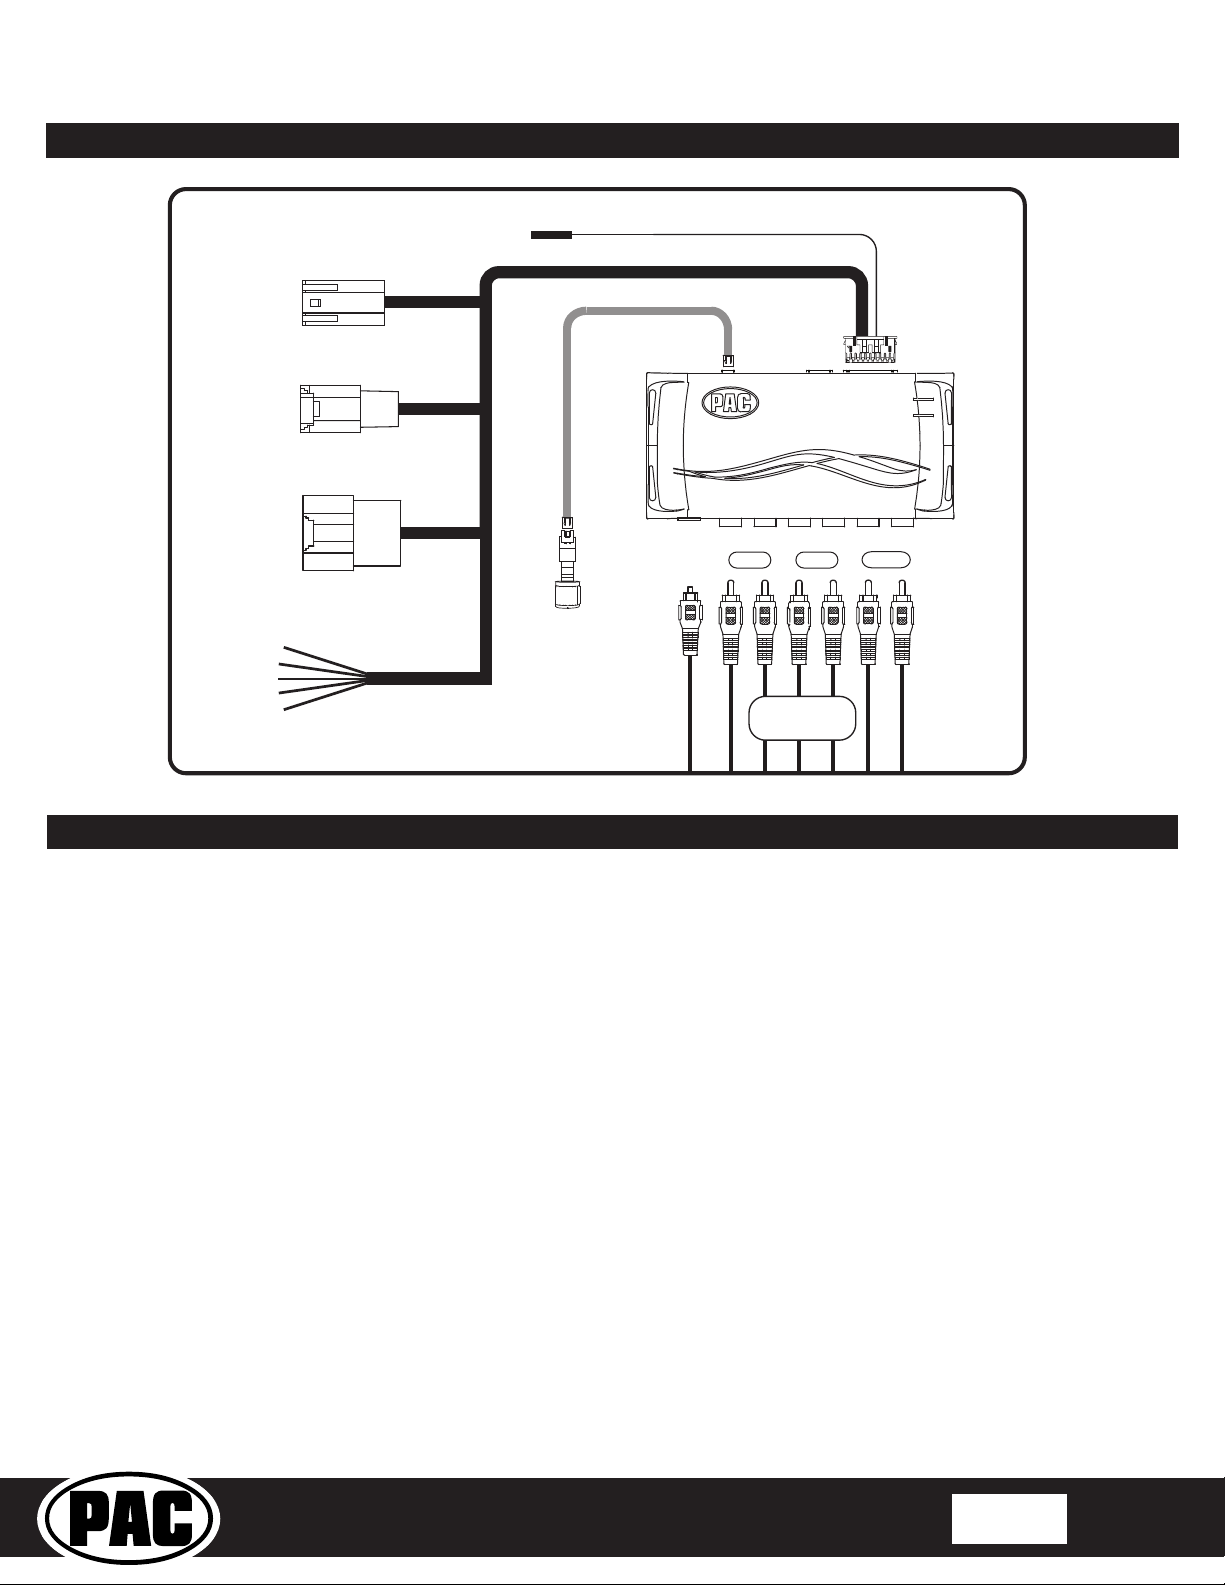
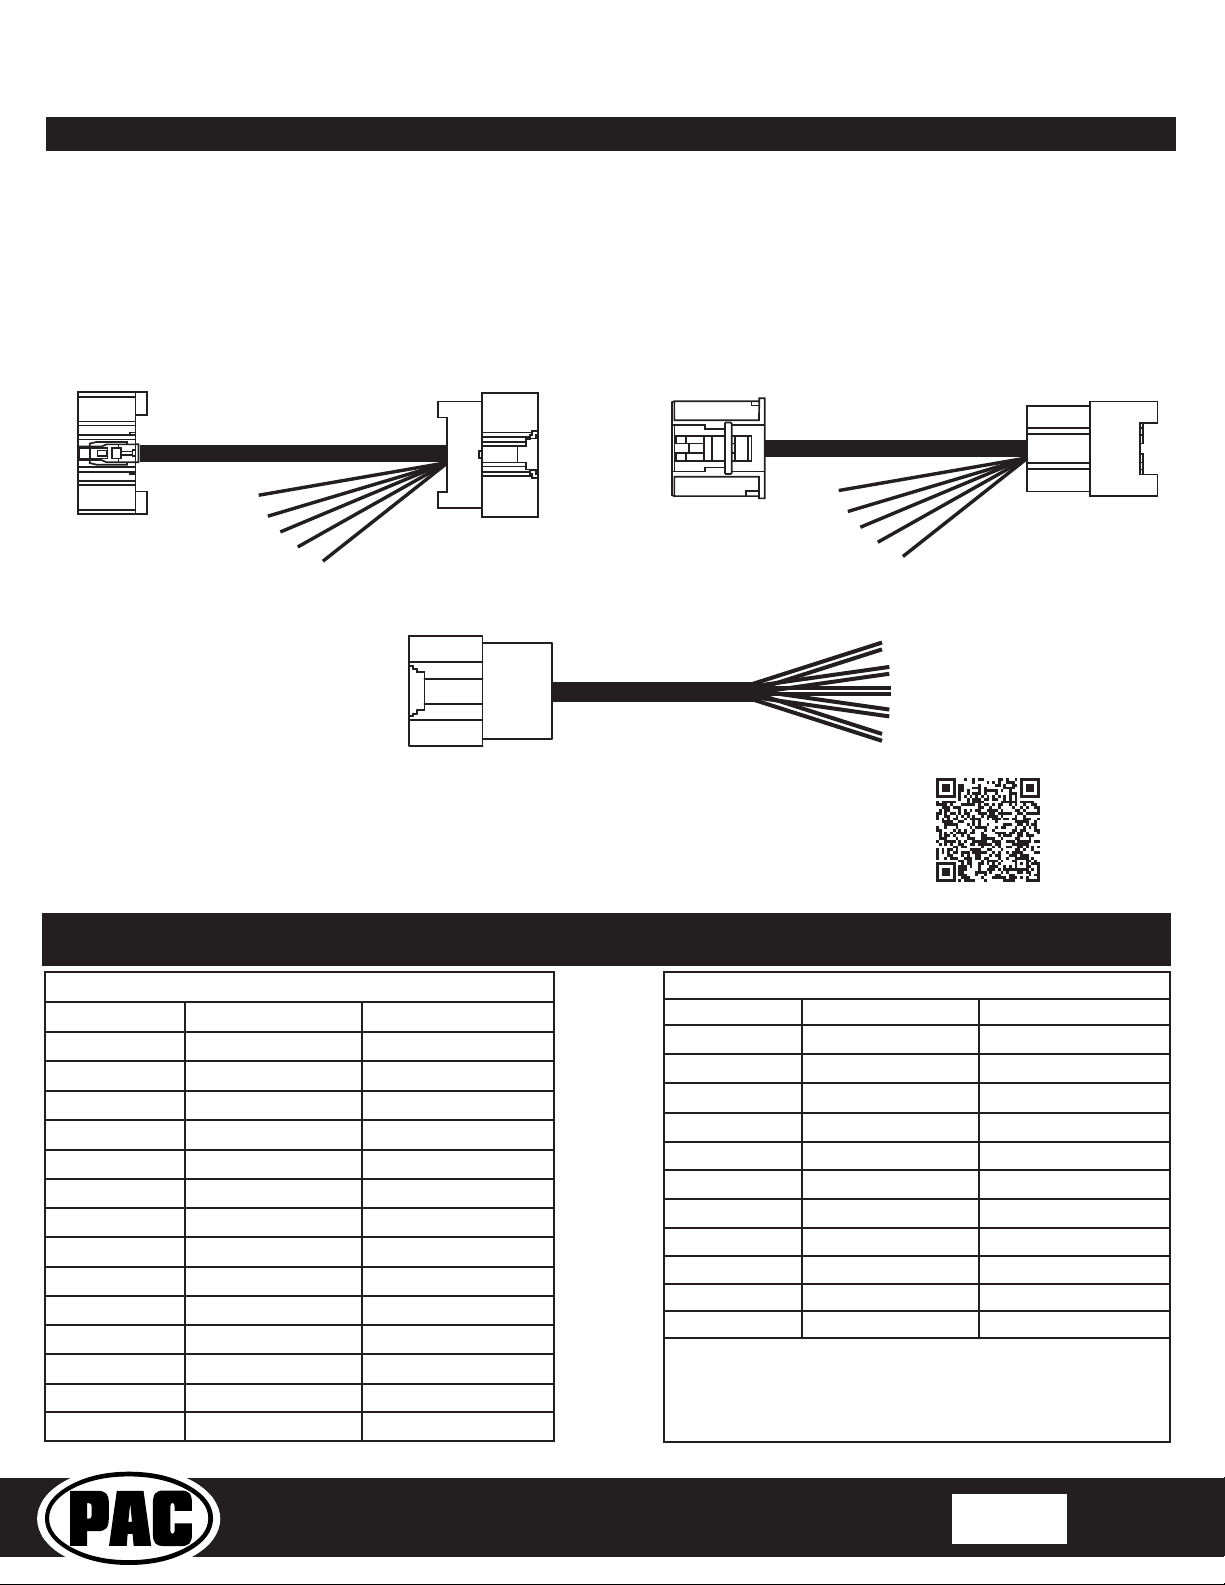
Advanced Amplier Interface
for Select Ford Vehicles
AP4-FD31
Setup and Conguration
1. Once all connections have been made and all factory harnesses are reconnected, close all the doors, lock the car using the
factory keyfob, and let the vehicle sit for 10 minutes with the keyfob out of range. This will ensure that the vehicle data-bus
goes to sleep and the AmpPRO will function as intended.
2. Turn the ignition on. LED 1 on the interface will turn on and the +12v remote output will turn on.
3. Set the amp gain(s) to the desired level. We recommend using an oscilliscope and test tones to set the amp gain(s). Please
refer to the MECP Advanced study guide if you are unfamiliar with this process.
4. Check volume, balance, fade and EQ settings.
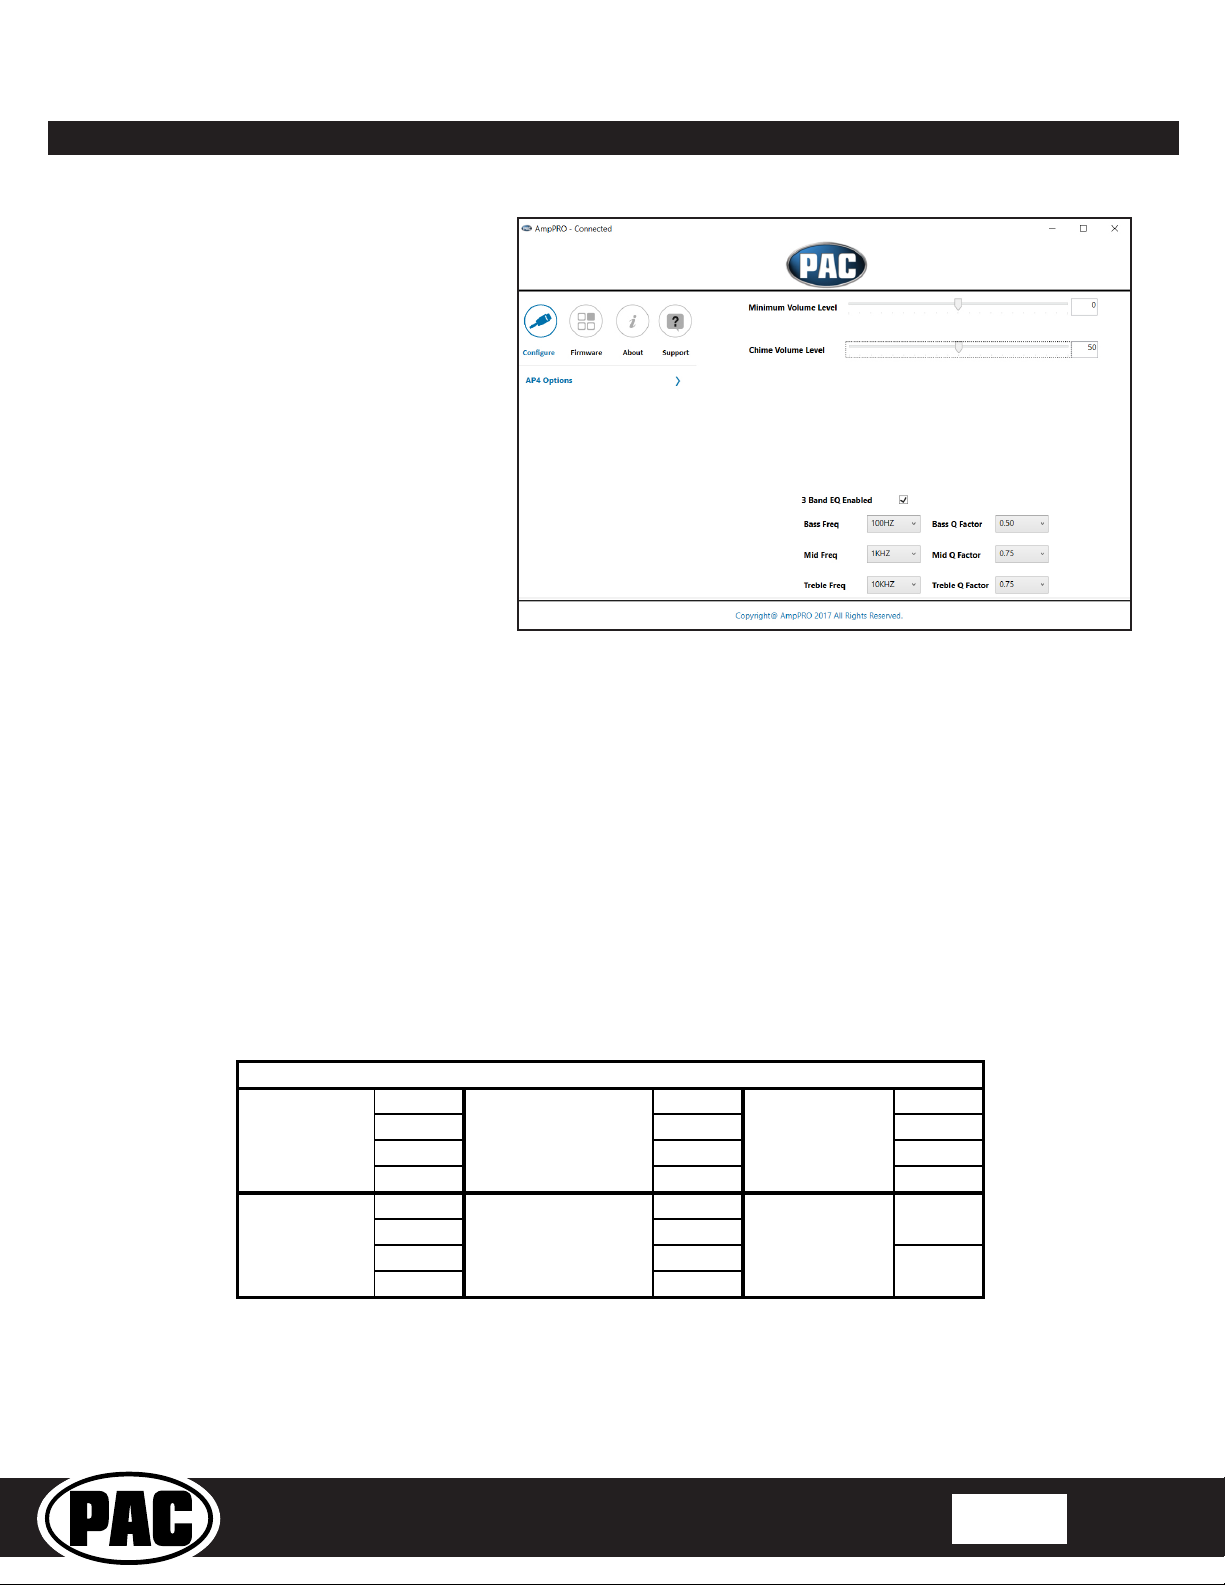
5. If you would like to adjust the chime volume or minimum volume, do so using one of the methods outlined below. If you are
happy with the default levels, no adjustments are necessary.
Manually Setting the Chime Volume
You can manually set the level of the factory chime using either the programming button on the side of the interface, or the
factory SWC. If you would like to set the chime volume using the PC app please proceed to the AmpPRO App section.
PLEASE NOTE: Level control knob must be connected to module for either of the following methods.
Setting the chime volume using the programming button
1. Start with the level control knob turned all the way down (counter-clockwise), the vehicle running and the driver's door closed.
2. Press the programming button on the side of the interface.
3. LED 1 will turn green and there will be three beeps.
4. Open the driver's door and the chimes will begin continuously sounding for seven seconds.
5. Turn the level control knob clockwise until the desired chime level is reached.
6. You can now either press the programming button twice or wait ten seconds to exit the settings.
Setting the chime volume using the factory SWC
1. Start with the level control knob turned all the way down, the vehicle running and the driver's door closed.
2. Press and hold the track down button on the factory SWC for approximately ten seconds. PLEASE NOTE: The radio will
respond to the SWC commands during this process, this is normal and has no eect on the AP4 operation.
3. LED 1 will turn green and there will be three beeps.
4. Open the driver's door and the chimes will begin continuously sounding for seven seconds.
5. Turn the level control knob clockwise until the desired chime level is reached.
6. You can now either press the programming button twice or wait ten seconds to exit the settings.
Manually Setting the Minimum Volume
If the minimum volume of the radio (factory radio volume level 1) is too loud, you can manually set the level of the minimum
volume using either the programming button on the side of the interface or the factory SWC. If you would like to set the
minimum volume using the AmpPRO app, please proceed to the AmpPRO App section.
Setting the minimum volume using the programming button
1. Start with the level control knob turned all the way down (counter-clockwise).
2. Set the amp gains to the desired level.
3. Set the volume on the factory radio to 1.
4. Press the programming button on the side of the interface twice.
5. LED 1 will turn amber and there will be two beeps.
6. Turn the level control knob clockwise until the desired minimum volume level is reached.
7. You can now either press the programming button once or wait ten seconds to exit the settings.
Setting the minimum volume using the factory SWC
1. Start with the level control knob turned all the way down (counter-clockwise).
2. Set the amp gains to the desired level.
3. Set the volume on the factory radio to 1.
4. Press and hold the track up button on the factory SWC for approximately ten seconds. PLEASE NOTE: The radio will
respond to the SWC commands during this process, this is normal and has no eect on the AP4 operation.
5. LED 1 will turn amber and there will be two beeps.
6. Turn the level control knob clockwise until the desired minimum volume level is reached.
7. You can now either press the programming button once or wait ten seconds to exit the settings.