abem Terrameter LS User manual

User Manual
Terrameter LS Toolbox
ABEM Product Number 33 3100 08
ABEM 2016-12-07, based on release 2.0.1 of Terrameter LS Toolbox

ABEM Terrameter LS Toolbox

ABEM Terrameter LS Toolbox
Thank you for choosing ABEM Terrameter LS Toolbox
Trademarks
Microsoft®and Windows®are registered trademarks of Microsoft Corporation.
All other trademarks belong to their respective holder.
General information
Information in this manual is subject to change without notice and constitutes no commitment
by ABEM Instrument AB.
ABEM Instrument AB takes no responsibility for errors in this manual or problems that may
arise from the use of this material.
In general, e-mail correspondence gives the fastest response.
In view of our policy of progressive development, we reserve the right to alter specifications
without prior notice.
ABEM will be pleased to receive occasional reports from you concerning the use and
experience of the equipment and software. We also welcome your comments on the contents
and usefulness of this manual. In all communication with ABEM be sure to include the
instrument types and serial numbers and software versions.
Contact details:
Address:
ABEM Instrument AB
Löfströms Allé 6A
SE-17266 Sundbyberg
Sweden
Phone:
+46 8 564 88 300
Web site:
www.guidelinegeo.com
Email:
© Copyright 2016 ABEM Instrument AB. All rights reserved.

ABEM Terrameter LS Toolbox
i

ABEM Terrameter LS Toolbox
ii
Table of Contents
Section Page
1Introduction..........................................................................................................1
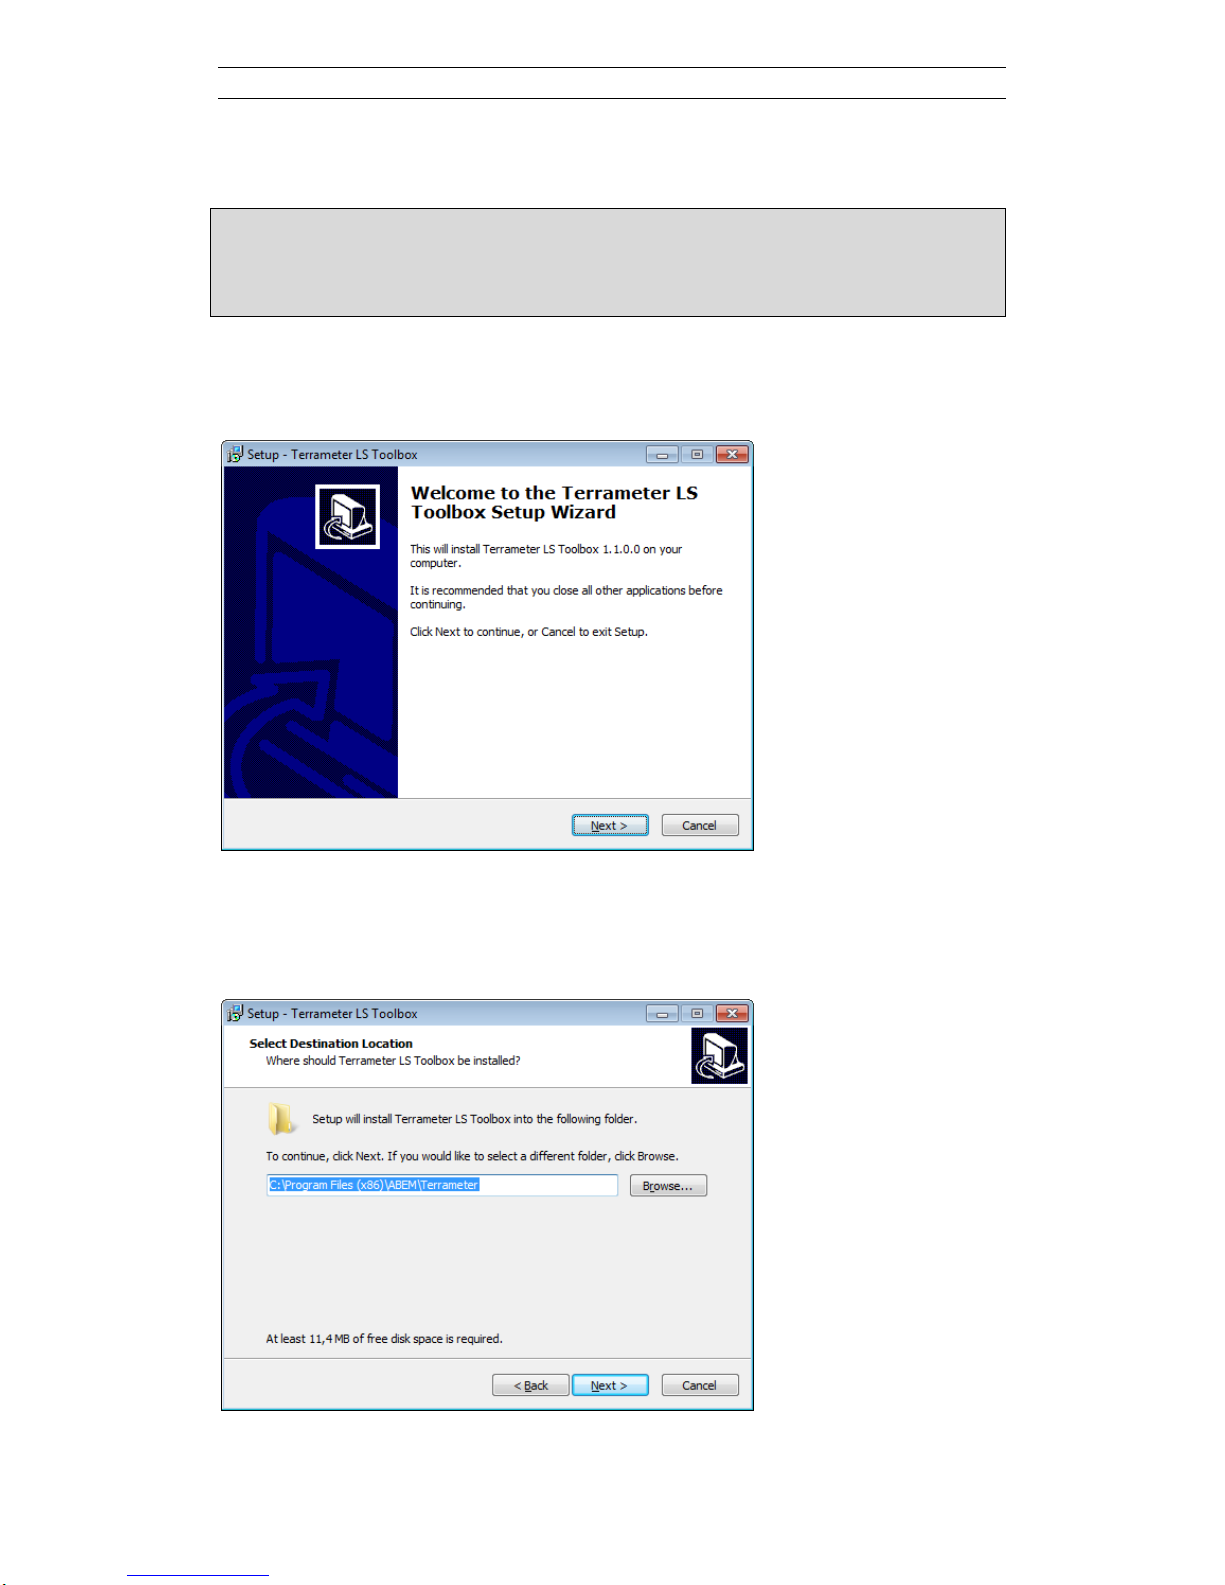
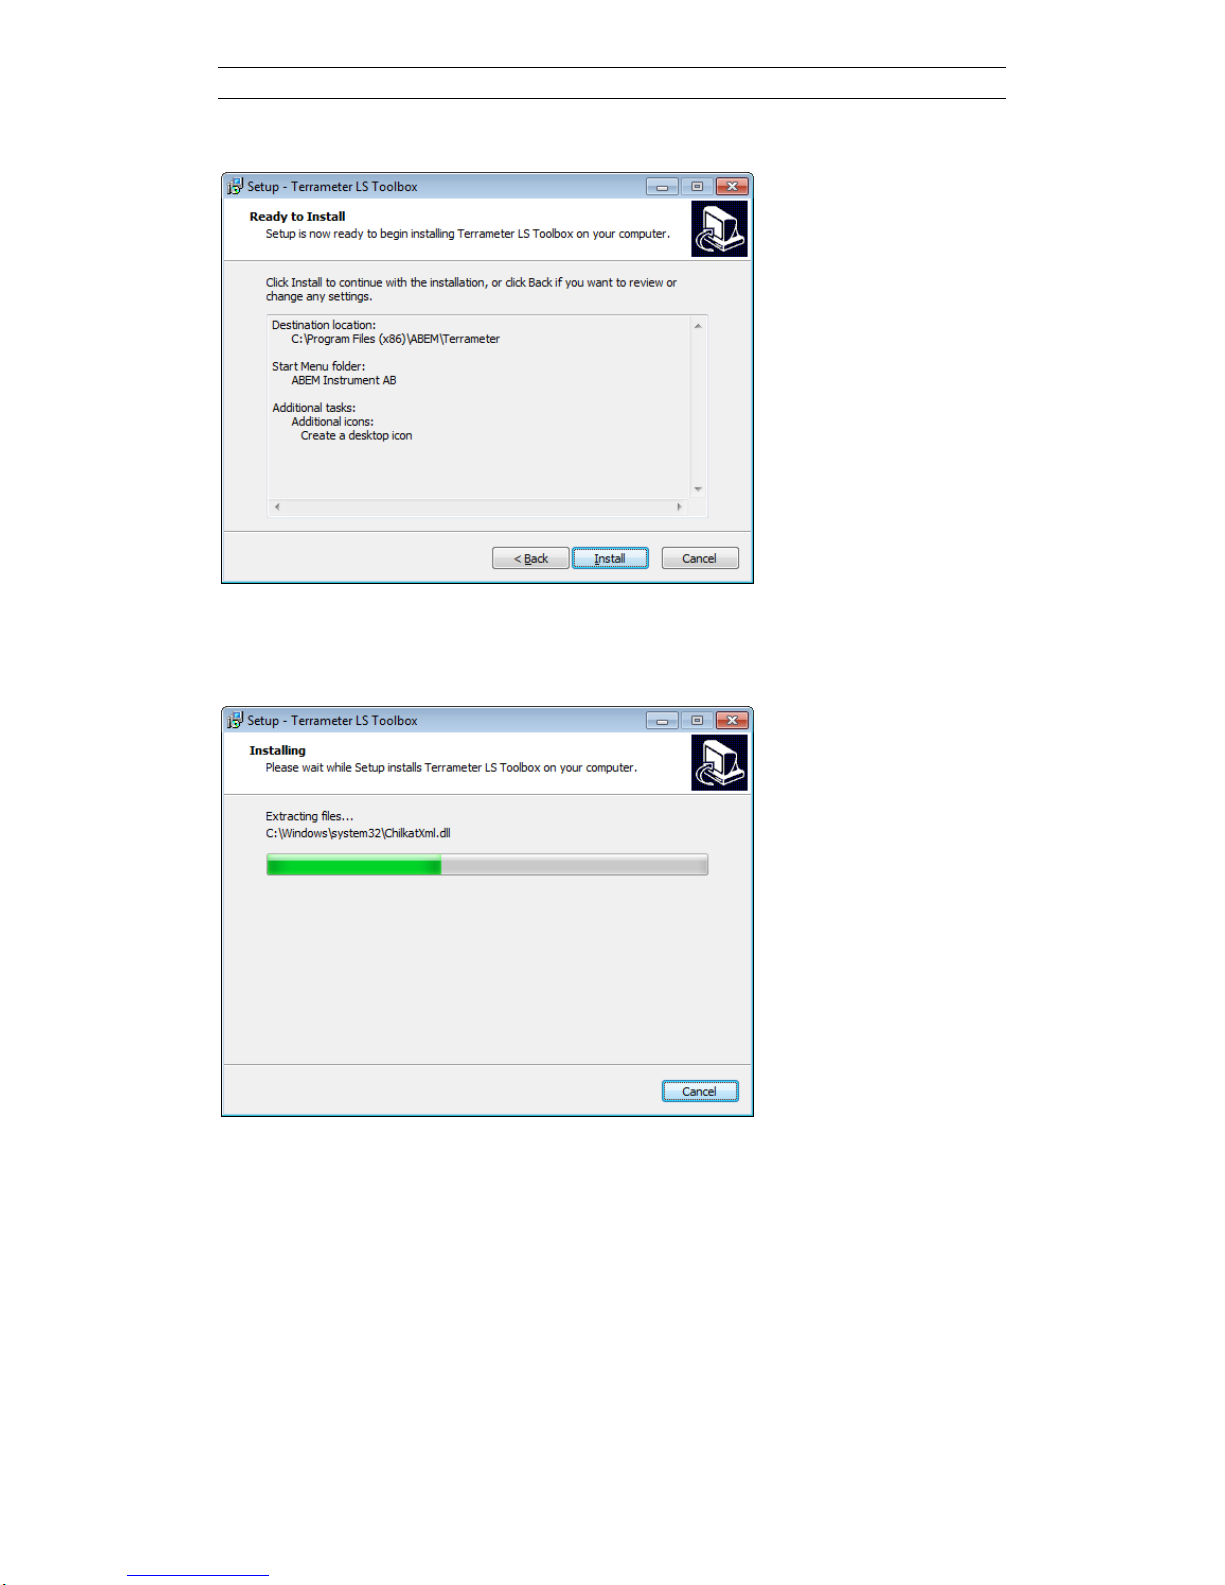
2Installation............................................................................................................2
3Overview...............................................................................................................6
4Instrument Communication and Management.................................................8
Initiating Communication..............................................................................8
Importing Data.............................................................................................10
Spread and Protocol Transfer.......................................................................11
Firmware Update .........................................................................................14
4.4.1 Updating the application software ...........................................................14
4.4.2 Updating the current transmitter firmware ..............................................15
Setting Timezone and Time.........................................................................17
5Data Management and Post-Processing...........................................................20
Project Management ....................................................................................20
Task Data Post-Processing...........................................................................22
5.2.1 Table ........................................................................................................24
5.2.2 Export.......................................................................................................26
5.2.3 View Electrode Contact Test ...................................................................26
5.2.4 Show on Map...........................................................................................27
5.2.5 View Pseudosection.................................................................................28
5.2.6 Full Waveform.........................................................................................31
5.2.7 View IP Decay Curves.............................................................................33
5.2.8 Edit Electrode Coordinates ......................................................................34
6Main Menu .........................................................................................................36
Conversion of ADR to XML Spread File....................................................37
Conversion of ORG to XML Protocol file ..................................................39
View Spread and Protocol ...........................Error! Bookmark not defined.
Windows Display.........................................................................................41

ABEM Terrameter LS Toolbox
iii

ABEM Terrameter LS Toolbox
1
1 Introduction
Terrameter LS Toolbox is a revised replacement for the Terrameter LS Utility
Software. The Terrameter LS Toolbox can be found and downloaded from
www.guidelinegeo.com .
The following functions are included:
Transfer of data files Terrameter LS => PC
Viewing, culling and export of data file contents via table
Listing contents of project data base files
Export of data files in different formats
Plotting of electrode contact resistances
Viewing the location of the survey on map
Plotting data as pseudo sections
Plotting of IP decay curves
Plotting of full waveform data sweeps
Export of full waveform data to TXT files
Transfer of spread and protocol files PC <=> Terrameter LS
Conversion of address files from the SAS4000 system into XML format
Conversion of protocol files from the SAS4000 system into XML format
Update of instrument software
Essentially everything is based around the tree structure on the left side and the
functions are accessed via a popup menu that appears when right clicking on an item.

ABEM Terrameter LS Toolbox
2
2 Installation
Note! Operating systems such as Windows 7, 8, 8.1 and 10 might have
limited access and permission to the “C:\Program Files” and “C:\Program Files
(x86)” folders, which might cause errors. To avoid issues it could be recommended
to install the Terrameter LS Toolbox in another folder, e.g. “C:\ABEM\Terrameter\”
The Terrameter LS Toolbox installer is available for download from www.abem.se.
The installation process is a matter of following a few simple steps.
When the installation program is run, the following dialog first appears:
Click Next.
The default installation folder can be accepted or changed. To change click Browse…
or type directly in the text field.
Click Next.

ABEM Terrameter LS Toolbox
3
The default Start Menu shortcut can be accepted or changed. To change click
Browse… or type directly in the text field.
Click Next.
Choose if a desktop icon shall be created or not.
Click Next.

ABEM Terrameter LS Toolbox
4
The installation process is now ready to start.
Click Install.
The installation is executed.

ABEM Terrameter LS Toolbox
5
When installation is complete, choose if you want to launch the Terrameter LS
Toolbox immediately or not:
Click Finish.
The installation process is now complete and Terrameter LS Toolbox is ready to be
used.
Terrameter LS Toolbox can be started either from the desktop icon or the start menu.

ABEM Terrameter LS Toolbox
6
3 Overview
The user interface is based on a tree structure holding one or more project groups as
well as any number of Terrameter LS instruments (Figure 1). A project group can
contain any number of projects. These projects are taken from one or more Terrameter
LS instruments. This is useful if the data from a site or client project for practical
reasons have been saved to more than one project in an instrument, or if more than
one instrument has been used.
Figure 1. Example tree structure
By default the tree structure information is saved under “Shared documents”. The
location of the tree structure information can be changed (Figure 2). If a tree structure
is created and saved under “Shared documents” it will be accessible by anyone who
uses the computer, but the projects under the project groups must of course be saved
in a location that can be accessed by all users and not under e.g. “Personal
documents”. It is also possible to save several tree structures under arbitrary
directories to have separate trees for e.g. different geographical areas or clients.
Furthermore it is possible to choose a directory on a network drive in a corporate
network to make it possible to access a tree structure from different computers.

ABEM Terrameter LS Toolbox
7
Figure 2. Tree structure location setup dialog
A tree structure can eventually become very large as more and more project groups,
projects and instruments are added. If a project group is removed from the tree the
data will not be deleted, but it may be desirable to keep the Terrameter LS projects
organised in project groups e.g. for possible future re-processing of the data. Instead
of removing the project groups it is possible to start a new tree structure in a different
directory of the computer, in this way it is possible to go back to an old tree structure
view at a later point.
Warning! The software is not designed to handle more than one
user of a tree structure at a time! The Terrameter LS
Toolbox functionality cannot be guaranteed and tree
structure information can be lost if users from two or
more computers attempt to access a common tree
structure at the same time.

ABEM Terrameter LS Toolbox
8
4 Instrument Communication and Management
Initiating Communication
Transfer of measured data, spreads and protocols can conveniently be done between
the Terrameter LS and a PC with LS Toolbox using a network connection. Instrument
software upgrading is also carried out this way. First the instrument must be
connected to the same network as the PC. Alternatively the built-in DHCP server can
be activated in the Terrameter LS and the PC connected directly to it. Please read
section “The Network” in the instruction manual for Terrameter LS for details on how
to do that.
Figure 3. LS Instruments context menu
Figure 4. Dialog for choosing an IP number and activating the connection
Right-click on the “LS Instruments” tree node (Figure 3) and select Connect New
Instrument to add an instrument. Enter the IP address of the instrument in the opened
dialog (Figure 4) and press Connect. Connection to a previously used instrument is
done by right clicking on its tree node and selecting Connect from the context menu
(Figure 5). Either enter a new IP address or select between previously used IP
addresses and then press Connect (Figure 4).
When the instrument has been connected all context menu items except Connect
becomes enabled (Figure 6).
The Properties section shows locally stored information about the instrument
(Figure 7).

ABEM Terrameter LS Toolbox
9
Figure 5. Context menu for an unconnected instrument
Figure 6. Context menu for a connected instrument
Figure 7. Properties section

ABEM Terrameter LS Toolbox
10
Importing Data
To import data from a Terrameter LS, right click on the instrument tree node and
choose Manage Projects (Figure 6). The Manage Projects dialog (Figure 8) is shown
with a list of the projects on the instrument. Use the checkboxes on the left side
(Figure 9) to select the project(s) to import to the PC. Before the data transfer is
started, a start destination folder must be specified.
If the checkbox “Use Start Destination for All Projects” is checked, all projects will
be stored in the Start Destination folder. If left unchecked a dialog will ask where the
selected project(s) is to be stored. The checkbox “Include full waveform data” must
be checked to transfer such data. This is of course only relevant if full waveform data
were recorded. By checking the checkbox “Add to Project Group” a project can
directly be added to a Project Group. If left unchecked the project(s) must be
manually added.
Press “Download” to start the data transfer. Before data is saved the destination must
be confirmed, and there is an opportunity to modify the destination and/or the name of
the three structure file, if so desired.
Note! Please observe that it can take considerable time to
transfer full waveform data, even over a direct cable
link. Hence it may be convenient to transfer only the
project database in the first step, for example for on-site
data quality checks in the field, and transfer the full
waveform data at the end of the day.
Note! If hovering the mouse over the question mark bubbles,
help and tips are displayed.
Figure 8. Data transfer dialog

ABEM Terrameter LS Toolbox
11
Figure 9. Three Projects selected for transfer
Figure 10. Transfer is ongoing
Spread and Protocol Transfer
The Spread and Protocol Transfer dialog (Figure 11) is opened by right clicking on
the tree node of the instrument and choosing Import/Export spread and protocol. The
two lists on the dialog are populated with spreads and protocols for the PC and the
instrument respectively, the PC to the left and the instrument to the right. Use the
checkboxes on either list (Figure 12) to select the spread(s) and protocol(s) to transfer.
Note! The protocols required for the selected spreads are not
automatically transferred. They must be explicitly
selected (Figure 12).
Press the respective arrow button to transfer from the PC to the instrument or vice
versa. The default directory in the PC is dependent on the Windows version
Terrameter LS Toolbox is run on. The current directory is shown, bottom-left, and it is

ABEM Terrameter LS Toolbox
12
possible to change to this by pressing the Browse button or entering text into the text
box. If a spread or protocol in the Terrameter LS is to be replaced by a new improved
or corrected version Allow overwrite must be checked.
Figure 11. Spread and protocol transfer dialog
Figure 12. Spreads and protocols are selected for transfer

ABEM Terrameter LS Toolbox
13
All protocols that can be used with a spread are listed under that spread in the tree lists.
A protocol can in some cases be used in combination with two or more spreads, and
as a result the same protocol can be present under more than one spread in the tree
view.
Summary information about the spreads and protocols can be viewed by opening the
Info node in the tree list (Figure 13), or by right-clicking on the item in question
(Figure 14). It is also possible to delete items via this context menu.
Figure 13. Info for spreads and protocols have been opened
Figure 14. Spread and protocol file summary information.

ABEM Terrameter LS Toolbox
14
Firmware Update
For the Terrameter LS there are two software that can be updates. The first is the
application software, which is the graphical user interface and the data acquisition
software. The second is the current transmitter software, also called current
transmitter firmware, which controls the behaviour of the current transmitter.
Both software can be downloaded from Guideline Geo’s web page. Go to the
Resource Center section under www.guidelinegeo.com and download the files
containing the latest versions.
4.4.1 Updating the application software
Open the Update Instrument dialog (Figure 15) by right-clicking on the tree node of
the instrument and choosing Update from the context menu. Now press the
“…” button to select the downloaded update package file, and then press Update to
start the installation process. The outcome of the installation process will be echoed in
the text box of the dialog (Figure 16). If the process was successful the Terrameter LS
will automatically re-boot, after which the new instrument software version is running
and the text box will say “Process completed” (Figure 17). Please verify that the new
version is shown on the “Welcome” page in the Terrameter LS.
Figure 15. Instrument firmware update dialog
Other manuals for Terrameter LS
1
Table of contents