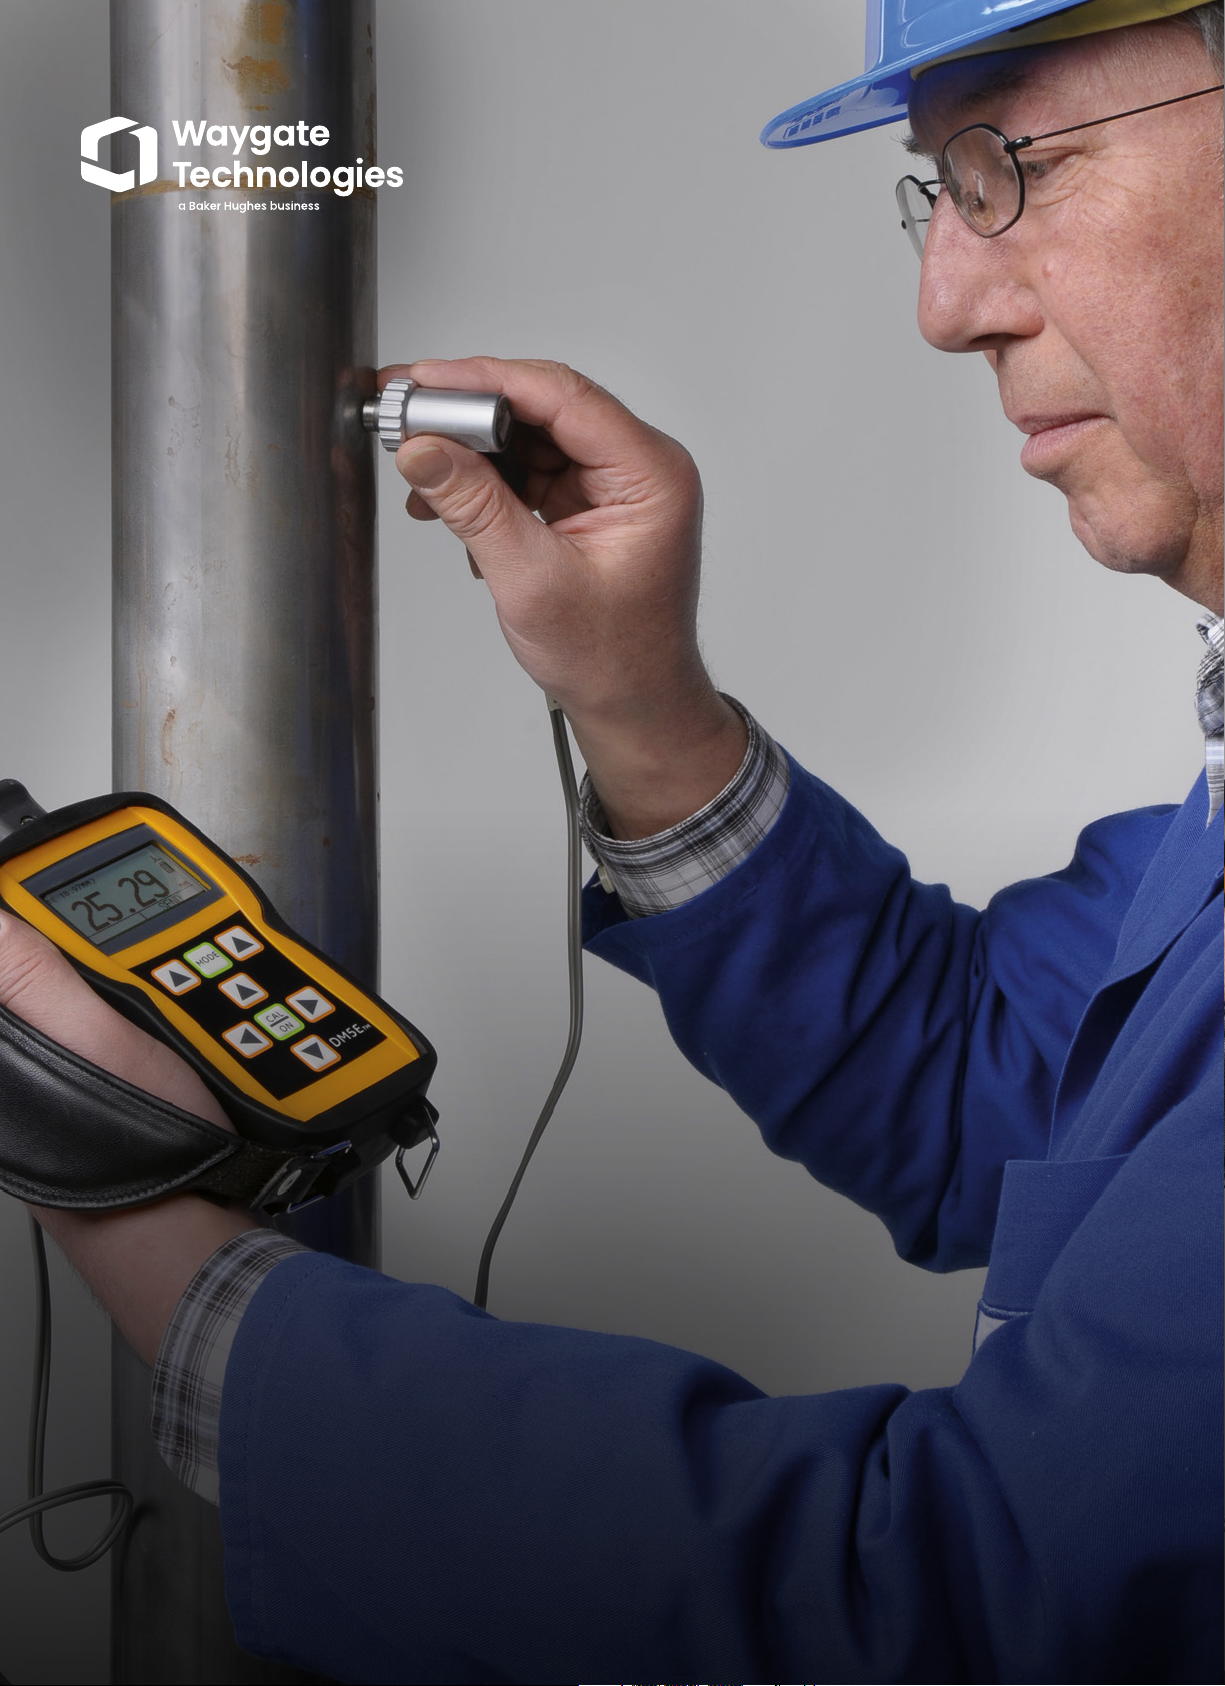
Waygate Technologies DM5E Basic User manual

DM5E corrosion
thickness gauges
A range of high-performance, reliable
and easy-to-use instruments

The DM5E family
The DM5E family represents the highest standard of
portable corrosion monitoring thickness gauges from
Waygate Technologies. It offers significant improvement
in performance over previous corrosion thickness
gauges in terms of better thickness measurement stability
and repeatability at normal and elevated temperatures. It
has been designed for operation in the harshest working
environments, performing wall thickness measurements
on pipelines, pressure vessels and storage tanks in the
oil and gas industry, as well as in the petrochemical and
power generation sectors.

The DM5E Basic
The rugged housing of the DM5E Basic is common to all versions. It is
ergonomically designed with a weight of just 223g, including its AA
batteries, which allow up to 60 hours of operation. The basic version is
specified to EN 15317 and features an LCD data display, which is backlit to
be visible in all lighting conditions. Instrument operation is carried out with
one hand via a user-friendly interface. This is a sealed, watertight and
dust-proof membrane keypad, which features a minimum of function keys
and arrow keys. Navigation through menus is simple and intuitive. The
basic version incorporates a wide range of features, including Min/Max
capture, B-Scan generation, alarms, and differential thickness measurement
to allow instant comparison between measured and nominal thickness.
The DM5E family
Choose from three levels of functionality.
DM5E Basic, DM5E, or DM5E DL.
The DM5E
The DM5E incorporates all the features of the DM5E Basic but also offers the
DUAL MULTI operating mode. This has been used in previous corrosion
thickness gauges from Waygate Technologies and has proved invaluable
in measuring thickness of metal through coatings. There is no need to
remove the coating at the measuring point, saving time and money. Users
can upgrade from DM5E Basic to DM5E in the field.
The DM5E DL
The DM5E DL is identical to the DM5E but features a built-in datalogger
supporting grid-style data file formats. This is capable of holding up to
50,000 readings. Files can be transferred to a PC by means of a Mini USB
port. Files can also be imported directly into Microsoft Excel through
a macro. All alphanumeric data for filenames and notes is directly entered
via the keypad. Both the basic and standard versions are field-upgradable
to become DL versions.

User-friendly operator interface
All versions of the DM5E have the same user-friendly
operator keypad interface. This has a central
mode key, a calibration/on/off key, two function
arrow keys to activate and set functional control
and four arrow keys for adjusting parameter values
and for navigating through the intuitive single-level
menu. The keypad allows access to all calibration,
set-up and measurement display modes of the
instrument. With the DL version, a file display mode
allows users to create and store thickness readings
in files. All calibration is menu-driven and the
operator is guided through every step. There is
a built-in calibration reminder, which can be set to
remind the user to calibrate after a specified number
of measurements or after a given time period.
New range of high-performance
probes
A new set of ultrasonic probes has been developed
for the DM5E family to provide the instruments with
optimized performance, even at very high temp-
eratures. The DA5xx series includes a 5-MHz
standard probe for general purpose applications, a
2-MHz version for high penetration and a 7.5-MHz
fingertip probe. A newly developed 5-MHz
high-temperature probe offers an operating range
from -10°C up to +204°C. (Standard probes
operate to 70°C.)

Thickness measurement under
coating
Both the DM5E and the DM5E DL offer dual-multi
measurement. Virtually all components and struc-
tures subjected to thickness measurement will
have some kind of protective coating. Such coatings,
including paint, contribute significant error to
thickness measurements of underlying metal walls
when using conventional methods. In addition,
the removal of coatings, and their subsequent
reapplication, involves considerable cost and time.
With the field-proven dual-multi feature there is
no need to remove any protective coating. It is only
necessary to select dual-multi mode, place the
probe in position and take the measurement.
Normal
The thickness value appears as large
digits in the center of the display.
MIN Scan
A minimum thickness scan that allows
the user to run the probe over the wall
surface. After the evaluation period, the
minimum material thickness measured
is displayed.
MAX Scan
A maximum thickness scan that is exactly
the same as a MIN Scan apart from
the fact that the maximum thickness
measured is displayed.
DIFF/RR%
Compares the measured thickness with
a user-specified nominal thickness. The
dimensional difference between the two
values is displayed, as is the percentage
difference.
B-Scan
Displays a graphic representation of a
B-Scan showing minimum thickness
values. The graph is derived by measuring
and recording at 1 point per second.
Flexible data processing
The DM5E DL has a built-in datalogger, with a
capacity to store up to a massive 50,000 reading in
grid and linear files. This makes the measurement
data available for further processing. Using our
UltraMATE software, measurement data files can
be transferred from the instrument to a PC, where
they can be stored and, if required, printed out
in different fixed-format reports. Typically, these
can be color histograms, where ranges of
measured values are color-coded, or color can be
used to highlight the distribution of minimum/
maximum limit values exceeded. Data can also be
pasted into Windows Clipboard for easy transfer
into spreadsheet and word processing applications.
A range of measurement displays
All versions of the DM5E offer a range of measurement displays.
These include:
Technical specifications
DM5E family
Instrument specifications
Operating principle Ultrasonic, pulse echo measurement method
Measuring range
Depends on probe and material, 0.60 mm to 508 mm (0.025” to 20.00”) in IP to 1st BW measurement mode,
2.00 mm to 127.0 mm (0.079” to 5.00”) in dual-multi measurement mode, the coating thickness range shall
be 0.3 mm to 2.50 mm (0” to 0.098”).
Measuring
resolution 0.01 mm default - selectable 0.01, 0.1 mm (0.001” default - selectable 0.001”, 0.01”)
Material velocity
range 0.508 to 18.699 mm/msec (0.0200” to 0.7362”/msec)
Material velocity
resolution 1 m/s (0.0001”/msec)
Units Inch or millimeter
Calibration One-point cal, on-block and off-block, two-point cal
Pulser Excitation Pulse Spike pulser
Voltage 120 V into 50 ohm load, using 20 MHz oscilloscope
Receiver Bandwidth 500 KHz to 12 MHz @ -3 dB
Gain Automatic gain control
Display type High-resolution graphical LCD, 64 x 128 pixels, 53.0 mm x 27.0 mm with backlight and adjustable contrast
Update rate 4 Hz or 8 Hz, user selectable, 24 Hz scan mode capture rate
Thickness value
display
NORMAL view mode 5 Digit, 10.6 mm (0.4”) high
B-SCAN view mode 5 Digit, 2.55 mm (0.1”) high
Display of last
reading Solid filled or hollow digits indicate coupled or uncoupled condition
Setups 9 standard setups for probes
Alarm settings Minimum and maximum alarms, range of 0.25 mm to 508 mm, 0. (0.010” to 20.00”)
reading alternates between solid and hollow when alarms are enabled and violated
Power
requirements 2 “AA” size batteries
Battery life/
operating time Approximately 60 hours
Instrument shut-off Selectable ALWAYS ON or AUTO OFF after 5, 10, 15, 30 minutes of inactivity
Language Selectable English, German, French, Spanish, Italian, Russian, Japanese and Chinese
I/O connectors Transducer Dual Lemo 00 (coax)
Mini-USB Mini USB to PC
Temperature Operating -10°C to +50°C (+10°F to +120°F)
Storage -20°C to +60°C (-10°F to +140°F)
Weight 223 g (0.597 lb) including batteries
Size 138 mm x 32 mm x 75 mm
Shock
IEC 68-2-27 Ea, as per Mil Std 810C Method 516.2 Procedure I with a 15g 11ms impulse half sinusoidal wave
applied 6 times per axis
Sealing IEC529 / IP54, dust proof/dripping water proof as per IEC 529 specifications for IP54 classification

Data recorder option features
Capacity 50,000 readings
File structures Grid file
Number of rows 1 to 50,000
Number of columns 1 to 223
File naming Up to 24-character alphanumeric name
Optional software UltraMATE and UltraMATE Lite
Technical specifications
DM5E family
Note: Instrument specifications are subject to change without prior notice.
DM5E probe/transducer specifications
Model DA501 Model DA503 Model DA512 Model DA590 Model FH2E
Frequency 5 MHz 2 MHz 7.5 MHz 5 MHz 7.5 MHz
Probe style Standard Standard Fingertip High-temperature Fingertip
Operating
temperature range
(continuous)
-20 to 70°C -20 to 70°C -20 to 70°C -20 to 204°C <54°C
Contact diameter 15 mm (0.590”) 20 mm (0.787”) 7.5 mm (0.300”) 12.7 mm (0.500”) 9.6 mm
IP to first
measurement
range
1.0 to 200 mm
(0.040 to 8”)
5 to 300 mm
(0.200 to 12”)
0.6 to 60 mm
(0.020 to 2.4”)
1 to 125 mm @20°C
(0.040 to 5” @68°F)
1.3 to 25.4 mm
@204°C (0.050 to 1”
@400°F)
0.75-25 mm
Minimum multi-
echo measurement
range
3.0 to 100 mm
(0.118 to 3.936”)
10 to 150 mm
(0.393 to 5.905”)
3.0 to 25 mm
(0.118 to 0.984”) N/A N/A

© 2020 Baker Hughes – All rights reserved. Baker Hughes reserves the right to
make changes in specifications and features shown herein, or discontinue the
product described at any time without notice or obligation. Contact your BHI
representative for the most current information. The Baker Hughes logo is a
trade mark of Baker Hughes. The BH Monogram is a trademark of Baker Hughes.
JB170718 (04/2020)
waygate-tech.com
Waygate Technologies, formerly GE Inspection Technologies, is a global leader
in NDT solutions with more than 125 years of experience in ensuring quality,
safety and productivity.
This manual suits for next models
2
Table of contents
Other Waygate Technologies Test Equipment manuals

Waygate Technologies
Waygate Technologies Everest XL Detect VideoProbe User manual

Waygate Technologies
Waygate Technologies Krautkramer USM Go User manual

Waygate Technologies
Waygate Technologies Everest Mentor Visual iQ VideoProbe User manual

Waygate Technologies
Waygate Technologies Krautkramer USM 100 User manual
Popular Test Equipment manuals by other brands

Energy Recovery
Energy Recovery Pressure Exchanger PX Q400 Installation, operation and maintenance manual

Pantone
Pantone 3 Operation manual

ElektroPhysik
ElektroPhysik MiniTest 600 operating manual

Outline
Outline FASTQC-LS operating manual

Owon
Owon SDS1022 user manual

PHYSITEMP
PHYSITEMP NTE-2A operating manual