manuals.online logo
Brands
  1. Home
  2. •
  3. Brands
  4. •
  5. ABQINDUSTRIAL
  6. •
  7. Measuring Instrument
  8. •
  9. ABQINDUSTRIAL RP6 User manual

ABQINDUSTRIAL RP6 User manual

rec
h
U
cycling
um
User
gpap
mim
rma
per m
met
anua
moistu
er
al
re me
RP
eter
P6
Distributed by: ABQ Industrial LP USA
Tel: +1 (281) 516-9292 / (888) 275-5772 eFax: +1 (866) 234-0451
Web: https://www.abqindustrial.net E-mail: [email protected]
page2
1.) F
o
s
a
re
a
th
e
di
r
2.) S
w
h
a
3) Pl
e
m
e
c
o
wi
t
o
n
ar
e
b
e
in
s
4.) In
di
f
th
e
th
e
h
a
w
h
in
c
T
h
th
e
v
a
a
p
re
p
b
a
T
o
5.) In
c
a
s
w
o
r a corr
e
a
me tem
a
son, le
t
e
materi
a
r
ect sunl
i
w
itch on
a
ndle ba
e
ase
n
e
asurem
o
ntact a
r
t
h adeq
u
n
e hand
e
a rests
e
any w
i
s
tantly s
h
the sam
f
ferent p
o
e
meas
u
e
store
m
a
ndle ba
r
h
en the
c
reased.
h
e humi
m
e
avera
g
a
lues.
P
p
parently
p
resent
a
le.
o
name t
h
the typ
e
a
n chan
g
w
itch sett
e
ct mea
s
perature
t
your hu
a
l for at l
i
ght!).
the de
v
r for 3 s
n
ote th
a
ent de
p
r
ea of t
h
u
ate pr
e
and en
s
on the
p
i
re belo
w
h
ows th
e
e way, t
a
o
sitions
u
ring val
m
enu b
y
r
shortly.
numbe
r
m
eter
R
g
e moi
s
P
lease
wet are
a
the ave
r
h
e save
d
e
selecti
o
g
e the
ing usin
g
Meas
u
s
ureme
n
(+/-3°)
mimeter
east hal
f
v
ice: Pr
e
econds.
a
t the
p
ends o
h
e sens
o
e
ssure t
o
s
ure th
a
p
aper b
a
w
the s
e
e
water c
o
a
ke furth
of the p
ues. Th
e
y
pressin
The sto
r
r
in fro
n
R
P6 aut
o
s
ture co
n
avoid
a
s of the
r
age moi
d
results
o
n men
u
calibrati
o
g
the arr
o
u
ring pr
o
n
t please
than th
e
adjust t
o
f
an hou
r
e
ss the
accura
c
n the
s
o
r. Hold
o
the p
a
a
t the w
h
a
le. The
r
e
nso
r
.
o
ntent.
er meas
aper bal
e
saving
g the b
u
r
age wa
s
n
t of th
e
o
maticall
y
n
tent of
measu
r
bale, a
s
sture c
o
press th
e
u
(press
o
n curv
e
o
w keys.
o
cedure
ensure
e
mater
i
o
the su
r
r
before
key
c
y of
s
ize of
the de
v
a
per bal
e
h
ole se
n
r
e must
The dis
p
urement
l
e and s
g
is don
e
u
tton on
s
succes
e
symbo
y
calcul
a
f
the s
a
r
ements
s
they d
o
o
ntent of
e
butt
o
once)
e
resp.
that the
i
al unde
r
roundin
g
measuri
n
or the
the
the
v
ice
e
in
n
sor
not
p
lay
t
s at
ave
e
in
the
s
sful
l
a
tes
a
ved
at
o
not
the
o
n.
you
the
ver
s
device
r test.
F
g
temper
a
n
g (prot
e
button
s
ion 1.1
has the
F
or that
a
ture of
e
ct from
on the
page3
Start-
u
Your
h
of rec
y
be us
e
()f
o
short
t
the fr
e
ready
for 5
s
switch
Desig
n
co
n
e
cali
b
m
te
m
u
p
h
umimet
e
y
cling p
a
e
d imme
d
o
r 3 sec.
t
ime the
e
e mem
o
to use.
F
s
econds.
es off a
u
n
of the
n
nector
f
e
xternal
senso
r
b
ration
c
densit
y
m
easuri
n
value:
mperat
u
easurin
g
plate
e
r RP6
m
a
per bal
e
d
iately.
S
Now th
e
serial n
u
o
ry spac
e
F
or swit
c
If you
d
u
tomatic
a
device
f
or
c
urve /
y
g
u
re
g
m
oisture
e
s is del
S
witch o
n
e
displa
y
u
mber, t
h
e
are di
s
c
hing of
f
d
o not p
u
a
lly.
meter f
o
ivered
w
n
the de
v
y
starts
g
h
e softw
a
s
played.
f
the de
v
u
sh any
o
r deter
m
w
ith load
e
v
ice by p
r
g
lowing.
a
re versi
o
After th
a
v
ice, pre
s
button f
o
m
ination
e
d accu
m
ressing
t
During
t
o
n, the
b
a
t the h
u
s
s the p
o
o
r 4 min
w
U
P
ver
s
of water
m
ulato
r
a
t
he pow
e
t
he start
u
b
attery s
t
u
mimete
r
o
wer bu
t
utes, th
e
measur
valu
e
w
ater co
n
U
SB inte
handl
e
P
ower b
u
resp. s
a
s
ion 1.1
content
a
nd can
e
r button
up for a
t
ate and
r
RP6 is
t
ton ( )
e
device
r
ing
e
:
n
tent
rface
e
ba
r
u
tton
a
ving
page4
List o
f
Pressi
for at
calibr
a
calibr
a
pressi
n
grey a
senso
r
Deter
m
Due t
o
and di
calibr
a
effect
e
corres
that, t
a
least t
h
The c
o
Calcul
Volu
m
and w
e
Speci
f
calibr
a
curve
300
Recyc
350
Recyc
Rec
y
Rec
y
Rec
y
f
calibra
ng the
least
3
a
tion cur
v
a
tion cur
v
n
g the
re not a
v
r
and ca
n
m
inatio
n
o
the ad
verse p
a
a
tion cur
v
e
d by
a
ponding
a
ke sam
h
e size
o
o
mpress
e
ate the
v
m
e (m³) =
e
igh the
f
ic wet w
e
a
tion
l.Pape
r
l.Pape
r
400
y
cl.Pape
r
450
y
cl.Pape
r
500
y
cl.Pape
r
tion cur
v
or k
e
3
seco
n
v
es will
v
e by pr
e
key. C
a
v
ailable f
o
n
not be
c
n
of the
p
dition o
f
a
pe
r
de
n
v
e has t
o
a
comp
a
to norm
p
les fro
m
o
f the se
n
e
d densi
t
v
olume:
length(
m
material
.
e
ight (kg
/
pap
e
Corr
u
layer
Chip
b
with
o
r
Light
r
New
s
pack
a
r
Mixe
d
colo
u
pape
v
es
e
y in th
e
n
ds, a l
appear.
e
ssing
a
libratio
n
o
r the a
c
c
hosen.
p
aper ty
f
diverse
n
sities re
s
o
be det
a
rison
m
E2028
7
m
differe
n
n
sor plat
e
t
y is det
e
m
) * brea
d
.
/
m³) = w
e
e
r type
u
gated
p
cardbo
a
b
oard,
o
ut corru
g
newspri
s
print, p
a
a
ging
d
was
t
u
red
d
r
e
measu
ist of
a
Select
y
or an
d
n
curves
c
tual
pe
substra
s
p. com
p
ermined
m
easure
m
7
(drying
n
t place
s
e
and u
p
e
rmined
a
d
th(m) *
e
ight (k
g
p
ape
r
,
w
a
rd
mixed
g
ated pa
nt
a
per an
d
t
epape
r
,
d
ocumen
t
ring win
d
a
ll avail
a
y
our des
d
confir
m
display
e
tes duri
n
p
ressed
once b
e
m
ent by
chamb
e
s
all ove
r
p
to a de
p
a
s follo
w
height(
m
g
) / volu
m
w
hite m
u
cardbo
a
a
pe
r
d
cardbo
a
asso
r
ts, of
f
d
ow
a
ble
s
ired
m
by
e
d in
n
g pape
r
densitie
s
e
fore m
e
calibra
t
e
r resp.
k
r the m
e
p
th of 50
w
s:
m
)
m
e (m³)
swi
t
u
lti-
ard
ard
r
ted
f
set
ver
s
r
manuf
a
s
, the a
d
e
asuring.
t
eable
m
k
iln dryi
n
e
asuring
cm.
t
ch setti
S1
S2
S3
S4
S5
s
ion 1.1
a
cturing
d
equate
This is
m
ethods
n
g). For
field, at
ng
page5
Menu
Rec
y
Rec
y
Rec
y
level o
v
550
y
cl.Pape
r
600
y
cl.Pape
r
650
y
cl.Pape
r
v
erview
r
Coat
e
r
Multi
p
woo
d
r
Switch
Ma
i
T
yp
e
Sto
r
Next
c
Previ
o
Num
b
Watc
Ente
r
Switc
Switch
Open
t
e
d pape
r
p
rint,
w
d
-free
lowe
r
i
n menu
e
selectio
r
e menu
c
alibration cu
o
us calibratio
n
b
er of lo
g
s
h or edit sav
e
r
new lo
g
h of
f
u
pp
e
r
his menu/en
t
r
w
hite
n menu
rve
n
curve
e
d lo
g
s
t
e
r
docum
e
K
e
M
e
M
e
e
nts
e
ypad
s
e
asuring
w
rol
l
po
w
sw
sw
sa
v
ho
l
w
a
en
t
da
t
e
nu: en
t
sw
sw
exi
en
t
en
t
ne
x
lef
t
ye
s
no
Sh
O
K
ver
s
S6
S7
S8
s
ymbo
w
indow:
l
ing men
u
w
er ON /
itch uppe
itch lowe
r
v
e
l
d
a
tch save
d
t
er suppli
e
t
a
t
er
itch uppe
itch lowe
r
t
t
er numb
e
t
er letters
x
t or right
t
s
ift
K
s
ion 1.1
ls
u
OFF
r
r
d
data
e
r´s
r
r
e
rs
page6 version 1.1
Overview main menu
Edit logs
Manual logs
Clear logs
Print logs
Last log
All logs
Clear logs
Send logs
Manual logs
Clear logs
Options
Date/time
Datalog time
Language
Unlock
°C / °F
Lighting time
Auto off time
Setting
Materialcalib.
Password
Reset
Status
Operating the instrument
Switching on: Press for three seconds.
Setting date and time: two times -> Options -> date/time
Saving:
Hold:
Display lighting:
Switching off:
Press the button to save the shown
measuring value. To name the saved results
press the button.
Select the menu item „Options“, then select
„datalog time“. Activate the Hold function
there and change to the measuring window
again. When the symbol is pressed, the
shown measuring value is frozen on the
display until another button is pressed.
Press the key briefly; the display lighting
switches off automatically after approx. 30
seconds. The lighting is activated
automatically when pressing any button.
Press the key in the measuring window for
5 seconds. The instrument switches off after
releasing the key. The instrument switches off
automatically after approx. four minutes.
page7 version 1.1
Measuring range: If the measuring value is
blinking in grey, the
measuring range has been
exceeded. In this case the
measuring accuracy is decreasing.
Activation of the “superuser” function
2 times - Options – Unlock
Enter the 4-digit password by using the button (standard is the 4-digit
serial number) and confirm by pressing the button.
Meas
(Avail
To en
before
activa
followi
15 mi
the suu
connecc
ttes the
Calibrr
Relativve air hu
Absoluu
Absoluute mois
Absoluu
Absoluu
Plug thhe sens
calibraa
The cc
develoo
a quicc
particuu
effectee
uurement
aable opttwith pluu
ionally)
ssure acccurate m
rroundinn
startingg your
tor. Youucorres
ng calibrr
ation cuurves
mmidity
te moistture was
tture Kraf
te moistture Tes
te air huumidity
nutes. SSwitch o
tion curvv
alibratioon curv
ped fromm
k orientt
lar papee
d by Schh
g tempee
mmeasure
r humimm
pponding
ation currves are
ttepaper
ttliner
ttliner
oor into thee materi
n the h
e. The dd
ee “Abso
a mixtuure of di
ation. TThe fine
r types hh
aller Gmm
g-in sennsor
easuringg values
rature ooment.
eter auuair hu
isplay imm
lute m
ffferent p
adjust
as to bee effect
bH for aa fee.
f the maa
TThen pl
tomaticaally rec
mmidity c
availablee:
aal to meaasure an
umimetee
mediatee
ooisture
mment to
eed by th
let the pplug-in
terial foor at le
uug the
oognizes
alibratio
dd let it a
r RP6 aand sel
ly showss the m
aaper typees and i
special
ee custo
ssensora
aast half
ssensor i
tthe sen
nn curve
ddjust for
eect the
eeasuring
wwastepapper” ha
ss determ
applicat
mmer resp.
ddjust to
aan hour
nnto the
ssor and
s. The
approx.
desired
result.
ss been
ined for
ions or
can be
page8
Adjust
Switch
charac
air with
distanc
tment (d
hon th
cteristic“
hone ha
ce of 1 m
device ca
e instru
using the
and. The
meter from
alibratio
ument a
earrow
re must
mthe dev
on)
nd sele
keys. Ho
not be a
vice.
ect the
old the h
any wall o
calibratio
umimete
or other
vers
on curv
er RP6 up
objects w
sion 1.1
ve „test
pin the
within a
recom
Press
level.
Select
arrow
switch
Press
bar sh
way.
entere
button
The mmeasurin
shouldd range
measuu
calibraation. Thi
the left
Navigat
using tt
buttoon.
the m
keys an
This mmthe 4-enter
humimmeter R
right eedge of
ing on t
the thir
ows the
After aa
devicee
other 33
When t
d corre
betwee
ring vallue is
mend aa
s can b
ee to th
he arroww keys.
enu itemm
ddigit se
PP6. You
dd button
first digi
waitingg
acceptss
digits hh
g valuee shown
nn +1.5
oout of t
n adjusstment
ee effecte
key twicce to r
ee menu
eenu itemm
dd confirmm by pres
has toorial nu
can find
the dispplay a s
hhe instrumment.
tt of your
time oof a fe
the enntered d
ave to bbe enter
hhe 4-digg
cctly (see
on th
by zer
dd as follo
eeach the
item „O
CConfirm bby press
„Calibbrate“ u
sing .
mmber of
it on t
hhort tim
as oftenn as th
serial n
ww secon
igit. N
eed in th
it numbber has
picture)), press
aand -0..
hhis rangge, we
oo-point
wws:
menu
pptions“
iing the
ssing the
be unloocked. Foor that
your
hhe top
ee after
eeblack
uumber.
dds the
oow the
eesame
been
the
ee displayy
5. If thee
Now
the qu
a zer
meas
If an
„Calibrr
hand uup in the
standss behind
ery by p
point
uuring win
ready ffor use
exclam
to confirrm.
the diss
ate?“. HHold the
air and
rressing
aagain.
aation ma
play wwill sho
humime
make s
the senssor plat
. The d
oo adjustmm
dow appp
rk (!) a
ww the
tter RP6
pppears
query
in one
uure that nnothing
ee. Then cconfirm
eevice will effect
ent. As soon aas the
ears, the instrumment is
oon the
page9
display
possib
adjusta
your d
y, the z
ble, as
able rang
ealer.
zero po
the cali
ge. In th
int adju
bration
his case
stment
is out
please c
is not
of the
contact
verssion 1.1
45°C,
mechaa
Clean
Any ki
proof
For mi
materi
made.
(www.
Batterr
If the bbattery s
chargee of batt
chargeed IMME
Chargging the
Connee
cable tto a PC
to chaarge the
the temm
Devicee
To proo
nd of w
(IP64),
Exempption fr
we reff
moistuure. The
measuuring re
guaranntee sta
In cas
humime
y chargee
ery is s
DIATEL
ct the prrovided
or anoth
complet
peratuu
as otherwwise the
mainteenance i
vide a loong life
ds or hnical loaa
your devvice usin
eet cleani
oom liabil
sreadinggs and w
use anyy
moistur
als. Theerefore
e of a
tter.com)
yymbol apppears i
hhown in
YY.
batteriess
UUSB cab
er USB
eely disc
re durinng the
batterie
eat e.g.
gg a dry
bbut not raainproof.
ity
rong me
liabilityy.
e depe
ssults. Eaach devi
mmp. If thoose are
faulty
or your
nn the me
the stat
chargin
hharged b
cchargin
ss may b
nstructioons
oof your ddevice p
ccloth.
ng damaages the
Do not
we recoommen
ce incl
broken,
ddevice,
ddealer.
asuring
us (!), t
le to the
atteries.
gg proce
ee destro
droppingg it or
device.
eexpose y
aasuremeents and
This iis a devvice for
nnds on mmultiple
no clai
pplease
device aa
gg adapterr
sss is be
yyed.
not exllease doo
ddirect su
quick
dd a plaausibility
uudes a sserial n
mms for g
ccontact
wwindow rr
hhe batterries hav
Please make s
ppose it too
nnlight ex
The devvice is
oour devicce to the
ddetermin
conditionns and
check
uuarantee
SSchaller
esp. if aa critical
ee to be
nd the oother endd of the
. It takess about 66 hours
uure that
ttween 0°C and
strong
posure.
ssplash-
rain.
eesulting ddof this r amage
aation of
mmultiple
of the
uumber aand the
can be
GmbH
page11 version 1.1
Transfer saved data to the PC
To send your saved logs to the PC, connect
the humimeter device to your PC using the
USB cable that was delivered with
yourdevice. Carefully loose the protection
cap on your humimeter and plug in the USB
mini B connector. The bigger connector has
to be connected to a USB slot on your PC.
Start the LogMemorizer software on your PC
and switch on your humimeter RP6.
The data transfer can be started on your
humimeter or on the software:
Starting the data transfer on the humimeter:
Press the key until you reach the menu
(see image on the right). Then select „Send
Logs“ and confirm by pressing the key.
Now select „Manual Logs“ and confirm by
pressing again. All saved logs will be sent
to your PC.
Starting the data transfer on your PC:
Press the button „remote control“ in the
LogMemorizer software. A drop-down menu
with several options opens (see image
below).
For transferring the data you can select
„Import last manual log“ (the last saved
measuring series is transferred) or „Import all
manual logs“ (all saved logs are transferred).
If you click on one of these menu items, the
transfer starts immediately.
For the basic adjustments of the software
please look through the instructions on the
LogMemorizer USB flash drive.
page12
Print
s
(only
w
To pri
n
the p
r
delive
r
protec
t
plug i
n
plasti
c
switch
Not till
plugg
e
by pre
it doe
s
and tr
y
Press
reach
„Print
L
Now
y
saved
series
select
e
To sa
v
storag
s
aved d
a
w
ith op
t
n
t your
s
r
inter u
s
r
ed with
t
ion cap
n
the sid
c
casing
on the
d
then th
e
e
d in at
t
ssing .
s
not bl
i
y
again.
the b
the men
L
ogs“ an
y
ou can
s
measur
i
(logs).
C
e
d logs
a
v
e paper
e regula
r
a
ta (log
s
t
ionally
a
s
aved d
a
s
ing the
your d
e
on the
e of the
at the
d
evice.
e
other s
i
t
he prin
t
Now th
e
i
nk, ple
a
utton at
u (see i
m
d confir
m
s
elect if
y
i
ng serie
C
onfirm
b
a
re print
e
, please
r
ly.
s
)
a
vailabl
e
a
ta, conn
printer
e
vice. C
a
humim
e
connec
t
humim
e
i
de of th
e
t
er. Swit
c
e
green
L
a
se cha
n
your hu
m
m
age on
m
by pre
s
y
ou wa
n
s or all
s
b
y pressi
e
d out n
o
think of
e
printe
r)
ect the
d
cable
t
a
refully l
o
e
ter RP
6
t
or with
t
e
ter RP
6
e
cable
h
c
h on th
L
ED is b
l
n
ge the
m
imeter
the righ
t
s
sing .
t to prin
t
s
aved m
n
g a
g
o
w.
clearing
r)
d
evice t
o
t
hat wa
s
o
ose th
e
6
. At firs
t
t
he clos
e
6
. The
n
h
as to b
e
e printe
r
l
inking. I
f
batterie
s
until yo
u
t
). Selec
t
t
the las
t
easurin
g
g
ain. Th
e
the dat
a
o
s
e
t
e
n
e
r
f
s
u
t
t
g
e
a
ver
s
s
ion 1.1
page13
Hard
w
In cas
e
or can
Pleas
e
startin
g
Remo
v
meter
button
humi
m
any fo
again
a
If the
h
w
are Re
s
e
that y
o
not be s
w
e
make
g
the foll
v
e the
b
by pulli
n
on th
e
m
eter will
rce, if it i
a
nd try
a
h
umimet
e
s
et
o
ur humi
w
itched
o
sure th
owing p
r
b
lue pla
s
n
g the t
w
e
right
u
restart.
s not po
s
a
gain.)
e
r is not
meter d
e
o
n any
m
at the
a
r
ocedure
s
tic han
d
w
o half
s
u
pper e
d
Put the
s
sible to
restartin
g
e
vice do
e
m
ore, yo
u
a
ccumul
a
:
d
le by s
l
s
ides a
p
d
ge of
two sid
put the
s
g
, pleas
e
e
s not r
e
u
can ca
r
ator ha
s
l
iding it
p
art. Th
e
the mo
i
es toge
t
s
ides to
g
e
contac
t
e
spond t
rry out a
s
been
off. Op
e
e
n push
i
sture
m
t
her aga
g
ether e
a
t
your te
c
ver
s
o any k
e
hardwa
r
charge
d
e
n the
m
the sm
a
m
eter. N
o
in. (Do
n
a
sily, flu
s
c
hnical s
s
ion 1.1
e
y press
r
e reset.
d
before
m
oisture
a
ll push
o
w the
n
ot use
s
h them
upport.
Technical data
Measuring depth max. 500mm
Calibration curves 23
Resolution 0.5 % water content; 0.5 °C/°F
Measuring range 0.0 – 50.0% water content
Temperature range -10 °C to +50 °C (0.5 °C), 14 to 122 °F
(0.5 °F)
Operating temperature 0 °C to 50 °C, 32 to 122 °F
Storage temperature -20 °C to +60 °C, -4 to 140 °F
Memory approx. 10,000 measuring values
Temperature compensation automatic
page14 version 1.1
Menu languages English, German, French, Italian,
Spanish, Russian
Power supply LI-Ion accumulator 1950mAh
(for 60 to 100 operating hours)
Current consumption 40mA (with light)
Display 128 x 64 matrix display, lighted
Dimensions 620 mm x 100 mm x 147 mm
Weight 1 kg (incl. accumulator)
Degree of protection IP 64
Scope of supply RP6 with integrated accumulator, user
manual, plastic case, USB interface
incl. cable and PC software, calibration
certificate
Optional Bluetooth module, portable printer,
proof plate in wooden case, external
plug-in sensor


me
Un
Une
Cho
me
rest
sho
Therr
belo
!IMPOO
Most cc
Prodduct te
temper
rial hal
The
shouu
matee
ensuure a te
Wroong cali
ble-che
aasuring.
oose a
aasuring.
on the
Inaddequate
e has too
w the se
RTANT!! please
ommonn
mmperatu
ld be app
ff an ho
mmperatur
bbration
bbalancedd
ven conntact su
relativ
If the
material
ww too loww measu
nsor pla
read
reasonns for mi
proximaately the
uur befor
ee adjust
ccurve re
cck the seeDou lection
pressinng
rrface
eely flat
mmeasurin
evenly,
rring valu
thickness
be at lleast 50
tte.
same.
ee startin
mment.
ssp. swit
of the
surfa
gg plate
the de
ees.
s of maaterial o
cm of
sreadinggs
aature of the meassuring deevice an
PPut the
gg the m
cce for
ddoesn´t
vvice will
rr bale
mmaterial
rre out off application rangge
dd the ma
hhumimet
eeasure
cch settinng
ccorrect ccalibrati
terial un
eer devic
mment in
oon curve
dder test
ee to the
oorder to
before
Elec
Any
pape
mea
elect
plate
ctrically
kind of m
er pollut
asuring r
trically co
e.
conduct
metal as
ed by s
result. P
onductiv
tive mate
well as e
soot or
Please m
emateria
erial/wir
electrical
wire has
make su
al in an
re in the
ly condu
sa neg
ure that
area of 5
measur
ctive pac
gative in
there is
50 cm be
ring field
ckaging f
fluence
sno m
elow the
d
film e.g.
on the
metal or
sensor
Connected USB cable during measuring
During the measurement, the USB cable must not be connected to
the device, as the measuring value may be
falsified by more than 10 %.
Distributed by: ABQ Industrial LP USA
Tel: +1 (281) 516-9292 / (888) 275-5772 eFax: +1 (866) 234-0451
Web: https://www.abqindustrial.net E-mail: [email protected]

Other ABQINDUSTRIAL Measuring Instrument manuals

ABQINDUSTRIAL LS-36-LED User manual

ABQINDUSTRIAL

ABQINDUSTRIAL LS-36-LED User manual

ABQINDUSTRIAL DT-5TG User manual

ABQINDUSTRIAL

ABQINDUSTRIAL DT-5TG User manual

ABQINDUSTRIAL GalvanoTest 3000 Use and care manual

ABQINDUSTRIAL

ABQINDUSTRIAL GalvanoTest 3000 Use and care manual

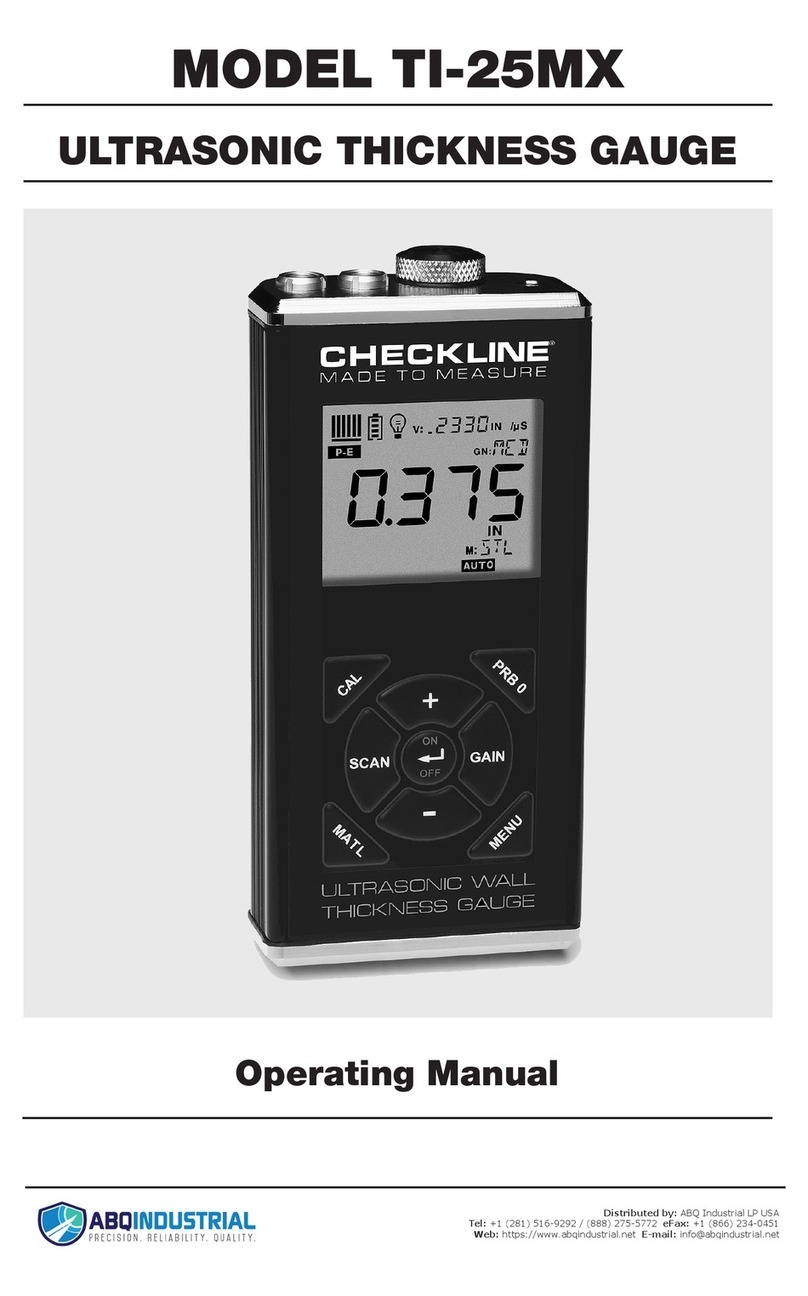
ABQINDUSTRIAL TI-25MX User manual

ABQINDUSTRIAL

ABQINDUSTRIAL TI-25MX User manual

ABQINDUSTRIAL TI-25MXT User manual

ABQINDUSTRIAL

ABQINDUSTRIAL TI-25MXT User manual

ABQINDUSTRIAL TI-007DLX User manual

ABQINDUSTRIAL

ABQINDUSTRIAL TI-007DLX User manual

ABQINDUSTRIAL DELMHORST J-2000 User manual

ABQINDUSTRIAL

ABQINDUSTRIAL DELMHORST J-2000 User manual

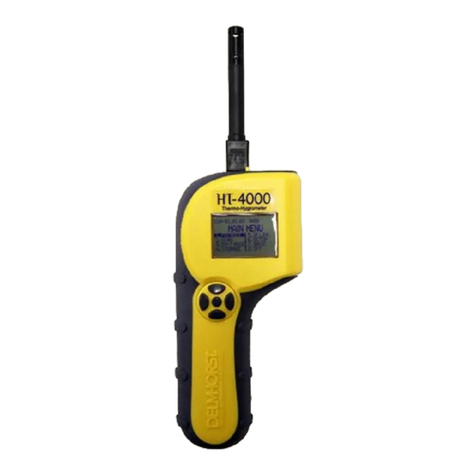
ABQINDUSTRIAL HT-4000 User manual

ABQINDUSTRIAL

ABQINDUSTRIAL HT-4000 User manual

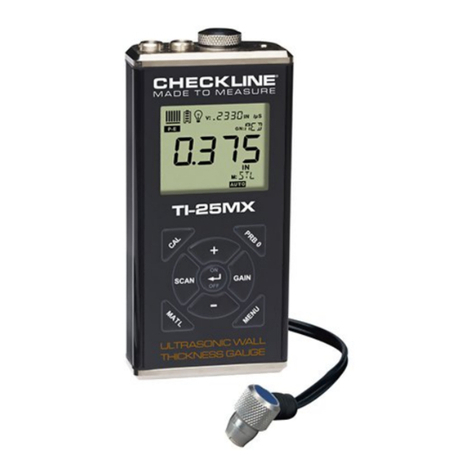
ABQINDUSTRIAL TI-25MX User manual

ABQINDUSTRIAL

ABQINDUSTRIAL TI-25MX User manual

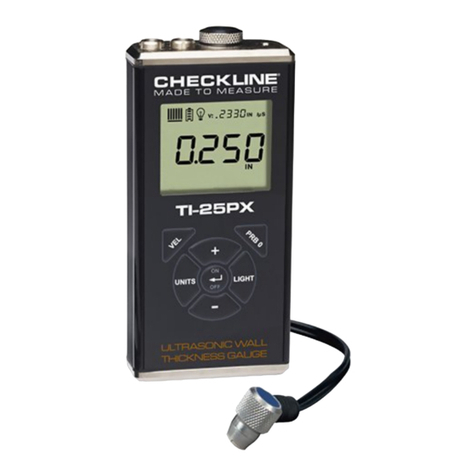
ABQINDUSTRIAL TI-25PX User manual

ABQINDUSTRIAL

ABQINDUSTRIAL TI-25PX User manual

ABQINDUSTRIAL Western Instruments WC-8 User manual

ABQINDUSTRIAL

ABQINDUSTRIAL Western Instruments WC-8 User manual

ABQINDUSTRIAL SKIPPER 5 User manual

ABQINDUSTRIAL

ABQINDUSTRIAL SKIPPER 5 User manual

ABQINDUSTRIAL DD-100 User manual

ABQINDUSTRIAL

ABQINDUSTRIAL DD-100 User manual

ABQINDUSTRIAL Checkline TI-25DLXT User manual

ABQINDUSTRIAL

ABQINDUSTRIAL Checkline TI-25DLXT User manual

ABQINDUSTRIAL DCF-3000EZ-E User manual

ABQINDUSTRIAL

ABQINDUSTRIAL DCF-3000EZ-E User manual

ABQINDUSTRIAL Dakota Ultrasonics ZX-2 User manual

ABQINDUSTRIAL

ABQINDUSTRIAL Dakota Ultrasonics ZX-2 User manual

ABQINDUSTRIAL HORIBA U-50 Series User manual

ABQINDUSTRIAL

ABQINDUSTRIAL HORIBA U-50 Series User manual

ABQINDUSTRIAL TotalCheck User manual

ABQINDUSTRIAL

ABQINDUSTRIAL TotalCheck User manual
Popular Measuring Instrument manuals by other brands

Anritsu Spectrum Master MS2712E user guide

Anritsu

Anritsu Spectrum Master MS2712E user guide

CMi PC-66L quick guide

CMi

CMi PC-66L quick guide

Sper scientific 840065 instruction manual

Sper scientific

Sper scientific 840065 instruction manual

Flexim PIOX S502ID Operating	 instruction

Flexim

Flexim PIOX S502ID Operating instruction

GTC FF310 user manual

GTC

GTC FF310 user manual

Endress+Hauser Prosonic M FMU40 Brief operating instructions

Endress+Hauser

Endress+Hauser Prosonic M FMU40 Brief operating instructions

Hanna Instruments HI 93739 instruction manual

Hanna Instruments

Hanna Instruments HI 93739 instruction manual

Spectris Servomex SERVOPRO NanoChrome Operator's manual

Spectris

Spectris Servomex SERVOPRO NanoChrome Operator's manual

General UV254SD user manual

General

General UV254SD user manual

ORTEC 420 instruction manual

ORTEC

ORTEC 420 instruction manual

axing SZU 17-02 Operation instructions

axing

axing SZU 17-02 Operation instructions

Sper scientific 800050 instruction manual

Sper scientific

Sper scientific 800050 instruction manual

Panasonic LP-V10U-C Specification sheet

Panasonic

Panasonic LP-V10U-C Specification sheet

AEMC PowerPad III quick start guide

AEMC

AEMC PowerPad III quick start guide

Levitronix LEVIFLOW LFSC-D Series user manual

Levitronix

Levitronix LEVIFLOW LFSC-D Series user manual

Teledyne HASTINGS 2002 instruction manual

Teledyne

Teledyne HASTINGS 2002 instruction manual

GE Kelman DGA900 Operator's guide

GE

GE Kelman DGA900 Operator's guide

Stanley CL2i user manual

Stanley

Stanley CL2i user manual

manuals.online logo
manuals.online logoBrands
  • About & Mission
  • Contact us
  • Privacy Policy
  • Terms and Conditions

Copyright 2025 Manuals.Online. All Rights Reserved.