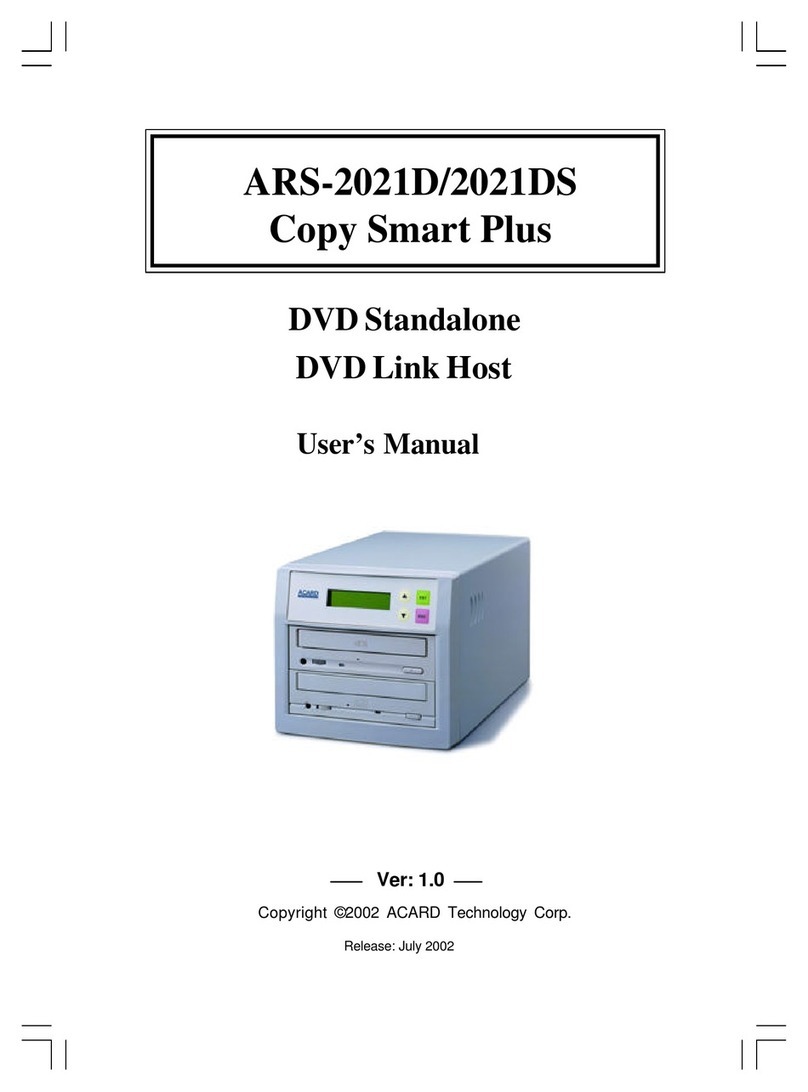
Acard ARS-2030L User manual

ARS-2030L/2032
Copy Smart Plus
Copyright ©2007 ACARD Technology Corp.
Release: March 2007
Attention:
It takes over 5 seconds to
power on after shutdown
otherwise the system may
operate abnorrmally.
CD Duplicator
User’s Manual
Ver: 1.4

Copyright and Trademark
The information in this manual is subject to change without prior notice and does
not represent a commitment on the part of vendor, who assumes no liability or re-
sponsibility for any errors that may appear in this manual.
ACARD and SCSI are the trademarks of ACARD Technology Corp.
This manual contains materials protected under International Copyright Laws. All
rights reserved. No part of this manual may be reproduced, transmitted or tran-
scribed without the expressed written permission of the manufacturer and author of
this manual.
ACARD’s ARS-2030L/2032 Copy Smart Plus are merely used for copying and
editing personal audio and video data. Violating Copy Right is a criminal act.
ACARD's Copy Smart Plus only supports legal backup operation.
ACARD Technology Corp. is not responsible for the user’s illegal actions.

WEEE Statement English
In order to cope with the increasing waste electrical and electronic equipment, reduce the use of landfill and
incinerator, and prevent the harmful matter of waste equipment from entering the environment, the European
Union (EU) has set the Directive on Waste Electrical and Electronic Equipment (WEEE) asking manufacturers
to collect, recycle and treat waste electrical and electronic equipment properly. Member nations already
established their free of charge recycle systems of WEEE before August 13, 2005. Accordingly, ACARD has
to be responsible for recycling all products exported to Germany. You can return your ACARD product that
needs recycling to a local collector.
WEEE Erklärung German
Mit dem Ziel die steigende Menge elektrischer und elektronischer Altgeräte zu bewältigen ohne hierzu
unnötig Mülldeponien und Verbrennungsanlagen zu belasten und um die Verschmutzung der Umwelt durch
freiwerdende Stoffe aus den Altgeräten zu vermeiden, hat die Europäische Union (EU) die Richtlinie über
Elektro-und Elektronik-Altgeräte erlassen. Die Richtlinie verpflichtet Hersteller, elektrische und elektronische
Altgeräte umweltgerecht einzusammeln, zu recyceln und zu entsorgen. Die Mitgliedsstaaten der EU haben
bereits ihre kostenfreien Recyclesysteme konform der WEEE vor dem 13. August 2005 eingerichtet.
Entsprechend der Richtlinie ist ACARD verantwortlich für die umweltgerechte Entsorgung aller nach
Deutschland exportierten ACARD Produkte. Sie können Ihr zu entsorgendes ACARD Produkt zu Ihrer
örtlichen Sammelstelle bringen.
AEEA verklaringDutch
Met het doel de stijgende hoeveelheid afgedankte elektrische en elektronische apparatuur te beheersen
zonder hiervoor onnodig stortplaatsen en verbrandingsovens te belasten en om de vervuiling van het milieu
door vrijkomende stoffen uit de afgedankte apparatuur te voorkomen, heeft de Europese Unie (EU) de richtlijn
betreffende afgedankte elektrische en elektronische apparatuur besloten. Deze richtlijn verplicht fabrikanten
afgedankte elektrische en elektronische apparatuur in te zamelen, te recyclen en te verwijderen. De lidstaten
van de EU hebben reeds de kosteloze recyclesystemen volgens de AEEA vóór de 13 augustus 2005
ingericht. Conform de richtlijn is ACARD verantwoordelijk voor de verwijdering van alle naar Nederland
geëxporteerde ACARD producten. U kunt uw afgedankt ACARD product naar uw locale inzamelplaats
brengen.
(OHNWULNYH(OHNWURQLN0DGGH$WÕNODUÕ'HPHFL
Turkish
(OHNWULNYH HOHFWURQLNPDGGH DWÕNODUÕQÕQ \XNVHOPHVL\OH EDVHGHELOPHNDUD]L GROGXUPD YH FRS \DNPDIÕUÕQÕ
NXOODQÕPÕQÕ D]DOWPDNDWÕN PDGGH ]DUDUODUÕQÕQ FHYUH\H \D\ÕOPDVÕQÕ RQOHPHN LFLQ $YUXSD %LUOLJL
$%XUHWLFLOHUGHQHOHNWULNYHHOHNWURQLNPDGGHDWÕNODUÕQÕJHUHNWLJLJLELWRSODPDODUÕQÕJHULGRQXVWXUPHOHULQLYH
kimyasal isleme
WDEL WXWPDODUÕQÕ
talep etmek icin
(OHNWULN YH (OHNWURQLN 0DGGH $WÕNODUÕ X]HULQH ELU GLUHNWLI
KD]ÕUODGÕ7RSOXOXNX\HOHUL $JXVWRV WHQ RQFH
HOHNWULNYH HOHNWURQLNPDGGH DWÕNODUÕQÕQ XFUHWVL]JHUL
GRQXVXPVLVWHPOHULQLFRNWDQROXVWXUPXVODUGÕ%XQGDQGROD\Õ$&$5'$OPDQ\D\DLKUDFHWWLJLEXWXQXUXQOHULQ
geri donusumunden sorumludur.
$&$5' XUXQOHUL JHUL GRQXVXP JHUHNWLULUVH \HUHO WRSOD\ÕFÕODUD JHUL
verebilirsiniz.

WEEE
[xe_l_gv
Russian
Qlh[u
kijZ\blvky
k
m\_ebqb\Zxsbfky
g_gm`guf
we_dljbq_kdbf
b
we_dljhgguf
h[hjm^h\Zgb_f
,
mf_gvrbl_
bkihevah\Zgb_
aZdZiu\Zgby
fmkhjZ
b
bkihevah\Zgby
mklZgh\db
^ey
k`b]Zgby
hloh^h\
,
ij_iylkl\mcl_
\j_^ghfm
\u[jhkZf
aZ]jyagylv
hdjm`Zxsmx
kj_^m
,
?\jhi_ckdbc
khxa
(
?K
)
mklZgh\be
>bj_dlb\m
ih
G_gm`ghfm
We_dljbq_kdhfm
b
We_dljhgghfm
H[hjm^h\Zgbx
(WEEE)
^ey
lh]h
,
qlh[u
ba]hlh\bl_e_c
kh[jZeb
,
i_j_jZ[Zlu\Zeb
b
\hh[s_
ijhy\beb
\gbfZgb_
d
g_gm`ghfm
we_dljbq_kdhfm
b
we_dljhgghfm
h[hjm^h\Zgbx
^he`guf
h[jZahf
.
Qe_gu
gZpbb
mklZgh\beb
[_kieZlgmx
kbkl_fm
i_j_jZ[hldb
WEEE
^h
13
Z\]mklZ
2005.
Khhl\_lkl\_ggh
, ACARD
h[yaZg
[ulv
hl\_lkl\_gguf
aZ
lh
,
qlh
i_j_jZ[hlZe
\k_
ijh^mdlu
,
wdkihjlbjm_fu_
\
=_jfZgbx
.
<u
fh`_l_
\ha\jZlblv
\Zr
ijh^mdl
ACARD,
dhlhjuc
gm`^Z_lky
\
j_pbjdmeypbb
f_klghfm
k[hjsbdm
.
WEEE Statement French
Afin de gérer la quantité croissante de déchets électriques et électroniques, de réduire l’utilisation des
décharges et des incinérateurs et d’éviter que des déchets nocifs ne polluent l’environnement, l’Union
Européenne a publié la directive WEEE sur les déchets électriques et électroniques. Celle-ci spécifie que les
fabricants doivent collecter, recycler et traiter l’équipement électronique et électrique usagé. Depuis le 13 août
2005, les pays membres ont mis en place un système de recyclage gratuit selon le WEEE.
De ce fait, Acard est responsable du recyclage de tous les produits exportés vers l’Allemagne. Vous pouvez
mettre au rebut votre équipement ACARD usagé dans votre centre local de recyclage.
Pour plus d’informations sur les lieux de mise au rebut des équipements usagés destinés au recyclage,
veuillez contacter votre mairie, votre service de traitement des déchets ménagers ou le magasin où vous avez
acheté le produit.
RAEESpanish
Con la finalidad de reducir el incremento de residuos eléctricos y de material electrónico, reduciendo el uso
de los vertederos e incineradoras y prevenir el preocupante aumento del contacto de estos residuos con el
medio ambiente. Por este motivo la Unión Europea ha fijado la Directiva de Residuos de Aparatos Eléctricos
y Electrónicos (RAEE) solicitando a los fabricantes la recolección, reciclaje y tratamiento de ests residuos
correctamente. Los paises miembros ya han establecido su sistema de reciclaje gratuito de RAEE antes del
13 de Agosto del 2005. Por este motivo ACARD es el responsable del reciclaje de todos los productos
exportadosa Alemania. Usted puede devolver su producto ACARD a un punto de recogida local cuando
desee reciclarlo.
Dichiarazione WEEEItalian
Per far fronte all’aumento dei residui delle apparecchiature elettriche ed elettroniche, ridurre l'uso di materiale
di riporto e degli inceneritori, ed impedire che il materiale nocivo delle apparecchiature residue entri a contatto
con l'ambiente, l’ Unione Europea (UE) ha stabilito le Direttive sui Residui delle apparecchiature Elettriche ed
Elettroniche (WEEE) chiedendo ai fornitori di raccogliere correttamente, riciclare e trattare le apparecchiature
elettriche ed elettroniche residue. Le nazioni facenti parte dell’ Unione Europea hanno già stabilito il loro
sistema gratuito di riciclaggio di questo materiale (WEEE) prima del 13 agosto 2005. Di conseguenza,
ACARD è responsabile del riciclaggio di tutti i prodotti esportati in Germania.Potete restituire il vostro
prodotto acquistato da ACARD che deve essere riciclato da un’ azienda specificalocale.

Table of Contents
Chapter 1 Introduction ................................................6
1.1 Features ...................................................................... 6
1.2 Specifications .............................................................. 6
Chapter 2 Installation...................................................8
2.1 Copy Smart Plus Only ................................................ 8
2.2 A Whole System.......................................................... 8
2.3 A System without CD Writers ..................................... 8
2.4 How to Install............................................................... 9
Chapter 3 Basic Instructions.....................................13
3.1 Buttons and LCD ...................................................... 13
3.2 About HDD Installation............................................ 14
3.2.1 With an HDD.............................................................................. 14
3.2.2 Without an HDD ........................................................................ 15
3.3 Board Layout ........................................................... 17
Chapter 4 Functions....................................................19
4.1 Copy.......................................................................... 19
4.2 Test ........................................................................... 20
4.3 Test & Copy .............................................................. 21
4.4 Verify ........................................................................ 22
4.5 Compare ................................................................... 23
4.6 Prescan...................................................................... 24
4.7 Disc Info .................................................................... 25
4.8 SelectSource ............................................................. 26
4.9 Image ........................................................................ 27
4.9.1 Load............................................................................................. 27
4.9.2 Delete Image ............................................................................... 28
4.9.3 Image Info................................................................................... 29
4.9.4 Compare Image.......................................................................... 29
4.9.5 Select Image ................................................................................ 31
4.9.6 Select Src Drive .......................................................................... 31

4.10 Edit Track................................................................32
4.10.1 CD to CD .................................................................................. 33
4.10.2 CD to HDD ............................................................................... 37
4.10.3 Play Audio Track..................................................................... 42
4.10.4 Close Session ............................................................................ 43
4.11 Setup ........................................................................44
4.11.1 Language .................................................................................. 45
4.11.2 Burn Speed............................................................................... 45
4.11.3 Read Speed............................................................................... 46
4.11.4 Auto Start Drive....................................................................... 46
4.11.5 Startup Menu ........................................................................... 47
4.11.6 Auto Verify ............................................................................... 47
4.11.7 Auto Compare .......................................................................... 48
4.11.8 Auto Prescan ............................................................................ 48
4.11.9 Eject Disc.................................................................................. 49
4.11.10 Burn On The Fly.................................................................... 49
4.11.11 Burn Mode .............................................................................. 50
4.11.12 Button Sound.......................................................................... 51
4.11.13 Device Info .............................................................................. 51
4.11.14 System Info ............................................................................. 52
4.11.15 Quick Erase ............................................................................ 53
4.11.16 Full Erase................................................................................ 54
4.12 Adv Setup.................................................................55
4.12.1 UnderRun Protect.................................................................... 55
4.12.2 Overburn .................................................................................. 56
4.12.3 Read Error Skip....................................................................... 56
4.12.4 Format HDD ............................................................................ 57
4.12.5 Verify HDD .............................................................................. 57
4.12.6 Burn-in...................................................................................... 58
4.12.7 Update Firmware ..................................................................... 59
4.12.8 Compare Firmware ................................................................. 60
4.12.9 H/W Diagnostic ........................................................................ 60
4.12.10 Load Default........................................................................... 61
4.12.11 CD+G ...................................................................................... 62
4.12.12 ISRC & MCN ......................................................................... 62
4.12.13 Switch Link-Host (optional) ................................................. 63

Chapter 5 Troubleshooting .......................................64
5.1 About LCD ............................................................... 64
5.2 About Error Messages .............................................. 64
5.3 About CD-ROM/CD Writers .................................... 64
5.4 About Buttons ........................................................... 64
5.5 About CD Writer Not Readable ............................... 65
5.6 About High Failure Rate........................................... 65
5.7 About Firmware Update ........................................... 65
5.8 About Function 12 and Cancellation ........................ 65
Appendix A About AEC-4420P/PB ........................66
Appendix B LCD Messages......................................80

6
ARS-2030L/2032 Manual
Chapter 1 Introduction
ARS-2030L and ARS-2032 are especially designed for copying CD in video, audio
or data form. ARS-2030L is for 3 CD writers while ARS-2032 for 7 writers. These
two duplicators make copying easy and efficient. Professionally mechanical design,
multifunctional LCD and 4 simple buttons on the panel are very helpful in opera-
tion. For any end-user the two models are really cost-effective.
1.1 Features
1.2 Specifications
Power Voltage: 5V±5%
Current: 0.5A Max
Environment Operation: 0°C to 60°C
Storage:-20°C to 85°C
Humidity 15% to 90%
lIDE to IDE Copy Controller.
lBuilt-in SCSIDE technology.
l4 (2030L) /8 (2032) independent IDE channels.
lPower-onself test.
lSupport HDD.
lAutomatic format detection.
lUser-friendly interface with LCD messages.
lFast copying on high-speed CD writers
lEasy operation without installing software and extra training.
lFirmware update through CD-ROM.

7
ARS-2030L/2032 Manual
Dimension L 200 mm
W 146.2 mm
H 42 mm
Connector 40-pin internal IDE connector
Cable ATA-66 (under 46 cm)
CD Format : CD-ROM (Mode1 & Mode2), CD-ROM/XA (Mode2 form1 &
form2), CD-DA, Mixed-Mode, Video CD, CD-1, Karaoke CD,
Photo CD (Single & Multi-session), CD-Extra, HFS, CD-Bridge,
ISO9660, CD-R and CD-RW
Supported CD-ROM : TEAC
Supported CD-RW : Plextor, TEAC, Sanyo, Nichimen, SONY, RICOH
Please visit the web site of ACARD to get the newest data.
http://www.acard.com

8
ARS-2030L/2032 Manual
Chapter 2 Installation
Before installing your copy smart plus, please note that there are three kinds of
packages: the copy smart plus only, a whole copying system and a system without
CD writers.
lUnpack the package.
lCheck if there is any defect or malfunction.
lBe sure that voltage is set correctly.
lAn HDD (optional).
2.2 A Whole System
lUnpack the package.
lCheck if there is any defect or malfunction.
lPrepare suitable CD writers according to the list given in subsection 1.2.
lAssemble the copy smart plus according to your needs.
lBe sure that voltage is set correctly.
2.3 A System without CD Writers
2.1 Copy Smart Plus Only
lUnpack the package.
lCheck if there is any defect or malfunction.
lPrepare a CD-ROM and CD writers.
lPrepare a 5.25” external case (5~10-bay chassis).
lPrepare an HDD and a mobile rack (optional).
lPrepare switching power supply (300W).
lMake all IDE devices in Master mode.

9
ARS-2030L/2032 Manual
2.4 How to Install
The following diagram and pictures indicate the installation of ARS-2030L copy
controller with a CD-ROM and 3 CD writers.
Copy Controller /
ARS-2030L
CH 1 / CD-ROM
CH 2 / CD Writer
CH 3 / CD Writer
CH 4 / CD Writer
4 3 2 1
LCD

10
ARS-2030L/2032 Manual
The following diagram and pictures indicate the installation of ARS-2030L copy
controller with an HDD, a CD-ROM and 3 CD writers. The second picture shows
that HDD is put inside a tray.
Copy Controller /
ARS-2030L
CH 1 / CD-ROM
(Slave)
CH 2 / CD Writer
CH 3 / CD Writer
CH 4 / CD Writer
4 3 2 1
LCD
CH 1 / HDD
(Master)

11
ARS-2030L/2032 Manual
The following diagram and pictures indicate the installation of ARS-2032 copy con-
troller with a CD-ROM and 7 CD writers.
Copy Controller /
ARS-2032
CH 4 / CD Writer
CH 3 / CD Writer
CH 2 / CD Writer
CH 1 / CD-ROM
CH 5 / CD Writer
CH 6 / CD Writer
CH 7 / CD Writer
CH 8 / CD Writer
4 3 2 1 8 7 6 5
LCD

12
ARS-2030L/2032 Manual
The following diagram and pictures indicate the installation of ARS-2032 copy con-
troller with an HDD, a CD-ROM and 7 CD writers.
Copy Controller /
ARS-2032
CH 4 / CD Writer
CH 3 / CD Writer
CH 2 / CD Writer
CH 1 / CD-ROM
(Slave)
CH 5 / CD Writer
CH 6 / CD Writer
CH 7 / CD Writer
CH 8 / CD Writer
4 3 2 1 8 7 6 5
CH 1 / HDD
(Master)
LCD

13
ARS-2030L/2032 Manual
Chapter 3 Basic Instructions
3.1 Buttons and LCD
There are four buttons and an LCD on the panel of the copy smart plus. They are
described as follows.
1 2 4
3 5
1. It shows all functions and messages.
2. It is used to scroll up through functions or menus.
3. It is used to scroll down through functions or menus.
4. It is used to execute a selected function.
5. It is used to cancel a selected function.
After you power on, and the copy smart plus detects the installed hardware like CD-
ROM, CD writers, it will execute a self-test for seconds. When the self-test finishes,
LCD will show the messages as follows.
1. 2.
CD Duplicator
1-3 ver: 2.03K Initialize SDRAM
Figure 1 represents ARS-2030L. The firmware version for1-to-7 ARS-2032 is 2.03S.
For the convenience of exposition we take ARS-2030L as an example.

14
ARS-2030L/2032 Manual
3. 4.
Detect Drives 1. Copy
3.2 About HDD Installation
HDD installation is not necessary, but with a hard disk you can use and enjoy the
function of Image. In other words, you have one more choice to reproduce a CD
from an image file stored in the hard disk. In subsection 3.2.1 and 3.2.2 we are going
to describe the differences of installing a 3.5” hard disk and not installing.
3.2.1 With an HDD
If you install a 3.5” hard disk to your copy smart plus, the operation procedures will
be as follows.
lOnce your copy smart plus detects the hard disk, it will ask if you want to
format or not. A 10GB hard disk can be divided into 10 partitions. Each
partition has 1GB.
lUse function 8 Select Source to set the hard disk as the source.
lIn function 9 Image select a partition to store the data.
lIf there is no data in a selected partition, place a source CD into CD-ROM
and use function 9-01 Load to transmit data from CD into the selected
partition by pressing ENT. Different data can be stored in different partitions.
lSwitch to function 1 Copy by pressing ▲.Place blank CD disks into
the CD writers, and press ENT to start copying.
There are 12 functions for you to use. Function 1 is Copy. You can press▼ to select
other functions.

15
ARS-2030L/2032 Manual
3.2.2 WithoutanHDD
If you don’t install a 3.5” hard disk to your copy smart plus, the operation procedures
will be as follows.
lWhen copying comes to an end, the passed CDs will eject automatically.
The default is eject automatically, but you can change it.
lThe failed CDs will remain in the writers. The default is keeping failed
CDs in the writers, but you can change it. You need to press the buttons on
the writers to take the failed CDs.
lDuring operation do not press any button on your copy smart plus, because
interruption will harm the device, and CDs will be damaged.
lPlace a source CD into CD-ROM.
lSwitch to function 1 Copy by pressing ▲ .Place blank CD disks into the
CD writers, and press ENT to start copying.
lWhen copying comes to an end, the passed CDs will eject automatically.
The default is eject automatically, but you can change it.
lThe failed CDs will remain in the writers. The default is keeping failed
CDs in the writers, but you can change it. You need to press the “eject”
buttons on the writers to take the failed CDs.
A figure of ATA-66 cable layout is on the next page.

16
ARS-2030L/2032 Manual
Please identify two different cables before hardware installation.
1. Three connectors for CD-ROM or optional HDD
2. Two connectors for CD writers
Connect toARS-2030L/
2032 IDE ports Connect to IDE
CD-ROMdrive
(Slave)
Connect to IDE hard
drive(Master)
Connect to ARS-2030L/2032
IDEports Connect toIDEWriter

17
ARS-2030L/2032 Manual
The board layout of ARS-2030L is shown as follows.
3.3 Board Layout

18
ARS-2030L/2032 Manual
The board layout of ARS-2032 is shown as follows.
Host Mode ON
1 2 3 4 5 6
ON
1 2 3 4 5 6
ON
Target Mode
Other manuals for ARS-2030L
1
This manual suits for next models
1
Table of contents
Other Acard Computer Hardware manuals
Popular Computer Hardware manuals by other brands

Boser
Boser HS-5210 manual

Advantech
Advantech MIC-715 user manual

Easy Controls
Easy Controls MC370 owner's manual

Cypress Semiconductor
Cypress Semiconductor CY7C1510JV18 Specification sheet

Measurement Computing
Measurement Computing PCI-CTR05 user guide

Feig Electronic
Feig Electronic OBID classic ID RWA40.30 Montage, installation