Acer Air Monitor User manual

User’s Guide

- 2-
First off...
Congratulations on your purchase of the Acer Air Monitor. It is a first, positive step in helping
you improve your quality of life. This simple device monitors the air quality within its
immediate surroundings.
The Air Monitor allows you to monitor five critical indicators of indoor air quality. These are:
• Temperature - This metric directly relates to comfort and mood.
• Humidity - Moisture leads to colds, flus, and risk of toxic mold formations.
• VOCs - Volatile Organic Compounds are toxic chemicals that can cause skin and
respiratory irritation.
Note: According to experimental studies, in regards to general indoor living environments, CO2 and
TVOC (Total Volatile Organic Compounds) concentrations have a positive correlation, and can
accurately represent the indoor air pollution index. Thus, we derive our CO2 equivalent (CO2eq)
value from our TVOC measurement.
• Dust - PM2.5/PM10 (fine/coarse particulate matter) travels deep into our respiratory
system and can trigger asthma, allergies and other related health problems.
Through visual indicators on the device, as well as more detailed information on the app, the
Acer Air Monitor helps track and gives advice on how to improve the air quality, your health,
and the health of the ones you care about.

- 3-
Package contents
Make sure the following items are in your package. If anything is missing, contact your
authorized dealer or distributor.
Note: Actual items might differ from illustrations.

- 4-
A tour of the device
Item
Description
1
Function button &
Light sensor
• Short press - Detect air quality immediately
• Long press (5 secs), after the beep, immediately let go of the button -
Reset Wi-Fi for configuration. The recorded Wi-Fi AP and password
setting will be cleared
2
Wall-mounting hole
Used for hanging the device on a hook
3
Battery LED
indicator
Shows the battery status:
• Green - Battery is fully-charged
• Red - Battery is charging
• Off - power adapter not connected
4
Power switch
Turns the power on and off
There is no power LED indicator
5
Micro-USB
connector
Connects to the power adapter
6
Wi-Fi indicator
Shows the wireless connection status:
• Green - Local Wi-Fi network and Acer Cloud connected
• Red - Local Wi-Fi network connected only (device can not access
internet or cannot connect to the Acer Cloud)
• Off - Wi-Fi is not configured or device is disconnected from the Wi-Fi
network
7
Air quality
indicator
Lights up using different colors to show the current air quality.
8
Front panel
Detach to reveal the particulate matter sensor for maintenance

- 5-
Getting started
Follow these steps:
1. Attach the appropriate power adapter plug to the USB power adapter.
2. Connect the micro-USB cable to the port on the Air Monitor. If necessary, attach the
micro-USB extension plug first to the device before you connect the micro-USB cable.
Note: Air Monitor should be plugged in at all times, but it also has a built-in backup battery and can
function for a limited time when power is cut off. Air Monitor should be placed in the room you want
to monitor on a flat, stable surface with open air around it –preferably at the normal height level of
your nose, such as on a bookshelf or a side table in the living room, or on a nightstand in a bedroom,
as a few examples. The more open the placement, the better the air reading and Wi-Fi connection. For
the backup battery, it can function for about 6 hours with a Wi-Fi connection. (without Wi-Fi
connection, it can function for about 12 hours)
3. Slide the power switch to the left to turn on the Air Monitor.
Note: The air quality indicator will first cycle through the different colors and begin gathering data.
4. Download the Air Monitor app from either the iOS AppStore or the Google Play store.
Note: Mobile system requirements:
Android : Android 5.0 and above
iOS : iOS 9.0 and above

- 6-
Quick notes
• While on AC power, the device will perform measurements once every 10 seconds.
• The TVOC sensor requires around 5 minutes to stabilize.
• When the device first power on, the TVOC sensor will need 48 hours to do background
auto-calibration.
• If device reboots, the Temperature & Humidity sensor will need 2 hours to become stable.
• The device will begin showing the air quality after 30 seconds.
• To get the current reading, press the function button for 1 second until you hear the tone.
• To get the most accurate data, please always place the Air Monitor such with the function-
key facing up.
• Do not cover the light sensor or place the device in the shade in order to ensure the best
experience.

- 7-
Setting up the device
After you’ve turned on the device and downloaded the Air Monitor app, let’s get started by
setting up the required connections.
Air Monitor has two connection modes.
1. Bluetooth connection
Bluetooth connection is for local connections between the device and your mobile phone. You
will not need to sign into an Acer account to establish the connection.
You can see the real time sensor data in the mobile app within the range of the Bluetooth
connection.
One mobile phone can see multiple Air Monitors’ sensor data through the Bluetooth connection.
The number of Air Monitors a mobile phone can connect to will depend on the Bluetooth
capability of the mobile device. We suggest a maximum of 8 Air Monitors to one mobile device.
We suggest to set up an Air monitor in a 30 square meter space.
Please follow the steps below and the instructions shown on the mobile app to setup your Air
Monitor.
1. Enable Bluetooth on your phone.
Note : The Bluetooth of Air Monitor will automatically be on stand by for potential connections; you
won’t need to turn on the Bluetooth manually.
2. Launch the Air Monitor app.
3. Tap the Setup Device
4. Tap the detected Air Monitor.

- 8-
Note: If you have multiple Air Monitor devices, the app will list these by proximity, i.e., the closest
to the furthest away.
5. Tap Local only.
6. You can now start setting up your Air Monitor.

- 9-
The Bluetooth icon in the above diagram will turn blue. If Bluetooth connection is off, the
Bluetooth icon will be in grey.

- 10 -
2. Acer Cloud connection through Wi-Fi
Login into / creating an Acer account enables 4 more features in comparison to the Bluetooth
mode.
1. Remote monitoring feature, a mobile phone can see the Air Monitor’s data remotely.
2. The Air Monitor will upload sensor data to Acer Cloud so a user can view historical sensor
and map view data in the mobile app.
3. This mode also enables the IFTTT feature. If a user sets up an IFTTT applet with the Air
Monitor through the IFTTT mobile APP, the IFTTT trigger will only enable in the Acer
Cloud mode.
4. The upcoming Amazon Alexa Air Monitor Skill feature will only works if the Air Monitor
connects to the Acer Cloud.
In this mode, the total number of mobile phone and Air Monitor in one Acer Cloud account is
limited to 32.
Please follow the steps below and the instructions shown on the mobile app to setup and
connect your Air Monitor to the Acer Cloud. You will also need to carry out these steps again if
you change the Wi-Fi network that your Air Monitor connects to. If you encounter any
connection problem, you may refer to the Help page in our app.
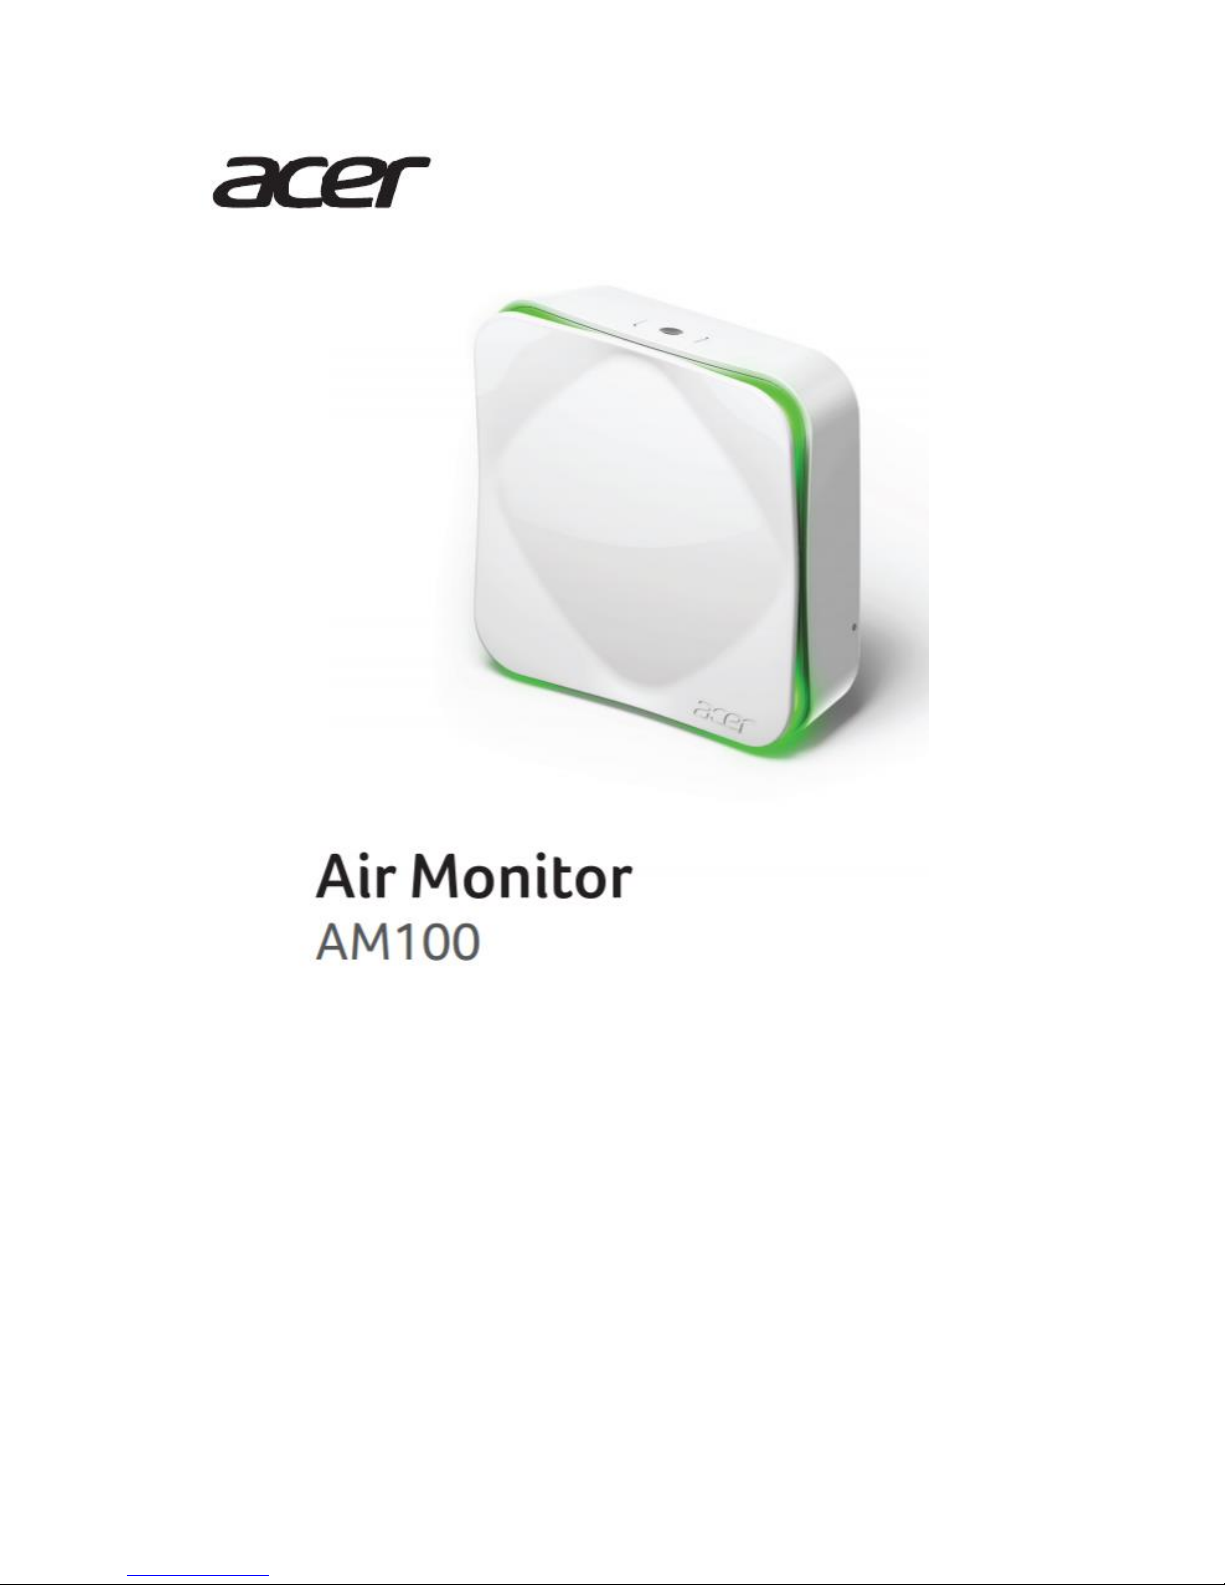
1. Your mobile phone still needs to connect to your Air Monitor by Bluetooth Connection.
After you complete the Bluetooth connection, make sure you have Wi-Fi enabled on your
mobile device.
2. Connect your mobile device to the same local Wi-Fi AP(Access Point) which you will
make the Air Monitor connect to.
Note: The Air Monitor only support 2.4G Wi-Fi network, it can NOT connect to 5G
Wi-Fi network.
3. Tap the Menu Icon, Tap the Device Center,

- 11 -
4. Tap the desired device, Tap on Config Wi-Fi AP setting.
5. The Acer account login page will appear. If you do not have an Acer account, please
register for one.

- 12 -
6. After completing registration, the Air Monitor Wireless settings page will appear.
7. You will see your local Wi-Fi AP name. After entering the password, the app will begin
connecting the device to internet through the Wi-Fi AP and login the device to your Acer
account.
8. The Air Monitor will connect to your local Wi-Fi AP, and then it will connect to Acer
Cloud through the Wi-Fi network to sign in to your Air Monitor.

- 13 -
9. When the app and device have successfully linked to your Acer account, a congratulatory
screen will appear and the device’s Wi-Fi indicator will turn green.

- 14 -
Using the application
Upon launching the app, you will be greeted with the main screen, which displays a list of Air
Monitor(s) connected to your app.
This screen gives you a quick glance into the indoor air quality index (IAQ) measurement as
well as the connection status to your Acer account via Wi-Fi and via Bluetooth of each Air
Monitor.
You may tap specific Air Monitors if you want to view more information or change their
settings. This will bring you to the screen of the specific Air Monitor you selected showing that
device’s real-time indoor air quality index (IAQ), and other readings such as PM2.5, PM10,
CO2eq, TVOC, humidity and temperature. The app will also show the ambient light level. The
screen will re-fresh every minute.
The connection status to the device and to your Acer account will also be shown. More air
quality information and suggestions will be listed on this screen as well.
Scroll down the screen to see historical data of the different measurements if the Air Monitor is
in Acer Cloud connection mode. For example on temperature data, it provides
Day/7Days/30Days views.
Note: if your Air Monitor doesn’t connect to Acer Cloud you will not see the historical data.

- 15 -
Menu icon ( )
The main screen is also where you can access the different settings and options by tapping on
the menu icon ( ). The following options will be available:
Under Acer Air Monitor:
• Device Center
• Product Introduction
• Settings
Under Acer ID:
• Login/Logout
• Map View
Under Service:
• Knowledge Center
• Help
• Contact us
• About this APP

- 16 -
Device Center
To access the Device Center, tap the menu icon, then tap Device Center to view a list of the all
connected Air Monitor(s).
You may tap a specific Air Monitor if you wish to view more information or modify settings.
This screen shows the following information:
Under...
Item
Description
Connection Status
Acer Air Monitor
Displays the MAC address and the
connection status
Rename
Sets a nickname for the device
Unbind
Unbinds (disassociates) this device from the
app and your Acer account. The product will
be removed from the device list.
The Wi-Fi settings and Bluetooth settings
will be cleared.
Config Wi-Fi AP
settings
Sets the Wi-Fi connection and binds this
device with the app and your Acer account
Device Settings
Manual Lighting
Manually set the intensity of the air quality
indicator to high, low or off
Sleep Mode
Sets the intensity of the air quality indicator
to automatically adjust to either the ambient
lighting, or to a preset sleep and wake-up
time
Bad Air Quality Alert
Sound
Sets an alarm that sounds when a specified
air quality level (e.g. unhealthy or very
unhealthy) is reached
Location
Sets the map location of the device
Device Software
Update
Update now
Checks for and updates the firmware of
the device
Note: Device firmware upgrade includes
Wi-F firmware upgrade and Bluetooth
firmware upgrade.
Please make sure the Air Monitor is

- 17 -
connected to both Wi-Fi and Bluetooth.
The air quality indicator will turn red
during the firmware update process.
When it is complete, you will hear a
beep. It will take about 2 minutes for
Wi-Fi firmware update through the Wi-
Fi connection. It will take 10 or more
minutes for firmware updates done with
the Bluetooth connection.
Product Introduction
To view the Product Introduction, tap the menu icon, and then tap on Product Introduction.
This will direct your phone’s or tablet’s browser to the product page of the Acer Air Monitor.
Settings
To access the Settings menu, tap the menu icon, and then tap Settings to adjust certain settings
of the app, such as the temperature display unit and push notifications.
Login/Logout Acer account
To log in or out, tap the menu icon, then tap Login Acer account to create or log in to your
Acer account in order to bind your Air Monitor to your account. If you are logged in, you can
also log out from this screen.
Map View
To access Map View, tap the menu icon, and then tap Map View to show the map locations of
the Air Monitor(s) bound to your account.
Note: You must set the location for each Air Monitor for it to appear in the Map View. For further
instructions please see Device Center section of the manual.

- 18 -
Knowledge Center
To view the Knowledge Center, tap the menu icon, and then tap Knowledge Center to access
the built-in database which will help you understand various air quality concepts and
measurements.
Help
For Help using Air Monitor, tap the menu icon, then tap Help to view helpful information
regarding the device. This useful question-and-answer section gives you quick answers and
solutions to the app and device usage.
Contact us
For Acer contact information, tap the menu icon, and then tap Contact us.
About this APP
For more detailed information regarding the APP, tap the menu icon, and then tap About this
APP.
Note:
• For IFTTT & Amazon Alexa features, please refer to the additional manuals. You can get
them from http://home.cloud.acer.com/airmonitor/spec/

- 19 -
Understanding the Air Quality indicator
The air quality indicator lights up to show the current air quality using specific defined colors
for each air quality level.
Refer to the table below for a quick description of these lights:
Color
Reading
Description
Green
0-50
Good
Yellow
51-100
Moderate
Orange
101-150
Unhealthy for sensitive groups
Red
151-200
Unhealthy
Purple
> 200
Very Unhealthy
Note: You can set the light intensity of the air quality indicator manually or automatically. See
Device Center section of the manual for more information.

- 20 -
Taking care of your device
The optical glass of the particulate matter sensor may require cleaning once every six months
for optimum performance.
To clean the optical glass:
2. Prepare a cotton swab.
2. Detach the front cover.
4. Use the cotton swab to clean the sensor.
4. Reattach the front cover.
Frequently Asked Questions (FAQs)
For frequently asked questions, please reference the app for found on your device for details.
This manual suits for next models
1
Table of contents
Other Acer Measuring Instrument manuals