Acertara AmpSafe User manual

AmpSafe™ User's Manual Page 1
Acertara AmpSafe™
Ultrasound Transducer Electrical Leakage Tester
User's Manual

AmpSafe™ User's Manual Page 2
Product Description
The AmpSafe™is a microprocessor-based ultrasound transducer electrical leakage test
device. The AmpSafe™ measures both the conductivity of the cleaning/test medium
and the leakage current of the ultrasound transducer. The AmpSafe™ provides the
following features:
•Bring Your Own Device (BYOD) operation: interact with the AmpSafe™by using
any device with a Web browser (PC, tablet, phone)
•Wi-Fi or USB connection to BYOD
•"Single mode" for single measurements of leakage current
•"Meter mode" for continuous measurement of leakage current
•Data save capability on device and/or on a Cloud endpoint
•Test report generation in HTML or PDF
•User-selectable test limits by transducer manufacturer and model
•2.5% or ± 2.5µA, whichever is greater, FS measurement accuracy
•Automatic internal self-test
•Digital calibration
•Battery life display (0% to 100%)
•Soak timer
WARNING
High voltages are generated when running AmpSafe™.Avoid electrical shock.
DO NOT touch the ultrasound transducer or any surface that is in contact with
AmpSafe™, including the liquid in the test basin, once you start a measurement.
DO NOT use AmpSafe™ in any patient occupied areas.
DO NOT connect any leads from patient to the AmpSafe™ or any transducer under test.
DO NOT operate the AmpSafe™ if water or other liquid has been spilled on the unit.
This can cause a shock hazard. Call Acertara Acoustic Laboratories (Acertara) at the
number listed in the Service and Technical Support section of this manual.
Caution
AmpSafe™ is designed to be serviced only by authorized service personnel. Contact
Acertara at the number listed in the Service and Technical Support section of this
manual for service.

AmpSafe™ User's Manual Page 3
User Responsibilities
Users are responsible for testing ultrasound transducers according to the transducer
manufacturer’s instructions and using manufacturer identified pass/fail criteria.
AmpSafe™ users are assumed to have a basic technical knowledge of ultrasonic systems,
transducers, and the fundamentals of electronics. Users are responsible for reading and
following all product labeling and product literature, and for heeding all warnings and
cautions described in the labeling and literature.
General Operating Overview
The AmpSafe™ is designed to test the electrical safety of all types of diagnostic
ultrasound transducers, independent of the ultrasound systems on which they are
typically used. Although the AmpSafe™ can test virtually any type of ultrasound
transducer, it is especially recommended in the testing of TEE (Transesophageal
Echocardiography) transducers prior to each use, as recommended by TEE ultrasound
manufacturers. The AmpSafe™ tests the integrity of the outer insulation barrier of the
transducer as well as the capacitive leakage currents that exist. Due to the proximity of
the TEE transducer to the human heart during normal operation in a patient procedure,
abnormally elevated electrical leakage currents can be hazardous to the patient and
could induce micro-shock, resulting in cardiac fibrillation and death. It is therefore vital
to routinely test TEE and other types of ultrasound transducers prior to their use on a
patient.
Test Set Up
Set up AmpSafe™ leakage tester, probe and adapter, and basin as shown in the figure
below. Ensure that the in-line conductivity probe is immersed in the conductive liquid
medium.
To ensure the insertion tube is soaked for an appropriate amount of time AmpSafe™ has
a timer function that allows the User to set the amount of soak time desired. When the
selected soak time is reached, AmpSafe™ will provide a visual indication and emit an
audible beep indicating to the User to begin the electrical leakage test.

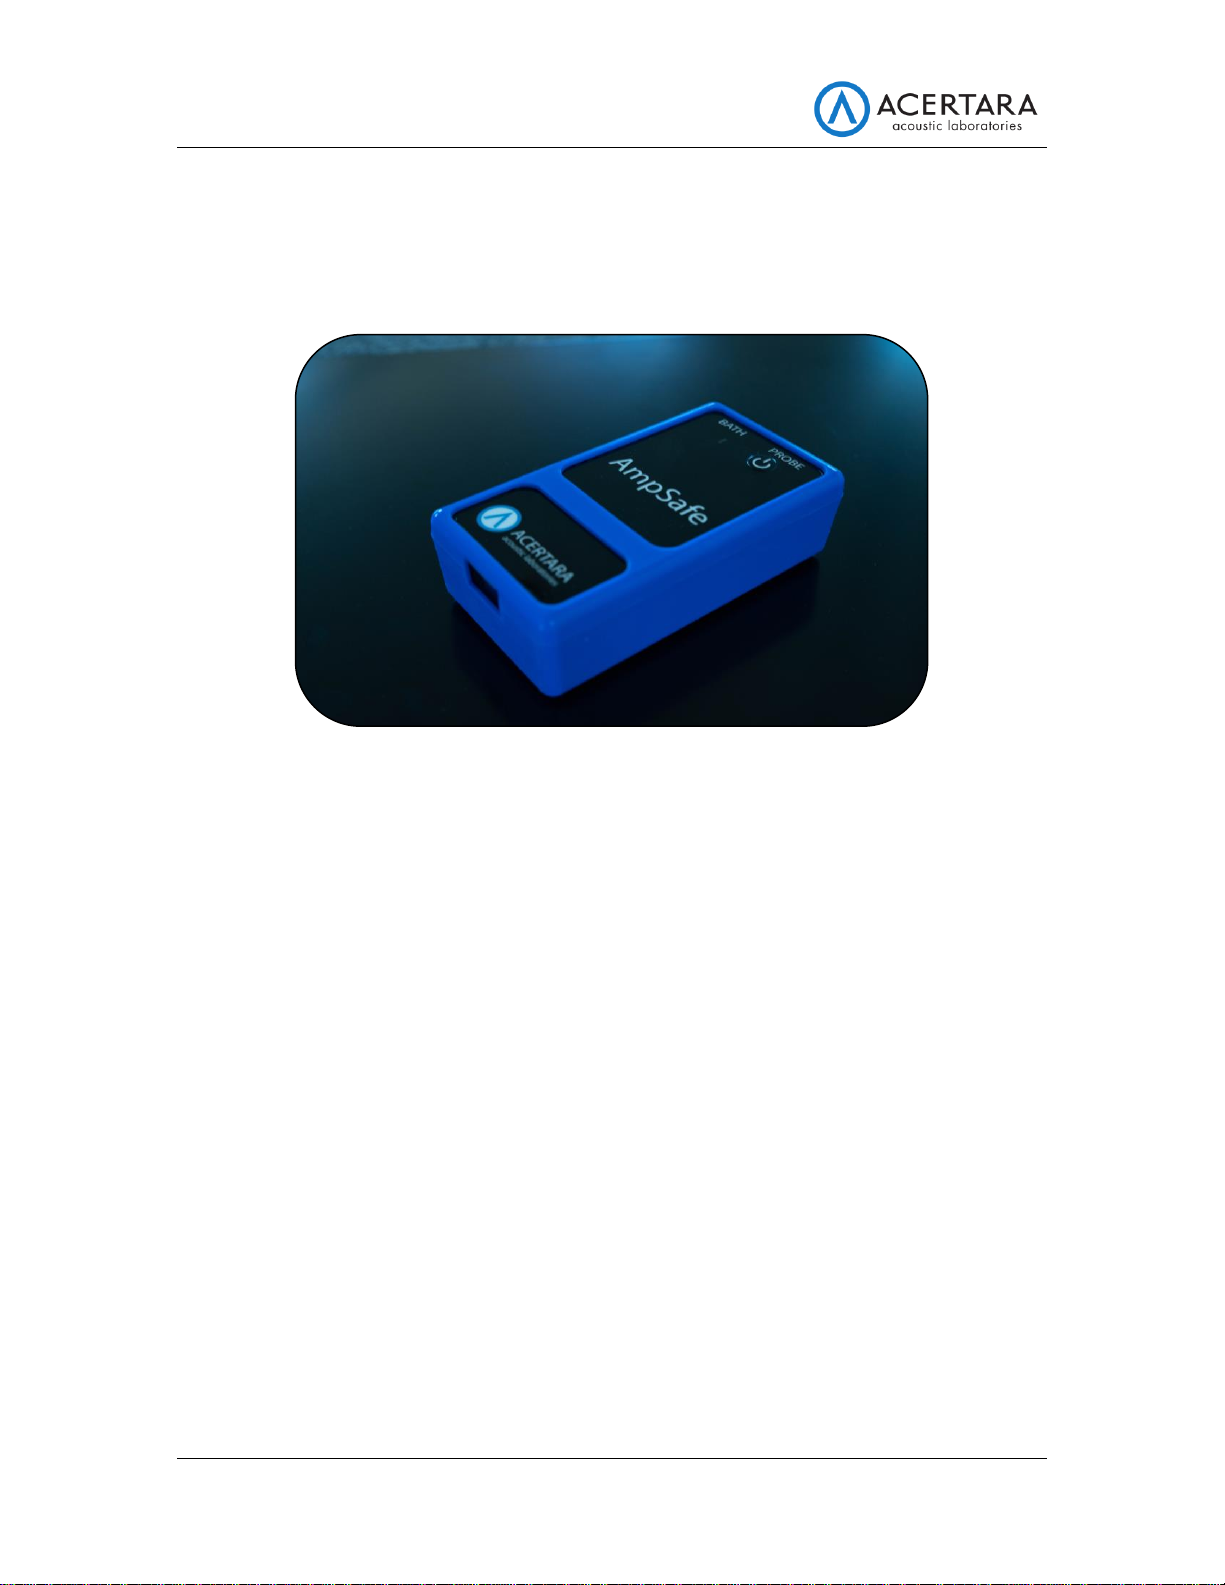
AmpSafe™ User's Manual Page 4
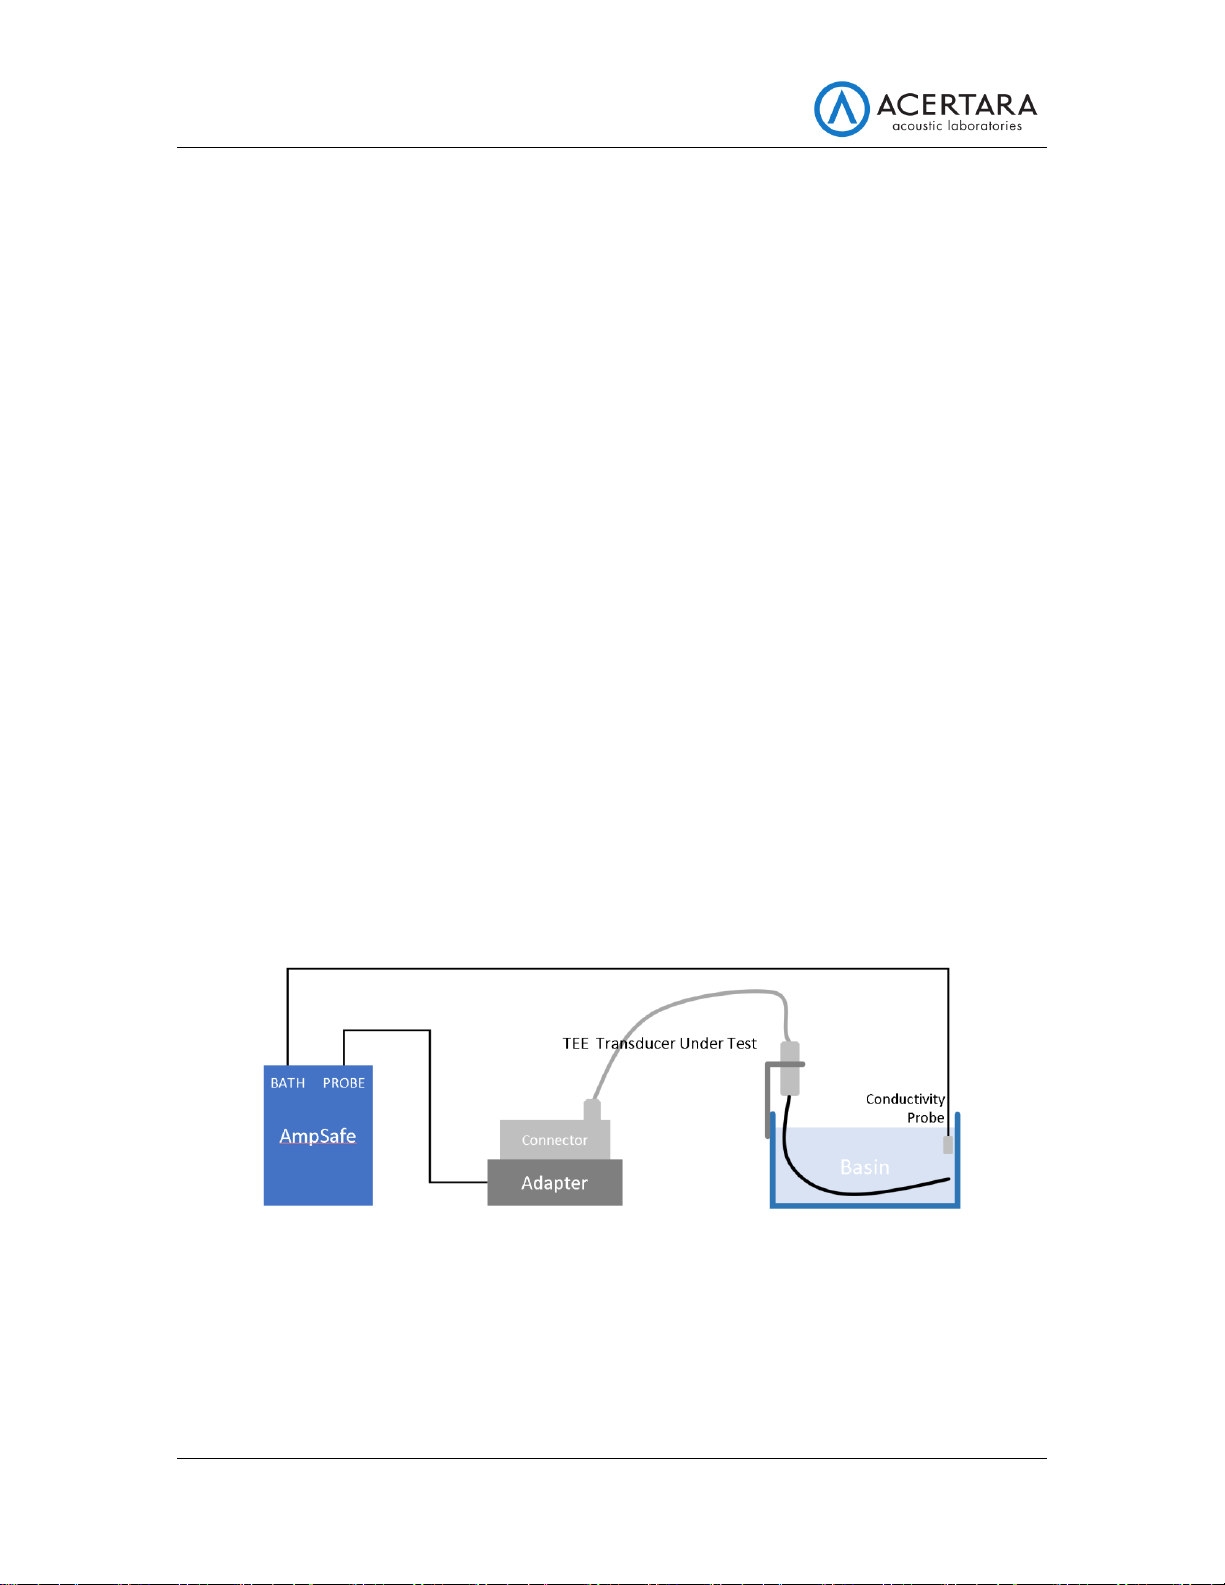
AmpSafe™ Set Up
The AmpSafe™ unit has a bi-color status LED that is solid red during startup. After a
successful startup and self-test the LED will indicate solid or blinking green. Startup can
take up to 60 seconds. After startup, the user can connect to the device using the Web
browser on a "Bring Your Own Device" (BYOD -- PC, tablet, phone). Acertara offers a
BYOD as an accessory if desired. There are two primary connection methods: 1) wired
and 2) wireless. For the wired connection, insert one end of a USB cable into the
AmpSafe™ unit (USB C connector) and the other end into the BYOD (commonly USB A).
After a few moments, the BYOD will recognize the AmpSafe™ device and the user can
open a Web browser to operate the unit. For the wired connection, enter
http://sn00000.ampsafe in the Web browser's address bar, where "00000" should be
replaced by the serial number of the unit which can be found on the unit's enclosure. If
this does not connect, enter the following numeric IP address: http://192.168.42.1.For
a wireless (Wi-Fi) connection, the user must configure Wi-Fi for client mode or hotspot
mode (see "Settings Page" below). In client wireless mode, enter
http://sn00000.ampsafe where "00000" should be replaced by the serial number of the
unit which can be found on the unit's enclosure. If this does not connect , using the
unit's numeric IP address in Wi-Fi client mode is usually not practical -- you can defer to
a wired USB connection in this scenario. In hotspot wireless mode, use the BYOD to
display available Wi-Fi networks and select the network named "AmpSafe-SN0000"
where "00000" should be replaced by the serial number of the unit which can be found
on the unit's enclosure. Once a wired or wireless connection is established and the URLs
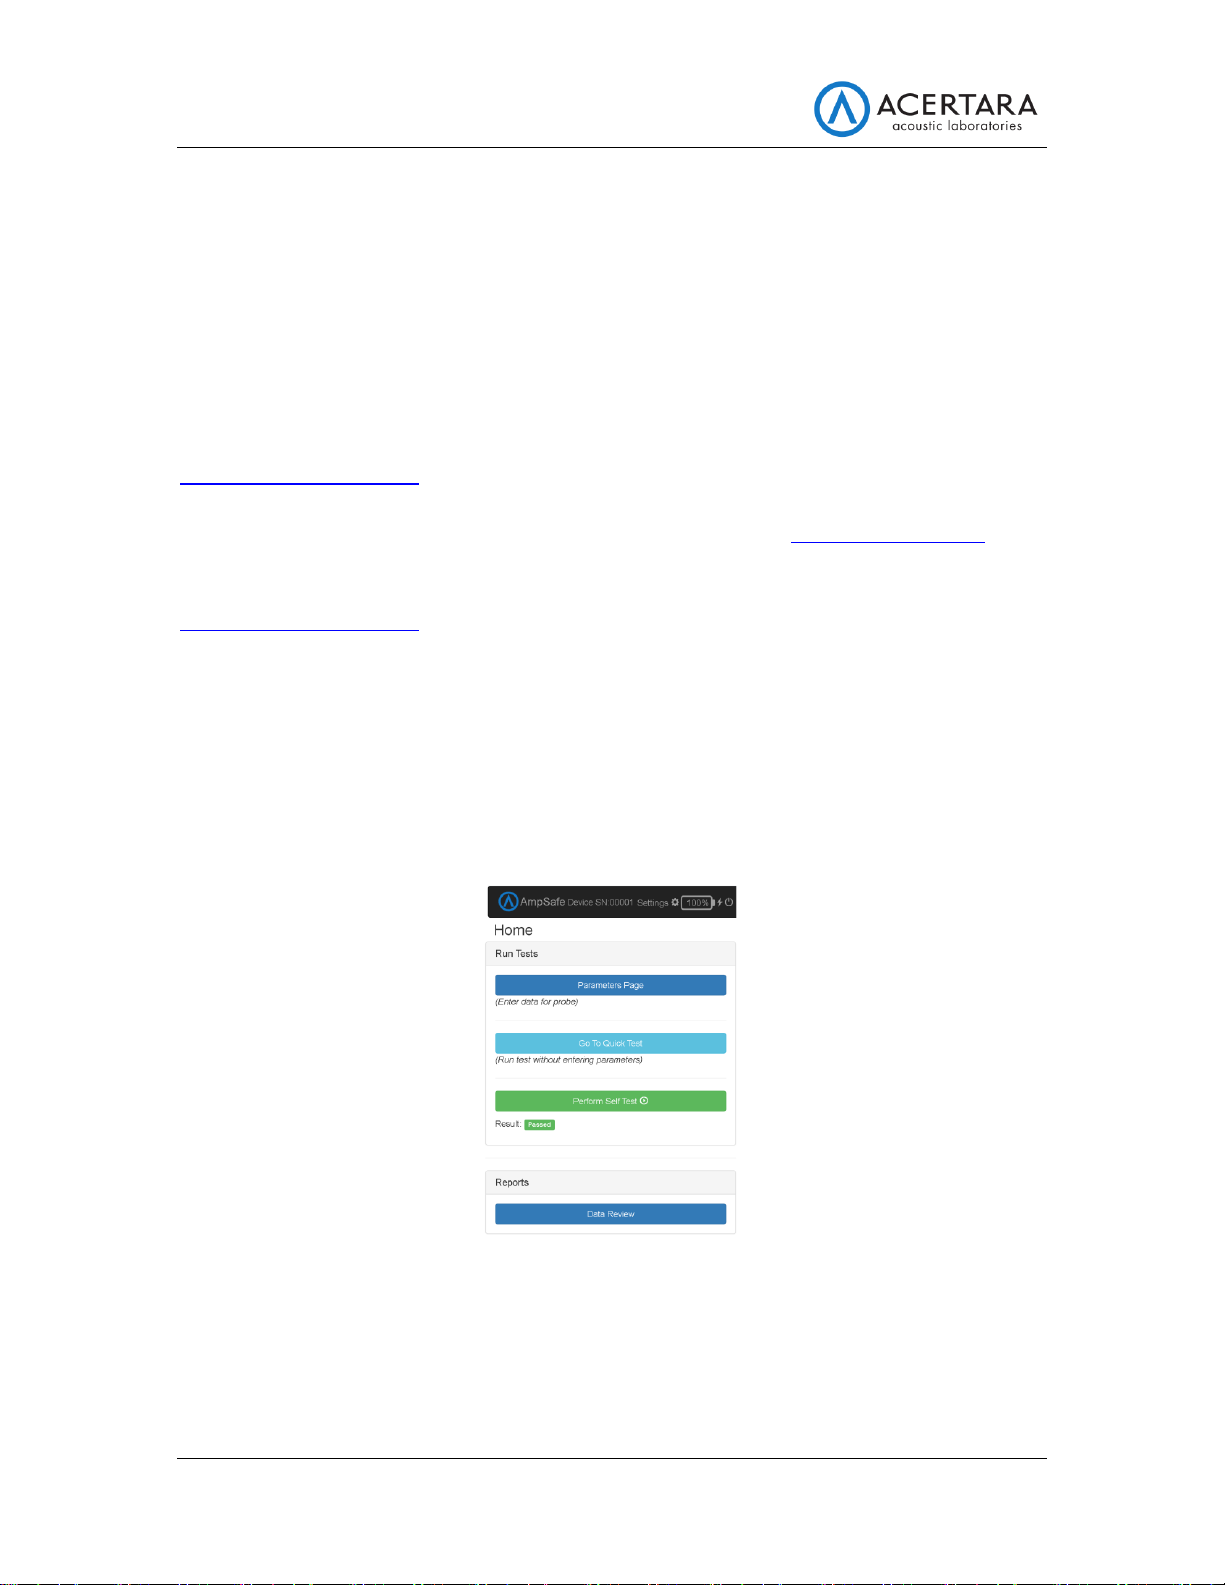
noted above are entered into the Web browser's address bar, the Home page will
appear:
The Home page (and every page) displays the device serial number, a link to the settings
for the device, the battery level, and a power on/off button as shown in the above
screenshot.

AmpSafe™ User's Manual Page 5
Power, Battery, and Charging
The battery is a rechargeable 2.3Ah Lithium-Ion. AmpSafe™ is charged via its USB port.
The fastest way to charge AmpSafe™ is with the unit powered on. Charging AmpSafe™
while the device is off limits the USB current to 100mA and the battery will take much
longer to charge. Also, unless the battery is fully discharged, the unit can be used and
measurements made while the device is charging. Whenever the battery is charging a
"lightning bolt" is displayed on the battery icon. Below a factory-defined battery level, a
warning will be displayed to the user. After an extended period of inactivity AmpSafe™
will automatically power down. The default auto power down inactivity period is set to
60 minutes but this can be adjusted.
Self Test
During power-up, the unit will perform a self-test and report the results as pass or fail.
The user can invoke a self-test by clicking the "Perform Self Test" button as shown in the
Home page screenshot above. Upon failure, it will indicate "failed". There are several
possible reasons that a self-test may fail, but a common cause is low battery.
Settings Page
The settings page allows the user to configure the following items: Wi-Fi, Email
notifications, and software update as discussed in this section.
Wi-Fi can be configured in two ways: 1) as a client that connects to an existing network,
and/or 2) as a hotspot that will appear in any list of available Wi-Fi networks shown on
the BYOD. Wi-Fi mode (1) (client) is useful when the user wants the AmpSafe™ device
to connect to their company's network. Wi-Fi mode (2) (hotspot) is useful when the
user wants to operate the device wirelessly but does not want the device to connect to
their company's network. The Wi-Fi settings are summarized in the screenshot below:

AmpSafe™ User's Manual Page 6
The information entered for Wi-Fi settings is as follows:
•For client mode: specify the SSID of the network to which you wish to connect
and the password for that network.
•For hotspot mode: specify the SSID that you would like to assign to AmpSafe™--
this SSID will be broadcast to the BYOD for connection. Also specify a password
that must be entered on the BYOD.
USB settings are currently fixed and not necessary but they appear for future expansion.
Email notifications can be sent for failing leakage tests by selecting the checkbox and
entering one or more recipient email addresses:
Finally on the Settings page, a software update can be applied. Software updates
require an update image file to be sent from Acertara to the user via email or user
download. Once this file is obtained and copied to the BYOD, choose the update file by
clicking "Choose File" and then click "Update" to begin the update:

AmpSafe™ User's Manual Page 7
Performing Leakage Tests
WARNING High voltages are generated when running AmpSafe™. Avoid electrical
shock. DO NOT touch the ultrasound transducer or any surface that is in contact with
AmpSafe™, including the liquid in the test basin, once you start a measurement
To conduct leakage tests, the user has two options from the Home page: 1) Full Test, or
2) Quick Test as discussed next.
Full Test
A Full Test gathers information about the test conditions before conducting the leakage
current measurement. Data from a Full Test can be digitally stored and retrieved. To
begin a Full Test, click "Parameters Page" from the Home page which will allow you to
enter test conditions as shown below:
Make, Model, and Serial Number are required to properly identify the measurement
data as it is saved. After entering the test conditions, click "Next: Measurement" to
show the Measurement page which will conduct the actual leakage current
measurements (discussed in "Measurements Page" below).
Quick Test
A Quick Test does not require information about the test conditions before conducting
the leakage current measurement. Data from a Quick Test cannot be digitally stored
and retrieved. To begin a Quick Test, click "Go To Quick Test" from the Home page to

AmpSafe™ User's Manual Page 8
show the Measurement page which will conduct the actual leakage current
measurements (discussed in "Measurements Page" next).
Measurement Page
The Measurement page is shown below. The main features are annotated in the
diagram as: 1) Leakage Test command and results, 2) Drive Signal configuration, and 3)
Countdown Timer.
Verify the desired drive signal by selecting the voltage and frequency under "Drive
Signal". The user can run a test by clicking "Run" -- the leakage test will be performed
and the result will be displayed under the "Result" heading. Additionally, the actual
measured current and the pass/fail threshold will be displayed below the pass/fail
result. Single measurements cannot be stopped mid-stream. If the measurement
produces very low current (below 3µA) for two or more measurements, the software
allows you to ignore further warnings. Warnings are ignored until the Measurement
page is closed, the unit goes to sleep, if there is a measurement error, any measurement
parameter is changed, or a good measurement is made (above 3µA).When the
Measurement page is entered via Full Test, the "Save" button is available which will save
the test data to the device and it can be reviewed from the Data Review page (see
section "Data Review Page" below) . Additionally, AmpSafe™ offers "Meter Mode"
which is enabled by checking the box labeled "Meter mode". Meter Mode will run a
continuous leakage current measurement and the measured result is displayed live.
Meter Mode is executed in the following segments to help preserve battery life: 1)

AmpSafe™ User's Manual Page 9
30sec, 2) 60sec, 3) 120sec, etc. Beyond segment three (3), each subsequent segment is
120sec. Finally, the Measurement page provides a countdown timer which can be used
for arbitrary countdowns or it can be configured to launch a leakage test after the
countdown expires.
Data Review Page
The Data Review page is accessible from the Home page by clicking the "Data Review"
button. The Data Review page is shown below:
Summary information and results are displayed in the list of measurements to allow for
quick visual comparison between tests. Click any entry in the data file list to view an
HTML report for that measurement. From the Web browser, select "Print to PDF" or
"Save as PDF" to generate a PDF version of the report. An example report is shown
below:

AmpSafe™ User's Manual Page 10
Maintenance and Calibration
Clean the outside of the AmpSafe™ system and the adapters with a damp cloth as
needed to remove dust and dirt. Do not open the AmpSafe™ case. AmpSafe™ requires
calibration and Acertara recommends annual calibration. Call Acertara at (303) 834-
8413 to arrange for calibration.
Software Security
AmpSafe™ is an internet-enabled medical test and measurement device. With Internet
connectivity comes added concerns about the security of the device and the network it
is connected to. AmpSafe™ provides the following features and security mitigations:
•Hosted Wi-Fi AP Mode (hotspot mode)
oAmpSafe™ can “host” a Wi-Fi network for the purposes of both
configuration and normal use.
oThis network is secured via WPA2 wireless encryption. It can also be
disabled entirely.
•Client Wi-Fi Mode (client mode)
oAmpSafe™ can connect to a pre-existing wireless network for normal
operation
oWhile the owner of that network is responsible for its security settings,
AmpSafe™ is compatible with several varieties of wireless encryption to
ensure that modern network configurations can be used.
oClient mode can also be disabled entirely.
•USB Mode
oA computer can be connected to AmpSafe™ via a USB-C cable.
oCommunication with AmpSafe™ uses standard wired internet protocols
over USB.
•Cloud Connectivity
oAmpSafe™ uses the internet to communicate with Acertara's servers to
provide modern Cloud integrations (e.g. automatic emails, software
updates). All of these communications utilize transport-layer security
(TLS) and user data remains protected at every step of the transaction.

AmpSafe™ User's Manual Page 11
Troubleshooting
Symptoms
Possible Causes
Unit does not power-on
Ensure the battery is charged above the critical level of 5%.
Unit powers down by itself
If the unit is unused for an extended period of time (one
hour by default), it will automatically power off; refer to the
section "Auto Power Down" for more information.
Additionally, the unit will automatically power-down when
the battery is below 5%; ensure adequate battery charge.
Cannot perform a test
The unit will disallow measurements when the battery
drops too low; ensure adequate battery charge.
Cannot save test data
Ensure that the Quick Test mode is not active and ensure
that a Manufacturer, Probe Model, and Probe Serial
Number have been selected before proceeding with a
measurement.
Very low current measured during a test
Ensure the "Probe" connector is properly seated and
connected at the AmpSafe™ unit and at the probe under
test.
Bath fault encountered during a test
Ensure the "Bath" connector is properly seated and
connected at the AmpSafe™ unit and in the test bath.
AmpSafe™Specifications
SPECIFICATIONS
EXCITATION VOLTAGE
120VAC or 240VAC
EXCITATION FREQUENCY
50Hz or 60Hz
LEAKAGE CURRENT
≤250µA, 2.5µA or 2.5%
CONDUCTIVITY CURRENT
500 µA
DISPLAY
Bring Your Own Device
SETUP MEMORY
Micro SD, All Parameters
MEMORY RETENTION
5 Years w/o Power
OPERATING RANGE Temp
10 to 30 Degrees C
STORAGE RANGE Temp
-20 to 35 Degrees C
CONSTRUCTION
ABS Plastic
SIZE
158 x 83 x 47 mm
(L x W x D)
WEIGHT
0.32 kg
POWER
LINE: 5V USB
BATTERY: Rechargeable Li Ion
POWER CONSUMPTION
ON: less than 300mA
OFF: less than 60 µA
BATTERY LIFE/Charge
≥ 100 tests

AmpSafe™ User's Manual Page 12
Service and Technical Support
you may have about your AmpSafe™ system. Accessories may also be ordered by calling
Limited Warranty
Acertara warrants its new products to be free from defects in materials and
workmanship under the service for which they are intended. This warranty is effective
for twelve months from the date of shipment.
Exclusions: This warranty is in lieu of any other warranty expressed or implied,
including, but not limited to any implied warranty of merchantability or fitness for a
particular purpose.
Acertara is not liable for any incidental or consequential damages.
No person other than a corporate officer of Acertara is authorized to give any other
warranty or assume any liability and must be in writing.
Remedies: The purchaser’s sole and exclusive remedy shall be as follows: 1) the repair
or replacement of defective parts or products without charge, 2) at the option of
Acertara, the refund of the purchase price.
Table of contents
Popular Test Equipment manuals by other brands

Apera Instruments
Apera Instruments Salt20 instruction manual

Associated Research
Associated Research HypotULTRA 7800 quick start guide

Agilent Technologies
Agilent Technologies Infiniium User's quick start guide

Baker Hughes
Baker Hughes Druck DPI 610E-PC quick start

DeLaval
DeLaval Activity Meter 2 Quick manual

GDD Instrumentation
GDD Instrumentation TDLV instruction manual