ACR S&V Radical R-C10MB2 User manual


KOMPATIBILITÄTSLISTE
BITTE BEACHTEN:
- Der Einbau des Radical-Geräts sollte von einem autorisierten Fachhändler durchgeführt werden.
Zur Montage werden spezifische Kenntnisse und Werkzeuge benötigt. Unsachgemässer Einbau
kann zu Schäden am Fahrzeug und am Radical-Geräts führen.
HINWEIS:
- Geeignet für die Nachrüstung des Basis MB Radio Modells „Audio 20 CD“ und der
Werksnavigation „NTG2.5“. Diese beiden OE Systeme können ohne weiteres Zubehör montiert
und betrieben werden.
- In Abhängigkeit zur vorhandenen Werksausstattung, z.B. einem Harman Kardon Soundsystem
oder auch einem im Fahrzeug vorhandenen Audio Gateway („AGW“) werden zusätzliche
Komponenten benötigt um das R-C10MB2 zu betreiben. Beachten Sie bitte den Artikel R-MB-
MOST bzw. das separat verlinkte PDF „MOST Interface für R-C10MB2“.
LIEFERUMFANG:
Nr.
Artikel
Menge
1
Radical-Gerät
1
2
GPS-Antenne
1
3
WIFI-Antenne
1
4
Externe BT MIC und Kabel 3m
1
5
USB-Kabel 4P to 4P,USB-B
Weiblich, Lila
1
6
USB-Kabel 4P to 6P,USB-B
Weiblich, Grün
1
7
AUX+RCA Kabel 10PIN
1
8
SUBWOOFER Kabel
1
9
Sicherung 15A250V
1
10
Montagewerkzeug
Kunstoffgriff
1
11
Hauptanschlusskabel für
Mercedes-Benz
1
12
CAN-BUS für MB W211
1
13
ISO-DIN Antennenadapter
1
14
FM Antennenadapter Single
FAKRA
1
15
Doppelseitiges Klebepad
1
16 Kurzanleitung 1
MARKE
MODELL
TYP
MODELLYAHR
Mercedes-Benz
E-Klasse Limousine
W211
2003 > 2009
Mercedes-Benz
E-Klasse Kombi T-Model
W211
2004 > 2009
Mercedes-Benz
E-Klasse CLS
C219
2005 > 2006

EINBAUBEISPIEL MB W211
DEMONTAGE UND VORBEREITUNG:
1. Entfernen Sie das Gehäuse um die
Gangschaltung. Greifen Sie dazu unter das
Gehäuse am oberen Ende und ziehen Sie
das angebrachte Gehäuse vorsichtig nach
oben
2. Lösen Sie dann den Aschenbecher, der
ebenfalls nur eingesetzt wird, indem Sie ihn
vorsichtig nach hinten und oben drücken.
3. Lösen Sie die beiden rot markierten
Schrauben mit Ihrem Torx-
Schraubendreher. Ziehen Sie anschließend
die nicht mehr angebrachte
Klimatisierungsvorrichtung aus der Welle.
Bitte achten Sie darauf, das Kabel der
Klimaanlage nicht zu beschädigen.
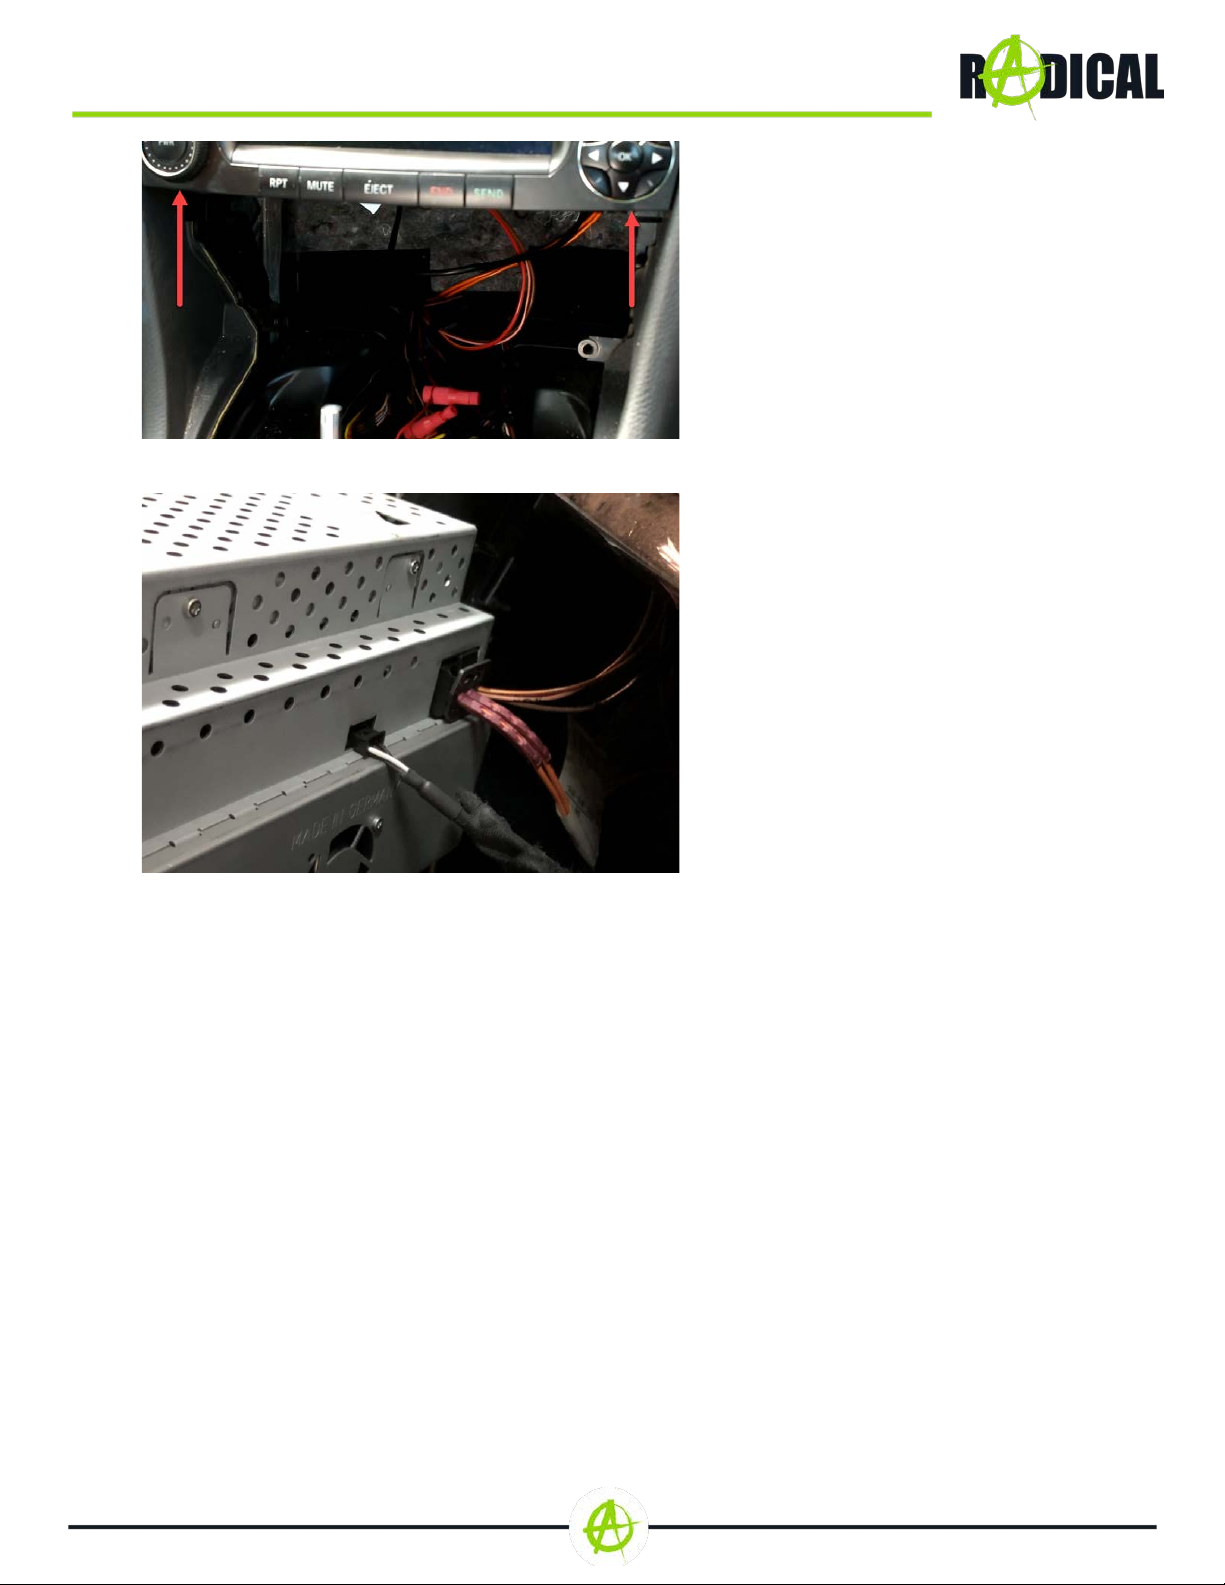
4. Lösen Sie die beiden Schrauben unter
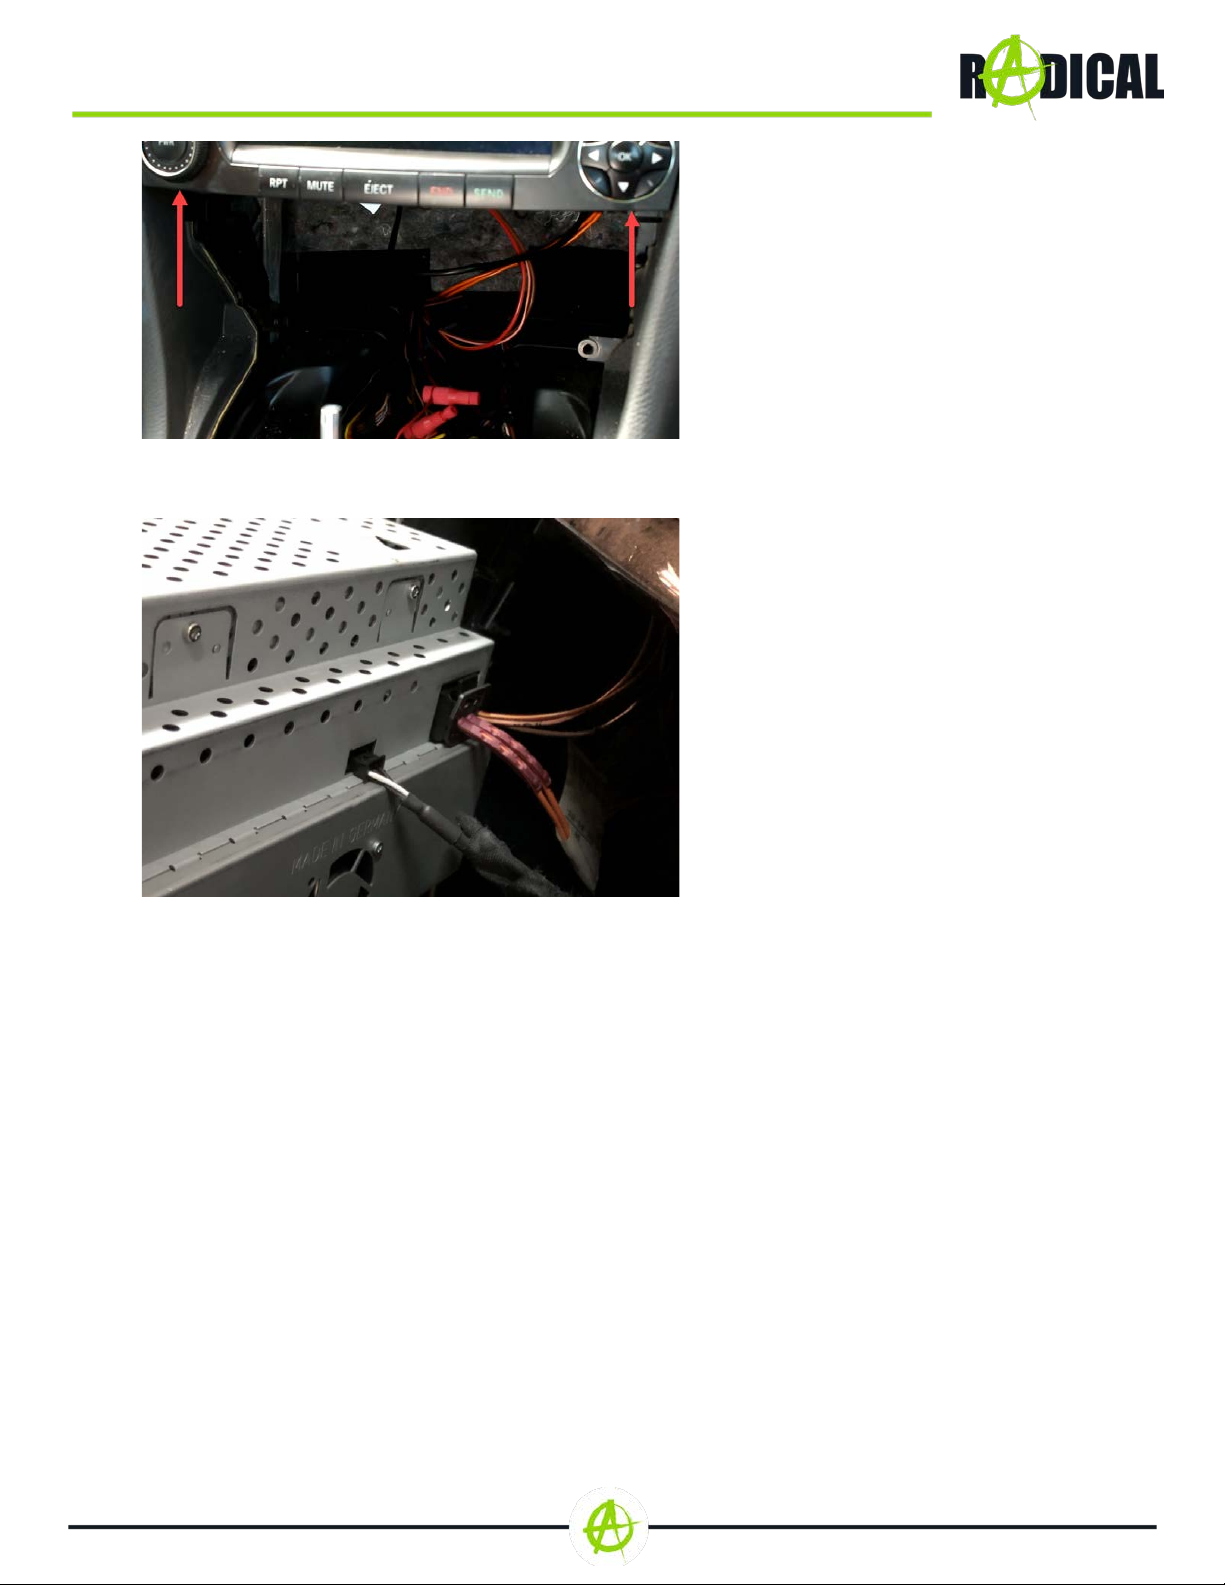
dem Gerät, die durch rote Pfeile
gekennzeichnet sind.
5. Sobald die Schrauben vollständig gelöst
sind, ziehen Sie das Originalradio aus dem
Steckplatz. Bitte stellen Sie sicher, dass
keine Kabel dahinter beschädigt werden.
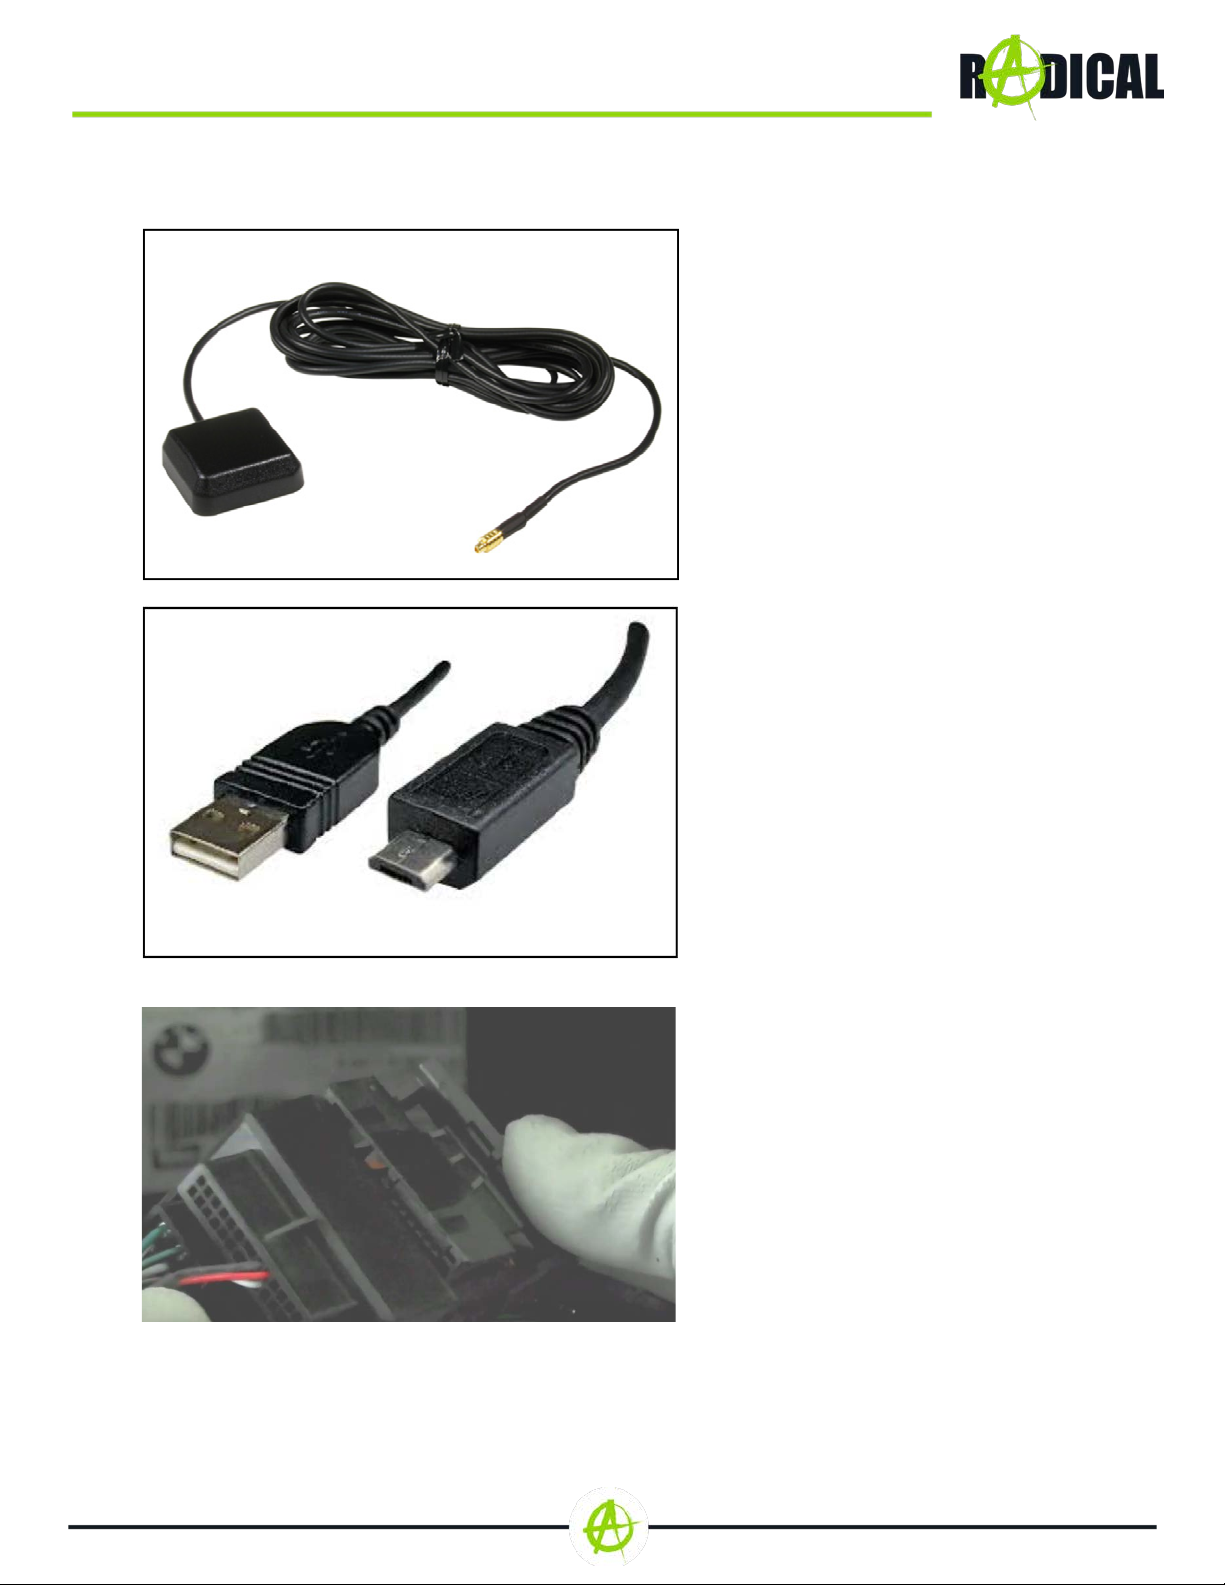
INSTALLATION
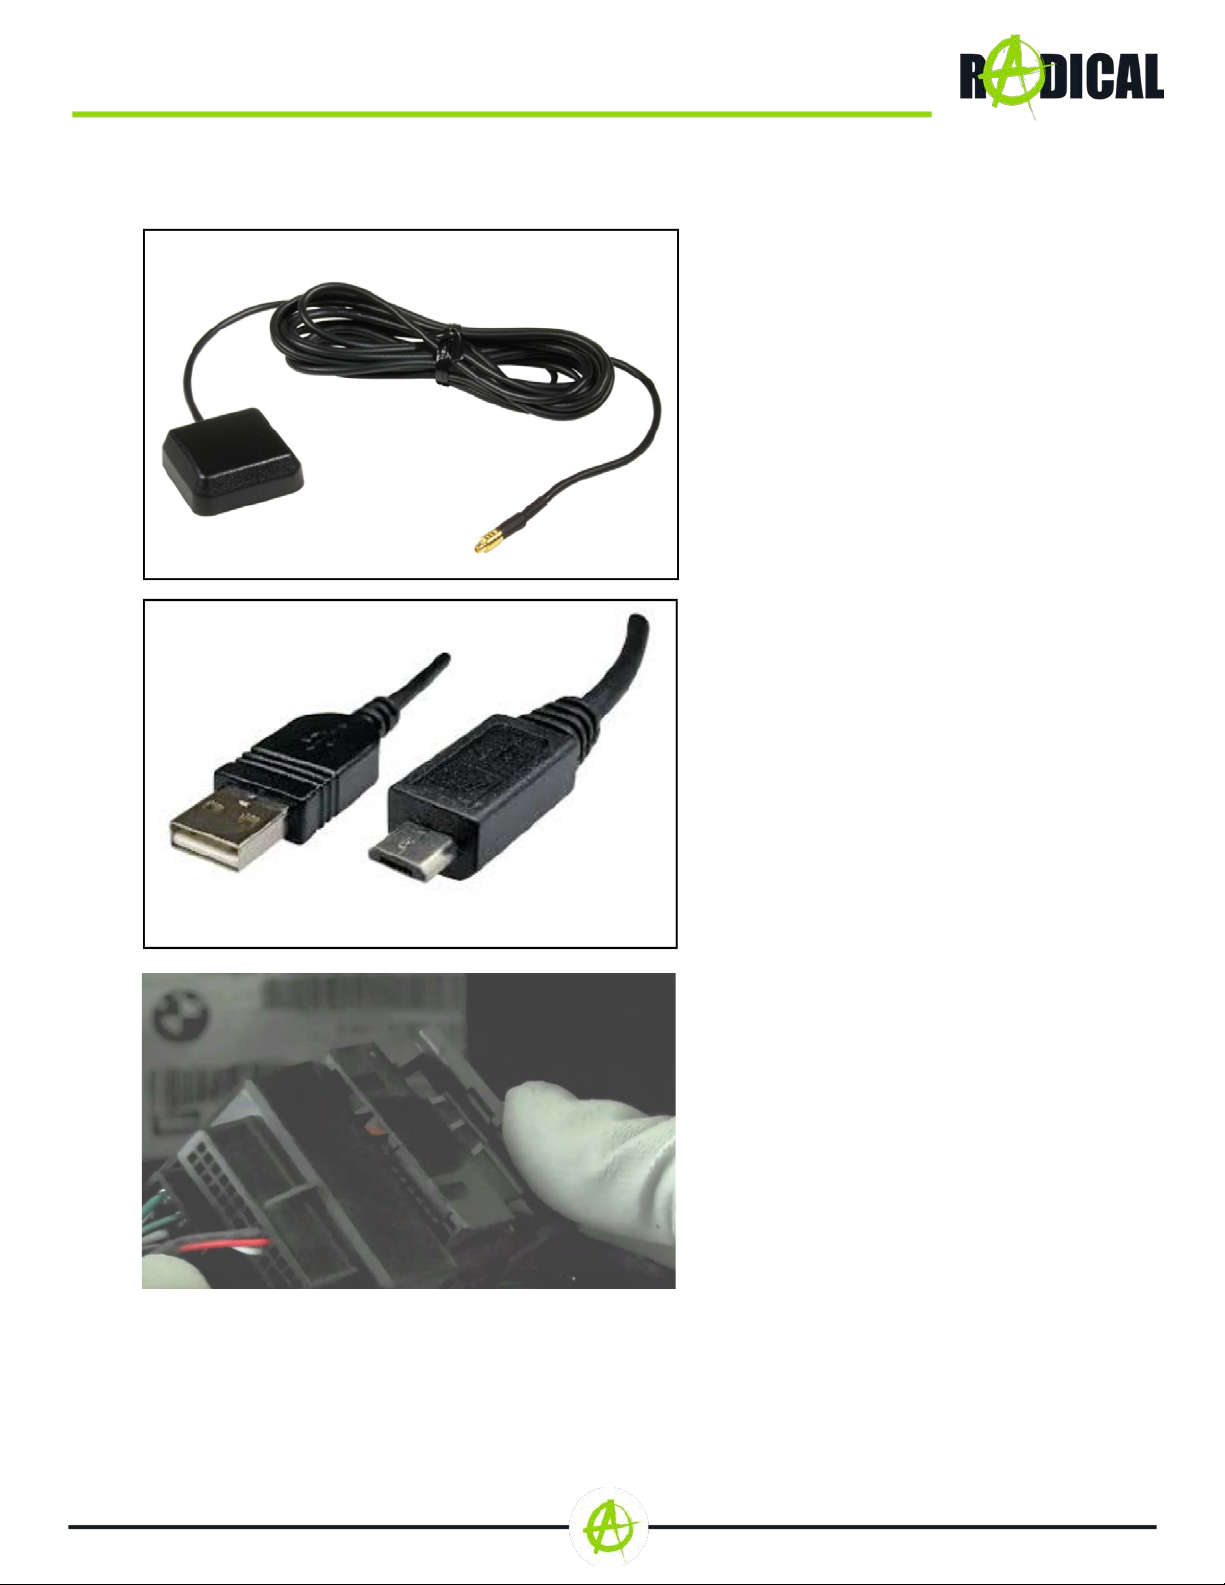
6. Montieren Sie die GPS-Antenne (Nr.
2) an einer geeigneten Stelle und achten
Sie darauf, dass der GPS-Empfang nicht
durch die Abschattung von metallischen
Fahrzeugteilen negativ beeinflusst wird
(Wärmeschutzverglasung etc.). Verlegen
Sie das Anschlusskabel anschließend in
den Radioschacht.
7. Verlegen Sie die USB-
Verlängerungskabel (Nr. 5, 6) vom
Radioschacht an die von Ihnen
gewünschte Stelle.
8. Verbinden Sie das jeweilige
Hauptanschlusskabel (Nr. 11) des Radical-
Geräts (Nr. 1) mit dem Stecker des
Fahrzeugs und schließen Sie den
Verriegelungsmechanismus des Steckers.
Verbinden Sie anschließend das CAN-BUS
Interface (Nr. 12)mit dem
Hauptanschlusskabel. Verbinden Sie alle
zuvor in den Radioschacht verlegten Kabel
und die originalen Antennenkabel mit dem
Radical-Gerät (Nr. 1).

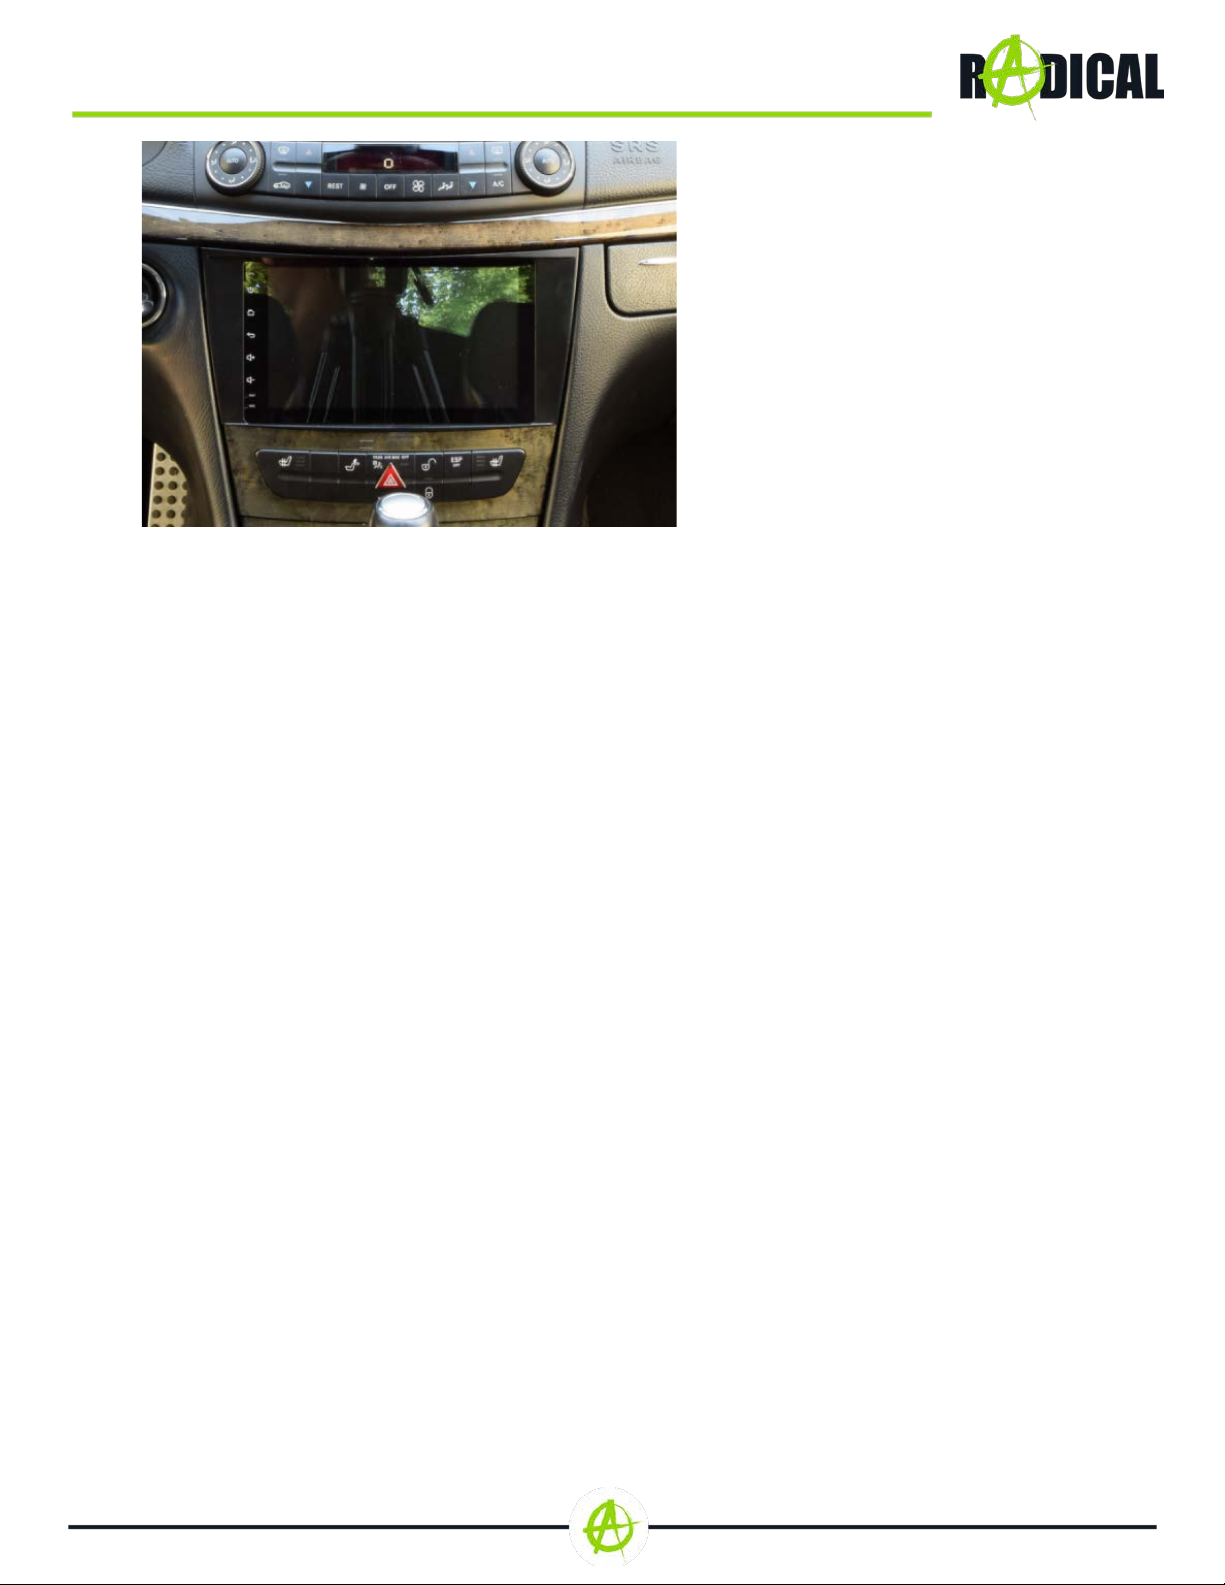
9. Schieben Sie zum Abschluss das
RADICAL Gerät in den Radioschacht und
befestigen Sie, in umgekehrter
Reihenfolge, wieder alle Schrauben und
Verschalungen.
Der Einbau des R-C10MB2 ist hiermit
beendet.

ANSCHLUSSSCHEMA:
COMPATIBILITYLIST
PLEASE NOTE:
- The installation of the Radical device should be carried out by an authorized installer. Specific
knowledge and tools are required to do the installation. Incorrect installation can cause damage to
the vehicle and the Radical device.
CAUTION:
- Suitable for the replacement of the MB basic equipment radio “Audio 20 CD” and the OE sat nav
model “NTG2.5”. These two OE systems can be replaced with the R-C10MB2 device without any
other additional accessory / interface components.
- Depending on the factory fitted optional components such as OE sound system by Harman
Kardon or presence of an Audio Gateway ("AGW") in the vehicle, additional components become
mandatory to operate a R-C10MB2. Also see the R-MB-MOST item described in the separate
PDF "MOST interface for R-C10MB2".
THE KIT INCLUDES:
Nr.
Artikel
Menge
1
Radical device
1
2
GPS antenna
1
3
WIFI Antenna
1
4
External BT MIC and Cable
3m
1
5
USB Cable 4P to 4P,USB-B
Female, Purple
1
6
USB Cable 4P to 6P,USB-B
Female, Green
1
7
AUX+RCA Cable 10PIN
1
8
SUBWOOFER Cable
1
9
Fuse 15A250V
1
10
Installation Tool Plastic
Handle
1
11
Power Cables for MB
1
12
CAN BUS for MB W211
1
13
ISO-DIN antenna adapter
1
14
FM antenna adapter single
FAKRA
1
15
3M double Sticker
1
16
Quick start guide
1
BRAND
MODEL
TYPE
MODEL YEAR
Mercedes-Benz
E-Klasse Limousine
W211
2003 > 2009
Mercedes-Benz
E-Klasse Kombi T-Model
W211
2004 > 2009
Mercedes-Benz
E-Klasse CLS
C219
2005 > 2006
EXAMPLE OF INSTALLATION MB W211
REMOVAL WORK AND PREPARATION:
1. Loosen the casing around the gear shift.
To do this, reach under the casing at the
upper end and carefully pull the attached
casing upwards.
2. Then loosen the ashtray, which is also
only inserted, by gently pushing it back and
up.
3. Loosen the two red marked screws with
your Torx screwdriver. After this is done,
pull the climate control device, which is no
longer attached, out of the shaft. Please
take care not to damage the cable of the air
conditioner.
4. Loosen the two screws located under
the device, marked by red arrows.
5. As soon as the screws are completely
loosened, pull the original radio out of the
slot. Please make sure not to damage any
cables behind them.
INSTALLATION
6. Mount the GPS antenna (No. 2) at a
suitable location and make sure that the
GPS reception is not adversely affected by
the shading of metallic vehicle parts
(thermal insulation glazing, etc.). Then lay
the connection cable in the radio slot.
7. Route the USB extension cables
(No. 5, 6) from the radio slot to the location
of your choice.
8. Connect the respective main
connection cable (No. 11) of the Radical
device (No. 1) to the plug of the vehicle and
close the locking mechanism of the plug.
Then connect the CAN-BUS interface (No.
12) with the main connection cable. Connect
all the cables previously laid in the radio slot
and the original antenna cables to the
Radical device (No. 1).
9. Finally, slide the RADICAL device into
the radio slot and fasten all screws and
casing again in reverse order.
The installation of the R-C10MB2 is hereby
completed.

Table of contents
Languages:
Popular Automobile Accessories manuals by other brands

Metra Electronics
Metra Electronics 99-8201 installation instructions

Axxess
Axxess AXDSPL-GM30 installation instructions

TAUBENREUTHER
TAUBENREUTHER 16 - 590 FITTING INSTRUCTION

Yakima
Yakima K1009 instructions

Verus Engineering
Verus Engineering A0158A installation manual

Car-Interface
Car-Interface CI-RL3-MIB-TT-LA manual

Westfalia
Westfalia SIARR 8845 Installation and operating manual

TEXA
TEXA TMD MK5 manual

Safe-T-Pull
Safe-T-Pull Pro User Assembly & Install Guide

Safe Fleet
Safe Fleet PRIME DESIGN HRI3-E-FT43B Assembly instructions

Maxxhaul
Maxxhaul 70468 Instruction manual & parts list

DV8 OFFROAD
DV8 OFFROAD D-JP-180014-STR4 installation manual


