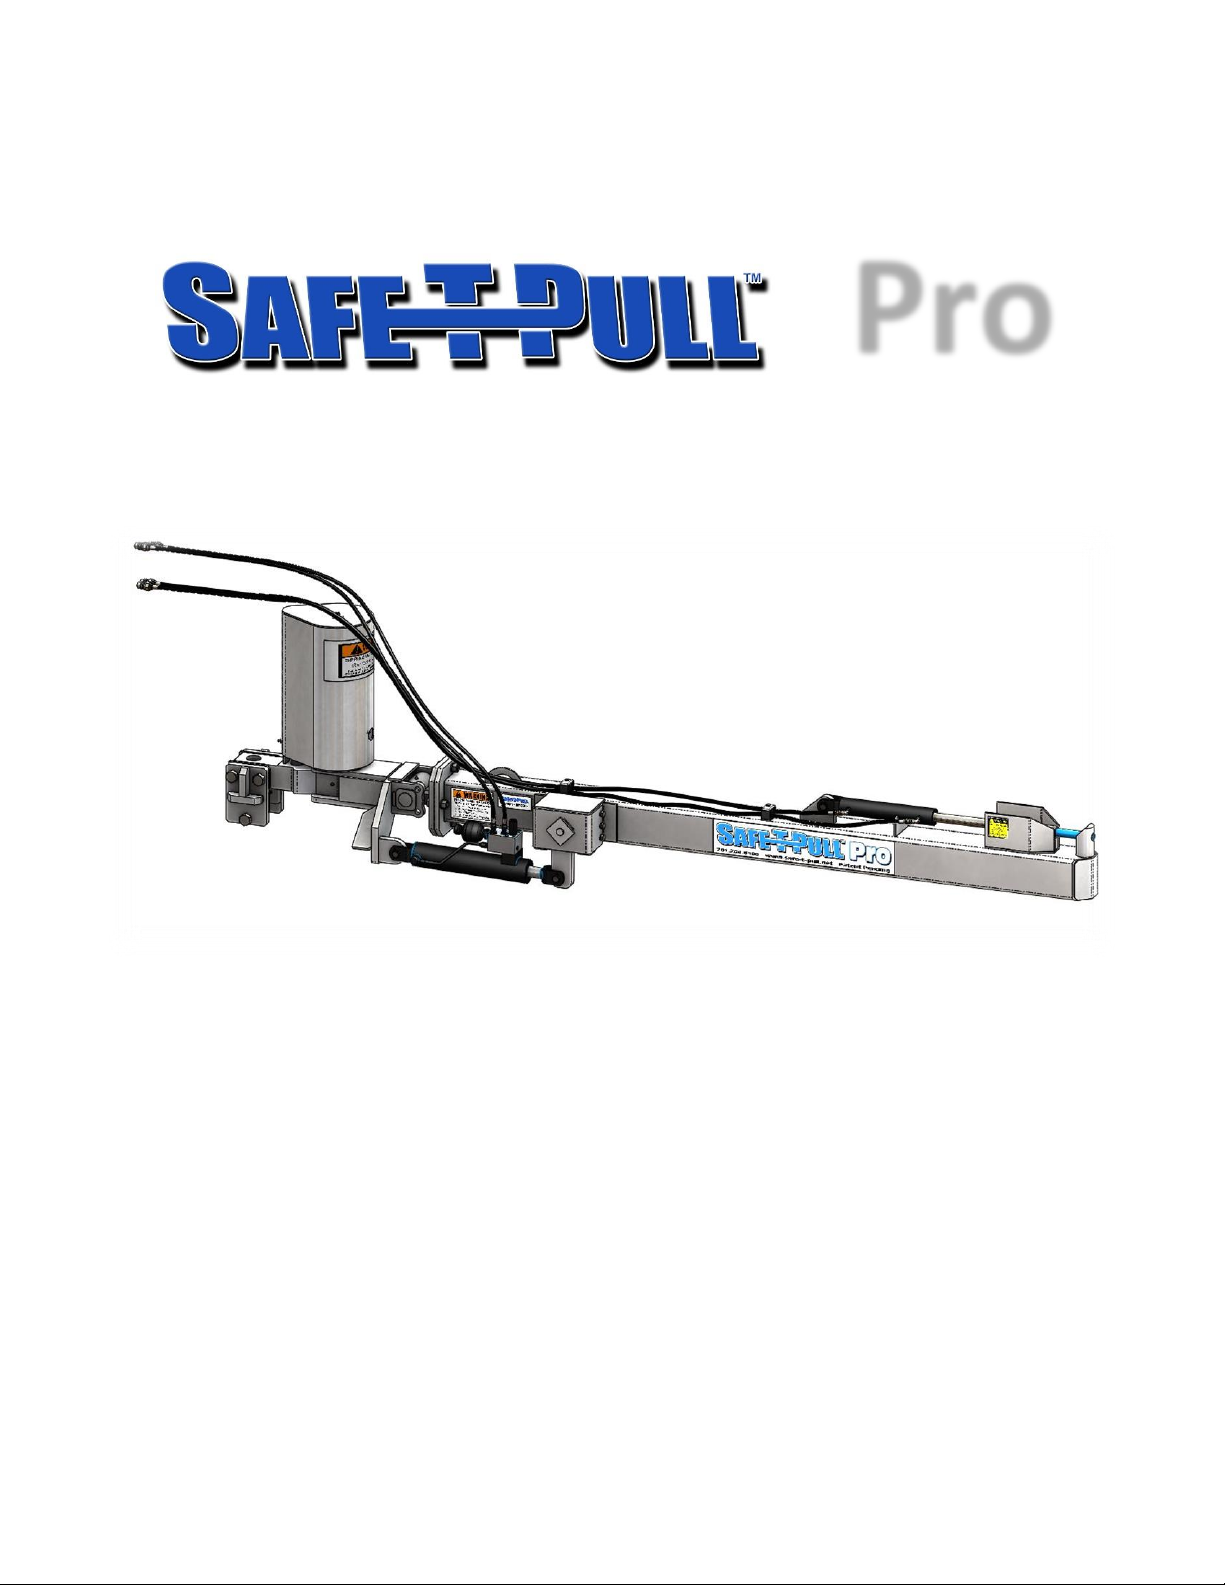
manuals.online logo
Brands
  1. Home
  2. •
  3. Brands
  4. •
  5. Safe-T-Pull
  6. •
  7. Automobile Accessories
  8. •
  9. Safe-T-Pull Pro User manual

Safe-T-Pull Pro User manual

Popular Automobile Accessories manuals by other brands

Magneti Marelli AC161 Installation instruction

Magneti Marelli

Magneti Marelli AC161 Installation instruction

FDI uEZ GUI Start here

FDI

FDI uEZ GUI Start here

JCROffroad JT Install instructions

JCROffroad

JCROffroad JT Install instructions

Rostra VOXXElectronics 250-1930 owner's guide

Rostra

Rostra VOXXElectronics 250-1930 owner's guide

TOP VEHICLE TECH GR3FORD5 installation manual

TOP VEHICLE TECH

TOP VEHICLE TECH GR3FORD5 installation manual

Safe Fleet PRIME DESIGN AR-2000-BLK manual

Safe Fleet

Safe Fleet PRIME DESIGN AR-2000-BLK manual

Skoda Fabia Combi 5J Fitting instructions

Skoda

Skoda Fabia Combi 5J Fitting instructions

Camcar 40077 Al Mounting instructions

Camcar

Camcar 40077 Al Mounting instructions

Camcar 40089 AL Mounting instructions

Camcar

Camcar 40089 AL Mounting instructions

Impac Tradesman 2000 installation manual

Impac

Impac Tradesman 2000 installation manual

DVB OFFROAD BRSB-01 installation manual

DVB

DVB OFFROAD BRSB-01 installation manual

Safari Snorkel SS385HF installation guide

Safari Snorkel

Safari Snorkel SS385HF installation guide

ULTIMATE SPEED 279746 Assembly and Safety Advice

ULTIMATE SPEED

ULTIMATE SPEED 279746 Assembly and Safety Advice

SSV Works DF-F65 manual

SSV Works

SSV Works DF-F65 manual

ULTIMATE SPEED CARBON Assembly and Safety Advice

ULTIMATE SPEED

ULTIMATE SPEED CARBON Assembly and Safety Advice

Witter F174 Fitting instructions

Witter

Witter F174 Fitting instructions

WeatherTech No-Drill installation instructions

WeatherTech

WeatherTech No-Drill installation instructions

TAUBENREUTHER 1-336050 Installation instruction

TAUBENREUTHER

TAUBENREUTHER 1-336050 Installation instruction

manuals.online logo
manuals.online logoBrands
  • About & Mission
  • Contact us
  • Privacy Policy
  • Terms and Conditions

Copyright 2025 Manuals.Online. All Rights Reserved.

Page 1of 9
Pro
User Assembly & Install Guide
Safe-T-Pull Inc.
Page 2of 9
Safety Information
Please read the following safety notes carefully before working with the Safe-T-Pull PRO. These
notes include important safety information about installation, usage, and maintenance.
All personnel working on, with, or near a Safe-T-Pull PRO must wear safety toed shoes, safety
glasses, reflective safety vest, protective gloves, and hard hat.
The Safe-T-Pull PRO may raise or lower unexpectedly. When servicing the Safe-T-Pull PRO be sure
the pulling vehicle is OFF and the Puller Arm is in the lowered position.
When traveling on public roads or during extended periods of storage, install the Manual Cylinder
Lock. This will prevent the Puller Arm from accidentally lowering.
Rules for safe hydraulic operation
Park hydraulic machinery where children cannot reach it.
If your pulling vehicle has hydraulic flow control capabilities, (usually measured in GPM)
decrease the flow to the minimum amount required to operate the Safe-T-Pull PRO (2 GPM)
Block the Safe-T-Pull PRO when you must work on the system while raised; DO NOT rely
solely on the hydraulic lift.
Avoid servicing the hydraulic system while the machine engine is running.
Do not remove cylinders until the Safe-T-Pull PRO is resting securely on the ground or safety
stands or blocks; shut off engine.
Before disconnecting hydraulic hoses, relieve all hydraulic pressure.
Be sure all hose connections are tight and hoses are not damaged.
Use a non-volatile cleaning solvent to wash parts.
Three common hydraulic system hazards
1. Burns from very hot, high pressure fluid.
2. Injuries and illness from flailing hydraulic lines.
3. Hydraulic fluid injection into the body.
Ways to prevent hazards from occurring
When attempting to detect pinhole leaks in hydraulic hoses run a piece of cardboard or
wood along the hose.
NEVER touch hydraulic hoses when they are under pressure.
NEVER connect a low pressure hose, cylinder, or ANY aftermarket equipment to the Safe-T-
Pull PRO.
Ensure all hydraulic components are in proper working condition on the pulling vehicle.
Periodically check for oil leaks and worn hoses.
Keep contaminants from hydraulic oil and replace filters regularly.
Lubricate cylinder rods with protective lubricant to avoid rusting.
Page 3of 9
Safety Locks
As a safety feature, 2014 and newer Safe-T-Pull PRO’s come equipped with Manual Puller Arm
Locks. The Safe-T-Pull PRO may be locked up in the raised positon to prevent “settling” or lowering.
Raised Position
When the Puller Arm is raised all of the way up, a pin may be installed into the top hole position
to keep it from lowering. Also us the Manual Cylinder Lock to choke the rod of the cylinder.
WARNING: These pins will NOT stop the puller arm from being raised or lowered hydraulically.
Unpacking Instructions
Before discarding any packaging, be sure all included parts are accounted for. Remove all strapping
and/or banding on the package. For claims please visit section 1 of this document.
Page 4of 9
Assembly
If your Safe-T-Pull PRO has been palletized for shipping, assembly is required. After unpacking,
follow these steps to assemble your Safe-T-Pull PRO.
Recommended Tools:
Lifting device (fork lift, skid-steer, cherry picker)
Chain or lifting strap
Two ¾” wrenches or sockets
Two 11/16” wrenches
Two 1 1/8” wrenches or sockets
One 1 1/2” wrench or socket
One 1 7/16” wrench or socket
WARNING: All lifting equipment must be rated for 1,000 pounds (453.5kg) or more!
Step 1: Remove the swivel assembly by lifting it out of its stand using a lifting strap or chain. It works
best to remove the “Dust Cover” first to “choke” a lifting strap around the large compression spring.
Note: Two ¾” wrenches or sockets required.
Page 5of 9
Step 2: Pin the Spring Tongue onto the Swivel Assembly. Bolt the pin into place with the included ½”
bolt and nylock nut.
Note: Two ¾” wrenches or sockets required.
Page 6of 9
Step 3: Align the puller tube assembly and swivel assemblies as shown below. Slide the Spring Tongue
into the Puller Tube Assembly.
Step 4: Bolt the Puller Tube and Swivel assemblies together with the four included ¾” bolts, lock
washers, and nuts.
Note: Two 1 1/8” wrenches or sockets required
Page 7of 9
Step 5: Using the provided pins, attach the Smart Lift Cylinder as shown below.
Step 6: Attach the hydraulic hoses to the Smart Lift Cylinder.
Note: Two 11/16” wrenches required
Page 8of 9
Installation
After assembling your Safe-T-Pull PRO, follow these steps to install the puller to your pulling
vehicle.
Installation Instructions
Step 1: Use a lifting device to align the tongue of the Safe-T-Pull PRO into your tractor’s drawbar.
Step 2: Slide your tractor’s pin into the drawbar. Be sure to use the correct bushings according to
your drawbar width and pin size.
Note: Category 3 drawbar requires a bushing for the puller tongue
Category 4 drawbar requires no bushings
Category 5 drawbar requires two bushings for the tractor drawbar
Step 3: Tighten the three Drawbar Side-Clamp bolts to lock the Safe-T-Pull PRO into place. Be sure
to use the correct shims according to your drawbar width.
Note: Category 3 drawbar requires no shims
Category 4 drawbar requires one ½” shim per side
Category 5 drawbar requires two ½” shims per side
(Picture on Next Page)
Drawbar Width (Cat 4)
Safe-T-Pull Puller Tongue
Drawbar Pin
9in Bolts
Nuts
1/2in Shim
Side Plate
Page 9of 9
Step 4: Push your four hydraulic hoses into your tractor’s ports.
CAUTION: Ensure that all hydraulic equipment is in proper working order. Visit the Safety
Information section in this document for more information.
Step 5: Extend and retract both the Lift Cylinder and the Pin Cylinder several times to fill the lines
with hydraulic fluid.
NOTE: If this step is missed your Safe-T-Pull PRO may not work properly. This may take up to
several minutes.