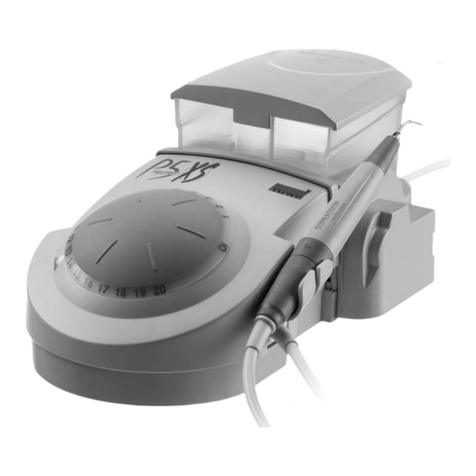
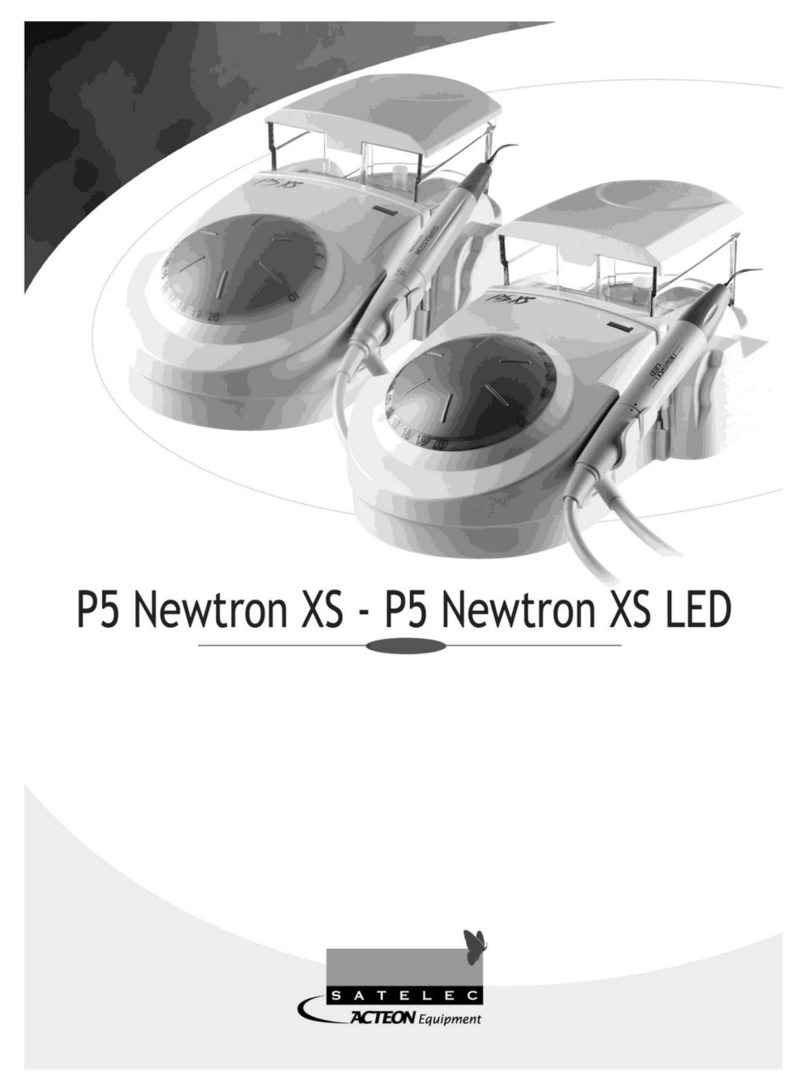
ACTEON Equipment SATELEC P MAX Newtron XS User manual


2

English 4
Français 22
Español 40
Deutsch 58
Italiano 76
Nederlands 94
3

4
1 INTRODUCTION 5
2 WARNINGS 5-6
3 DESCRIPTION
Physical description 6-7
Technical description 7-9
4 INSTALLATION/FIRST USE
Unpacking the device 9
Recommendations 9
Installation 9-10
First use 10-11
5 IRRIGATION SOLUTIONS 11
6 USING THE DEVICE 11-12
7 SHUTTING DOWN THE DEVICE 12
8 ROUTINE MAINTENANCE/STERILIZATION
Maintaining the irrigation circuit/
irrigation tank 13
Handpiece maintenance 13
Tip maintenance 13-14
Device maintenance 14-15
9 MAINTENANCE
Fuse replacement 15
Operation faults 15-17
10 ELECTROMAGNETIC COMPATIBILITY
Electromagnetic emissions 17-18
Electromagnetic immunity 18
Electromagnetic immunity/mobile
radiofrequency equipment 19
Recommended separation distances 20
Cable lengths 20
11 DISPOSAL AND RECYCLING 21
12 MANUFACTURER'S LIABILITY 21
13 REGULATIONS 21
14 SYMBOLS 21
15 CUSTOMER RELATIONS
Manufacturer identification 112
Subsidiaries 112-113
The list of accessories referred to in this manual
is not exhaustive. Consult your local dealer for
further information.
ENGLISH
CONTENTS

I - INTRODUCTION
Congratulations! You have just taken possession
of your P MAX NEWTRON XS®.
Designed by SATELEC, the P MAX NEWTRON XS is a
piezoelectric ultrasonic generator that uses
ultrasonic tips for dentistry.
In order to get the most out of this high-
technology device and ensure it has a long
working life, please read this manual carefully
before using or maintaining it.
Sentences preceded by the symbol are
points to which you should pay particular
attention.
II - WARNINGS
CAUTION:
United States Federal Law restricts the use of
this device solely to qualified, trained and
competent dental health practitioners or under
their supervision.
To reduce the risks of accidents, the
precautions stipulated below must be taken.
Device users:
- Use of the P MAX NEWTRON XS is restricted solely
to qualified, trained and competent dental
health practitioners in the normal context of
their work.
- If you have received this device by error, please
contact the supplier so that it can be removed.
Interactions:
- The P MAX NEWTRON XS must not be used if the
patient and/or the operator has a cardiac
stimulator or any other active implant (e.g. a
cochlear implant).
- The device complies with applicable
electromagnetic compatibility standards. The
user should nevertheless ensure that any
potential electromagnetic interference does
not cause an additional risk (presence of
radiofrequency emitters, electronic devices,
etc.).
- The device is not designed to withstand shocks
delivered by an electric defibrillator.
Electrical and air connection:
- Your device must be connected to the electric
power supply by a certified dental installation
technician.
- To avoid any risk of electric shock, this device
must be connected to an electric supply with a
protective ground.
- The electric supply to which the device is
connected must comply with the standards in
force in your country.
- The device must be connected to the dental
office's medical-quality filtered air distribution
system.
Using the device:
- Do not use the device if it appears to be
damaged or faulty.
- Turn the device off before unplugging the power
cord.
- To unplug the cord, grip the cord plug and hold
the wall socket.
5

- Never fill the irrigation solution tanks while
they are on the device.
- Do not fill the irrigation solution tanks beyond
the level shown by the border on each tank.
- When the device is not to be used for a long
period of time, rinse thoroughly, then unplug
the device from the electric supply.
Environment:
- Do not cover the device or obstruct the
ventilation vents.
- Do not immerse the device in liquid, and do not
use it outdoors.
- Do not tilt the device at an angle greater than
5°.
- Do not place the device near a heat source.
- Make sure that the cords are not in the traffic
path.
- The device should be stored in its original
packaging in a safe place.
- The device is not designed for use in the
presence of anesthetic gases or any other
flammable gas.
- Do not expose the device to water vapor, or
splashes.
- The device is not designed to work near ionizing
radiation.
- Do not insert metal objects into the device (risk
of electric shock, short-circuit or emission of
hazardous substances).
Maintenance:
- It is essential to rinse your device, before and
after each use.
- To avoid any reaction between different
irrigation solutions which may be used
(crystallization, precipitation, etc.), it is
essential to rinse the irrigation solution tanks
and irrigation solution circuit with distilled or
dematerialized water each time the irrigation
solution is changed.
Accessories:
- The device can only accept accessories
designed by SATELEC for the particular use for
which they are intended.
- Use of accessories from other manufacturer is a
potential hazard for you or your patients.
Repair:
- Do not repair or modify the device without prior
authorization from SATELEC.
- In the case of a fault, contact the supplier of
your device. Do not use unauthorized repairers,
who might make your device dangerous for you
and your patients.
If you have any doubt, contact an approved
dealer or our customer support department:
- www.acteongroup.com
III - DESCRIPTION
3. 1 PHYSICAL DESCRIPTION
The P MAX NEWTRON XS has seven elements:
- a control unit (Fig. 1-1).
- a footswitch (Fig. 3-1).
- a plug-in cord with handpiece connector (Fig. 1-
12).
- two tanks for irrigation solution (Fig. 1-10).
- two irrigation solution tank covers (Fig. 1-11).
6

The P MAX NEWTRON XS control unit has the
following items on the upper side:
- a control dial (Fig. 1-4), with numbers ranging
from 1 to 20 (power level) (Fig. 1-2).
- a knob for adjusting the irrigation solution flow
and the Flush/Prime function (Fig. 1-6).
- an irrigation solution tank selection button (Fig.
1-5).
- an "air" function indicator (Fig. 1-8).
The P MAX NEWTRON XS control unit has the
following item on the front panel a handpiece
cord connector (Fig. 1-7).
Located at the back of the unit are:
- a power cord socket with ground pin (Fig. 2-1),
- a footswitch connector (Fig. 2-2),
- an air input connection (Fig. 2-3).
- a power switch (Fig. 2-4).
The handpiece rest is located on the right-hand
side (Fig. 1-9).
The device has ventilation vents on the rear and
lower panels.
The device has four rubber feet to allow correct
air flow.
The handpiece accessories and tips are delivered
with their own instructions.
3. 2 TECHNICAL DESCRIPTION
a) Control unit upper panel
The dial (Fig. 1-3) is used to adjust the power: 1
to 20.
The display is separated into four colored
sections, each with five positions (Fig. 1-2).
The “ON” indicator (Figure 1, (4)) llights up with
the color and number of the chosen power level:
- Green: 1 to 9: very low to low power (e.g.
periodontics).
- Yellow: 6 to 14: medium power (e.g.
endodontics)..
- Blue: 12 to 18: high power (e.g. prophylaxis).
- Orange: 17 to 20: very high power (e.g.
specific treatments).
The BOOST mode can be used to deliver an
increased power of 2.5 steps on top of the power
effectively used (e.g.: power 6 is displayed =>
boost = 8.5).
When the BOOST function is selected, an orange
indicator lights up on the settings dial.
The technology of this device allows the
practitioner to work at constant amplitude
depending on the power selected with
compensation according to the effort applied.
Note:
The tip usage power level is selected according to
the directions in the TipBook™ and the color-
coded system (CCS) tips.
The Boost function is automatically deactivated
when the practitioner selects a new power
setting with the power setting dial.
The knob on the upper panel (Fig. 1-6) governs:
- Irrigation solution flow adjustment.
- FLUSH/PRIME function, when pressed. Press this
button to start draining with a delay of 8 min
(time required to empty a full tank); press again
to stop the draining and delay.
7

Note:
• Knob in position MIN corresponds to a flow of
around 5ml/min.
• Knob in position MAX corresponds to a flow of
around 40ml/min.
• FLUSH/PRIME function corresponds to a flow of
around 40ml/min.
The push button (Fig. 1-5) on the front panel
governs irrigation solution tank selection.
Note: The selected tank is lit up.
When the indicator (Fig. 1-8) is lit up the "air"
function is activated.
b) Control unit back panel
- The power receptacle (Fig. 2-1) with its
grounding pin is used to connect the P MAX
NEWTRON XS to the power supply using a plug-in
power cord.
- The footswitch connector (Fig. 3-2) is used to
connect the device to the multifunction control
footswitch.
- The device is connected to the dental office's
medical-quality air distribution supply via the
air connection (Fig. 3-3).
- The power switch (Fig. 3-4) turns the device on
or off.
- The fuse box (Fig. 3-5) contains two fuses to
protect the device.
c) Control unit front panel
The handpiece cord connector (Fig. 1-7) is used
to:
- Connect the handpiece cord to the device.
- Circulate fluid to the spray.
- Electrically link the device and the handpiece
via the handpiece cord.
d) Control footswitch
The multifunctional footswitch (Fig. 3-1) is used
to:
- Start the P MAX NEWTRON XS ultrasonic function
(Fig. 3-2).
- Start or stop the irrigation function (Fig. 3-3).
- Select the air function (Fig. 3-4).
- Select the boost function (Fig. 3-5).
Its weight and anti-slip pad ensure good stability.
e) Technical characteristics
Device name: PMAX NEWTRON XS
Electrical power supply:
Voltage: 100VAC / 115VAC / 230VAC (factory set)
Frequency: 50Hz / 60Hz.
Rated power: 30VA @ 230VAC.
Operating:
Intermittent service: 10 min ON / 5 min OFF.
Output characteristics:
Vibration frequency: 28KHz to 36Khz.
Irrigation flow rate: 0 to 40ml/min (nominal
value).
Air flow: 1.4l/min to 1.6l/min depending on the
tip.
Protection:
Electrical safety: Class 1, type BF.
2 fuses (power receptacle):
5 mm x 20 mm / 315 mAT rating 35 A @ 230 VAC.
5 mm x 20 mm / 500 mAT rating 35 A @ 115 VAC.
5 mm x 20 mm / 500 mAT rating 35 A @ 100 VAC.
1 FUS1 ref. fuse not accessible to the user: CMS /
2 AT.
8

Overall dimensions:
Control unit:
Width: 270mm
Height: 100mm
Height with tanks: 131mm
Depth: 246mm
Weight: 3Kg
Footswitch:
Width: 173mm
Height: 46mm
Depth: 177mm
Cord length: 2,000mm
Weight: 610g
Handpiece cord: 2,000mm
Tank capacity: 300ml each
Temperatures:
Operating: +10°C to +40°C.
Storage: -20°C to +70°C.
Humidity:
Operating: 30% to 75%.
Storage: 10% to 100% including condensation.
IV - INSTALLATION / FIRST
USE
4. 1 UNPACKING THE DEVICE
Upon reception of the device, check for any
damage caused in transit.
Contact your supplier if necessary.
4. 2 RECOMMENDATIONS
Have your connections to the electrical and air
supplies made by a certified dental installation
technician.
The electrical connection of the P MAX NEWTRON XS
must comply with applicable standards. A
grounded power supply socket must be used.
The device must be connected to the dental
office's medical-quality air distribution supply.
4. 3 INSTALLATION
Important:
Never rotate the handpiece connector on its
cord or you may damage the device.
Do not place the P MAX NEWTRON XS close to or
on top of another device.
Do not intertwine the power cord with the
footswitch cord or the handpiece cord.
- Place the control unit in position on a fixed,
horizontal surface or with a slope of no more
than 5°.
- Check that the power switch is in position O
(off).
- Connect the power cord to the receptacle of
the device.
- Connect the power cord to a socket with a
ground pin.
- Connect the multifunction footswitch to the
footswitch connector. Fully tighten the screws.
- Position the footswitch so that it is easily
accessible for your feet.
- Check that there is no humidity in the
handpiece cord connector connections. If there
is, dry it out by wiping, then blowing with the
multifunction syringe.
- Connect the handpiece cord to the connector
on the device located on the front panel,
making sure that the two marks on the cord
plug and the connector symbol are lined up.
9

- Check that there is no humidity in the
handpiece cord connections. If there is, dry it
out by wiping, then blowing with the
multifunction syringe.
- Connect the handpiece to the cord connector by
simply plugging it in, making sure that the two
marks on the cord plug and the handpiece are
lined up.
- Place the handpiece on its rest.
- Install the irrigation solution tanks on their
supports.
- Place the covers on the irrigation solution
tanks.
4. 4 FIRST USE
Before using the P MAX NEWTRON XS for the first
time, you are advised to carry out the following
operations:
- Fill the irrigation solution tanks with
disinfectant, without exceeding the level
indicated by the borders (Fig. 4-1).
- Place the covers on the irrigation solution tanks.
- Place the irrigation solution tanks on the
device.
- Connect the handpiece cord to the device.
- Connect the handpiece to the handpiece cord.
- Switch on the device (I).
- Set the device to minimum power (1) and
maximum flow.
- Select an irrigation solution tank using the push
button (Fig. 1-5).
- Press the irrigation flow setting button (Fig. 1-
6) to rinse the irrigation circuit on the device.
- Completely empty the disinfectant solution out
of the tank.
- Select the other irrigation solution tank by
pressing the tank selection push button again
(Fig. 1-5).
- Press the irrigation flow setting button (Fig. 1-
6) to rinse the irrigation circuit on the device.
- Completely empty the disinfectant solution out
of the tank.
- Remove the irrigation solution tanks from the
device.
- Remove the covers from the irrigation solution
tanks.
- Fill the irrigation solution tanks with distilled or
demineralized water.
- Place the covers on the irrigation solution
tanks.
- Place the irrigation solution tanks on the
device.
- Select an irrigation solution tank using the push
button (Fig. 1-5).
- Press the irrigation flow setting button (Fig. 1-
6) to rinse the irrigation circuit on the device.
- Completely empty the tank.
- Select the other irrigation solution tank by
pressing the tank selection push button again
(Fig. 1-5).
- Press the irrigation flow setting button (Fig. 1-
6) to rinse the irrigation circuit on the device.
- Completely empty the tank.
- Select the air function by pressing the
corresponding switch on the foot pedal (Fig. 3-
4).
- Flush the irrigation circuit with air for at least
30 seconds by activating the ultrasonics using
the control footswitch (Fig. 3-2).
10

- Switch off the machine (O).
- Disconnect the handpiece from the handpiece
cord.
- Disconnect the handpiece cord from the device.
- Remove the irrigation solution tanks from the
device.
- Remove the irrigation solution tank covers.
- Perform maintenance/sterilization on all the
material according to the instructions in
chapter 8.
V - IRRIGATION SOLUTIONS
The P MAX NEWTRON XS is not designed to
administer drugs.
However it can manage irrigation circuit rinsing
and operating field irrigation with medical
products such as:
- Physiological saline.
- Hypochlorite.
- Chlorexidine.
- Dakin®.
- Eludril®.
- E.D.T.A. Salvizol®.
VI - USING THE DEVICE
Important:
- Do not disconnect the handpiece or the
handpiece cord while the device is plugged in
and the footswitch is pressed.
- For your safety and that of your patient, the
PMAX NEWTRON XS must not be used with
accessories other than those supplied by
SATELEC.
- For correct tip vibration the tip must be
correctly screwed in, and not forced past its
stop point. To avoid self-blockage of the tip, it
must be removed after each usage.
- If it is screwed too far, the tip or handpiece
can fracture.
- The covers for the irrigation tanks and the
two irrigation solution tanks themselves must
always be in place during usage.
- Check the integrity of the device and its
accessories before and after each use in order
to detect any problem.
- If necessary, replace all faulty parts before
using your device.
The P MAX NEWTRON XS is started as follows:
- Make sure that the device is connected
correctly and properly insulated.
- Check that there is no humidity in the
handpiece connections or the handpiece cord
connector. If there is, dry it by wiping and
blowing using a multifunction syringe.
- Connect the handpiece cord to the device.
11

- Plug the handpiece into the handpiece cord.
- Remove the irrigation tank covers.
- Fill the tanks with irrigation solution without
exceeding the level indicated by the borders
(Fig. 4-1).
- Replace the irrigation tank covers.
- Install the filled tanks on their supports.
- Switch on the device (I)
- Set the device to maximum power (1).
- Prime the irrigation circuit by pressing the flow
setting button (Fig. 1-6).
- When the irrigation solution reaches the end of
the handpiece, release the button.
- Install the required tip on the handpiece.
- Moderately tighten the tip using the wrench to
ensure optimal ultrasonic operation.
- Set the device to the required power (according
to color and number) using the control dial (Fig.
1-4).
- If necessary, refer to the TipBook to find out
SATELEC tip usage power settings.
- Select the type of irrigation required (liquid
irrigation/no irrigation/air).
Liquid irrigation:
• Adjust the desired irrigation flow rate.
• Select the irrigation solution tank.
• Press the "Irrigation ON/OFF" button on the
multifunction footswitch (Figure 3, (3)).
• Press the footswitch to use your device.
No irrigation:
• Neither irrigation solution tank should be on.
• The "air" indicator should not be on.
• If any functions have been activated, press the
button of the particular function (irrigation or
air)
• Press the footswitch to use your device.
"Air" irrigation:
• Press the "air" button on the multifunction
footswitch (Fig. 3, (4)).
• The "air" indicator must be switched on.
• Press the footswitch to use your device.
VII - SHUTTING DOWN THE
DEVICE
At the end of the working day, you must:
- Empty the irrigation solution out of the
irrigation circuit and the irrigation solution
tanks, by pressing the irrigation flow setting
button (Fig. 1, item 6).
- Rinse the irrigation circuit and the irrigation
tanks (see chapter 4, (4.4)) with distilled or
demineralized water.
- Flush on air to dry the irrigation circuit.
- Disconnect the handpiece cord from the
handpiece.
- Disconnect the handpiece cord from the device.
- Switch the device off (O).
VIII - ROUTINE
MAINTENANCE/
STERILIZATION
Important:
To maintain the sterility or asepsis of the
accessories (handpiece, tips, etc.), store them
in sealed bags or leakproof containers suitable
for medical practice.
12

The handpiece cord and tanks are not
sterilizable.
Avoid using cleaning agents and disinfectants
containing inflammable substances.
If this is not possible, make sure that all of the
product has evaporated and that there is no
combustible matter on the device or its
accessories before it is switched on.
8. 1 MAINTAINING THE IRRIGATION CIRCUIT /
IRRIGATION TANK
In preparation for a long period of disuse of your
PMAX NEWTRON XS, the irrigation solution tanks
and the irrigation circuit must be rinsed (see
4.4).
After a period of disuse of your P MAX NEWTRON XS,
bacteria may develop on the inside of the tanks
and irrigation solution circuit. You are therefore
strongly advised to disinfect the tanks and
irrigation circuit of the device (see 4.4) before
using it again.
8. 2 HANDPIECE MAINTENANCE
After each use, the handpiece irrigation circuit
must be rinsed with distilled or demineralized
water for 20 to 30 seconds.
For cleaning, disinfecting and sterilizing the
handpiece, please refer to its specific
instructions manual.
8. 3 TIP MAINTENANCE
Important:
During sterilization, items made of different
metals must not come into contact. Any contact
would establish galvanic couples and cause
local damage. To avoid this happening, place
the items in a cloth or sterilizable bag.
a) Lifetime
Tip shape and weight are the determining
characteristics for obtaining maximum efficiency
of the ultrasonic generator.
Careful monitoring of these two characteristics
by the user will ensure that optimal performance
of the device is maintained.
Consequently, you are strongly advised not to
alter the structure of the tips by filing or twisting
them or modifying them in any other way.
Similarly, tip aging leads to alteration of its
characteristics through normal wear.
Always replace a tip that has been damaged by
wear or by accidental impact (dropped,
deformed, etc.).
Use the TIPCARD™ to check scaler tip wear.
Replace routinely-used tips at least one to three
times a year.
b) Pre-disinfection/Chemical Cleaning
To be carried out immediately after treatment,
wearing thick gloves.
Immerse in an ultrasonic bath (enzymatic,
quaternary ammonium base detergent /
disinfectant solution), carefully respecting the
concentration and contact time recommended by
the manufacturer of the solution.
Use a solution that bears the EC marking or that
is in compliance with any standard required by
the national regulations.
Rinse under running water for at least 30
seconds.
13

c) Mechanical/Chemical Cleaning
To be carried out immediately after pre-
disinfection/chemical cleaning, wearing thick
gloves.
Scrub the products in a new bath of enzymatic,
quaternary ammonium base detergent /
disinfectant solution, for at least 30 seconds, and
in any case until all remaining traces of
contamination have been removed.
Rinse again under running water for at least 30
seconds.
d) Drying
Dry with a clean, non-woven single-use cloth, so
as to remove any traces of liquid.
Keep in single-use sterilization sleeves or bags in
compliance with the specifications defined in
standard EN ISO 11607-1 or in any equivalent
standard required by the national regulations.
e) Sterilization
The tips must be sterilized individually in an
autoclave, according to the following
parameters:
- autoclave: type B, compliant with standard EN
13060;
- sterilization temperature: 134 °C;
- sterilization stabilization time: 18 minutes;
- pressure: 2 Bars min.
f) Storage
Then, store the sterilized products in a dry place
protected from dust.
Before re-use, if the integrity of the packaging is
not conformable, recondition the re-sterilize in
accordance with the defined protocol.
If contamination is visible inside the bag, destroy
the product.
g) Disposition of the product
Dispose of the product in receptacles for waste
materials of healthcare activities involving
infectious risks.
CAUTION: Not all autoclaves can reach 134° C.
Not all autoclaves draw a pre-vacuum. Please
refer to your autoclave manufacturer for
specific sterilization instructions.
8. 4 DEVICE MAINTENANCE
Important:
- Do not use the device if it appears to be
faulty.
- Do not use an abrasive product to clean the
device.
- The handpiece cord and tanks are not
sterilizable.
a) Maintenance
The P MAX NEWTRON XS control unit, handpiece
cord, irrigation solution tanks and multifunction
footswitch must be cleaned and disinfected on a
daily basis (alcohol or disinfectants*, dental
disinfectant wipes, such as SEPTOl™ wipes).
b) Monitoring
The accessories and cords should be regularly
checked for damage or faulty insulation. Replace
if necessary.
It is important to keep the control unit
ventilation vents clean in order to avoid
abnormal heating.
Check that there is no humidity in the handpiece
connections or the handpiece cord connector. If
there is, dry it by wiping and blowing using a
multifunction syringe.
14

Note:
In the case of a fault, you are advised to contact
the supplier of your P MAX NEWTRON XS. Do not use
unauthorized repairers, who might make your
device dangerous for you and your patients.
IX - MAINTENANCE
9. 1 FUSE REPLACEMENT
PMAX NEWTRON XS is protected by two fuses
located in the power receptacle (Fig. 2-1).
The replacement procedure is as follows:
- Switch the device off (position OI).
- Unplug the power cord from the electrical
supply.
- Unplug the power cord from the power
receptacle (Fig. 2-1).
- Insert the tip of a flat blade screwdriver into
the notch above the fuse drawer to release it
(Fig. 2-5)
- Remove the old fuses.
- Replace with new fuses of the same type and
rating.
- Push the fuse drawer back into its housing until
it clicks to indicate the correct position.
- Plug the power cord into the receptacle (Fig. 2-
1).
- Plug the power cord into the electrical supply.
Note:
The device also has an internal fuse not
accessible to the user (referenced FUS1 on the
printed circuit).
Contact the SATELEC after-sales service (refer to
chapter 2 - Repairs).
All the information necessary for the repair of
faulty components is made available by SATELEC
to the technical personnel of the SATELEC-
approved dealer network who carry out the work.
9. 2 OPERATION FAULTS
Refer to the following table.
15

16
Fault detected Possible causes Solutions
Device does not operate
(LCD screen off)
Power cord not plugged in properly. - Check the power socket.
- Return to SATELEC after-sales.
Power switch in position O. Place the power switch in position I.
Power receptacle fuse(s) blown. Replace the power receptacle fuses.
Internal fuse blown. Return to SATELEC after-sales.
No spray
Irrigation ON/OFF button activated. Press the Irrigation ON/OFF button.
air function selected. Press the air button.
Irrigation solution tanks empty. Fill the tanks with irrigation solution.
Faulty pump. Return to SATELEC after-sales.
Blocked irrigation circuit. Return to SATELEC after-sales.
Blocked tip or file. Unblock the tip or file.
Wrong choice of tip. Check the tip.
Handpiece cord blocked. Replace the cord.
No air
Faulty air connection. Check the air connection.
Irrigation ON/OFF button deactivated. Press the Irrigation ON/OFF button.
air function activated. Press the air button.
Blocked irrigation circuit. Return to SATELEC after-sales.
Blocked tip or file. Unblock the tip or file.
Wrong choice of tip. Change the tip.
Handpiece cord blocked. Replace the cord.
Power fault /
weak vibrations
Tip worn or distorted. Replace the tip.
Incorrect power adjustment. Refer to the TipBook for the necessary
information.
Incorrect use: incorrect angle of attack or
inadequate pressure on the tooth. Refer to the TipBook for the necessary
information.
Liquid or moisture present between
handpiece and cord. Dry the electrical contacts thoroughly.

X - ELECTROMAGNETIC COMPATIBILITY
Important:
The power cord, the handpiece cord and the footswitch cord must be kept apart.
The P MAX NEWTRON XS requires special precautions to be taken with regard to electromagnetic
compatibility.
It must be installed and prepared for use as described in chapter 4.
Certain types of mobile telecommunication devices such as mobile telephones are likely to interfere
with the P MAX NEWTRON XS.
The recommended separation distances in this section must therefore be complied with.
The P MAX NEWTRON XS must not be used near or on top of another device.
If this cannot be avoided, its operation under the conditions of use must be checked beforehand.
17
Fault detected Possible causes Solutions
No ultrasonic vibration Incorrect tip tightening. Retighten the tip with the wrench.
Faulty connector contact. Clean the connector contacts.
Handpiece cord wire cut. Replace the cord.
No light
Handpiece light ring is missing. Install the light ring.
Faulty light ring. Replace the light ring.
Faulty light ring connector contacts. Clean the connector light ring contacts.
Light ring reversed polarity. Position the light ring by lining up the lug
Faulty cord / handpiece connector
contacts. Clean the handpiece and/or connector
contacts.
Other. Contact your installer-integrator.
Leak between the
handpiece and the
handpiece cord Worn handpiece 1.15x1 seal. Replace the seal (kit F12304).
Leak between the
handpiece cord and the
device connector Worn hydraulic connections 1.15x1 seal. Replace the seal.
Liquid leaking under the
device Pipe rupture. Return to SATELEC after-sales.
Liquid leaking from the
tank connector Worn seals. Replace the seals.
Air leak Worn seal. Replace the seal.

The use of accessories other than those specified or sold by SATELEC as replacement parts may have
the consequence of increasing the emissions or decreasing the immunity of the P MAX NEWTRON XS.
10. 1 ELECTROMAGNETIC EMISSIONS
The P MAX NEWTRON XS is intended for use in the electromagnetic environment specified in the table
below.
The user and/or installer must ensure that the P MAX NEWTRON XS is used in such an environment.
10. 2 ELECTROMAGNETIC IMMUNITY
The P MAX NEWTRON XS is intended for use in the electromagnetic environment specified in the table
below.
The user and/or installer must ensure that the device is used in such an electromagnetic
environment.
18
Immunity test IEC 60601 test level Compliance level Electromagnetic environment - guidance
Electrostatic
discharge (ESD)
IEC 61000-4-2.
± 6KV contact
± 8KV air ± 6KV contact
± 8KV air
Floors must be wood, concrete, cement or tiled.
If floors are covered with synthetic material
(carpet, etc.), the relative humidity must be at
least 30%.
Electrical fast
transients
IEC 61000-4-4. ± 2KV for power supply lines ± 2KV for power supply lines Power quality should be that of a typical
commercial or hospital environment (hospital,
clinic).
Surges
IEC 61000-4-5. ± 1KV differential mode
± 2KV common mode ± 1KV differential mode
± 2KV common mode Power quality should be that of a typical
commercial or hospital environment.
Voltage dips, short
interruptions and
voltage variations
IEC 61000-4-11.
<5% UT (>95% dip in UT) for 0.5
cycles.
40% UT (60% dip in UT) for 5
cycles
70% UT (30% dip in UT) for 25
cycles
<5% UT (>95% dip in UT) for 250
cycles
<5% UT (>95% dip in UT) for 0.5
cycles.
40% UT (60% dip in UT) for 5
cycles
70% UT (30% dip in UT) for 25
cycles
<5% UT (>95% dip in UT) for 250
cycles
Power quality should be that of a typical
commercial or hospital environment.
If the use of the P MAX NEWTRON XS requires
continued operation during a power cut, it is
recommended that the product be powered from a
separate power supply (UPS, etc.).
Emission test Compliance Electromagnetic environment - guidance
RF emission - CISPR 11. Group 1 PMAX NEWTRON XS uses RF energy for internal operation.
Therefore, its radiofrequency emissions are very low and are not likely
to cause any interference in nearby equipment.
RF emission - CISPR 11. Class B PMAX NEWTRON XS is suitable for use in all establishments, including
domestic establishments and those directly connected to the public
low voltage power supply network that supplies buildings used for
domestic purposes.
Harmonic current emission
IEC 61000-3-2. Class A
Voltage fluctuation and flicker
IEC 61000-3-3. Complies

10. 3 ELECTROMAGNETIC IMMUNITY / MOBILE RADIOFREQUENCY EQUIPMENT
The P MAX NEWTRON XS is intended for use in the electromagnetic environment specified in the table
below.
The user and/or installer must ensure that the P MAX NEWTRON XS is used in such an electromagnetic
environment.
Note 1: At 80 MHz and 800 MHz, the higher frequency range applies.
Note 2: These specifications may not be applicable in all situations. Electromagnetic propagation is
affected by absorption and reflection from structures, objects and persons.
(a): The electromagnetic field strengths of fixed radiofrequency emitters, such as base stations for
mobile telephones (cellular/cordless), mobile radios, amateur radio, AM/FM radio broadcasts
and TV broadcasts cannot be determined exactly by theory. To assess the electromagnetic
environment due to fixed radiofrequency emitters, an electromagnetic environment
measurement must be made. If the measured radiofrequency field strength in the immediate
environment where the product is used exceeds the compliance level specified above, the
performance of the product must be tested to verify whether it conforms to the specification.
If abnormal performance is observed, additional measures may be necessary, such as reorienting
or relocating the product.
(b): In the 150 kHz to 80 MHz frequency range, the electromagnetic field strengths must be less
than 3 V/m.
19
Immunity test IEC 60601 test level Compliance level Electromagnetic environment - guidance
Portable and mobile radiofrequency communications devices must not be used near the P MAX NEWTRON XS (including its cables) at a distance
less than that recommended and calculated according to the frequency and power of the emitter.
Conducted
disturbance,
radiofrequency fields.
IEC61000-4-6
3 V/m
150 KHz to 80 MHz 3 V/m Recommended separation distance:
d = 1.2
Radiated
radiofrequency
electromagnetic
field.
IEC61000-4-3
3 V/m
80 MHz to 2.5 GHz 3 V/m
d = 1.2 80MHz to 800MHz.
d = 2.3 800MHz to 2.5GHz.
Where P is the maximum power rating of the emitter in watts
(W) according to the manufacturer's specifications and d is the
recommended minimum separation distance in meters (m).
The electromagnetic field strengths of fixed radiofrequency emitters, as determined by an electromagnetic environment measurement (a),
must be less than the compliance level in each frequency range (b).
Interference may occur near equipment marked with the symbol below:

10. 4 RECOMMENDED SEPARATION DISTANCES
The P MAX NEWTRON XS is intended for use in an electromagnetic environment in which radiated
radiofrequency disturbances are controlled.
The P MAX NEWTRON XS user and/or installer can help prevent electromagnetic interference by
maintaining a minimum distance between portable and mobile radiofrequency communications
equipment emitters and the P MAX NEWTRON XS according to the maximum output power of the
equipment, as recommended in the table below.
Note 1: At 80 MHz and 800 MHz, the higher frequency range applies.
Note 2: These specifications may not be applicable in all situations. Electromagnetic propagation is
affected by absorption and reflection from structures, objects and persons.
10. 5 CABLE LENGTHS
20
Cables and accessories Maximum length Complies with:
Handpiece cord
Control footswitch
Power cord <3m
RF emission, CISPR 1 - Class B/Group 1
Harmonic current emission: IEC61000-3-2
Voltage fluctuation: IEC61000-3-3
Immunity to electrostatic discharge: IEC61000-4-2
Immunity to electrical fast transients/bursts: IEC61000-4-4
Immunity to surges: IEC61000-4-5
Immunity to voltage dips, short interruptions and voltage variations:
IEC61000-4-11
Immunity to conducted disturbances induced by radiofrequency fields: IEC61000-4-6
Immunity to radiated radiofrequency electromagnetic fields: IEC61000-4-3
Rated max. power
of the emitter (W)
Separation distance in meters (m) according to emitter frequency
150 KHz to 80 MHz
d = 1.2
80 MHz to 800 MHz
d = 1.2
800 MHz to 2,5 GHz
d = 2.3
0,01 0.12 m 0.12 m 0.23 m
0,1 0.38 m 0.38 m 0.73 m
11.2 m 1.2 m 2.3 m
10 3.8 m 3.8 m 7.3 m
100 12 m 12 m 23 m
For emitters rated at max. power not listed above, the recommended separation distance d in meters (m) can be estimated
using the equation applicable to the frequency of the emitter, where P is the max. power rating of the emitter in watts (W)
according the manufacturer.
Table of contents
Languages:
Other ACTEON Equipment Media Converter manuals
