Wireless Display
Receiver
Model # SBWD100A
Installation Guide
This Installation Guide will walk you through the easy steps
to set up your ScreenBeam Pro Receiver. During this
process, we’ll show you how to :
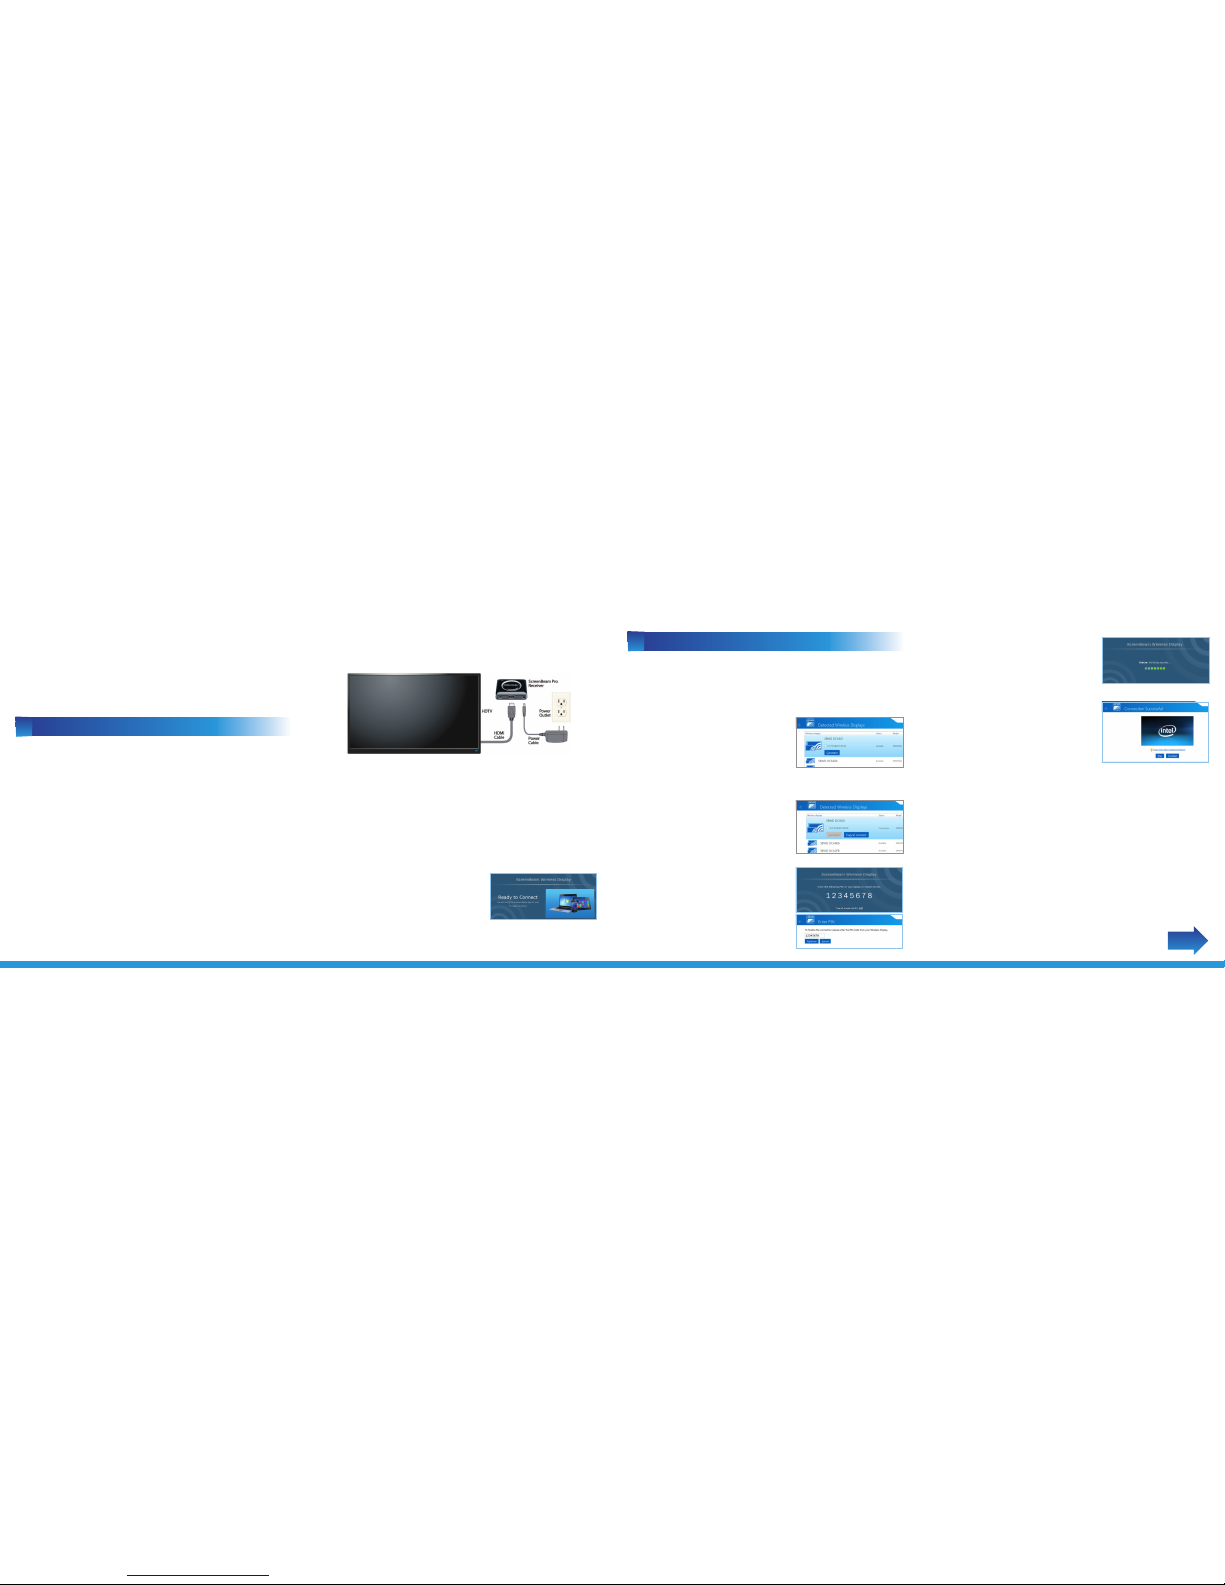
AInstall the Receiver
BConnect Using
Intel WiDi
CConnect Using
Wi-Fi Miracast
NEXT
CConnect Using Wi-Fi Miracast
Step1On the Miracast device, open the Wireless Display
Application.
Note: The name of the Wireless Display Application depends on
the device type and model. Refer to the device’s carrier or
manufacturer user manual for more details.
Step2The Wireless Display Application scans for available
receivers. Select the ScreenBeam Receiver from the list.
Step2Unzip (extract) the downloaded firmware file.
Step3Copy all of the files in the unzipped folder to the root
directory of the USB flash drive connected to the computer.
Note: Do not use a portable hard drive. You must use a
formatted FAT/FAT32 USB ash drive only.
Step4Make sure the HDTV connected to the Receiver is
powered on and the correct HDMI input is selected.
Note: You must disconnect all wireless devices (ultrabooks,
smartphones, tablets) from the Receiver before upgrading
the rmware.
Step5When the “Ready to Connect”screen appears, plug the
USB flash drive into the Receiver.
Step6Wait a few seconds until the upgrade message appears
on the HDTV. The HDTV screen may go temporarily blank for a
few seconds during the upgrade process.
Warning! Do not power o the Receiver or remove the USB ash
drive while the upgrade is in progress. This may cause the
rmware upgrade to fail.
Note: Before starting, make sure the Miracast device being used
has the latest operating system, and is updated to the newest
software version available.
Step3Wait for the device to associate with the Receiver. When
it does, the device’s screen will be displayed on the HDTV.
Upgrade the Receiver’s Firmware
Step1Go to www.actiontec.com/screenbeampro and
download the latest ScreenBeam Pro rmware. © 2013 Actiontec Electronics, Inc. ScreenBeam Pro and the Actiontec logo are
registered trademarks or trademarks of Actiontec Electronics, Inc., in the U.S. or
other countries. All other names are properties of their respective owners.
This product has a 1-year Limited Hardware Warranty and 90-day free software
updates from date of purchase.
Local Law
This Limited Warranty Statement gives the customer specic legal rights. The
customer may also have other rights which vary from state to state in the United
States, from province to province in Canada, and from country to country
elsewhere in the world.
To the extent that this Limited Warranty Statement is inconsistent with local law,
this Statement shall be deemed modied to be consistent with such local law.
Under such local law, certain disclaimers and limitations of this Warranty
Statement may not apply to the customer.
Go to http://www.actiontec.com/products/warranty.php for more information.
Go to www.actiontec.com/screenbeampro to register your
product and for more information, including:
• Videos • FAQs • Firmware • Wall Mount Templates
Part No: 0530-0688-000
Step7When the upgrade completes, the“Ready to Connect”
screen reappears on the HDTV, with the new rmware version
information displayed. Remove the USB flash drive from
the Receiver.
The ScreenBeam Pro Receiver is now upgraded.