ActivMedia Robotics Pioneer 2 User manual

Pioneer 2
&
PeopleBot
MOBILE ROBOTS
with Pioneer 2 Operating System Servers
COMPUTER
&
SYSTEMS
MANUAL

ii
Copyright © 2001, ActivMedia Robotics, LLC
All rights reserved.
Under international copyright laws, this manual or any portion of it
may not be copied—or in any way duplicated—without the expressed written consent of
ActivMEDIA ROBOTICS.
The software on disk and on the Pioneer 2 controller ROM, which accompany the robot
and/or are available for network download by ActivMEDIA ROBOTICS’ customers, are solely
owned and copyrighted or are products of SRI International as licensed for distribution by
ActivMEDIA ROBOTICS.
Pioneer developers and users are authorized by revocable license to develop and
operate custom software for personal research and educational use only. Duplication,
distribution, reverse-engineering, or commercial application of the Pioneer software and
hardware without the expressed written consent of ActivMEDIA R
OBOTICS is explicitly
forbidden.
The various names and logos for products used in this manual are often registered
trademarks or trademarks of their respective companies. Mention of any third-party
hardware or software constitutes neither an endorsement nor a recommendation.
ActivMEDIA ROBOTICS, LLC
44 Concord Street, Peterborough, NH 03458, USA •
http://www.ActivRobots.com
603-924-9100 • Fax 603-924-2184
Pioneer 2 Mobile Robots—Computer and Software Manual, v4 June, 2001

iii
Table of Contents
CHAPTER 1 INTRODUCTION.......................................................................................1
ADDITIONAL RESOURCES.......................................................................................................................1
ONBOARD PC OPERATION...................................................................................................................1
LINUX ...................................................................................................................................................2
User Login............................................................................................................................... 2
Network and User Configuration Tools............................................................................... 2
GUI Desktop........................................................................................................................... 2
Network Access.................................................................................................................... 3
WINDOWS95-2000/NT........................................................................................................................3
Network Configuration......................................................................................................... 3
SERIAL PORTS........................................................................................................................................3
CHAPTER 2 SOFTWARE - LINUX .................................................................................4
ACTIVMEDIA COLOR TRACKING SYSTEM (ACTS)...................................................................................4
AYLLU...................................................................................................................................................5
BOTSPEAK.............................................................................................................................................6
SAPHIRA ...............................................................................................................................................7
STEREO VISION SOFTWARE (SVS)...........................................................................................................8
CHAPTER 3 HARDWARE –
––
–LINUX...............................................................................9
ACTIVMEDIA PAN TILT UNIT (AMPTU)...................................................................................................9
BREEZECOM WIRELESS ETHERNET............................................................................................................9
WAVELAN/IEEE (ORINOCO) PCMCIA RADIO ETHERNET....................................................................9
BT848 FRAME GRABBER DRIVERS..........................................................................................................10
P2 GRIPPER........................................................................................................................................11
SONY PTZ CAMERA............................................................................................................................11
SOUNDBLASTER COMPATIBLE PC104 SOUND CARD..............................................................................11
DUAL SOUNDBLASTER COMPATIBLE PC104 SOUND CARDS ...................................................................11
SICK LASER RANGE FINDER..................................................................................................................12
WIRELESS RADIO MODEM ...................................................................................................................12
CHAPTER 4 SOFTWARE –
––
–WIN32 .............................................................................13
ACTIVMEDIA COLOR TRACKING SYSTEM (ACTS).................................................................................13
AYLLU.................................................................................................................................................14
BOTSPEAK...........................................................................................................................................15
REMOTE ACCESS PROGRAMS..............................................................................................................15
SAPHIRA .............................................................................................................................................16
CHAPTER 5 HARDWARE –
––
–WIN32............................................................................18
ACTIVMEDIA PAN TILT UNIT (AMPTU).................................................................................................18
BREEZECOM WIRELESS ETHERNET..........................................................................................................18
BT848 FRAME GRABBER DRIVERS..........................................................................................................18
P2 GRIPPER........................................................................................................................................18
SONY PTZ CAMERA............................................................................................................................18
SOUNDBLASTER COMPATIBLE PC104 SOUND CARD..............................................................................19
SICK LASER RANGE FINDER..................................................................................................................19
WIRELESS RADIO MODEM ...................................................................................................................19

iv
CHAPTER 6 PERFORMANCE PEOPLEBOT.................................................................20
HARDWARE ........................................................................................................................................20
SOFTWARE..........................................................................................................................................20
SONARS..............................................................................................................................................20
I/O EXPANSION BOARD AND JOYSTICK PORT.......................................................................................20
TABLETOP IR SENSORS..........................................................................................................................20
COLUMN IR BREAKBEAMS ...................................................................................................................21
IR SENSOR PROGRAMMING.................................................................................................................21
EMERGENCY STOP BUTTON AND E-STALL...............................................................................................21
GRIPPER.............................................................................................................................................22

1
Chapter 1 Introduction
Congratulations on your purchase of a Pioneer 2 or PeopleBot Mobile Robot from
ActivMEDIA ROBOTICS. This document describes the standard ways ActivMEDIA ROBOTICS
configures your robot’s onboard PC systems and software for use under Redhat Linux or
Microsoft Windows. This document also is a modest User’s Guide for operation of the
onboard computing systems.
Additional Resources
If you encounter any troubles with your new robot, please consult these sources before
contacting ActivMedia Robotics with support questions. These resources are available
for all ActivMedia Robotics customers, and help reduce questions about the robots.
http://robots.activmedia.com Pioneer Software and documentation
website
http://robots.activmedia.com/FAQ.html
Pioneer 2 Frequently Asked Questions
http://www.mobilerobots.com
General Robotic information, as well
as the WebPioneer
http://www.mobilerobots.com
General Robotic information
http://www.activrobots.com
General Robotic information
http://robots.activmedia.com/archives/pioneer-
users/index.html
Pioneer-users mailing list archives
http://robots.activmedia.com/archives/saphira-
users/index.html
Saphira-Users mailing list archives
http://www.amigobot.com
AmigoBot software and
documentation website
pioneer-suppo[email protected]
If something malfunctions on your
mobile robot, contact pioneer-
support for questions. This is ONLY for
robot breakdowns. Include your
robot’s SERIAL NUMBER and as
detailed a description of the problem
as possible.
Onboard PC Operation
We mount your Pioneer 2’s onboard PC inside the robot’s front nose. The system comes
complete with a high-capacity hard-disk drive for storage, onboard 10/100Base-T
Ethernet (radio Ethernet optional) for network access, an accessory sidepanel (right side
on the DX, in the AT’s center well, or on the left strut of the PeopleBot) for attachment of
a monitor, keyboard, mouse, and 10-BaseT Ethernet cable to a 10/100Mbps hub, and a
power switch and reset button. The PC is wired for control of your robot and accessories
you may have purchased, such as a laser range finder.
If you plan to work locally with your onboard computer, attach the necessary peripherals
before starting the robot. You must work from a local keyboard, mouse, and monitor at
least once to configure the onboard network.

2
Switch ON your robot’s Main Power and then switch ON computer power from the
sidepanel. A green LED indicates power state. The Ethernet radio accessory shares the
sidepanel’s 10-BaseT connector. Accordingly, switch the RADIO off on the robot’s
console if you attach a cable, or remove the Ethernet cable and switch the RADIO on if
you plan to communicate wirelessly.
We recommend that you attach a high-speed (4A standard) charger when working
locally. And we recommend that you put the robot up on blocks, should someone
inadvertantly engage the robot’s drive wheels.
Linux
We prefer RedHat Linux as Pioneer’s onboard OS for many reasons. Foremost among
these reasons are that Linux is very robust, comes complete with software development
tools, and includes networking features that make offboard monitoring and control of
your robot’s onboard systems much easier to accomplish.
When we installed Redhat Linux on your ActivMEDIA Mobile Robot, we configure it with
the following:
Table 1. Common networking settings
Hostname p2.activmedia.com
IP 192.168.100.32
Netmask 255.255.255.0
Default Gateway 192.168.100.1
Primary DNS 192.168.100.1
Workgroup ID (Win32) ACTIVMEDIA
User Login
We establish two users: guest and root. Neither are password protected.1
When working locally, use either root or guest to log in and access the system. Careful, of
course: root has special access priviledges that affect system-wide functions and
features of your Linux PC.
For security, when accessing the onboard PC from elsewhere on the network, you must
first login as guest or other equivalent user and then gain superuser privileges with the su
command.
Network and User Configuration Tools
Most system-wide configuration tools require that you are a superuser (root, usually) to
make any changes.
Reconfigure your Linux PC’s network with X-based /usr/bin/netcfg, or manually edit the
/etc/sysconfig/network and /etc/sysconfig/network-scripts/ifcfg-eth0 files with emacs or
pico. Table 1 contains the default networking values we use to install and test an
onboard Linux PC. Modify the hostname, domainname, network mask, IP address, and
so on, to match your own network specifications.
Add/edit users with /usr/bin/usercfg or /sbin/adduser.
Both utilities and others also are available through the GUI-based /usr/bin/control-panel.
GUI Desktop
RedHat Linux comes with several X-Window System-based GUI desktops for point-and-
click operation of the computing environment. When connected locally with keyboard,
1Use the passwd program to change user passwords. Type passwd alone and follow the prompts to change
your login password, or as root, type passwd <username> to change another user’s password.

3
mouse, and monitor, type the command “startx” to enable the GUI control desktop after
logging into the system.2
Network Access
To enable your robot PC’s Linux GUI (X-Windows) over the network, first allow your
computer to host the robot’s X- displays with xhost. For example, working remotely from
“bill2”, the first set of commands establish the X-host at the local console; the next
commands establish a network telnet connection with the robot; and the final
command starts up the Saphira robot control client which display should appear on your
local display.
[bill@bill2 bill]$ xhost +p2.activmedia.com
p2.activmedia.com being added to the control list
[bill@bill2 bill]$ telnet p2
...
login: guest
...(guest login)....
[guest@p2 guest]$ export DISPLAY=bill2.activmedia.com:0.0
[guest@p2 guest] saphira
Windows95-2000/NT
Unless you have purchased and installed a remote access program like Timbuktu from
Netopia (http://www.netopia.com) or the free VNC Viewer
(http://www.uk.research.att.com/VNC), you will not be able to access and operate a
Windows95-2000-based PC over the network. With caution, however, you may start up
your robot’s Windows-based PC with monitor, keyboard, and mouse attached, start the
robot application, and remove the attached peripherals to allow the robot to move
autonomously.
The default username is “msinstall” with no password.
Network Configuration
Similar with the Linux version, we configure your robot’s onboard PC for our local network
to test and exercise the systems (see Table 1). Use the Network Control Panel utililty to
change those settings to match your own LAN.
Serial Ports
/dev/ttyS0 (COM1) is for robot control (Saphira connection, for instance) and power
management (“/dev/UPS” symlink)
/dev/ttyS1 (COM2) is for a serial mouse or GPS, where applicable.
/dev/ttyS2 (COM3) Laser Range Finder
/dev/ttyS3 (COM4) Not used.
2Change to run-level 5 in /etc/inittab to automatically boot into GUI mode.

4
Chapter 2 Software - LINUX
ActivMEDIA ROBOTICS staff install a plethora of robotics-application and development
software with documentation on your Pioneer 2 onboard PC. Under Linux, most software
are located within their individual directories in /usr/local with rw (read/write) access by
members of the users group. Similarly, documentation is in /usr/local/doc and source
archives are in /usr/local/src.
ActivMedia Color Tracking System (ACTS)
There are two versions of ACTS, a demonstration version and a licensed version. The
demonstration version of ACTS has the full capabilities of the licensed version, minus its
client-networking capability. This means you can train colors, load images – nearly
everything pertaining to color tracking on the robot, which will give you a good picture
of how ACTS works, but you will be unable to use ACTS to have your robot react to the
color tracking system. The licensed version of ACTS, besides giving you full access to
networked clients, gives you several development tools to build your own clients, as well
as free access and updates to future versions and embellishments of ACTS. If you install
Acts, on your own, make sure to make a symbolic link from /dev/bt848 to /dev/fg0
ln –s /dev/bt848 /dev/fg0
Acts has been installed in the /usr/local/acts (/usr/local/acts-demo if you received the
demo version) on your robot’s hard drive. This directory has multiple sub-directories (less if
you have the demo version), each containing pertinent information for that directory.
The directory structure is as follows (all directories are preceded by /usr/local, but are left
out of the description:
acts/Makefile:
This file is the top level makefile. When you type “make” in this directory
it compiles the demo programs in the acts_robot and sfActs
subdirectories.
These directories do not exist in the demo version of ACTS.
acts/README:
This file contains various information on running ACTS, such as
system requirements and version information.
acts/VERSION:
This file contains information on what version of ACTS you are
currently running. This is useful to see if you are running the latest
version of ACTS. New versions will be released periodically,
and are available at our software website: http://robots.activmedia.com.
acts/acts_robot:
This subdirectory contains a demo application that connects the ACTS
server to a Saphira client program. This example, as documented in the
acts_robot.cxx file, has the Pioneer 2 Mobile Robot follow a previously
trained color object, stopping when the object or an obstacle is within a
certain range of the front of side of the robot. Type “make” in this
subdirectory to create the executable program, acts_robot.
acts/bin:

5
This subdirectory contains the exectuable of the ACTS server. To run the
ACTS server, cd to this directory (ie. cd /usr/local/acts/bin), then execute
the following command: ./acts &. This will start ACTS up in the
background, allowing you to run ACTS and train the system on various
colored objects. This subdirectory also contains a file, test.ppm, which is
used when you run the example training session, as described in the ACTS
manual.
acts/docs:
This subdirectory contains the ACTS manual, actsman2.pdf. The manual is
in the Acrobat reader format. To read this file under linux, you can issue
the following command: xpdf actsman2.pdf. This manual is the definitive
guide to ACTS, and should be read carefully to fully understand the
concepts behind ACTS.
acts/sfActs:
This subdirctory contains a program that is compiled into a loadable
shared object file. This file can be loaded into Saphira (from the
Programs->Load Program menu item.) It defines a Saphira process that
communicates to ACTS and sets up a series of data structures for
providing an interface to the blob information from within Colbert. Before
loading the .so file into Sahira, make sure to copy the CenterOnBall.act
file into the /usr/local/Saphira/ver62/colbert directory, to ease the
loading of the activity file. The CenterOnBall activity does just what the
name describes, it centers the robot on a colored ball.
For more information on the execution of ACTS, please consult the manual,
actsman2.pdf located in the acts/doc directory.
Ayllu
Ayllu is a tool for development of behavior-based control systems for intelligent mobile
robots. It extends subsumption-style message passing to the multi-robot domain,
provides for a wide variety of behavior-arbitration techniques, and allows a great deal of
run-time system flexibility, including dynamic reconfiguration of behavior structure and
redistribution of tasks across a group of robots as determined by either task constraints or
changing availability of resources.
standard set of basic motor-control and sensor-interpretation behaviors for the Pioneer
mobile robot. These include a base controller that takes advantage of direct wheel-
speed control to provide highly responsive, arc-based, velocity-based (rotational and
translational), and distance-based motor commands; as well as support for all Pioneer
accessories including control of vision system modes and training. Due to the nature of
Ayllu as an extendable collection of behaviors, all new versions will reamin strictly
backward compatible with earlier versions so upgrades will be painless.
Whence the name Ayllu? Ayllu is a Quechua-language term that refers to a close-knit
community, usually, but not exclusively, of kin, which engages in many mutual and
reciprocal activities. Quechua is a native language of the Andean region, spoken by
approximately 13 million people in Bolivia, Peru, Ecuador, Chile, Colombia, and
Argentina. For information on the Quechua language, check Ullanta Perfomance
Robotics’ Quechua homepage at http://www.robotics.usc.edu/~barry/Quechua. Yes,
Ullanta comes from Quechua too.
The Ayllu directory structure is as follows:

6
Ayllu/AylluDemos:
This directory contains many useful demo applications for Ayllu. To make
one of the demo programs, simply type “make” followed by the name of
the program you want to make (ie. make wanderer.)
Ayllu/README
This file contains information on how Ayllu was installed on your computer,
and how to configure your system settings to recognize that Ayllu is
installed.
Ayllu/include:
This directory contains the necessary Ayllu include files for compiling Ayllu
programs.
Ayllu/lib:
This directory contains the necessary Ayllu library files, used for compiling
Ayllu programs. The easiest way to ensure that these libraries are linked
when you compile your program is to add the directory to your
LD_LIBRARY_PATH system setting (located in /etc/profile if you are using
the bash shell.)
Ayllu/makefile:
This is the top level makefile, which compiles all the programs in the
AylluDemos directory.
Ayllu/version:
This file contains the version information of the Ayllu distribution you are
using.
Botspeak
Botspeak speech synthesis/speech recognition software has been integrated with IBM’s
ViaVoice software, for use with the Pioneer2 intelligent mobile robots. We do not directly
support user-installation of this project, as it is very complicated, but we may help
unofficially. In this case, our response time may be slow. If we have installed Botspeak
on your computer, it has been fully configured and tested before you received your
robot. Botspeak uses the Inter-language unification corba-like interface provided by
Xerox. More information on ILU can be found at the Xerox ftp website:
ftp://ftp.parc/xerox.com/pub/ilu/ilu.html. The directory structure for botspeak is as
follows:
botspeak/bin:
This sub-directory contains the botspeak server. This must be run to
accomplish speech recognition and synthesis with Saphira.
botspeak/binding:
This is a required subdirectory for ILU.
botspeak/botspeak.txt:
This file contains information on how to run botspeak, and how botspeak
was installed on your system.
botspeak/example:

7
This subdirectory contains an example program for connecting Botspeak
to a Saphira client program. Read the README.txt file in this subdirectory
for information on how the example works. To run the example, type the
following command at the prompt: ./example. If the Saphira client
window disappears, re-run the program until it stays, then say “hello” into
the microphone.
botspeak/lib:
This subdirectory contains the libraries needed to compile and execute
botspeak enabled programs. The easiest way to ensure that these
libraries are linked during compile is to add the directory to your
LD_LIBRARY_PATH system variable (ie in the /etc/profile file if you are using
the Bash shell.)
Saphira
Saphira is a rich programming environment for developing robotics applications. Written
and maintained by Kurt Konolige, PhD, and his colleagues at SRI International, Saphira
uses fuzzy logic behaviors to control the popular Pioneer, PeopleBot and AmigoBot
robots.
You must have a Saphira environment variable setup to compile and execute Saphira
programs. If we install the software on you computer, we have pre-configured this
variable. If you are installing Saphira on a different workstation, make sure you make this
variable (ie, in /etc/profile for the bash shell: SAPHIRA=/usr/local/Saphira/ver62, if this is
your install directory.)
We install Saphira in the /usr/local/Saphira/ver62 directory on your robot. The directory
structure for Saphira is as follows:
ver62/apps:
This contains sample programs for learning how to program Saphira by
example. The various programs in this directory contain information such
as how to connect to the Pioneer 2 Mobile Robot and how to make a
window-less client program. To compile these programs, simply type
make in the directory.
ver62/bin:
This contains the binaries Saphira, a robotic client program, Pioneer, the
Pioneer simulator, as well as other binaries. The Saphira manual gives
more information on the binaries in this directory.
ver62/Colbert:
Colbert is an interactive way to program your robots. Colbert has files,
Called activities, that do not need to be compiled to execute commands
to the robot (thus, Colbert is in interpreted language). This directory is the
default location for storing the Colbert activity files, for loading into the
Colbert Evaluator. Place all activity files you create here.
ver62/devices:
This stores the modules and code for controlling devices through Saphira,
such as the SICK laser range finder and the Sony Pan Tilt Zoom camera.
ver62/handler:
This has the necessary include and library files for compiling and running
Saphira client programs. Set your LD_LIBRARY_PATH system variable to the

8
handler/obj directory to ease compiling programs
(ie.LD_LIBRARY_PATH=/usr/local/Saphira/ver62/handler/obj)
ver62/license:
This file contains licensing information for your copy of Saphira. Please
read for information on your rights to use the software.
ver62/maps:
This directory contains maps, which can be used by your Saphira client
programs for information on the robots environment. Consult the Saphira
Users Manual for more information on using maps.
ver62/params:
This directory contains information for different types of Pioneer robots. It
has the proper hardware configurations settings (ie sonar), which allows
Saphira to take full advantage of your robots hardware.
ver62/update:
This file contains information on the changes done to this version of
Saphira from the last release version of Saphira.
ver62/version:
This file contains the version information for the Saphira in use.
ver62/worlds:
This directory contains worlds, which are simlar to maps. Please consult
the users manual for more information on utilizing worlds in Saphira.
Stereo Vision Software (SVS)
Find the stereo vision software licensed from SRI International in the /usr/local/svs14
directory of your robot, if you purchased SVS. This system is typically used with the AMPTU
with dual monochrome cameras. To test SVS, follow these steps:
1. cd to the svs bin directory: cd /usr/local/svs14/bin
2. export the following variables:
a. export SVS_DEV=1
b. export SVS_PXC_PC104=1
3. run the smallv program in the bin directory: ./smallv
3. A new window will appear, select the following option in the window:
a. Input:
video
b. Select the Contin button
After following these steps (verifying that your AMPTU is turned ON and the lens caps are
removed from the cameras, you should see live images from both the cameras
displayed in their corresponding boxes in the window. To verify that you are getting
images from each individual camera, put your hand in front of each camera (close to
the camera, so it blacks out the video window). The video window corresponding to the
camera you have your hand in front of will go black, while the other video window will
show a live image.

9
Chapter 3 Hardware – Linux
This section of the documentation shows the user how to run the various hardware
options (including software that drives the hardware) available on the Pioneer 2 Mobile
Robot. It is not a definitive guide to the hardware packages, but is meant as an
introduction to running the hardware. This will enable the user to quickly learn how to use
the hardware, while gaining a considerable level of knowledge on their robotic system.
ActivMedia Pan Tilt Unit (AMPTU)
The AMPTU by ActivMedia Robotics is a fully functional Pan-Tilt unit, capable of panning
90 degrees left and right, and tilting 90 degrees up and down. The software included
with the AMPTU allows the user to operate the Pan-tilt unit in the Saphira environment.
The software for the AMPTU is included in the /usr/local/Saphira/ver62/devices directory.
To test your AMPTU, follow the steps below:
1. Start a Saphira client program (ie. /usr/local/Saphira/ver62/bin/saphira)
2. Connect to your robot with the Saphira client (File->Connect->/dev/ttyS0)
3. Turn on power to your AMPTU
4. load the amptu_demo.act file from the Program->Load Program menu.
The program automatically connects to the AMPTU and delivers a series of commands to
the AMPTU. The amptu_demo.act file is located in the /usr/local/Saphira/ver62/colbert
directory, and is a good example for how to control the AMPTU within Saphira.
BreezeCom Wireless Ethernet
The Breezecom wireless Ethernet devices do not need to be configured in any way by
the customer. Simply remember to remove—if installed—the Ethernet cable attached to
the 10Base-T port and switch the RADIO ON.
To install the BreezeCom Access Point, simply connect it to a HUB in your environment
with a regular Ethernet cable, or connect directly to your workstation or laptop computer
with a crossover Ethernet cable. Once connected and powered, the Access Point will
be auto-detected by the Station Adapter (located inside the Pioneer 2), and will begin
communication. The connection should be transparent to the user.
WaveLAN/IEEE (Orinoco) PCMCIA Radio Ethernet
With Linux, you may use either the onboard Ethernet (device eth0) wired directly to a
hub, or the WaveLAN/IEEE (Orinoco) PCMCIA radio Ethernet (device wvlan0) connected
through an Access Point, but not both devices at once. The robot ships with eth0
enabled and wvlan0 disabled, although the PCMCIA card is inserted and activated. The
devices have the same IP address and hostname.
To alternately enable and disable the Ethernet devices, use the ifup and ifdown utilities.
You must be root. For example, to switch from cable to wireless:
#ifdown eth0; ifup wvlan0
Use the netcfg or linuxconfig utilities, or directly edit the /etc/sysconfig/network and
/etc/sysconfig/network-scripts/ifcfg-eth0 and /etc/sysconfig/network-scripts/ifcfg-wvlan0
files to change the device specifications.

10
Bt848 frame grabber drivers
We have installed the bt848 drivers in the /usr/local/bt848-1.x directory on your system.
Your system has been pre-configured to run with the PC104+ PXC200 Imagenation frame
grabber. The README in the toplevel of this directory includes information on how the
frame grabber drivers were installed. An example program, that saves a file called
rgb24.ppm, is located in the /usr/local/bt848-1.2/examples/PXC200 directory. The
example, grabreadPXC200 grabs a single frame of image, and saves it to the file. You
can view this image by using the xv program. (Ie. xv rgb24.ppm.)

11
P2 Gripper
The P2 Gripper software has been installed in the /usr/local/Saphira/ver62/devices
directory on your system. To test your gripper, follow the steps below:
1. Start a Saphira client program (ie /usr/local/Saphira/ver62/bin/saphira)
2. Connect to your robot with the Saphira Client (File->Connect->/dev/ttyS0)
3. From the Programs->Load Program menu item, select the p2grip.so file.
4. In the Colbert Interactive window (located at the bottom of the Saphira client
window), issue the following command: help p2grip. This will list a series of
commands you can issue to the gripper. An example is: p2grip close, which
tells the gripper paddles to close (p2grip open opens the paddles.)
Sony PTZ Camera
The Sony Pan-Tilt-Zoom camera has been fully integrated onto our Pioneer 2 Mobile
Robot. To test your Sony PTZ camera, follow the steps below (to test frame grabbing from
the camera, read the bt8xx information located in this manual.)
1. Start a Saphira client program
2. Connect to your robot with the Saphira client.
3. From the Programs->Load Program menu item, load the ptzdemo.act file.
This will start a demo program that tests the features of the Sony PTZ camera. The file that
the test program runs, ptzdemo.act, is located in the /usr/local/Saphira/ver62/colbert/
directory, and is an good example of how to control the Sony PTZ camera in your own
Saphira client program.
Soundblaster compatible PC104 sound card
Redhat linux supports the PC104 sound card in your robot. To test your sound card for
playing sounds, follow the steps below:
1. Connect a pair of speakers to the appropriately labeled wire on your robot.
2. type the following command:
cat /usr/share/sndconfig/sample.au > /dev/audio
3. You should hear Linus explaining how he pronounces linux.
To test your sound card for recording sounds, follow theses steps:
1. Connect a pair of speakers and a microphone to the appropriately labeled
wires on your robot.
2. type the following command:
dd bs=8k count=10 < /dev/audio > test.au
and speak into the microphone (the recording will last 10 seconds, the length
of “count.” This will create a file in your current working directory, called
test.au.
3. now type the following command:
cat test.au > /dev/audio
Dual Soundblaster compatible PC104 sound cards
This option is a custom add-on, usually found on PeopleBots. ActivMedia Robotics does
not support user-installation of this accessory, but has configured robots in the past for
dual sound card support. If you have a dual sound card system installed on your robot,
the following test will show you how to determine that both soundcards are functioning.
(NOTE: All software written by ActivMedia Robotics uses the first sound card on the
computer. Special software must be written by the user to take advantage of the
second sound card.)

12
Sound card one is configured to be /dev/audio. To test sound input from a microphone,
follow the steps for a single sound card, described above. Sound card two is configured
to be /dev/audio1. To test this sound card for sound input from a microphone, follow the
steps for a single sound card system (described above), except replace this line:
dd bs=8k count=10 < /dev/audio > test.au
with:
dd bs=8k count=10 < /dev/audio1 > test.au
We do not currently support output from both sound cards, so output must be passed to
sound card 1.
Sick Laser Range Finder
We install the software to control the SICK (pronounced seek) Laser Range Finder in the
/usr/local/Saphira/ver62/devices/sicklrf directory on your robot. To test your laser range
finder, follow the steps below:
1. Turn your robot and laser range finder on.
2. Start a Saphira client program (ie. /usr/local/Saphira/ver62/bin/saphira)
3. Connect to your robot (File->Connect->/dev/ttyS0)
4. Load the sicklrf.so file (Programs->Load Program)
5. In the Colbert Interactive window (at the bottom of the Saphira client
window) type the following command:
SfStartLRF(0,””)
This will cause the Sick LRF to power cycle, and the LED’s located on the top front of the
LRF will turn from GREEN to YELLOW/RED, back to GREEN, back to RED, then settle on
GREEN. At this time, you will see many new points on your Saphira screen. These points
(little blue squares) are returned from the laser, and indicate obstacles the laser range
finder has detected.
Wireless Radio Modem
The wireless radio modems in your robot have been configured at the factory to work in
pairs. Do NOT adjust the settings of the radio modems, as this will cause communication
failure. Simply connect the radio modem labled “HOST” to your workstation or laptop
computer, and connect through Saphire to the appropriate serial port.

13
Chapter 4 Software – Win32
The various robot control software are found in relevant directories on your C: boot drive.
Manuals are located in C:\Manuals.
ActivMedia Color Tracking System (ACTS)
There are two versions of ACTS, a demo version and the licensed version. The
demonstration version of ACTS has the full capabilities of the licensed version, minus its
client-networking capability. This means you can train colors, load images – nearly
everything pertaining to color tracking on the robot, which will give you a good picture
of how ACTS works, but you will be unable to use ACTS to have your robot react to the
color tracking system. The licensed version of ACTS, besides giving you full access to
networked clients, gives you several development tools to build your own clients, as well
as free access and updates to future versions and embellishments of ACTS. Microsoft
Visual C++ 6.0 is required to compile projects with ACTS.
Acts has been installed in the C:\Acts (C:\Acts-demo if you received the demo version)
folder on your robot’s hard drive. This directory has multiple sub-directories (less if you
have the demo version) each containing pertinent information for that directory. The
directory structure is as follows (all directories are preceded by /usr/local, but are left out
of the description:
Acts/README:
This file contains various information on running ACTS, such as
system requirements and version information.
Acts/VERSION:
This file contains information on what version of ACTS you are
Currently running. This is useful to see if you are running the latest
Version of ACTS. New versions will be released periodically,
And are available at our software website: http://robots.activmedia.com.
Acts/acts_robot:
This subdirectory contains a demo application that connects the ACTS
server to a Saphira client program. This example, as documented in the
acts_robot.cxx file, has the Pioneer 2 Mobile Robot follow a previously
trained color object, stopping when the object or an obstacle is within a
certain range of the front of side of the robot. Double-click on the
acts_robot.dsw file to load the project into Microsoft Visual C++ 6.0
Acts/bin:
This subdirectory contains the exectuable of the ACTS server. To run the
ACTS server, double-click on the acts.exe icon. This will start ACTS in the
background, allowing you to run ACTS and train the system on various
colored objects. This subdirectory also contains a file, test.ppm, which is
used when you run the example training session, as described in the ACTS
manual.
Acts/docs:
This subdirectory contains the ACTS manual, actsman2.pdf. The manual is
in the Acrobat reader format. To read this file double-click on the
actsman2.pdf file. This manual is the definitive guide to ACTS, and should
be read carefully to fully understand the concepts behind ACTS.

14
Acts/sfActs:
This subdirctory contains a program that is compiled into a loadable
shared object file. This file can be loaded into Saphira (from the
Programs->Load Program menu item.) It defines a Saphira process that
communicates to ACTS and sets up a series of data structures for
providing an interface to the blob information from within Colbert. Before
loading the .so file into Sahira, make sure to copy the CenterOnBall.act
file into the C:\Saphira\ver62\colbert (or the correct folder where you
installed Saphira) directory, to ease the loading of the activity file. The
CenterOnBall activity does just what the name describes, it centers the
robot on a colored ball.
For more information on the execution of ACTS, please consult the manual,
actsman2.pdf located in the C:\Acts\docs folder.
Ayllu
Ayllu is a tool for development of behavior-based control systems for intelligent mobile
robots. It extends subsumption-style message passing to the multi-robot domain,
provides for a wide variety of behavior-arbitration techniques, and allows a great deal of
run-time system flexibility, including dynamic reconfiguration of behavior structure and
redistribution of tasks across a group of robots as determined by either task constraints or
changing availability of resources.
standard set of basic motor-control and sensor-interpretation behaviors for the Pioneer
mobile robot. These include a base controller that takes advantage of direct wheel-
speed control to provide highly responsive, arc-based, velocity-based (rotational and
translational), and distance-based motor commands; as well as support for all Pioneer
accessories including control of vision system modes and training. Due to the nature of
Ayllu as an extendable collection of behaviors, all new versions will reamin strictly
backward compatible with earlier versions so upgrades will be painless.
Whence the name Ayllu? Ayllu is a Quechua-language term that refers to a close-knit
community, usually, but not exclusively, of kin, which engages in many mutual and
reciprocal activities. Quechua is a native language of the Andean region, spoken by
approximately 13 million people in Bolivia, Peru, Ecuador, Chile, Colombia, and
Argentina. For information on the Quechua language, check Ullanta Perfomance
Robotics’ Quechua homepage at http://www.robotics.usc.edu/~barry/Quechua. Yes,
Ullanta comes from Quechua too.
Ayllu/AylluDemos:
This directory contains many useful demo applications for Ayllu. To make
one of the demo programs, simply double-click on the AylluDemos.dsw
file, to load the projects into Microsoft Visual C++ 6.0
Ayllu/README
This file contains information on how Ayllu was installed on your computer,
and how to configure your system settings to recognize that Ayllu is
installed.
Ayllu/include:
This directory contains the necessary Ayllu include files for compiling Ayllu
programs.
Ayllu/lib:

15
This directory contains the necessary Ayllu library files, used for compiling
Ayllu programs.
Ayllu/VERSION:
This file contains the version information of the Ayllu distribution you are
using.
Ayllu/Ayllu_man.pdf
This is the Ayllu Users Manual, which contains information on Ayllu,
And how to program robotic control programs using Ayllu.
Botspeak
Botspeak speech synthesis/speech recognition software has been integrated with IBM’s
ViaVoice software, for use with the Pioneer2 intelligent mobile robots. We do not directly
support user-installation of this project, as it is very complicated, but we may help
unofficially. In this case, our response time may be slow. If we have installed Botspeak
on your computer, it has been fully configured and tested before you received your
robot. Botspeak uses the Inter-language unification corba-like interface provided by
Xerox. More information on ILU can be found at the Xerox ftp website:
ftp://ftp.parc/xerox.com/pub/ilu/ilu.html.
Botspeak/bin:
This sub-directory contains the botspeak server. This must be run to
accomplish speech recognition and synthesis with Saphira.
Botspeak/binding:
This is a required subdirectory for ILU.
Botspeak/botspeak.txt:
This file contains information on how to run botspeak, and how botspeak
was installed on your system.
Botspeak/example:
This subdirectory contains an example program for connecting Botspeak
to a Saphira client program. Read the README.txt file in this subdirectory
for information on how the example works. To run the example, double-
click on the example.exe icon. If the Saphira client window disappears,
re-run the program until it stays, then say “hello” into the microphone.
Botspeak/lib:
This subdirectory contains the libraries needed to compile and execute
botspeak enabled programs.
Botspeak/include
This subdirectory contains the include files needed to compile botspeak
enabled programs.
Remote Access Programs
Many robotic users wish to control their robots from a remote workstation through their
wireless ethernet. Windows does not support this feature without special software, which
can be purchased from a number of resources. A few of these resources are listed
below, and have all been tested using the Pioneer 2 mobile robot. Please note that
ActivMedia Robotics does not support nor prefer any of these products over another, but
simply provides information on the products.

16
Timbuktu: http://www.netopia.com/software/
PcAnywhere: http://www.pcanywhere.com/
Saphira
Saphira is a rich programming environment for developing robotics applications. Written
and maintained by Kurt Konolige, PhD, and his colleagues at SRI International, Saphira
uses fuzzy logic behaviors to control the popular Pioneer, PeopleBot and AmigoBot
robots.
You must have a Saphira environment variable setup to compile and execute Saphira
programs. If we install the software on you computer, we have pre-configured this
variable. If you are installing Saphira on a different workstation, make sure you make this
variable (ie, in AUTOEXEC.BAT: set SAPHIRA=C:\Saphira\ver62, if this is your install
directory.)
ver62/apps:
This contains sample programs for learning how to program Saphira by
example. The various programs in this directory contain information such
as how to connect to the Pioneer 2 Mobile Robot and how to make a
window-less client program. To compile these programs, simply type
make in the directory.
ver62/bin:
This contains the binaries Saphira, a robotic client program, Pioneer, the
Pioneer simulator, as well as other binaries. The Saphira manual gives
more information on the binaries in this directory.
ver62/Colbert:
Colbert is an interactive way to program your robots. Colbert has files,
Called activities, that do not need to be compiled to execute commands
to the robot (thus, Colbert is in interpreted language). This directory is the
default location for storing the Colbert activity files, for loading into the
Colbert Evaluator. Place all activity files you create here.
ver62/devices:
This stores the modules and code for controlling devices through Saphira,
such as the SICK laser range finder and the Sony Pan Tilt Zoom camera.
ver62/handler:
This has the necessary include and library files for compiling and running
Saphira client programs. Set your LD_LIBRARY_PATH system variable to the
handler/obj directory to ease compiling programs
(ie.LD_LIBRARY_PATH=/usr/local/Saphira/ver62/handler/obj)
ver62/license:
This file contains licensing information for your copy of Saphira. Please
read for information on your rights to use the software.
ver62/maps:
This directory contains maps, which can be used by your Saphira client
programs for information on the robots environment. Consult the Saphira
Users Manual for more information on using maps.
ver62/params:
Other manuals for Pioneer 2
1
This manual suits for next models
1
Table of contents
Other ActivMedia Robotics Robotics manuals
ActivMedia Robotics
ActivMedia Robotics PeopleBot User manual
ActivMedia Robotics
ActivMedia Robotics Pioneer 2 Arm User manual
ActivMedia Robotics
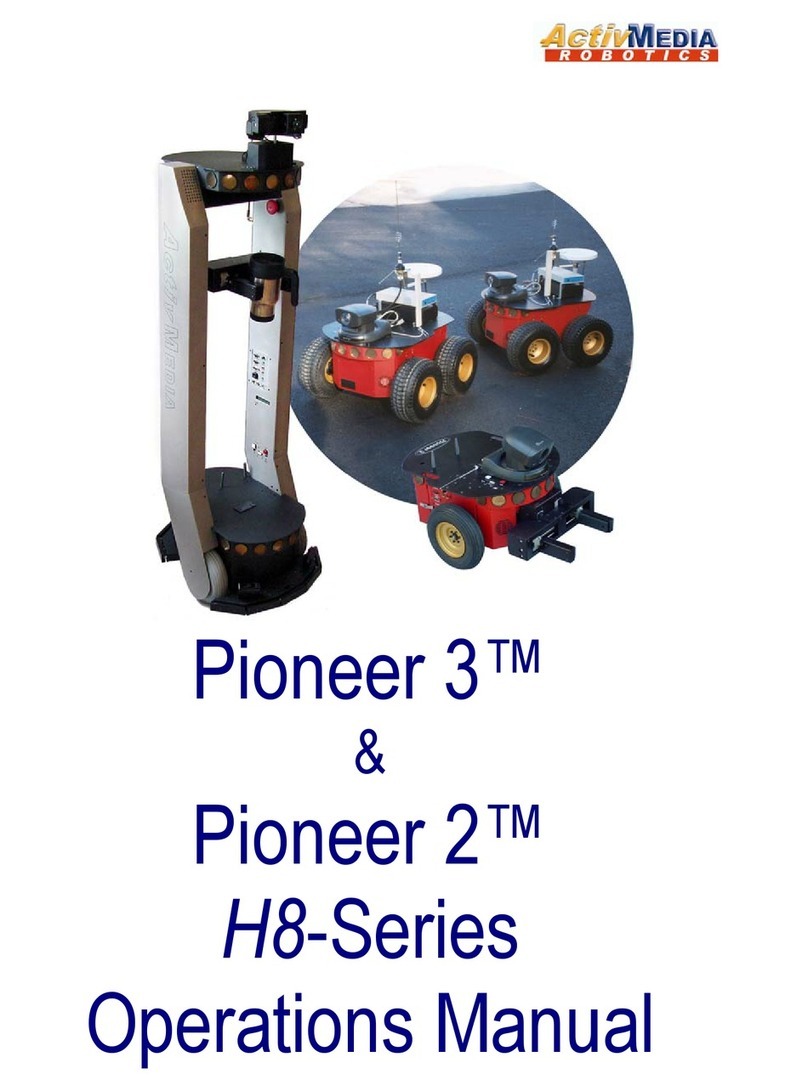
ActivMedia Robotics 3TM User manual
ActivMedia Robotics
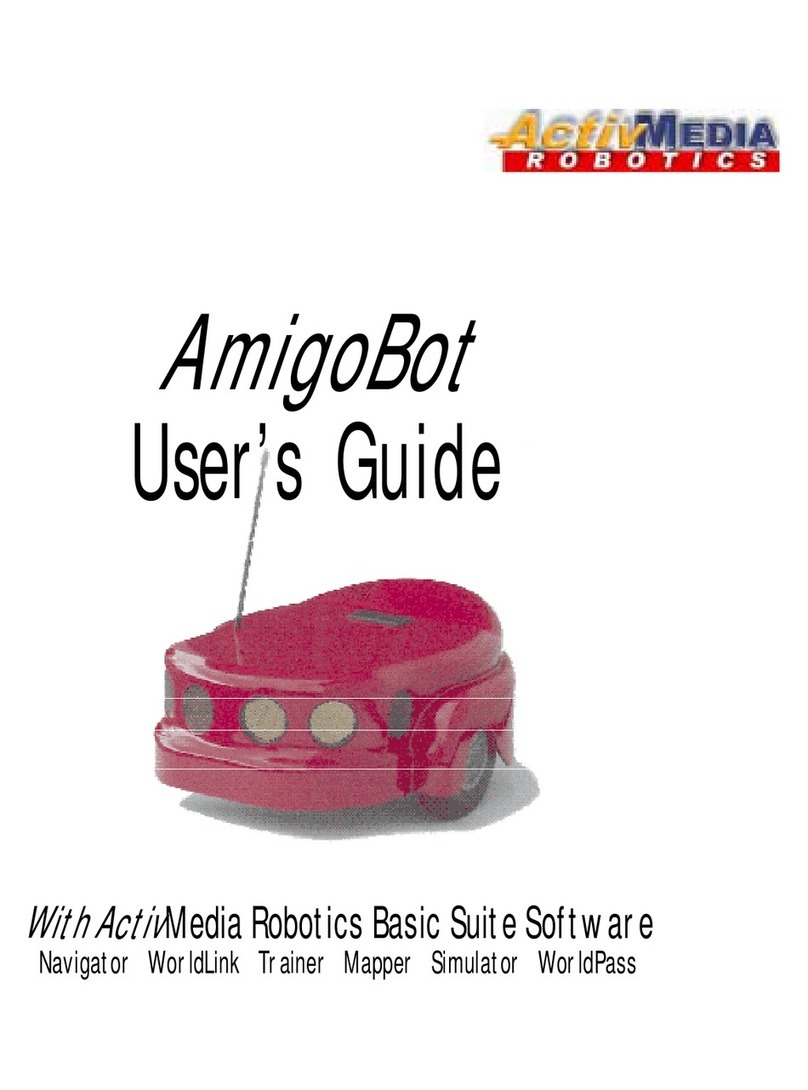
ActivMedia Robotics AmigoBot User manual
ActivMedia Robotics
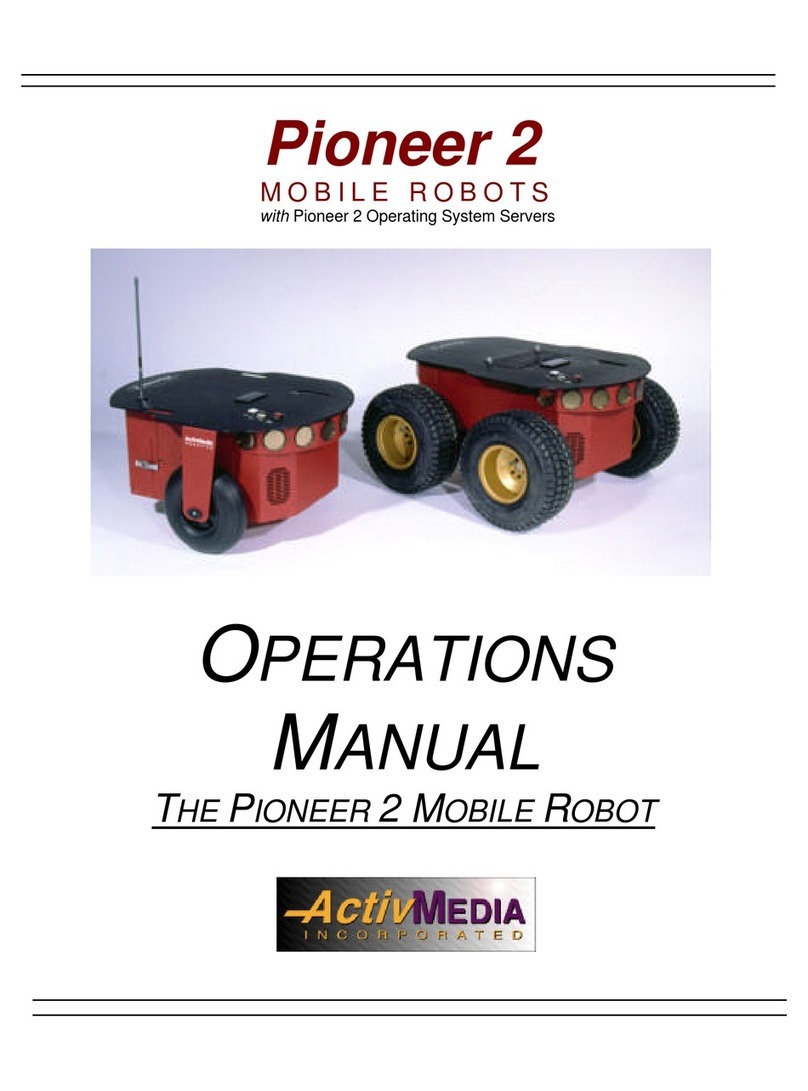
ActivMedia Robotics Pioneer 2 User manual
ActivMedia Robotics
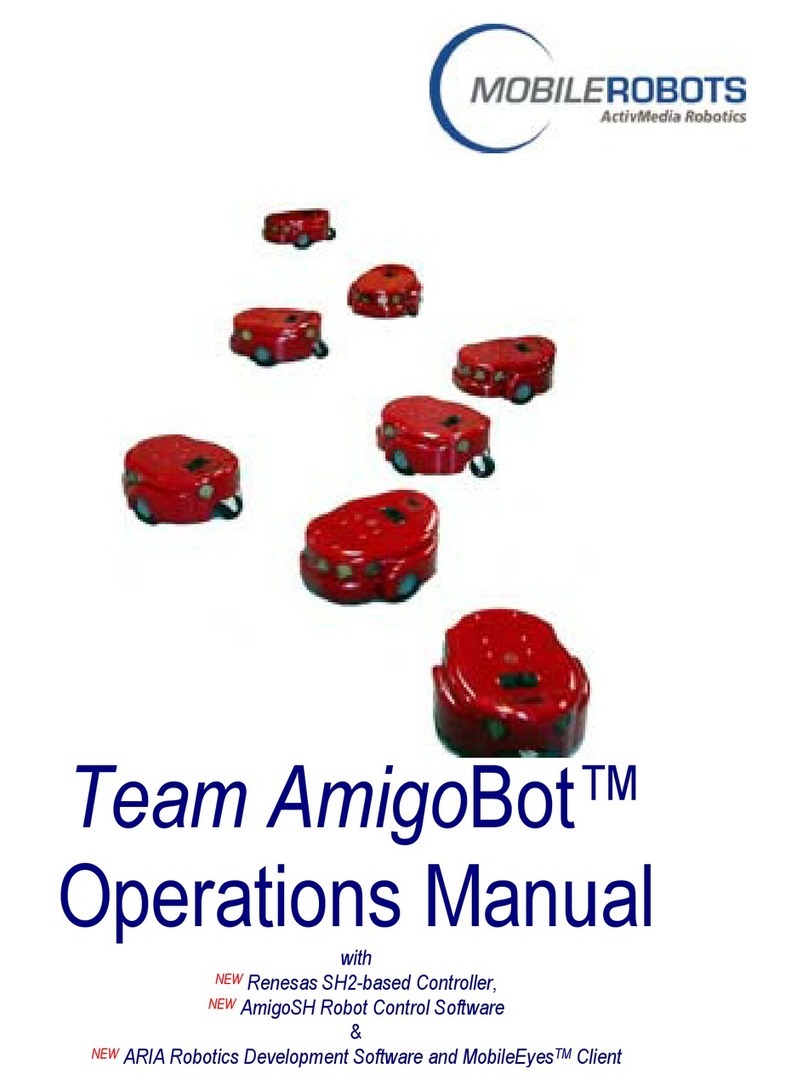
ActivMedia Robotics MOBILEROBOTS Team AmigoBot-SH User manual
ActivMedia Robotics
ActivMedia Robotics Pioneer 2 TCM2 User manual
ActivMedia Robotics
ActivMedia Robotics Pioneer 3 User manual

ActivMedia Robotics
ActivMedia Robotics AmigoBot User manual
ActivMedia Robotics
ActivMedia Robotics Pioneer Gripper User manual
