ActivMedia Robotics Pioneer Gripper User manual

Pioneer
Gripper

Copyright © 2004, ActivMedia Robotics, LLC. All rights reserved.
Under international copyright laws, this manual or any portion of it may not be copied or in any
way duplicated without the expressed written consent of ActivMedia Robotics.
The software on disk and on the controller FLASH, which accompany the Pioneer Arm and are
available for network download by ActivMedia Robotics customers, are solely owned and
copyrighted or are licensed products distributed by ActivMedia Robotics.
Developers and users are authorized by revocable license to develop and operate custom
software for personal research and educational use only. Duplication, distribution, reverse-
engineering, or commercial application of the ActivMedia Robotics or licensed software and
hardware without the expressed written consent of ActivMedia Robotics is explicitly forbidden.
The various names and logos for products used in this manual are often registered trademarks or
trademarks of their respective companies. Mention of any third-party hardware or software
constitutes neither an endorsement nor a recommendation.
ActivMedia Robotics’ Pioneer Gripper Manual v6, September, 2004
ii

Pioneer Gripper
Important Safety Instructions
Read the installation and operations instructions before using the equipment.
Avoid using power extension cords.
To prevent fire or shock hazard, do not expose the equipment to rain or moisture.
Refrain from opening the unit or any of its accessories.
Keep equipment away from hair or fur.
Inappropriate Operation
Inappropriate operation voids your warranty! Inappropriate operation includes, but is not
limited to:
Dropping the equipment
Overloading the Arm above its payload capacity
Getting the equipment wet
Continuing to run the equipment after hair, yarn, string, or any other items have become
wound in one or more of its joints
All other forms of inappropriate operation or care
Use ActivMedia Robotics’ authorized parts ONLY;
warranty void otherwise.
iii

Contents
CHAPTER 1 INTRODUCTION..............................................................................................................................1
GRIPPER PACKAGE ...................................................................................................................................................1
Package Components ..........................................................................................................................................1
User Supplied Components .................................................................................................................................1
ADDITIONAL RESOURCES .........................................................................................................................................1
Software...............................................................................................................................................................1
Newsgroups .........................................................................................................................................................2
Support ................................................................................................................................................................2
CHAPTER 2 THE PIONEER GRIPPER ...............................................................................................................3
SPECIFICATIONS .......................................................................................................................................................3
CHAPTER 3 INSTALLATION AND TESTING...................................................................................................5
STEP 1: REMOVE POWER ..........................................................................................................................................5
STEP 2: LOOSEN OR REMOVE THE ROBOT'S NOSE ....................................................................................................5
STEP 3: REMOVE TOP DECK PLATE ..........................................................................................................................5
STEP 4: INSTALL POWER AND CONTROL CABLES .....................................................................................................6
Power Cable ........................................................................................................................................................6
Signal Cable ........................................................................................................................................................6
STEP 5: REASSEMBLE ...............................................................................................................................................6
STEP 6: ATTACH THE GRIPPER .................................................................................................................................7
STEP 7: ENABLE THE GRIPPER IN AROS ..................................................................................................................7
STEP 7: TEST THE GRIPPER .......................................................................................................................................8
TROUBLESHOOTING..................................................................................................................................................8
CHAPTER 4 OPERATION AND PROGRAMMING ........................................................................................10
GRIPPER ON THE USER I/O PORT ............................................................................................................................10
GRIPPER SERVERS ..................................................................................................................................................11
AROS GRIPPER CLIENT COMMAND SET ................................................................................................................11
GRIPPER Command with Gripper-Server Command Argument......................................................................11
GRASPING PRESSURE..............................................................................................................................................11
LIFTCARRY ...........................................................................................................................................................11
GRIPPER STATES AND STATUS................................................................................................................................12
ARIA GRIPPER SUPPORT .......................................................................................................................................13
CHAPTER 5 MAINTENANCE & REPAIR ........................................................................................................14
DRIVE LUBRICATION ..............................................................................................................................................14
FACTORY REPAIRS .................................................................................................................................................14
APPENDIX A ..........................................................................................................................................................15
AROS STANDARD SERVER INFORMATION PACKET................................................................................................15
APPENDIX B...........................................................................................................................................................16
H8S USER I/O-GRIPPER PORT................................................................................................................................16
WARRANTY & LIABILITIES .............................................................................................................................18
iv

Pioneer Gripper
Chapter 1 Introduction
Congratulations on your purchase and welcome to the rapidly growing community of
researchers, developers, and enthusiasts of ActivMedia mobile robots.
This Pioneer Gripper Manual provides the general and technical details you will need to install
and operate the Gripper accessory on your Pioneer 3 or 2 mobile robot (DX and AT models).
We also encourage you to use these companion resources that come with your robot:
Operations Manual
ARIA and other related software manuals
Registration & Account Sheet
Personal account for the http://robots.activmedia.com support server
Pioneer [email protected] support newsgroup
GRIPPER PACKAGE
Our experienced robotics manufacturing staff put your Pioneer Gripper through a “burn-in”
period and carefully tested it before we shipped the hardware. Our care extends beyond:
Besides the companion resources listed above that bring the whole community of Pioneer to
you, we warranty the Gripper against mechanical and electronic parts and labor defects for
one year.
Even though we’ve made every effort to make your package complete, please check the
components once again after you unpack it from the shipping crate.
Package Components
Pioneer Gripper
Mounting hardware
Signal cable (20-conductor flat ribbon cable with IDC connectors)1
Power cable (2-conductor twisted pair with 0.15 latchlock connectors)
Pioneer Gripper Manual
User Supplied Components
Pioneer 3- or 2-DX or AT mobile robot
Set of hex wrenches that accompanied your original robot
Small, flat-bladed screwdriver
ADDITIONAL RESOURCES
New ActivMedia Robotics customers get three additional and valuable resources:
A private account on our Internet server for software, updates, and manuals
Access to private newsgroups
Direct access to the ActivMedia Robotics technical support team
Software
You should already have the necessary software—it comes with the robot. We also maintain a
24-hour, seven-day per week Web server where customers may obtain all ActivMedia Robotics
software and support materials:
http://robots.activmedia.com
1Cables may be installed in your new Pioneer 2 robot.
1

Some areas of the website are restricted to licensed customers. To gain access, enter
the username and password written on the Registration & Account Sheet that
accompanied your robot.
Newsgroups
We maintain several email-based newsgroups through which ActivMedia robot owners
share ideas, software, and questions about the robot. Visit the support
http://robots.activmedia.com website for more details. To sign up for pioneer-users,
for example, send an e-mail message to the –requests automated newsgroup server:
From: <your return e-mail address goes here>
Subject: <choose one command:>
help (returns instructions)
lists (returns list of newsgroups)
subscribe
unsubscribe
Our SmartList-based listserver will respond automatically. After you subscribe, send your
email comments, suggestions, and questions intended for the worldwide community of
Pioneer users:2
From: <your return e-mail address goes here>
Subject: <something of interest to pioneer users>
Access to the pioneer-users newslist is limited to subscribers, so your address is safe
from spam. However, the list currently is unmoderated, so please confine your
comments and inquiries to issues concerning the operation and programming of Pioneer
or PeopleBot robots.
Support
Have a problem? Can’t find the answer in this or any of the accompanying manuals?
Or do you know a way that we might improve our robots? Share your thoughts and
questions directly with us:
http://robots.activmedia.com/techsupport
Please include your robot's serial number (look for it beside the Main Power switch)we
often need to understand your robot's configuration to best answer your question.
Tell us your robot’s SERIAL NUMBER.
Your message goes directly to the ActivMedia Robotics technical support team. There a
staff member will help you or point you to a place where you can find help.
Because this is a support option, not a general-interest newsgroup like pioneer-users,
we reserve the option to reply only to questions about problems with your robot or
software.
2Note: Leave out the –requests part of the email address when sending messages to the newsgroup.
2

Pioneer Gripper
The Pioneer GripperChapter 2
Figure 1. Pioneer Gripper features
The Pioneer Gripper is a two-
degree of freedom (2-DOF)
manipulation accessory that
attaches to the front (nose) of a
Pioneer DX or AT mobile robot.
Independent segments—the
Gripper itself with paddles and a
Lift mechanism—let you grasp
objects on the floor, and raise
and carry them to a new
location.
The Gripper and Lift each are
driven by reversible-DC motors,
whose direction and power are
controlled through digital output
lines from your Pioneer robot’s controller. Embedded limit switches sense the Gripper
and Lift positions. The paddles each contain grip-sensor and infared (IR) breakbeam
switches, both front and rear, to sense objects and their positions within its grasp. These
sensors, too, interface with the Pioneer controller through dedicated digital input lines.
Although you may operate the Gripper directly through its digital I/O interface, there are
special servers included in your robot controller’s embedded software to fully manage its
operations. Accordingly, the client software developer need only issue a single, simple
command to actuate fundamental manipulation operations.
Figure 2. Pioneer Gripper and Lift dimensions
SPECIFICATIONS
In its fully down and open state, the two 3cm (1.5 inch) tall by 9.5cm (3.5 inch) deep
Pioneer Gripper paddles, each with 2mm soft-foam pads on the inside, open to 21.5cm
(8.4 inches) apart and ride 2.4cm (1.2 inches) off the floor with the DX or just 1cm (0.25
3

inches) off the floor with the AT models. The paddles extend out from Pioneer’s main
body 11cm (5 inches) beyond the top deck’s edges.
The paddles close horizontally until they grasp an object or close on themselves. The
grasping pressure is under software control and varies between 200g (0.5 lbs ) and 2kg (5
lbs). The Lift mechanism reaches nearly to the floor, and rises 7cm (3.5 inches) above,
and can lift objects weighing up to 2kg (5 lbs).
4

Pioneer Gripper
Chapter 3 Installation and Testing
Please read through this chapter carefully before you attempt to attach the Pioneer
Gripper to your robot. If for any reason you do not wish to perform the work yourself,
contact ActivMedia Robotics and make arrangements to have the assembly installed at
the factory.
STEP 1: REMOVE POWER
Switch Main Power off. REMOVE ALL BATTERIES! If you have the Pioneer 3
docking/charging accessory, reach in through the robot’s back door and remove the
automotive spade-type fuse from its socket on top of the battery box.
Skip to Step 6 if the Gripper came with your new robot;
it just needs to be attached.
STEP 2: LOOSEN OR REMOVE THE ROBOT'S NOSE
For new installations, you need to run the power and signal through the nose and into
the body of your Pioneer robot. Use the 3mm hex wrenches that came with the robot.
Depending on the model, two or three screws hold the nose to the underside of the
sonar ring. The bottom of the DX nose is hinged; another screw attaches the nose to the
underside of the AT. Swing the unfastened DX nose down (the nose comes completely
off with older models), or the AT nose towards the left side of the robot.
Also remove the plastic plug that covers the rectangular gripper cable-access hole in
the front face, lower right corner of the nose.
STEP 3: REMOVE TOP DECK PLATE
Using the 3mm hex wrench that
came with your robot, remove
the screws (Figures nearby) that
attach the front top deck plate to
the robot’s body.
Figure 3. Pioneer 3-DX and -AT front deck screws
Lift the front top deck open and
attach the cables through the
front half of the robot per Step 4.
Close and re-attach the front half
of the top plate, then open the
rear half of the top plate to
access the termination points for
the Gripper cables.
5

Installation
Figure 4. Rear deck screws for the Pioneer 2 robots
STEP 4: INSTALL POWER AND CONTROL CABLES
Start from the front of the robot and route the Gripper’s signal and power cables to their
respective locations in the body: the signal cable to the controller board and the power
cable to power terminals on the battery board. If you have an onboard PC, we
recommend that you run the cables under the computer, which means that you may
have to loosen, if not remove its four attaching screws and slide the cables underneath.
The power cable should be run through the wiring slots along the right side of the robot.
If you have a P3-AT with onboard computer, run both cables over the top of the
computer and to the respective controller and battery board. Re-install the front half of
the top plate and open the rear half to attach the cables to their respective
terminations. NOTE: If you have a factory installed Gripper, the power cable is attached
to the motor/power board, not the battery board.
Power Cable
Figure 5. Pioneer 2/3 battery board power terminals
At the rear of the robot, on
top of the box that holds the
batteries, locate the main
Power Out screw terminals.
Loosen those screws with a
flat-bladed screwdriver, add
the spade terminal ends of
the Gripper power cable to
that connector--black wire to black wire GND and yellow wire to yellow wire 12 VDC,
then tighten the screws well.
Signal Cable
Locate the User I/O-Gripper connector on your robot’s controller. See Appendix B for
details. Route the Gripper signal ribbon cable and plug it into that IDC connector. Seat
it well so that the latches lock the connector and cable to the board.
STEP 5: REASSEMBLE
Reverse the process in Steps 2 and 3 to re-attach your Pioneer’s top deck plate. Hold it a
few centimeters above the body and reattach the various cables to the Motor-Power
Interface board.
6

Pioneer Gripper
Align the 3mm mounting holes and re-attach the top deck plate to the body with the
3mm hex screws you had removed earlier.
Re-attach any of the computer cables and connectors to their mating connectors in the
nose section of your Pioneer 2 or 3.
CAREFUL!
Re-attaching the hard-disk drive cable incorrectly will permanently
damage both the drive and the onboard PC.
Re-attach the nose to the body with the screws you removed in Step 2.
STEP 6: ATTACH THE GRIPPER
Draw the Gripper’s power and signal cables through the access portal at the lower right
side of your Pioneer 2 or 3’s nose. You may have to remove a plastic plug from the hole
first.
Plug the Gripper power cable into the 2-pin latching connector on the Gripper control
board. Find it at the rear of the Gripper's Lift mechanism.
Plug the Gripper signal cable into the 20-pin header on the Gripper control board.
Place the Gripper assembly flush against the nose of your robot, aligning the pilot pins
through their respective guide holes. Now secure the Gripper with the four 3mm button-
head screws supplied with the assembly.
That's it. Time to re-insert the batteries, switch on your Pioneer 2 or 3’s Main Power, and
sniff for blue smoke. If sparks don’t fly and smoke is absent, it's time to enable and test
the Gripper servers.
STEP 7: ENABLE THE GRIPPER IN FLASH
Either use your onboard PC or run a serial cable from the SYSTEM serial port on your
Pioneer 2 or 3’s User Control Panel to an off-board PC. Power the robot, and put the
robot’s controller into maintenance mode (these last steps not necessary with latest
ARCOS-based controllers):
1. Press and hold in the white MOTORS button.
2. Press and release the red RESET button.
3. Release the MOTORS button.
Note that with the original P2OS-based Pioneer 2 robots, you also need to push the
FLASH switch at the front of robot ON.
On the PC, start your FLASH parameters configuration program: p2oscf(.exe) for C166-
/P2OS-based Pioneer 2’s, AROScf(.exe) for H8S-/AROS-based Pioneer 2-H8 and early
Pioneer 3 robots, or ARCOScf(.exe) for all SH2-/ARCOS-based Pioneer 3 robots.
If the program is not already installed in /usr/local/ (Linux) or in C:\Program
Files\ActivMedia Robotics\ (Windows®) on your onboard PC, find and install the
proper configuration tool from the CDROM that came with your robot, or a copy you
freshly downloaded from the support website http://robots.activmedia.com.
7

Installation
Change the HasGripper FLASH parameter to a value of 1 (at the ‘>’ prompt type,
‘hasgripper 1’ and press Enter). Then ‘save’ the parameter change both to your
robot's FLASH and again to a FLASH configuration file that you store on disk for later
retrieval and upload to your robot’s FLASH. For example, ‘save P2withGripper’,
creates the P2withGripper file that you may later ‘retrieve P2withGripper’ then
‘save’ to FLASH.3
You need to enable your Gripper in the FLASH only once; the change persists until you
change it again with the FLASH configuration tool.
Exit the program (‘q’ at the command prompt) and then RESET your robot’s controller
(red button on the User Control Panel).
STEP 7: TEST THE GRIPPER
Time to test your new Pioneer Gripper. Start your client PC, either onboard or attached
to your robot’s controller through the SYSTEM serial port on the User Control Panel. If you
had just performed Step 6, press RESET once to restart the controller.
Note that if the Gripper paddles are not closed with the Lift down, resetting the controller
automatically puts it into that storage position. This is also an initial test of whether the
Gripper is installed properly and operating normally.
Locate and start the ActivMedia Robotics Interface for Applications (ARIA)
demonstration program demo(.exe). It’s already installed in /usr/local/Aria/bin
(Linux) or accessible through Start:Programs:ActivMedia Robotics:ARIA (WIndows)
from your onboard PC. Otherwise, install it on your PC from the CDROM that
accompanied your robot or from a fresh distribution you may download from the
support website, http://robots.activmedia.com. For operation details, see your
robot’s operation manual.
Once connected with your robot server, the ARIA demo client has a Gripper control
mode option. Simply press the ‘g’ or ‘G’ (shift-g) key on the PC to enable that mode. The
ARIA demo displays the current state of your Gripper sensors, including limit switches and
breakbeam IRs. Press the keyboard arrow keys to raise and lower the Lift, and open and
close the Gripper paddles manually; the space bar key stops the Gripper motors.
Or press the ‘e’ or ‘E’ key to have the ARIA demo automatically exercise the Gripper
and Lift.
Press the ‘esc’ key to disconnect the ARIA demo and quit.
TROUBLESHOOTING
If you’ve never gotten the Gripper to move at all, or if you’ve just reinstalled it on the
robot but it does not move at all when tested, first make sure that your ARIA client
actually is connected with the robot’s controller. Please read the ARIA demo client text
messages as it makes the connection just after startup. It should say that it has
connected to the robot and displays the robot’s salient parameters, such as type
(“Pioneer”), subtype (“P3DX”, for example), and your robot’s name, if you set that FLASH
parameter. If not, check your serial connections and program setting.
If your ARIA demo client connects okay, but the Gripper doesn’t move, check and make
sure that you have properly enabled the Gripper parameter in the robot’s FLASH.
3AROS uses a “.cfg” and ARCOS appends the “.rop” file name suffix.
8

Pioneer Gripper
Next, does the ARIA demo program display apparently valid Gripper sensor readings? For
example, do the paddle switches indicate closed when they are closed, and open
when they are open? And do the breakbeam IRs work? If so, it is likely that the Gripper
power cable has become disconnected either from the Gripper control board or from
the battery board connection.4Loosen the Gripper from the robot’s nose first and check
the latch-locked connection. You might even test it with a voltmeter: the yellow wire is
the positive terminal and should read battery-level (around 12VDC) voltage. Easily
access the battery board through the rear plate of the top deck, as needed; you need
not remove the entire deck plate as you might have when originally installing the
Gripper.
The only other possible cause is the control cable. Make sure it’s connected to both the
Gripper control board and to the User I/O-Gripper connector on the controller.
If all else fails, contact ActivMedia support for more assistance.
4The Gripper power cable supplies its motors; the Gripper signal cable provides power to the Gripper’s sensors.
9

Gripper Operation and Programming
Chapter 4
The Pioneer Gripper comes fully integrated with your Pioneer 2 and 3's systems and
software. All ActivMedia Robotics’ controller-embedded software contain servers that
support state-based control routines that manage the Gripper functions for you. These
include the latest Renesas SH2-based ARCOS, Hitachi H8S-based AROS, and Siemens
C166-based P2OS Pioneer 2 and 3 controllers. Because it is attached through the
common Gripper-User I/O port, the controller and its servers also give you direct control
of the Gripper functions.
In turn, the controller servers are supported in all versions of ActivMedia Robotics-related
client software, including ARIA and many others. We supply several ARIA-based client
examples for programming the Gripper in the ARIA examples/ directory. Please consult
the various operations and software manuals for many more client-programming details.
GRIPPER ON THE USER I/O PORT
A Table nearby summarizes the Pioneer Gripper-User I/O port connections. You may
directly control the various Gripper functions and read its sensors using native
ARCOS/AROS/P2OS commands that manage the User I/O digital input and output ports.
For example, to raise the Lift, you might have your client software set the OD bits two and
three with the DIGOUT command #30. The effect is to enable the Gripper Lift motor and
set its direction to go up.
Operating the Gripper directly from the DIGOUT functions can be dangerous, however.
For instance, if you left the Lift-enable bit set, you can and will damage the Gripper's
motor-driver electronics.
Table 1. Gripper Connections on User I/O
PIN SIGNAL DESCRIPTION PIN SIGNAL DESCRIPTION
1 OD0 OD0;
Gripper enable
2 ID0 ID0;
Paddles open limit
3 OD1 OD1;
Gripper direction
4 ID1 ID1;
Lift limit
5 OD2 OD2;
Lift enable
6 ID2 ID2;
Outer breakbeam IR
7 OD3 OD3;
Lift direction
8 ID3 ID3;
Inner breakbeam IR
9 ID4 ID4;
Left paddle contact
10 OD4 OD4;
Not used by Gripper
11 ID5 ID5;
Right paddle contact
12 OD5 OD5;
Not used by Gripper
13 ID6 ID6;
Not used by Gripper
14 OD6 OD6;
Not used by Gripper
15 ID7 ID7;
Not used by Gripper
16 OD7 OD7;
Not used by Gripper
17 *AN0 A/D port 0 (default)
(0-5VDC = 0-255)
18 Vcc 5VDC < 1A
19 Vpp Battery 12VDC < 1A 20 Gnd Signal/power common
The states of both the DIGIN (IDx) and DIGOUT (ODx) digital I/O ports (one byte each)
appear in the standard Server Information Packet (SIP) that the controller sends
10

Pioneer Gripper
automatically to a connected client every client-server cycle, as well as in the client-
requested IOpac SIP. See your Pioneer Operations Manual for more details.
Table 2. User I/O DIGIN bits and meaning when attached by the Gripper
DIGIN X X 1 1 0 0 1 1
Grip
switch
- - Right
Paddle
Left
Paddle
Inner
Breakbeam
Outer
Breakbeam
Lift
Limit
Grip
Limit
When 1 - - open open obstructed obstructed open open
When 0 - - closed closed clear clear closed closed
GRIPPER SERVERS
Rather than control the Gripper from native User I/O servers, for safety and convenience
use the set of Gripper servers that come with your controller’s embedded software to
manage the accessory. These servers automatically drive the Gripper so to achieve
some fundamental state, such as up or down, open or closed. When used by client
software, the Gripper servers monitor and report its progress towards and achievement
(or lack) of a state, saving you coding time and effort. The servers also include a timeout
feature to protect against unfortunate stalls or hang-ups.
GRIPPER CLIENT COMMAND SET
A nearby table documents the AROS Gripper-server client command set. From a
connected client, issue the AROS GRIPPER command number 33, followed by its required
unsigned integer argument, which is the Gripper command number.
GRIPPER Command with Gripper-Server Command Argument
Commands to the Gripper servers are, for the most part, self-explanatory. For example,
to have the Gripper close its paddles, send the GRIPPER command #33 with the
GRIPclose command argument two.
In some cases, the GRIPPER command requires an operating value. Use another
command to set that operating value, immediately following the GRIPPER command
that requires the value.
The value-setting Gripper command is the GRIPPERVAL command number #36. Make its
integer argument the preceding Gripper command's operating value.
GRASPING PRESSURE
To set how hard the Gripper paddles will grasp an object, set a grasp_time delay, in 20
millisecond increments, for when the paddle contacts trigger (about 0.2kgs pressure) to
when the paddle drive motor stops. The default is 10 (200 milliseconds) which provides a
grasping pressure of around 0.5kg. Incrementally, the grasping pressure is roughly 0.5kg
per 200 milliseconds, to a maximum grasping pressure of around 2kg (grasp_time of 2
seconds).
LIFTCARRY
The LIFTcarry command and required carry_time operating parameter lets you use
the Gripper to lift or lower an object some distance between the top and bottom of the
Lift's limits.
The grip_carry distance is time-based, since there are no travel-encoders attached.
Accordingly, the actual Lift distance will be imprecise, depending on load, battery
11

voltage, and a variety of other factors. Under no-load and otherwise normal conditions,
assume approximately two centimeters per second of travel.
Table 3. AROS Gripper Client Command Set
COMMAND ARGUMENT LABEL ACTION
1 GRIPopen Open Gripper paddles
2 GRIPclose Close Gripper paddles; grasp pressure
regulated by command #16
3 GRIPstop Stop Gripper paddles
4 LIFTup Raise Lift
5 LIFTdown Lower Lift
33 6 LIFTstop Stop Lift
7 GRIPstore Simultaneously closes paddles and raises
Lift. For storage; not for
grasping/carrying an object
8 GRIPdeploy Simultaneously lowers Lift and opens
paddles. Not useful for object drops
(drops too soon), but for getting ready
to grasp an object.
15 GRIPhalt Halts both Gripper paddles and Lift
16 GRIPpress
Sets paddles grasping pressure; must
follow immediately with AROS command 36
with grasp time value.
17 LIFTcarry
Intermediate Lift position; must follow
immediately with P2OS command 36 and
carry_time value
1-100 grasp_time Time delay in 20 millisecond increments
after Gripper paddles first grasp an
object and before they stop moving.
Regulates grasp pressure.
36 ± 1-255 carry_time Time in 20 millisecond increments to
raise (+) or lower (-) the Gripper lift;
allows for a “carry” position
GRIPPER STATES AND STATUS
Besides the DIGIN and DIGOUT bytes found in the standard SIP (Appendix A), the Gripper
servers provide additional state information both in the standard SIP and in a special
GRIPPERpac SIP.
Table 4. Gripper State Byte
BIT MEANING WHEN SET (1)
G 0 Paddles open¹
R 1 Paddles close¹
I 2 Paddles moving
P 3 Gripper error
L 4 Lift up¹
I 5 Lift down¹
F 6 Lift moving
T 7 Lift error
¹ If both same state, paddles or lift position is unknown.
A Gripper state byte, which contents are described nearly, appears just after the sonar
readings in the standard SIP.
12

Pioneer Gripper
The state byte also comes, along with other salient information about the Pioneer
Gripper and its current status, in a special GRIPPERpac SIP (type 224; 0xE0). When
connected, the client requests a single GRIPPERpac packet or can have the servers
send an updated GRIPPERpac every client-server cycle, usually just after the standard
SIP.
Use the GRIPREQUEST command #37 with argument value of one to request a single
GRIPPERpac; greater than 1 for continuous (one-per-cycle) packets; or zero to halt
continuous packets.
Table 5. GRIPPERpac SIP contents
HEADER int Exactly 0xFA, 0xFB (250,251)
BYTE COUNT byte Number of data bytes + 2 (checksum)
TYPE byte Packet type = 0xE0
HASGRIPPER byte Gripper type: 0=none; 1=P2/3; 2=PeopleBot
GRIP_STATE byte See nearby Table
GRASP_TIME byte MS time controls grasping pressure
CHECKSUM integer Computed checksum
ARIA GRIPPER SUPPORT
ActivMedia Robotics’ Interface for Applications (ARIA) development environment
contains all the client-side foundation software that you need to operate and monitor
the Pioneer Gripper and robot-controller servers for you own robotics applications. We
encourage you to examine the various source files and included documentation that
better detail ARIA’s inner workings than we supply here.
A good place to start is in the ARIA examples/ directory. Look for the
gripperDemo.cpp. It uses the ArGripper and ArGripperCommands C++-language
classes to set up and operate the Pioneer Gripper. Find detailed documentation of
those classes, as well as the entire ARIA suite, in the ARIA Reference manuals.
13

Maintenance & Repair
Chapter 5
The Pioneer Gripper is built to last a lifetime and requires little maintenance.
DRIVE LUBRICATION
An occasional drop or two of oil on the guide rails is a very good idea. Place some thin,
household oil on a Q-Tip or similar applicator, and rub along the rails. Then start up the
Pioneer to exercise the Gripper and spread the lubricant.
FACTORY REPAIRS
If, after reading this manual, you’re still having hardware problems and you’re satisfied
that it needs repair, contact us:
http://robots.activmedia.com/techsupport
Tell us your robot’s SERIAL NUMBER
In the body of your message, describe the problem in as much detail as possible. Also
include your robot’s serial number (IMPORTANT!) as well as your name, email and mail
addresses, along with phone and fax numbers. Tell us when and how we can best
contact you (we will assume email is the best manner, unless otherwise notified).
We will try to resolve the problem through communication. If the robot must be returned
to the factory for repair, obtain a shipping and repair authorization code and shipping
details from us first.
We are not responsible for shipping damage or loss.
Use ActivMedia Robotics’ authorized parts ONLY;
warranty void otherwise.
14

Pioneer Gripper
Chapter 6 Appendix A
STANDARD SERVER INFORMATION PACKET
NAME VALUE DESCRIPTION
HEADER int Exactly 0xFA, 0xFB
BYTE COUNT byte Number of data bytes + 2 (checksum), not including header or
byte-count bytes
STATUS/PACKET 0x3S = Motors status
TYPE 2 Motors stopped
3 Robot moving
XPOS int Translation travel
YPOS int
THPOS Sint╪Orientation
L VEL Sint Wheel velocities
R VEL Sint
BATTERY byte Battery charge in tenths of volts (101 = 10.1 volts, for example)
STALL AND
BUMPERS
int Motor stall and bumper indicators.
CONTROL Sint Setpoint of the server’s angular position servo
FLAGS Sint Various status and states.
COMPASS byte Electronic compass accessory heading in 2-degree units
SONAR COUNT byte Number of new sonar readings included in SIP
NUMBER byte If Sonar Count>0, is sonar disc number 0-31; reading follows
RANGE int Sonar range value; multiply by RangeConvFactor‡
…REST OF THE SONAR READINGS…
GRIP_STATE BYTE Pioneer Gripper state byte
ANPORT BYTE Selected analog port number 1-5
ANALOG BYTE User Analog input (0-255=0-5 VDC) reading on selected port
DIGIN BYTE Byte-encoded User I/O digital input
DIGOUT BYTE Byte-encoded User I/O digital output
CHECKSUM INTEGER Packet-integrity checksum
15

Appendix BChapter 7
USER I/O-GRIPPER PORT
Note that all the internal connectors on the robot’s controller and the Gripper signal
connector (IDC sockets) are numbered odd pins on top and even pins on the bottom,
from right to left, relative to the key:
13 11 9 7 5 3 1
14 12 10 8 6 4 2
Figure 6. Location of the User I/O-Gripper port on the SH2-/ARCOS-based Pioneer 3
controller.
Figure 7. Location of the User I/O-Gripper port on the H8S/AROS-based Pioneer 2-H8 and
original Pioneer 3 controller board.
16
Table of contents
Other ActivMedia Robotics Robotics manuals
ActivMedia Robotics
ActivMedia Robotics AmigoBot User manual
ActivMedia Robotics
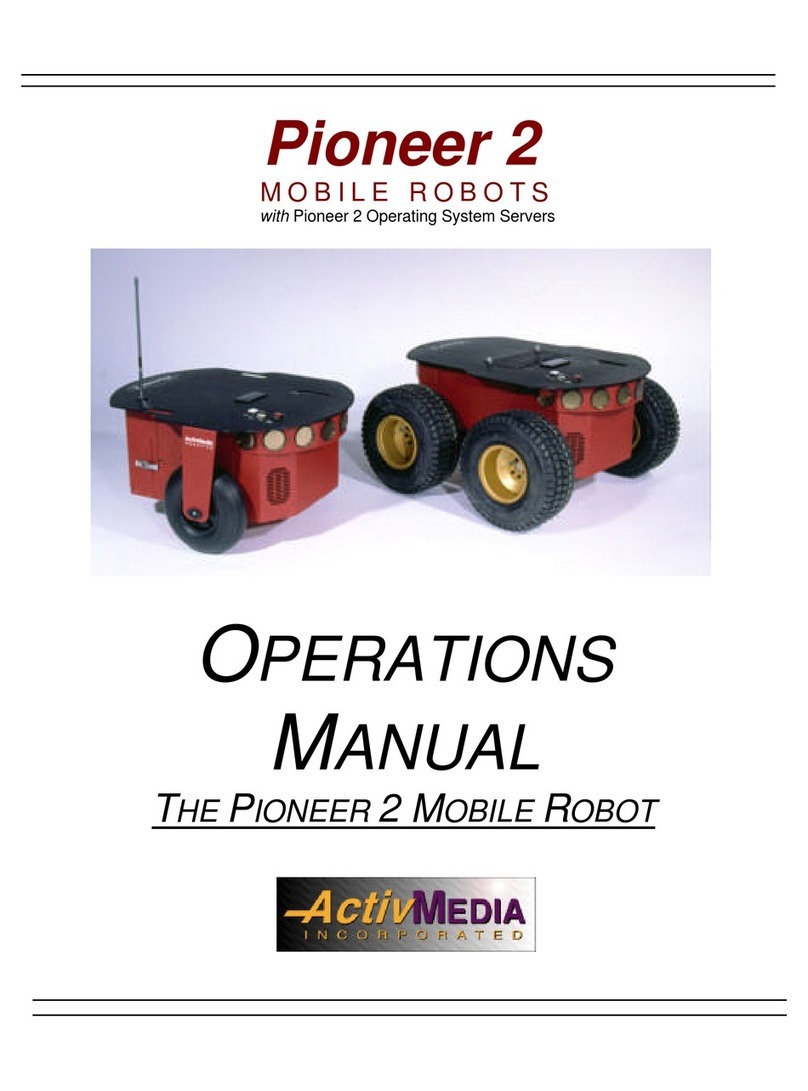
ActivMedia Robotics Pioneer 2 User manual
ActivMedia Robotics
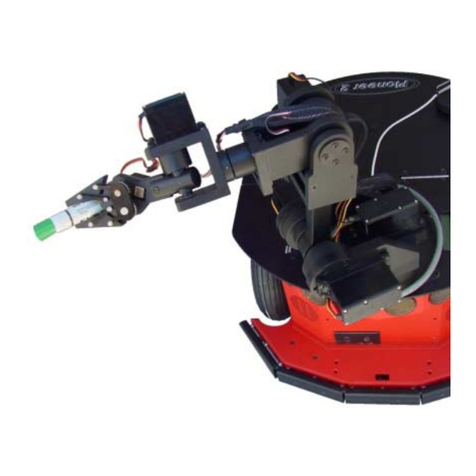
ActivMedia Robotics Pioneer 2 Arm User manual

ActivMedia Robotics
ActivMedia Robotics Pioneer 2 TCM2 User manual
ActivMedia Robotics
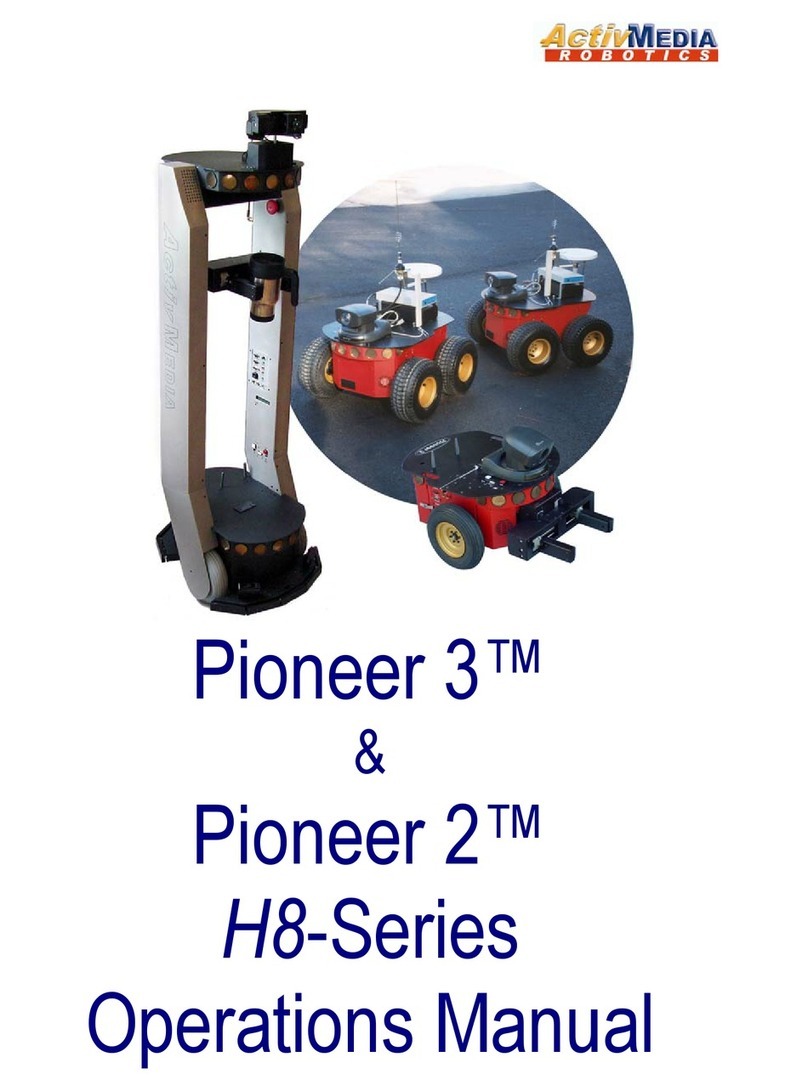
ActivMedia Robotics 3TM User manual

ActivMedia Robotics
ActivMedia Robotics Pioneer 3 User manual

ActivMedia Robotics
ActivMedia Robotics Pioneer 2 User manual

ActivMedia Robotics
ActivMedia Robotics PeopleBot User manual

ActivMedia Robotics
ActivMedia Robotics AmigoBot User manual

ActivMedia Robotics
ActivMedia Robotics MOBILEROBOTS Team AmigoBot-SH User manual

