ACU-RITE MILL PWR G2 Technical manual

December 19, 2017
MILLPWRG2 2 & 3 Axis
Release of Version R4SP7
For Use with Consoles (ID# 745604-NN) ONLY
NOTE: HEIDENHAIN Corporation recommends making a backup of the control with the USB
Recovery Drive before updating the control software. Please refer to the manual included with
the drive for the backup procedure. Reference compatibility chart below.
R4SP7 cannot be installed unless you have R4SP6 installed first. If you have previous
version of software such as R1, R2, or R3 SPx (release 1, release 2, or release 3 with
any service pack) download and install R4 SP6 prior to updating to R4SP7.
Consoles with ID# 745604-NN cannot be upgraded to R5 and will continue to receive
service packs under the R4 release. Please do not attempt to install release 5 (R5) onto
these consoles.
If required contact your authorized ACU-RITE dealer to purchase the USB recovery drive
1201909-01 includes a compatible USB Recovery Drive ID# 680480-03 for original G2 consoles
(ID#745604-NN).
If a special PLC for AMI functions was created for your MILLPWR system. The PLC for R4SP7
may need to be modified in the same manner. Any OEM/User customizations to the PLC will
need to be reintegrated into the new PLC project.
All users can verify your software version from the DRO screen by pressing SETUP. If one of
your soft keys is labeled More Commands, you have release 1 (R1) software. If one of your soft
keys is labeled Install Setup, press this key. Enter the password 8891 and press Enter. The
installed software version will be displayed at the bottom left of your screen.
If any issues are encountered, please contact your service representative for assistance.
You can download the software release update free of charge from our web site at www.acu-
rite.com. If you wish to purchase the software and operation manual from ACU-RITE, contact
your authorized dealer to place an order.
Installing the software onto your MILLPWRG2 system:
Use a blank USB memory stick (1 GB or larger) to update the software. Do not use any memory
stick with a smaller storage capacity. The software installation files are required for updating the
software. When a USB memory device in placed in a USB port prior to boot up with the update
files setup.zip, and setup.ini located within a folder named “install”, at boot up your G2 control
will detect the upgrade software files and proceed to install.
Procedure for downloading the update files and placing them on a USB drive.
Download the update from http://www.acu-rite.com/software-updates.html found under the
Controls Tab.

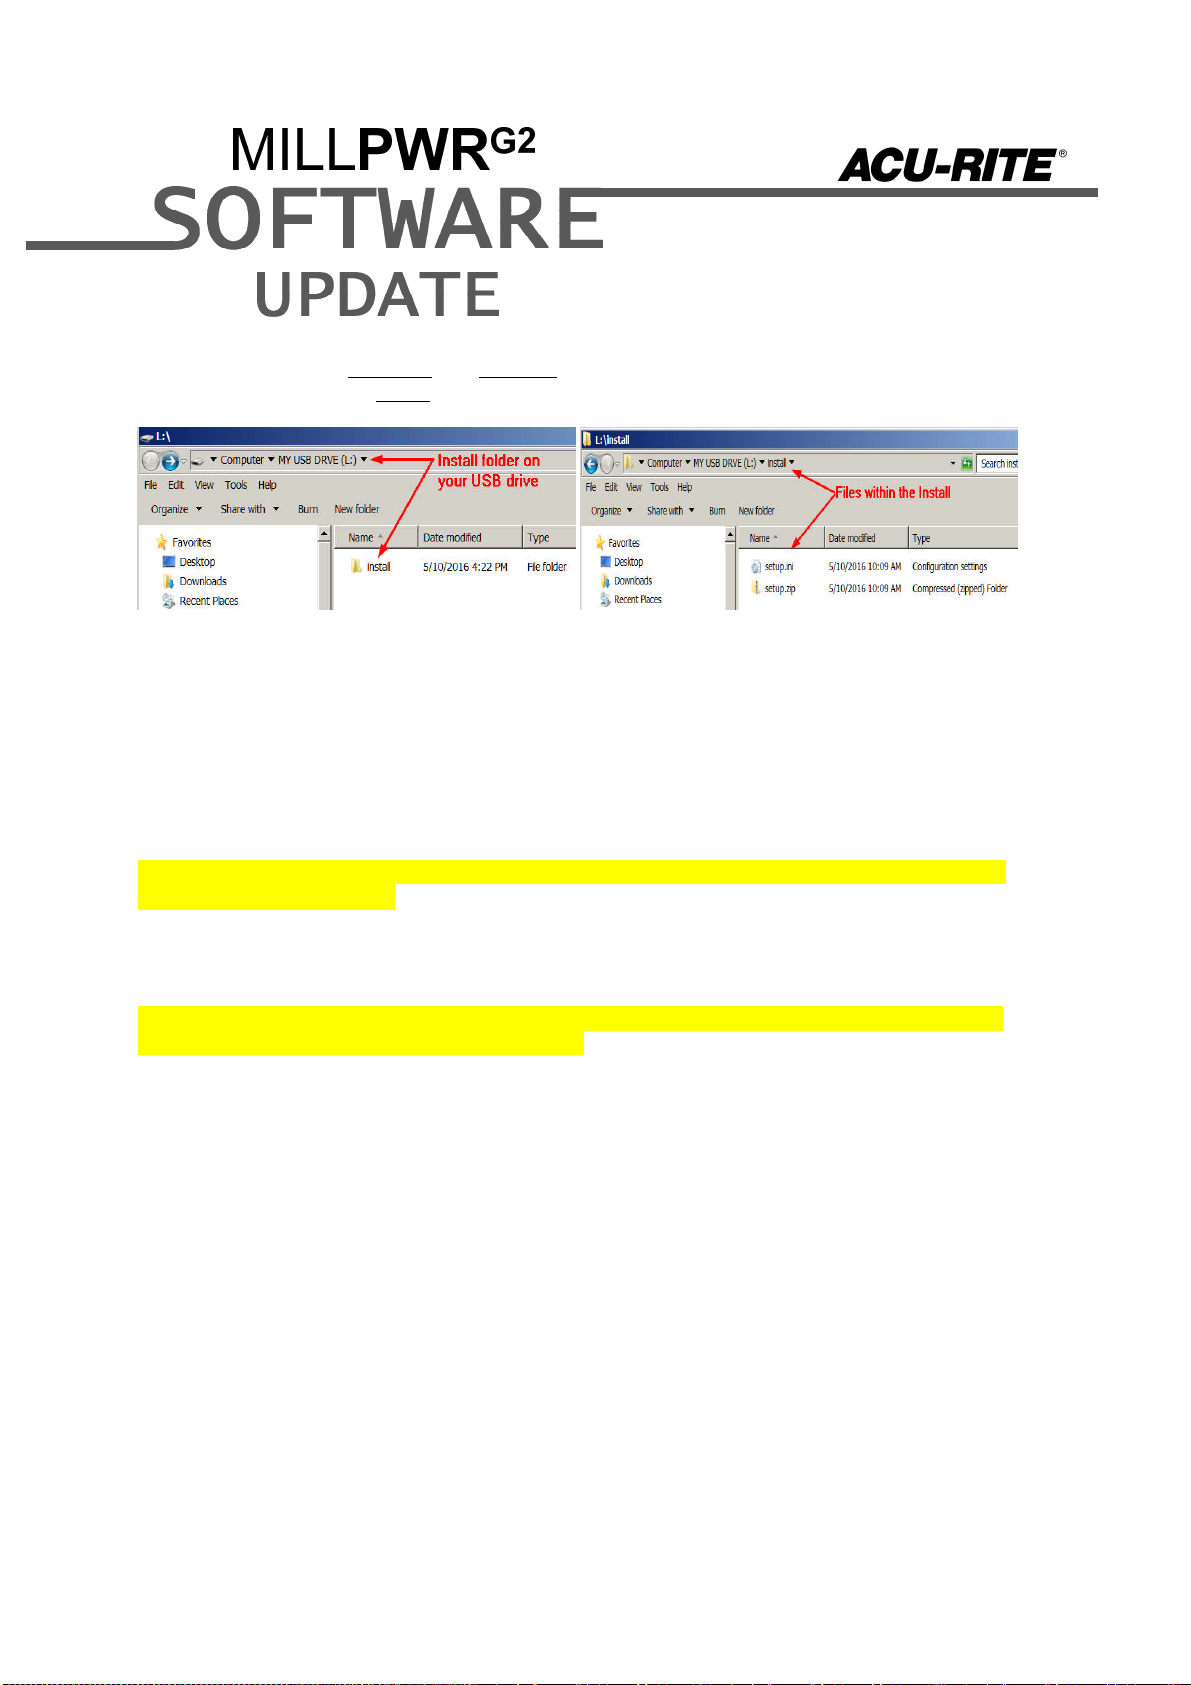
Unzip the downloaded archive insuring the target is the root level of your USB drive.
Insure the files setup.zip and setup.ini are transferred to a folder at the root level of your
USB drive named install, //MY USB DRIVE/install/
Procedure for updating the software
Shut down the control software using the normal method of pressing the Shutdown soft
key and then confirming the shutdown by pressing Yes.
Wait for the screen message which indicates that it is safe to switch off power, or restart.
Insert the USB memory device containing the folder named “install” on the USB memory
device.
Press ENTER to restart the system.
The software update will now be done automatically, taking approximately 10 - 20
minutes.
! A confirmation box will appear. If necessary, use the LEFT or RIGHT ARROW keys to select
Yes and then press ENTER.
When the update is complete, it will prompt you to remove the USB drive and restart. At this
time, remove the USB drive and press ENTER to restart. If the USB memory stick used for
installation is not removed, then the prompt to install the software will continue to appear on
subsequent power cycles.
! After installation and upon restart, you may receive a message prompt to confirm a firmware
update, accept the changes and RUN UPDATE.
-(Note: This particular NC startup screen can take several minutes to display. Please be
patient. Do not shutdown control and reboot.)
After the system has restarted, it will start up normally to the control software.
-Confirm that your count directions are correct. . (These values should not change when
upgrading software.)
- If special machine functions were active, Press the SETUP hard key, then the “Install
Setup” soft key, enter passcode 8891, press ENTER
- In the “Installation” dialogue, arrow down to the last option “Machine Functions” and
press ENTER
- Configure the dialog to match your machine Note:(only required if special machine
function options are installed like demo, AMI, guards, etc.)
- Press the USE hard key, then press the “Save Changes” soft key
- After a moment, you will get a reboot prompt
- Acknowledge the reboot and you are all done at the next startup.

MILLPWRG2 Recovery Drive Compatibility
Due to hardware differences the original MILLPWRG2 console and the current console
require different software upgrade paths.
Consoles can easily be identified by the color of the front bezel. The current design has
a darker grey color than the original design.
The current G2 console will proceed to release 6 (R6) and all its service packs.
The original G2 console will remain with release 4 (R4) and all of its service
packs.
Console ID#
and Software
Revision Recovery Drive
ID# 1114023-01
Recovery Drive
Kit ID# 1201909-
01
USB ID#
680480-03
Recovery Drive
Kit ID# 1127022-
01
USB ID#
680480-04
745604-NN Yes Yes No
R1 Yes Yes No
R2 Yes Yes No
R3 Yes Yes No
R4 Yes Yes No
R4 SP4 Yes Yes No
1113777-NN No Yes Yes
R1 No Yes Yes
R2 No Yes Yes
R3 No Yes Yes
R4 No Yes Yes
R4 SP4 No Yes Yes
R5 No No Yes
Post R5 No No Yes

Console ID # 745604-NN Console ID # 1113777-NN
G2 consoles (ID#745604-NN)
These consoles cannot be upgraded to R5 and will continue to receive service
packs under the R4 release. Please do not attempt to install release 5 (R5) onto
these consoles.
System drive restructuring on this original design consoles will cause the console
to become un-operational and require in house service to correct the issue. Do
not restructure the drive on these consoles.
Not all software enhancements will be included in future R4 releases. We
will continue to support console ID# 745604-NN with service packs through the
R4 released software that will mainly include minor enhancements or fixes.
USB Recovery Drive Kit 1201909-01 includes a compatible USB Recovery Drive
ID# 680480-03 for original G2 consoles (ID#745604-NN) and should be ordered
when replacing a recovery drive for these consoles. This drive does not include
the restructuring option, so the unit cannot be restructured accidentally.

These enhancements/changes were made:
The Bottom Finish will now take the value of 0 if it is not specified. Previously, if Bottom
Finish was blank, it would use the same value as the Side Finish field.
A consistent terminology “Software Travel Limit” is used now instead of ‘Table Limit’ or
‘Software Limit’.
The tool retract between Z passes for Rectangle pocket, Rectangle slot and Circle
pocket is now set to Z begin.
The amount of motion allowed in the W-Axis while running a program or Single Cycle is
now configurable via Advanced Configuration. The default of 2mm can be changed at
Axes->ParameterSets->PW->CfgControllerAuxil->checkPosStandstill. A value of “0”
disables the monitoring and allows any amount of motion in the W-Axis without error.
The Helix step now defaults to CW to represent a more common right-handed thread.
Fixed an issue where the PNG file was not updated when a loaded MPT file was
modified and saved.
Fixed an issue where the file text preview was not updated when a modified program
was saved.
Fixed an issue where the Helix function was available in the two axis mode.
Fixed an issue in Program Functions where the file view location was not automatically
switched to the USB drive when inserted.
Fixed an issue where the program step popup was not automatically closing when
switching from PGM to DRO mode.
Fixed an issue where the blend fails to calculate in certain scenarios when a rotated,
repeated or mirrored geometry was exploded.
Fixed an issue where the blockform calculation is off when the offset is different.
Z-retract error message is now updated to be at least 0.01” (or 0.2mm) higher than the
programmed values for consistency.
If any issues are encountered, please contact your service representative for assistance or
This manual suits for next models
2
Table of contents
Other ACU-RITE Music Mixer manuals

ACU-RITE
ACU-RITE MILL PWR G2 Technical manual

ACU-RITE
ACU-RITE MILL PWR G2 Technical manual

ACU-RITE
ACU-RITE MILLPWR G2 Technical manual

ACU-RITE
ACU-RITE MILLPWR G2 Technical manual

ACU-RITE
ACU-RITE MILLPWR G2 Technical manual

ACU-RITE
ACU-RITE MILLPWR G2 Technical manual

ACU-RITE
ACU-RITE MILL PWR G2 Technical manual

ACU-RITE
ACU-RITE MILL PWR G2 Technical manual

ACU-RITE
ACU-RITE Mill PWR G2 Technical manual

ACU-RITE
ACU-RITE MILL PWR G2 Technical manual