manuals.online logo
Brands
  1. Home
  2. •
  3. Brands
  4. •
  5. ADEMCO
  6. •
  7. Keypad
  8. •
  9. ADEMCO TeleSmart User manual

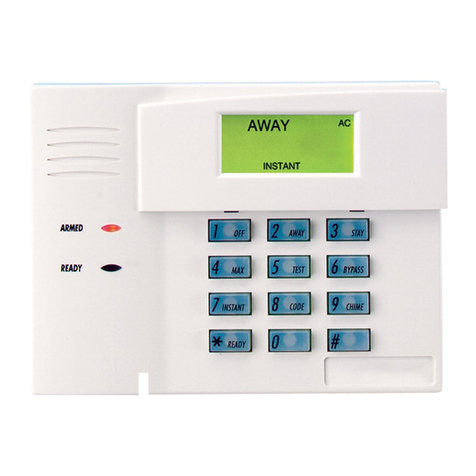
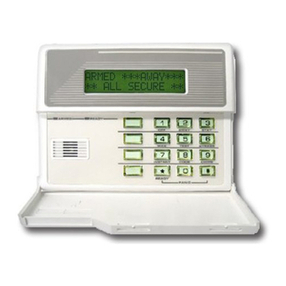
ADEMCO TeleSmart User manual

®
K3949V2 5/01
8VHU*XLGH
-2-
7DEOHRI&RQWHQWV
TeleSmart Keypad Options List ...................................................................................4
System Overview...........................................................................................................5
Introduction ................................................................................................................................................ 5
System Basics............................................................................................................................................ 5
Accessing the System................................................................................................................................ 5
Navigating and Selecting Options from a TeleSmart Keypad.....................................................................6
Turning the System’s Answer Mode On/Off...............................................................................................6
Making Telephone Calls............................................................................................................................. 7
Listening to Your Messages (option 01).....................................................................8
About Messages ........................................................................................................................................ 8
How to Listen to Your Messages................................................................................................................ 9
Recording Memos (option 02)....................................................................................10
About Memos........................................................................................................................................... 10
How to Record a Memo............................................................................................................................ 10
Caller ID Log (option 03).............................................................................................11
About the Caller ID Log............................................................................................................................ 11
How to View the Caller ID Log ................................................................................................................. 11
Privacy Feature (option 04).........................................................................................12
About the Privacy Feature........................................................................................................................ 12
How to Turn the Privacy Feature On/Off.................................................................................................. 12
How to Override Privacy Mode................................................................................................................. 12
Recording Greetings (option 05)................................................................................13
About Greetings (outgoing messages)..................................................................................................... 13
How to Record Greetings......................................................................................................................... 13
Setting the System Time (option 07)..........................................................................14
About the System Time............................................................................................................................ 14
How to Set the System Time.................................................................................................................... 14
Caller ID Display/Announcements (option 08) ..........................................................15
About Caller ID Displays and Announcements......................................................................................... 15
How to Turn Caller ID Display at the Keypad On/Off ............................................................................... 15
How to Turn Caller ID Announcements On/Off and How to Set the Volume............................................ 15
Toll Saver / Message Beeps (options 12 & 13)..........................................................16
About the Toll Saver Feature ................................................................................................................... 16
How to Turn Toll Saver On/Off................................................................................................................. 16
How to Check for Messages while Toll Saver is On................................................................................. 16
About Message Beeps (phone tone)........................................................................................................ 16
How to Turn Message Beeps On/Off ....................................................................................................... 16
-3-
7DEOHRI&RQWHQWV
Call Screening (options 14, 15, 16).............................................................................17
About Call Screening ............................................................................................................................... 17
How to Connect to a Call when Telephone Call Screening is On............................................................. 17
How to Turn Call Screening On/Off.......................................................................................................... 17
Ring Answer Count (option 17)..................................................................................18
About the Ring Answer Count.................................................................................................................. 18
How to Set the Ring Answer Count.......................................................................................................... 18
Quick Access Key (option 18)....................................................................................19
About the Quick Access Key.................................................................................................................... 19
How to Assign the Quick Access Key....................................................................................................... 19
Caller ID Options (option 19)......................................................................................20
About Caller ID Options............................................................................................................................ 20
How to Program Caller ID Options........................................................................................................... 20
Memory Dial Numbers (option 20)..............................................................................22
About Memory Dial Numbers................................................................................................................... 22
How to Program Memory Dial Numbers................................................................................................... 22
User Codes (option 21)...............................................................................................24
About User Codes.................................................................................................................................... 24
How to Program User Codes ................................................................................................................... 24
Zone Voice Tags (option 22).......................................................................................26
About Zone Voice Tags............................................................................................................................ 26
How to Record Zone Voice Tags ............................................................................................................. 26
PABX Line (option 23).................................................................................................27
About using a PABX Line......................................................................................................................... 27
How to Turn the PABX Line Feature On/Off............................................................................................. 27
TeleSmart Options from a Telephone........................................................................28
About Using a Telephone to Control TeleSmart....................................................................................... 28
To Use TeleSmart From a Telephone...................................................................................................... 28
Telephone Access Menu Map.................................................................................................................. 29
Using a Telephone to Control the Security System from.......................................................................... 30
TeleSMART Glossary..................................................................................................31
Appendix......................................................................................................................33
-4-
7HOH6PDUW.H\SDG2SWLRQV/LVW
The following table lists the keypad options available and the page number where you can
find detailed instructions for using these options. See page 28 for menu options available
from a telephone.
Options Available to All Users
(master code must enter a “0”before the option numbers 1-9; other users enter single-digit option
numbers 1-7)
No. Menu Option Used To… Page
01 (1) Hear Messages listen to messages and memos 8
02 (2) Record Memo record memos for other users of the system 10
03 (3) Caller ID Log view the log of callers 11
04 (4) Privacy On/Off turn privacy mode on or off 12
05 (5) Record OGM record greeting for each mailbox 13
06 (6) System On/Off turn answer mode on or off 6
07 (7) System Time set the system’s time 14
Options Available to Master Only
No. Menu Option Used To… Page
08 CID Display On/Off turn the CID display at keypads on or off 15
09 Keypad CID On/Off turn CID announcement at keypads on or off 15
10 Aux CID On/Off turn CID announcment at speakers on or off 15
11 Aux Volume set the auxiliary speaker volume 15
12 Toll Saver On/Off turn the toll saver feature on or off 16
13 Message Beeps On/Off turn dial tone message beeps feature on or off 16
14 HF Keypad On/Off turn keypad call screening (hands-free) on or off 17
15 HF Aux On/Off turn auxiliary speaker hands-free on or off 17
16 Handset On/Off turn handset hands-free on or off 17
17 Ring Answer set the ring answer count (2-8) 18
18 Access Key assign the Quick Access key (1-4) 19
19 Caller ID Settings program distinctive ring, mailbox, voice tag for
incoming calls 20
20 Memory Dial Settings program memory dial phone numbers 22
21 User Code Settings program user codes, mailbox access, keypad
message on or off 24
22 Zone Voice Tags record zone voice tags that are announced when
activity on a zone occurs 26
23 PABX Line set the system for use with a PABX network 27
-5-
6\VWHP2YHUYLHZ
,QWURGXFWLRQ
Welcome to TeleSMARTthe exciting telephone system that provides you and your family
with the conveniences of a digital answering machine, plus control over your security system.
This section briefly describes the various system features.
6\VWHP%DVLFV
Mailboxes The system has four mailboxes for storing messages and memos,
which lets each user listen to his/her own messages without having
to listen to messages intended for the other users.
Greetings When TeleSMART answers a call, a recorded greeting can instruct
the caller to press a key (2-4) to leave a message for a particular
mailbox. The system then announces a greeting and automatically
stores the caller’s message in that mailbox.
User Codes 4-digit User codes are needed to use the TeleSMART options. The
system has one Master code and up to five additional User codes.
Security System TeleSmart keypads are used to control your security system. The
system can also be set so that a user’s messages are automatically
played whenever that user disarms the security system from a
TeleSMART keypad.
TeleSmart also lets you use any Touchtone telephone to control your
security system.
Options The TeleSMART system lets you choose from a series of options,
which are displayed one at a time at the keypad. Simply scroll to the
desired option and turn it on or off by following the prompts.
$FFHVVLQJWKH6\VWHP
The TeleSMART system has three levels of keypad access as follows:
Entering…Lets You…
the programmed Quick Access key hear messages in the common mailbox only
( see page 19 for more information) (mailbox 1), and use menu options 1-7.
your user code + [∗] hear messages in all mailboxes to which you
have access, and use menu options 1-7.
the Master code + [∗] use all menu options 01-22
•While using TeleSMART from your home telephone, you are unable to receive calls.
•When using TeleSMART from your security system keypad, you can receive calls, but
TeleSMART cannot answer the call for you.
-6-
6\VWHP2YHUYLHZ
1DYLJDWLQJDQG6HOHFWLQJ2SWLRQVIURPD7HOH6PDUW.H\SDG
Each option is identified by a reference number. A list of system options is on page 4. After
accessing the system, the first option (Hear Messages) is displayed, and, if there are new
messages, the system begins announcing them†.
Use the following keys to navigate and select options:
To…Press…
Display the next option [∗]
Display the previous option [#]
Go to a particular option Master: [7] then enter the 2-digit option number
Other users: enter the desired option number (1-7)
Select the displayed option†[0]
Return to Main Menu [8]
Exit the system [9]
†
The system remains in the Main Menu during “number of messages”announcement, but automatically enters
the “Hear Messages”menu once the new message itself is being announced. Therefore, pressing a key before
a new message is announced selects the respective main menu option, while pressing a key after the message
has been announced selects the respective “Hear Messages”menu option.
Procedures described in this manual are based on usin
g
a keypad to access the system’s
options. When usin
g
a telephone to access the system, the option numbers are different. Refer
to the “
TeleSmart Options from a Telephone
”section on page 28 for navigating the options from
a telephone.
7XUQLQJWKH6\VWHP·V$QVZHU0RGH2Q 2II
You can use TeleSmart’s options at any time, but the system’s answer mode must be “on”
before TeleSmart can record messages from incoming callers.
463+6%1 13()
 7=78)1 32
463+6%1 13()
 7=78)1 3**
1. Go to the “06-System”prompt. The display shows the
current status of the system.
2. To turn the system off, press [0].
To turn the system back on, press [0] again.
DISPLAY NOTE: The top line of the display reads “Program Mode”when the master code is
used. It reads “User Menu”when other user codes are used. Throu
g
hout this manual, it is
assumed the Master code is used, and therefore the prompts show the words “Program Mode.”
-7-
6\VWHP2YHUYLHZ
0DNLQJ7HOHSKRQH&DOOV
TeleSmart offers the following telephone calling options:
•Normal Dialing: Place calls normally.
•Memory Dialing: Quick dialing of a pre-programmed number.
•Last Number Redial: Automatic redialing of previously dialed number
•Repeat Dialing: Repeatedly redials busy numbers until connection is made.
Type of Call Action/What Happens
Normal Dialing 1. Pick up any telephone handset in your home and listen for a dial
tone. Rapid beeps (if enabled) mean there are new messages
waiting.
2. To place a call, simply dial as usual after the beeps end.
Memory Dialing
[XX] ∗1
1. Pick up any telephone in your home and listen for a dial tone.
2. Press [xx] [∗] (xx = 2-digit memory location number, 01-15).
The system announces a voice tag (if recorded) or phone number
for that location after you press [∗].
3. Press [1].
The system begins dialing after you press [1].
To program memory/speed dial numbers and optional voice tags, see
“Memory Dial Numbers”on page 22.
Last Number
Redial
99 ∗
1. Pick up any telephone in your home and listen for a dial tone.
2. Press [9] [9] [∗].
TeleSMART automatically redials the last number called from any
phone in the house.
Repeat Dialing
66 ∗
1. After dialing a number, hang up the telephone handset, then pick it
up again and listen for a dial tone.
2. Press [6] [6] [∗], then hang up the handset again.
TeleSMART will automatically redial the number once per minute
for up to 30 minutes. The system then stops dialing that number.
When the number is available, your TeleSMART keypad will beep;
pick up the telephone handset and continue with your call.
-8-
/LVWHQLQJWR<RXU0HVVDJHVRSWLRQ
01
Hear Messages 02
Record Memo 03
Caller ID Log 04
Privacy On/Off 05
Record OGM 06
System On/Off 07
System Time 08
CID Display
NAVIGATION: [∗] = Next Option; [#] = Previous Option; [7] = GOTO prompt; [9] = Exit System.
$ERXW0HVVDJHV
Callers and users can leave messages in a particular mailbox by pressing the appropriate
key†before recording. This section describes how to listen to these messages.
†The key (2-4) corresponds to the mailbox number and can be identified in the greeting. See
Recording Greetings section (page 13) for instructions on how to record a greeting.
The Messa
g
e option is available only if there are new or saved messa
g
es in the system.
The
New and Saved Messages
chart below describes how the system responds
depending on whether there are new or saved messages.
New and Saved Messages
If there are…The system…
new messages or memos automatically announces the number of new messages,
then begins playing the oldest message in the user’s
mailbox. You can then save or erase the message,
Indicated By:
and/or play the next message in that mailbox.
Keypad: blinking yellow light
Press [8] to return to the Main Menu.
Phone: rapid beeps*
* if “Message-Beeps”option is on (see option 13 on page
16)
saved messages or memos starts the Main Menu. You can select the Message option
to listen to saved messages.
no messages or memos starts the Main Menu.
-9-
/LVWHQLQJWR<RXU0HVVDJHV
+RZWR/LVWHQWR<RXU0HVVDJHV
463+6%1 13()
  ,)%6 1)77%+)7
1)13 ;)( 41
1. Go to the “01-Hear Messages”prompt and press [0].
If there are new messages or memos in your mailbox,
the system automatically plays the oldest message and
displays the day and time the message was received.
The system automatically advances to the next prompt.
1)77%+) 1)29
 6)4)%8
2. After or during the message playback, you may select
from the options described below.
(Pressing [∗] or [#] displays the choices on the bottom line.)
Message Menu
1–Repeat Plays back the current message again.
2 –Save Saves the current message, then plays the next
message. If you do not save the message, the
system treats it as a new message.
3–Erase Erases the current message, then plays the next
message. After the last message is played, this
option becomes “erase all”messages.
4 –Next Stops the current message and begins the next
message in the order in which received.
5 –Previous Stops the current message and begins the previous
message.
6 –Sel. Mailbx Lets you select another mailbox by entering the
desired mailbox number (1-4). The system then
displays the number of messages in that mailbox
followed by the messages themselves. See “Enter
Mailbox”prompt at below.
8 –Menu Returns to the Main Menu options.
9 –Exit Exits the system.
)28)6 1E-0&3<
  
#
)2(
1%-0&3< ' 2);
1)13  17+ 
3. To hear messages in another mailbox, press [6] from
the “Message”Menu, then:
Enter the desired mailbox number, 1-4.
Remember, you can access only those mailboxes to
which you are authorized.
The system displays the number of new messages in
the selected mailbox and plays back the oldest
message, then returns to the “Message Menu”prompt.
When finished, press [8] to return to the Main Menu, or press [9] to exit the system.
-10-
5HFRUGLQJ0HPRVRSWLRQ 
01
Hear Messages 02
Record Memo 03
Caller ID Log 04
Privacy On/Off 05
Record OGM 06
System On/Off 07
System Time 08
CID Display
NAVIGATION: [∗] = Next Option; [#] = Previous Option; [7] = GOTO prompt; [9] = Exit System.
$ERXW0HPRV
A memo is a message you can record for other users of the system to hear. For example,
you might want to let them know you went to the store. These users would then use the
Message Menu to listen to your memo.
When you record a memo, you can play it back and/or erase it using this menu.
However, once you exit this menu, the memo can only be erased by using the Message
Menu described in the previous section.
+RZWR5HFRUGD0HPR
463+6%1 13()
 6)'36( 1)13
1. Go to the “02-Record Memo”prompt and press [0].
)28)6 1%-0&3<

#
)2(
2. Enter the mailbox number for the intended user.
To cancel this prompt, press the [#] key, then see the
“Memo Menu”prompt described below.
1%-0&3< '31132
6)'36( %8 832)
3. The display shows the selected mailbox.
Begin recording your memo after the tone.
Press any key to end the recording.
The memo is automatically saved and the system
displays the next prompt.
1&' 6)4 6)'
)6%7) 1)29
4. Select from the options described below.
Memo Menu
1–Repeat Plays back the recorded memo.
3–Erase Erases the recorded memo.
6–Record Returns to the “Enter Mailbox”prompt.
8–Menu Returns to the Main Menu.
9 –Exit Exits the system.
When finished, press [8] to return to the Main Menu, or press [9] to exit the system.
-11-
&DOOHU,'/RJRSWLRQ
01
Hear Messages 02
Record Memo 03
Caller ID Log 04
Privacy On/Off 05
Record OGM 06
System On/Off 07
System Time 08
CID Display
NAVIGATION: [∗] = Next Option; [#] = Previous Option; [7] = GOTO prompt; [9] = Exit System.
$ERXWWKH&DOOHU,'/RJ
The Caller ID Log is a record of the phone number and/or name of callers (depending on
the type of Caller ID service you subscribe to). The log stores up to 50 calls. After this,
the log overwrites the oldest call information with the newer calls (i.e., the 51st call
replaces the oldest call, the 52nd call replaces the next oldest, etc.).
Use this menu to display the Caller ID log. Refer to the
Caller ID Options
section on
page 20 for programming other Caller ID features if you subscribe to Caller ID service.
You must subscribe to Caller ID service from your telephone service provider to use the
Caller ID Log.
+RZWR9LHZWKH&DOOHU,'/RJ
463+6%1 13()
 '%00)6 -( 03+
1. Go to the “03-Caller ID Log”prompt and press [0].
17+ HE] 8-1)
4,32) 291&)6
2. The system displays the day, time, and phone number
of the most recent caller, then automatically advances
to the “Caller ID Log”Menu prompt.
'%00)6 -( 03+
6):-); )6%7)
3. Select from the options described below.
(Pressing [∗] or [#] displays the choices on the bottom line.)
Caller ID Log Menu
2–Review The name for the call is displayed on the bottom line
for 3 seconds (only if you have the “name”Caller ID
service).
3–Erase Erases the displayed entry in the Caller ID log.
NOTE: Any user can erase entries in the Caller ID log.
4–Next Displays the next call. Pressing [4] repeatedly scrolls
through the Caller ID log.
5–Previous Displays the previous call. Pressing [5] repeatedly
scrolls through the Caller ID log.
8–Menu Returns to the Main Menu.
9 –Exit Exits the system.
When finished, press [8] to return to the Main Menu, or press [9] to exit the system.
-12-
3ULYDF\)HDWXUHRSWLRQ
01
Hear Messages 02
Record Memo 03
Caller ID Log 04
Privacy On/Off 05
Record OGM 06
System On/Off 07
System Time 08
CID Display
NAVIGATION: [∗] = Next Option; [#] = Previous Option; [7] = GOTO prompt; [9] = Exit System.
$ERXWWKH3ULYDF\)HDWXUH
The Privacy feature turns off all telephone ringers and lets TeleSMART answer your calls.
This can be useful if you do not wish to be disturbed at certain times. For example, you may
wish to turn Privacy on during dinner to avoid being interrupted by phone calls.
•When the Privacy feature is on, it remains on for 8 hours, or until you turn it off. It
automatically turns off after 8 hours (phone ringers turned back on).
•Use the Messa
g
e Menu to check for any messa
g
es that may have been left while
Privacy was turned on (message light will be on at the keypad).
+RZWR7XUQWKH3ULYDF\)HDWXUH2Q 2II
463+6%1 13()
 46-:%'= 3**
463+6%1 13()
 46-:%'= 32
1. Go to the “04-Privacy”prompt.
2. To turn the Privacy feature on, press [0].
To turn Privacy off, press [0] again.
+RZWR2YHUULGH3ULYDF\0RGH
When you call in to the system, you can manually override Privacy mode if it is on:
1. Dial in to the system. When TeleSMART answers the call, the system announces
“privacy on”before the greeting to let you know it is turned on.
2. Press [0] during the greeting. You are then connected to the system and your voice can
be heard at the TeleSMART keypads and auxiliary speaker.
3. Simply speak into the telephone mouthpiece and say “pick up the phone”or
something similar to get the attention of those at the premises. Remember, the phone
does not ring at the premises, so your voice is the only alert they have to your call.
You can also set the system to automatically override Privacy mode for calls from a
specific phone number. See
Caller ID Options
on page 20 for details.
-13-
5HFRUGLQJ*UHHWLQJVRSWLRQ
01
Hear Messages 02
Record Memo 03
Caller ID Log 04
Privacy On/Off 05
Record OGM 06
System On/Off 07
System Time 08
CID Display
NAVIGATION: [∗] = Next Option; [#] = Previous Option; [7] = GOTO prompt; [9] = Exit System.
$ERXW*UHHWLQJVRXWJRLQJPHVVDJHV
When TeleSMART answers a call, the caller hears a recorded greeting (known as the
outgoing message or OGM). The system includes a pre-recorded greeting for the common
mailbox (common mailbox is mailbox 1), but if desired, you can record your own greetings.
The greeting can instruct a caller to press a key corresponding to a specific mailbox (2-4),
which lets the caller record a message in a particular mailbox.
Use this menu to record a greeting or to listen to an existing greeting.
+RZWR5HFRUG*UHHWLQJV
463+6%1 13()
 6)'36( 3+1
1. Go to the “05-Record OGM”prompt and press [0].
)28)6 1%-0&3<

#
)2(
2. Enter the mailbox number (1-4) for which the greeting
is to be recorded or reviewed.
You can record a
greeting only in a mailbox to which you have access.
To cancel the entry, press [#]. The system displays the
“Greetings Menu”prompt, described below.
1%-0&3< '31132
6)'36( %8 832)
3. Begin recording your greeting after the tone.
Press any key to end the recording. The greeting is
automatically played back once and saved.
When Making A Greeting Message (if using multiple mailboxes):
1. Include instructions for callers to press the appropriate key (2-4)
corresponding to the desired mailbox. E.g., “To leave a message for
Tom, press 2; to leave a message for Melissa, press 3.”
2. Leave a few seconds of silence at the end of your greeting to give
callers time to make their selection. This is because callers must
make a mailbox selection before the “record now”beep.
1&'
:
6)4)%8
6)'36( 1)29
4. Select from the options described below.
Greetings Menu
1–Repeat The recorded memo is played.
6–Record Returns to the “Enter Mailbox”prompt.
8–Menu Returns to the Main Menu.
9 –Exit Exits the system.
When finished, press [8] to return to the Main Menu, or press [9] to exit the system.
-14-
6HWWLQJWKH6\VWHP7LPHRSWLRQ
01
Hear Messages 02
Record Memo 03
Caller ID Log 04
Privacy On/Off 05
Record OGM 06
System On/Off 07
System Time 08
CID Display
NAVIGATION: [∗] = Next Option; [#] = Previous Option; [7] = GOTO prompt; [9] = Exit System.
$ERXWWKH6\VWHP7LPH
The internal clock is used to time-stamp all messages. Use this menu to set or view the
system’s time setting.
+RZWR6HWWKH6\VWHP7LPH
463+6%1 13()
 7=78)1 8-1)
1. Go to the “07-System Time”prompt and press [0].
7=78)1 8-1)
792 %1
2. The current time setting is displayed for five seconds.
The system automatically advances to the next prompt.
7)8 8-1)#

-
=)7 1)29
3. Press [1] (yes) to begin setting the day and time.
To cancel and return to the Main Menu, press [8].
(%=#  ;)(2)7(%=
∗
 2)<8 7)0)'8
4. Press [∗] until the correct day of the week appears, then
press [0] to select it.
The system automatically advances to the next prompt.
)28)6 ,396
 
5. Enter the current hour (use 2-digit entries; e.g., 09 for 9
o’clock).
The system automatically advances to the next prompt.
)28)6 1-298)7
 
6. Enter the current minute (use 2-digit entries).
The system automatically advances to the next prompt.
)28)6 %141
 %1 41
7. Enter the “AM”or “PM”setting by pressing “1”for AM or
“2”for PM.
The system automatically advances to the next prompt.
7=78)1 8-1)
792 %1
8. The system displays the day and time, then
automatically returns to the “Set Time”prompt described
above.
When finished, press [8] to return to the Main Menu, or press [9] to exit the system.
-15-
&DOOHU,''LVSOD\$QQRXQFHPHQWVRSWLRQ
01
Hear Messages 02
Record Memo 03
Caller ID Log 04
Privacy On/Off 05
Record OGM 06
System On/Off 07
System Time 08
CID Display
09
Keypad CID 10
Aux CID 11
Aux Volume 12
Toll Saver 13
Message Beeps 14
HF Keypad 15
HF Aux 16
Handset On/Off
NAVIGATION: [∗] = Next Option; [#] = Previous Option; [7] = GOTO prompt; [9] = Exit System.
$ERXW&DOOHU,''LVSOD\VDQG$QQRXQFHPHQWV
TeleSmart can provide Caller ID information if you subscribe to Caller ID service from
your telephone provider.
Caller ID Display and Announcement options let you:
•display Caller ID information at TeleSmart keypads
•announce Caller ID information at the keypad and/or auxiliary speaker (announces caller’s
phone number, or, if a voice tag is recorded in option 19, announces the voice tag)
•set the auxiliary speaker volume.
+RZWR7XUQ&DOOHU,''LVSOD\DWWKH.H\SDG2Q 2II
463+6%1 13()
 '-( (-7432
CID Keypad Display:
1. Go to the “08-CID Display”prompt.
2. To turn the CID keypad display on, press [0].
To turn the display off, press [0] again.
+RZWR7XUQ&DOOHU,'$QQRXQFHPHQWV2Q 2IIDQG+RZWR6HWWKH9ROXPH
463+6%1 13()
 /)=4( '-(32
CID announcements at the keypad:
1. Go to the “Keypad CID”prompt.
2. To turn the CID announcement on, press [0].
To turn the announcement off, press [0] again.
463+6%1 13()
 %9< '-(32
CID announcements at the auxiliary speaker:
1. Go to the “Aux CID”prompt.
2. To turn the announcement on, press [0].
To turn the announcement off, press [0] again.
463+6%1 13()
 %9< :30 1)(
)28)6 :3091)
03; 1)( ,-
Speaker Volume:
1. Go to the “Aux Volume”prompt and press [0].
2. Press [1] for low, [2] for medium, or [3] for high volume.
The system automatically returns to the Main Menu
with the new volume setting in effect.
-16-
7ROO6DYHU0HVVDJH%HHSVRSWLRQV 
09
Keypad CID 10
Aux CID 11
Aux Volume 12
Toll Saver 13
Message Beeps 14
HF Keypad 15
HF Aux 16
Handset On/Off
NAVIGATION: [∗] = Next Option; [#] = Previous Option; [7] = GOTO prompt; [9] = Exit System.
$ERXWWKH7ROO6DYHU)HDWXUH
The Toll Saver feature lets you call in to the system to check if there are new messages
(determined by the number of rings). This lets you hang up before incurring toll charges.
The Toll Saver feature works in combination with the security system. First, you must turn
Toll Saver on (shown below), but then it becomes active only when the security system is
armed in the AWAY or MAXIMUM mode. The Toll Saver feature is inactive when the
security system is disarmed or when it is armed STAY or INSTANT.
When Toll Saver is active (option is on and system is armed AWAY or
MAXIMUM), the “distinctive ring”feature is automatically disabled.
+RZWR7XUQ7ROO6DYHU2Q 2II
463+6%1 13()
 8300 7%:) 32
Toll Saver:
1. Go to the “12-Toll Saver”prompt.
2. To turn the Toll Saver feature on, press [0].
To turn Toll Saver off, press [0] again.
+RZWR&KHFNIRU0HVVDJHVZKLOH7ROO6DYHULV2Q
1. Call in to the system and listen for the number of rings:
2 rings = There are new messages/memos in one or more of the mailboxes
4 rings = There are no new messages/memos in any of the mailboxes
2. To save the toll charge if there are no new messages, hang up after the third ring.
$ERXW0HVVDJH%HHSVSKRQHWRQH
The system can alert you to new messages whenever you pick up the telephone
receiver, if desired. If the message beeps feature is turned on and you have new
messages, the system beeps over the dial tone when you pick up the telephone receiver.
When accessing TeleSmart from a telephne, this feature is announced as “phone tone.”
+RZWR7XUQ0HVVDJH%HHSV2Q 2II
463+6%1 13()
 17+ &))4 3**
Message Beeps:
1. Go to the “13-Message Beeps”prompt.
2. To turn Message Beeps on, press [0].
To turn Message Beeps off, press [0] again.
-17-
&DOO6FUHHQLQJRSWLRQV
09
Keypad CID 10
Aux CID 11
Aux Volume 12
Toll Saver 13
Message Beeps 14
HF Keypad 15
HF Aux 16
Handset On/Off
NAVIGATION: [∗] = Next Option; [#] = Previous Option; [7] = GOTO prompt; [9] = Exit System.
$ERXW&DOO6FUHHQLQJ
Call Screening lets TeleSMART answer your calls while you listen in from any phone and/or
keypad or auxiliary speaker (depending on programming) without the caller hearing you.
Call Screening From…Lets you…
Telephone (handset) listen to a caller’s incoming message from the telephone
without the caller hearing you. You can then connect to the
call or let TeleSMART continue recording the caller’s
message. This is known as Handset Call Screening.
Keypad and/or Speaker hear a caller’s incoming message at the keypad and/or
auxiliary speaker without the caller hearing you. You can then
pick up a telephone receiver to connect to the call or let
TeleSMART continue recording the caller’s message. This is
known as Hands Free (abbreviated “HF”) call screening.
+RZWR&RQQHFWWRD&DOOZKHQ7HOHSKRQH&DOO6FUHHQLQJLV2Q
1. Pick up the telephone receiver.
2. As you hear the caller leaving a message, click the “off-hook”button once, in the
same way you would when switching between callers if you had Call Waiting service.
Alternatively, you can press the “flash”key if your telephone has one.
You are automatically connected to the call and you can begin your conversation.
TeleSmart stops recording and is ready to answer the next call.
+RZWR7XUQ&DOO6FUHHQLQJ2Q 2II
463+6%1 13()
 ,* /)=4%(3**
Call Screening at the Keypad:
1. Go to the “14-HF Keypad”prompt.
2. To turn keypad Call Screening on, press [0].
To turn keypad Call Screening off, press [0] again.
463+6%1 13()
 ,* %9< 3**
Call Screening at the Auxiliary Speaker:
1. Go to the “15-HF Aux”prompt.
2. To turn speaker Call Screening on, press [0].
3. To turn speaker Call Screening off, press [0] again.
463+6%1 13()
 ,%2(7)8
Call Screening at the telephone:
1. Go to the “16-Handset”prompt.
2. To turn telephone Call Screening on, press [0].
To turn telephone Call Screening off, press [0] again.
-18-
5LQJ$QVZHU&RXQWRSWLRQ
17
Ring Answer 18
Access Key 19
Caller ID Prog 20
Memory Dial 21
User Code 22
Zone Voice Tag 23
PBX Line
NAVIGATION: [∗] = Next Option; [#] = Previous Option; [7] = GOTO prompt; [9] = Exit System.
$ERXWWKH5LQJ$QVZHU&RXQW
Use this menu to set the number of rings before the system answers the phone.
•The Rin
g
Answer Count does not appl
y
if Toll Saver is active
(
option is on and
s
y
stem is armed AWAY or MAXIMUM
)
. When Toll Saver is active, the rin
g
count is automaticall
y
set to 4 rin
g
s if there are no new messa
g
es and 2 rin
g
s if
there are new messages.
•If ke
y
pad or auxiliar
y
speaker Caller ID announcements are set to “on”
(
see
pa
g
e 15
)
, set the rin
g
count to “4”or hi
g
her, since it takes at least that man
y
rin
g
s before the s
y
stem completes the Caller ID announcement and can
answer the call. For example, even if the rin
g
count is set to “2,”the s
y
stem
does not answer a call until the Caller ID announcement is finished, which ma
y
take up to 3 or 4 rings.
+RZWR6HWWKH5LQJ$QVZHU&RXQW
463+6%1 13()
 6-2+ %27;)6
1. Go to the “17-Ring Answer”prompt and press [0].
)28)6 6-2+7

#
)2(
2. Enter the desired number of rings (2-8) you want to
occur before the system answers a call.
To cancel and return to Main Menu, press [#].
3. The system automatically returns to the Main Menu.
-19-
4XLFN$FFHVV.H\RSWLRQ
17
Ring Answer 18
Access Key 19
Caller ID Prog 20
Memory Dial 21
User Code 22
Zone Voice Tag 23
PBX Line
NAVIGATION: [∗] = Next Option; [#] = Previous Option; [7] = GOTO prompt; [9] = Exit System.
$ERXWWKH4XLFN$FFHVV.H\
You can assign a Quick Access key that lets users access the TeleSmart system by simply
pressing and holding that key down for two seconds (no user code needed). This makes the
system easy to use, since a user does not need to remember an access code.
IMPORTANT: When using the Quick Access key, only the first seven options (01-07) can be
used, and only the common mailbox is available for message playback. And, the top line of the
prompts reads, “User Mode”rather than “Program Mode.”
Make sure the Quick Access key IS NOT programmed for any other
security system function.
Check with your installer BEFORE assigning a Quick Access key.
+RZWR$VVLJQWKH4XLFN$FFHVV.H\
463+6%1 13()
 %'')77 /)=
1. Go to the “18-Access Key”prompt and press [0].
)28)6 %'')77 /)=
 
=
3**
2. Enter the number corresponding to the desired access
key (see figure below.
3. The system automatically returns to the Main Menu,
and the selected Access key can be used.
®
1
OFF
4
MAX
7
INSTANT
READY
2
AWAY
5
TEST
8
CODE
0
3
STAY
6
BYPASS
9
CHIME
#
ARMED
READY
MESSAGE
MIC
6162-002-V0
1
2
3
4
-20-
&DOOHU,'2SWLRQVRSWLRQ
17
Ring Answer 18
Access Key 19
Caller ID Prog 20
Memory Dial 21
User Code 22
Zone Voice Tag 23
PBX Line
NAVIGATION: [∗] = Next Option; [#] = Previous Option; [7] = GOTO prompt; [9] = Exit System.
$ERXW&DOOHU,'2SWLRQV
You can set the way the system responds to calls from up to 25 different phone numbers.
Caller ID Options let you:
•set a distinctive ring for certain phone numbers so you’ll know who is calling by the rings
•assign a mailbox where messages from a particular number are automatically recorded
•record a voice tag that will be announced when receiving calls from a particular number.
+RZWR3URJUDP&DOOHU,'2SWLRQV
463+6%1 13()
 '%00)6 -( 8&0
1. Go to the “19-Caller ID Tbl”(table) prompt and press [0].
'-( 03'%8-32  
7)0)'8
2. Select from the options described below.
(Pressing [∗] or [#] displays the choices on the bottom line.)
Caller ID Menu
1–Select Lets you enter a Caller ID location (01-25) to store
Location the settings (see “Enter Location”prompt below).
2–Review Displays the selected location’s settings.
3 –Erase Erases the settings for the selected location.
4 –Next Shows the CID settings in the next location.
5 –Previous Shows the CID settings in the previous location.
6 –Program Starts the Caller ID Program Menu.
8–Menu Returns to the beginning of the Program Menu.
9 –Exit Exits the system.
)28)6 03'%8-32
 
#
)2(
03' << 1& < 62 <
<<< <<<<<<<
3. Press [1] from the previous prompt, then enter the 2-digit
location number. The system displays current settings:
LOC = location no. (01-25); MB = mailbox (1-4);
RN = distinct ring count (2-5); “x”= phone number
The system automatically advances to the next prompt.
(Caller ID Review Prompt shown)
4,32) 291&)6#
=)7 23 129
)28)6 4,32) 23
<<< <<<<<<<
4. Press [1] (yes), then enter the phone number for this Caller ID
location. You can enter up to 10 digits, including area code.
•To define a display for private numbers, press [#] then [1].
•To define a display for out-of-area nos., press [#] then [2].
Press [#] then [0] to continue.
To skip the “Phone Number”prompt, press [2] (no).

Other manuals for TeleSmart

1

Other ADEMCO Keypad manuals

ADEMCO 6150PL3 User manual

ADEMCO

ADEMCO 6150PL3 User manual

ADEMCO Alpha Console 5330 User manual

ADEMCO

ADEMCO Alpha Console 5330 User manual

ADEMCO 6137 User manual

ADEMCO

ADEMCO 6137 User manual

ADEMCO 6270 - Ademco TouchCenter Keypad User manual

ADEMCO

ADEMCO 6270 - Ademco TouchCenter Keypad User manual

ADEMCO 6128WL User manual

ADEMCO

ADEMCO 6128WL User manual

ADEMCO 7720P User manual

ADEMCO

ADEMCO 7720P User manual

ADEMCO 6128RF User manual

ADEMCO

ADEMCO 6128RF User manual

ADEMCO 6128RF User manual

ADEMCO

ADEMCO 6128RF User manual

ADEMCO 6270 - Ademco TouchCenter Keypad Assembly instructions

ADEMCO

ADEMCO 6270 - Ademco TouchCenter Keypad Assembly instructions

ADEMCO 4130XM User manual

ADEMCO

ADEMCO 4130XM User manual

ADEMCO Galant 6128 RFH Parts list manual

ADEMCO

ADEMCO Galant 6128 RFH Parts list manual

ADEMCO 6137 User manual

ADEMCO

ADEMCO 6137 User manual

ADEMCO Vista 128 User manual

ADEMCO

ADEMCO Vista 128 User manual

ADEMCO Galant 6128 RFH User manual

ADEMCO

ADEMCO Galant 6128 RFH User manual

ADEMCO Galant 6128 RFH User manual

ADEMCO

ADEMCO Galant 6128 RFH User manual

ADEMCO 6148 User manual

ADEMCO

ADEMCO 6148 User manual

ADEMCO 6160CR User manual

ADEMCO

ADEMCO 6160CR User manual

ADEMCO 6150RF User manual

ADEMCO

ADEMCO 6150RF User manual

ADEMCO 6270 - Ademco TouchCenter Keypad User manual

ADEMCO

ADEMCO 6270 - Ademco TouchCenter Keypad User manual

ADEMCO 6139 User manual

ADEMCO

ADEMCO 6139 User manual

ADEMCO Galant 6128 RFH User manual

ADEMCO

ADEMCO Galant 6128 RFH User manual

ADEMCO 6128RF User manual

ADEMCO

ADEMCO 6128RF User manual

ADEMCO 4111XM User manual

ADEMCO

ADEMCO 4111XM User manual

ADEMCO 6148ICON Assembly instructions

ADEMCO

ADEMCO 6148ICON Assembly instructions

Popular Keypad manuals by other brands

Siemens SAK 53 installation instructions

Siemens

Siemens SAK 53 installation instructions

Texecom Premier LCDLP installation manual

Texecom

Texecom Premier LCDLP installation manual

Metra Electronics Combo Technical manual

Metra Electronics

Metra Electronics Combo Technical manual

Telcoma APRO quick start guide

Telcoma

Telcoma APRO quick start guide

Channel Vision A0127 instructions

Channel Vision

Channel Vision A0127 instructions

Automotive Data Solutions TR4650A owner's manual

Automotive Data Solutions

Automotive Data Solutions TR4650A owner's manual

eTIGER ES-K1A manual

eTIGER

eTIGER ES-K1A manual

Magellan K636 User quick reference guide

Magellan

Magellan K636 User quick reference guide

TIS TERRE Series installation manual

TIS

TIS TERRE Series installation manual

Newall DPG2000 Installation & user manual

Newall

Newall DPG2000 Installation & user manual

Bosch AMAX 2100 installation guide

Bosch

Bosch AMAX 2100 installation guide

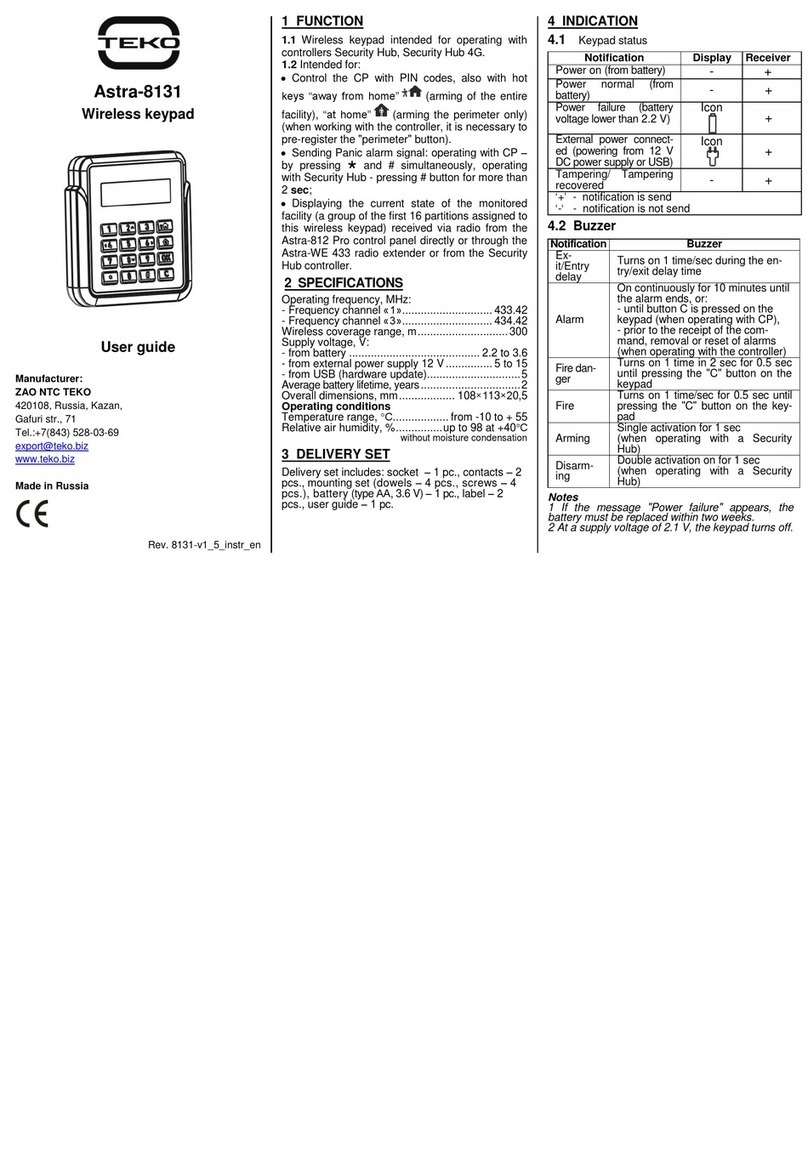
teko Astra-8131 user guide

teko

teko Astra-8131 user guide

Risco RPKEL installation guide

Risco

Risco RPKEL installation guide

Lenze EPM-H315 operating instructions

Lenze

Lenze EPM-H315 operating instructions

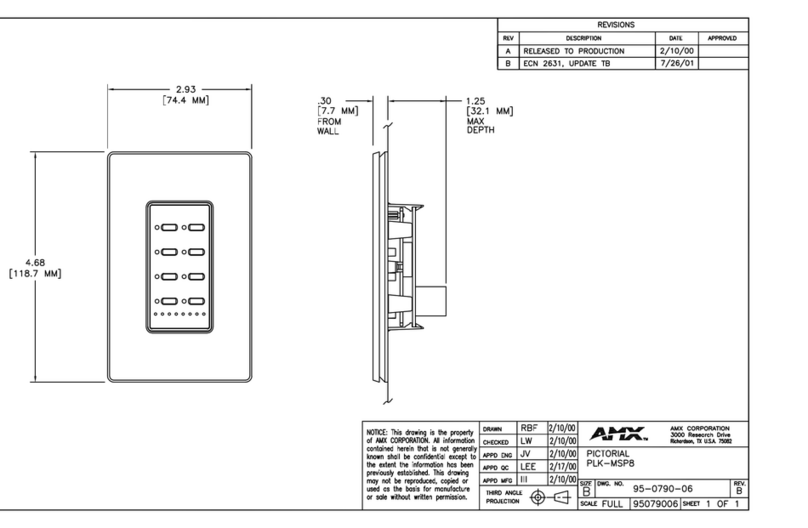
AMX PLK-MSP8 Specifications

AMX

AMX PLK-MSP8 Specifications

AMX METREAU MET-6NE quick start guide

AMX

AMX METREAU MET-6NE quick start guide

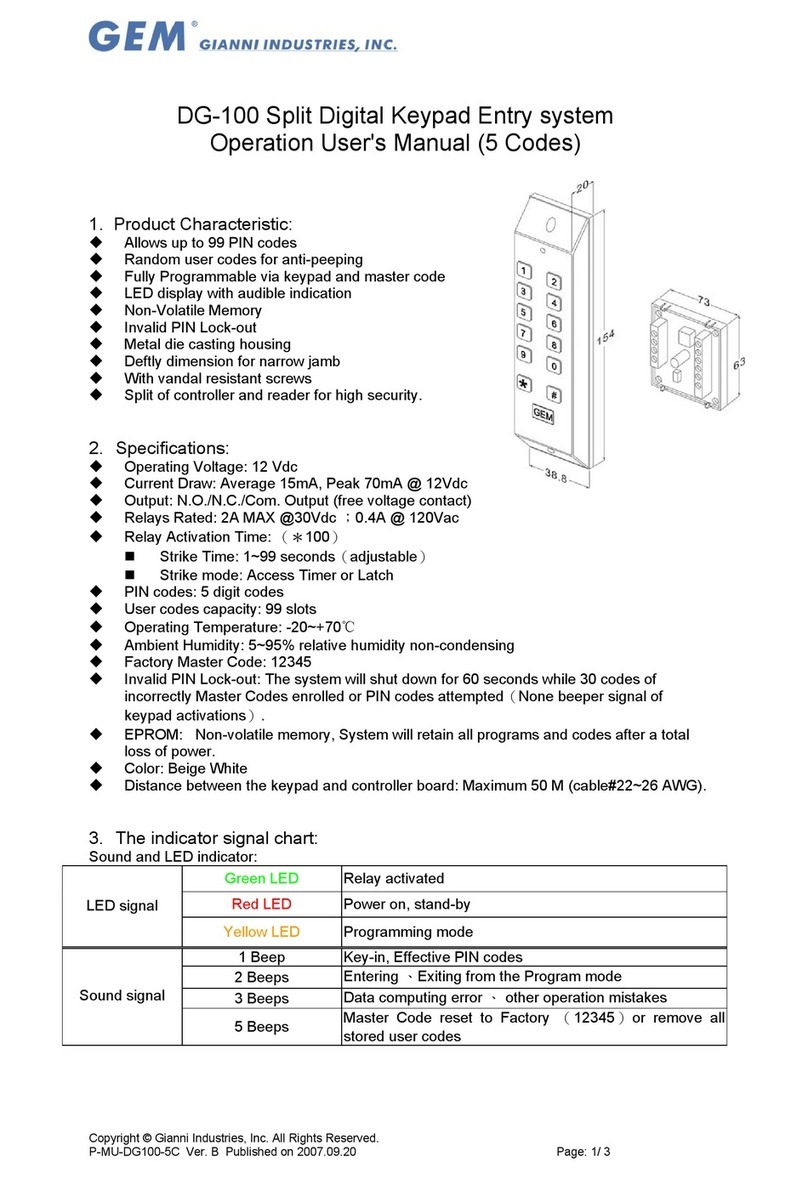
GEM DG-100 Operation user's manual

GEM

GEM DG-100 Operation user's manual

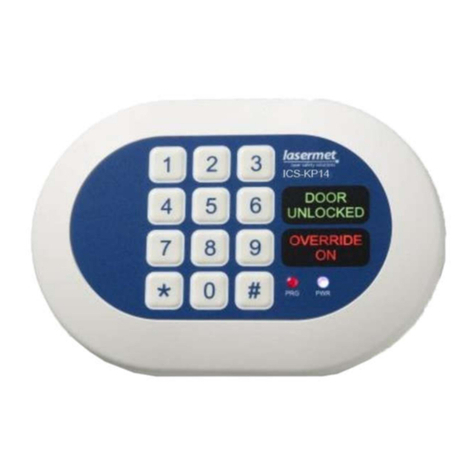
Lasermet ICS-KP14 instruction manual

Lasermet

Lasermet ICS-KP14 instruction manual

manuals.online logo
manuals.online logoBrands
  • About & Mission
  • Contact us
  • Privacy Policy
  • Terms and Conditions

Copyright 2025 Manuals.Online. All Rights Reserved.