ADEO Services R6121-1 User manual
2019-07
EAN CODE : 3276000620518
ELECTRIC MIXER R6121-1
Traduction de la version originale du mode d’emploi / Traducción de las Instrucciones originales / Tradução das Instruções Originais / Traduzione delle istruzioni originali / Μετάφραση
τωνπρωτότυπωνοδηγιών / Tłumaczenie instrukcji oryginalnej / Перевод оригинала инструкции / Перeклад оригінальної інструкції / Traducerea instrucţiunilor originale / Original Instructions
UA

2
A x1
B x1
D x2
C x1

Notes / Observaciones / Notas / Note / Σημειώσεις / Notatki / Примечания / Примітки / Note / Notes
Attention danger / Atención: Peligro / Atenção perigo / Attenzione pericolo / Προσοχή κίνδυνος /
Uwaga niebezpieczeństwo / Внимание! Опасно! / Увага! Небезпечно! / Atenţie, pericol / Caution danger
Observez / Atención / Aviso / Osservare / Προσέξτε / Przestrzegać / Соблюдайте правила техники
безопасности / Дотримуйтеся правил техніки безпеки / Respectaţi / Observe
Raccordé / Conectado / Ligado / Connesso / Με σύνδεση / Podłączone / Подключено /
Під’єднано / Conectat / Connected
Mise sous tension / Puesta en tensión / Ligação da alimentação / Messo sotto tensione /
Σύνδεση με το ηλεκτρικό δίκτυο / Włączenie zasilania / Включение под напряжение /
Під’єднання під напругу / Punere sub tensiune / Power up
Maintenance / Mantenimiento / Manutenção / Manutenzione / Σέρβις / Utrzymanie /
Техническое обслуживание / Технічне обслуговування / Mentenanţă / Maintenance
Hors tension / Apagado / Desligado da alimentação / Fuori tensione / Εκτός τάσης / Odłączenie zasilania /
Не под напряжением / Не під напругою / Scoatere de sub tensiune / Power o
Mentions légales & consignes de sécurité / Instrucciones legales y de seguridad / Avisos legais e instruções de segurança /
Istruzioni legali e di sicurezza / νομικό σημείωμα και οδηγίες ασφαλείας / uwagi prawne I instrukcja bezpieczeństwa /
руководство по технике Безопасности и правовым нормам / керівництво з техніки Безпеки і правовим нормам /
manual privind siguranța Și aspectele juridice / Legal & safety instructions

FR
PL
ES
RU
PT
UA
IT
RO
EL
EN
Montage Montaje Montagem Montaggio Συναρμολόγηση
Montaż Монтаж Збірка Ansamblu Assembly
1
2
3
FR
PL
ES
RU
PT
UA
IT
RO
EL
EN
Utilisation Utilización Utilização Uso χρήσης
użytkowania эксплуатации використання utilizare Use
1
2
4
PL RU UA RO EN
Konserwacja Уход Догляд Întreţinere Maintenance
1
2
5
FR ES PT IT EL
Entretien Serviço Manutenzione ΣυντήρησηMantenimiento
FR ES PT IT
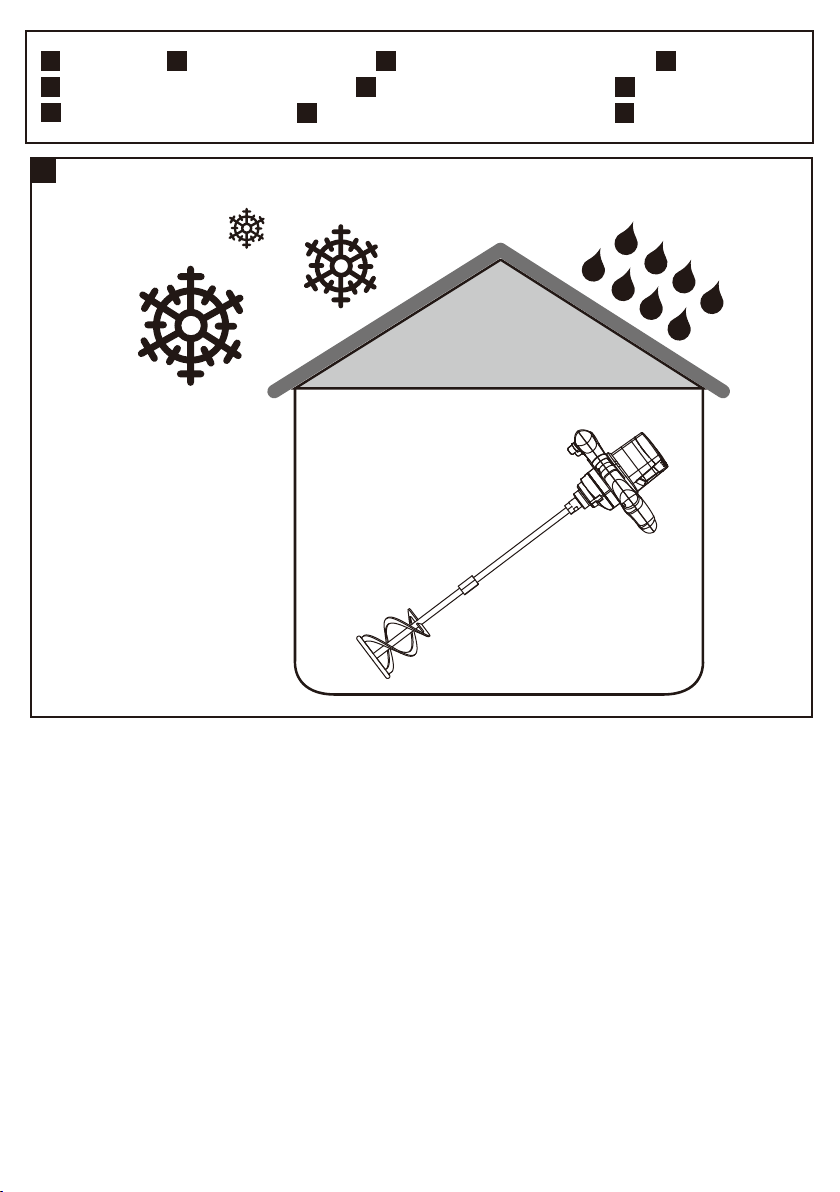
Hivernage Durante el invierno Preparação para o inverno Rimessaggio
PL RU
EL Αποθήκευση το χειμώνα Przechowywanie Зимний период
UA RO EN
Зимовий період Păstrare pe perioada iernii Winter storage
1
6
7
EN SYMBOLS
INTENDED USE
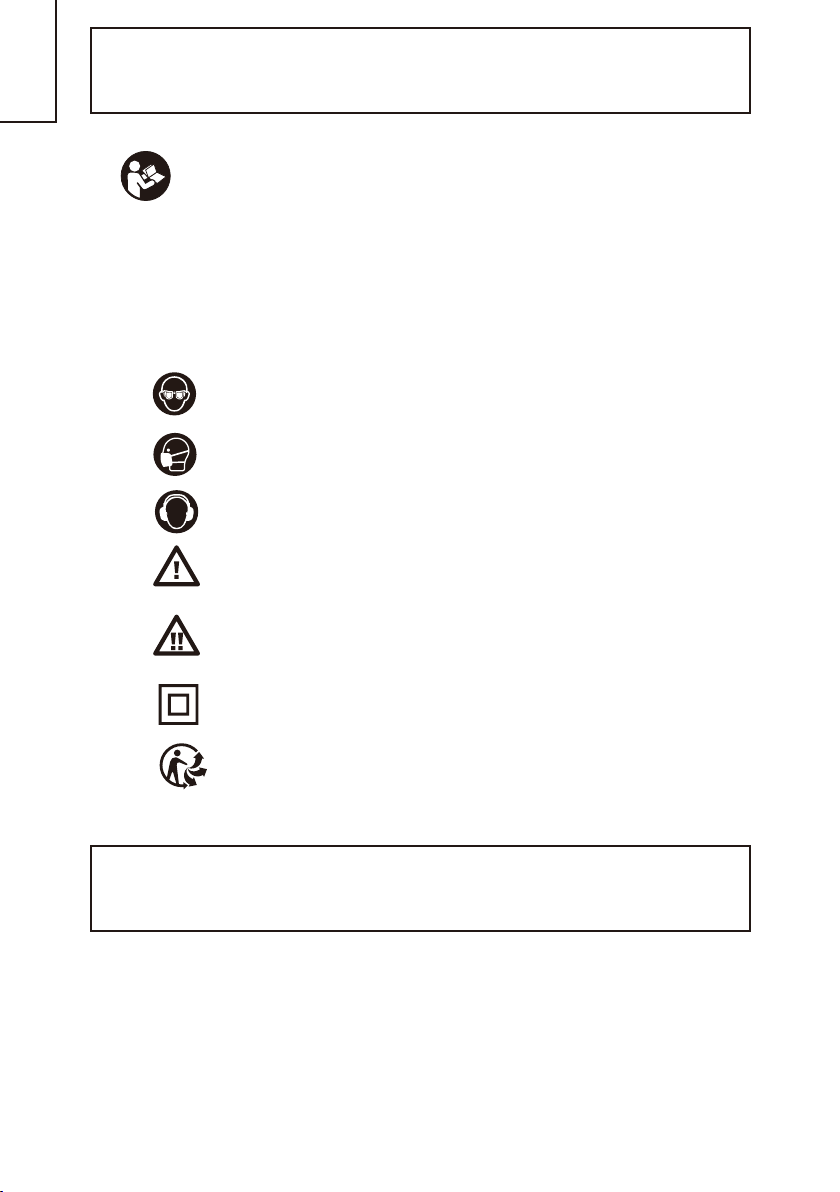
WARNING - To reduce the risk of injury, user must read instruction manual.
Use these operating instructions to familiarize yourself with the product,
the proper use and the safety instructions. Keep these operating instructions
in a safe place for future uses.
For safety reasons, children and young people under the age of 16, as well as
people not familiar with these operating instructions, may not use this product.
Persons with reduced physical or mental abilities may use the product only if they
are supervised or instructed by a responsible person.
Wear eye protection
This machine is intended for mixing with the sand, cement and mud. Do not use machine
attachments for works other than those for which they are designed for! All other
applications are expressly ruled out.
Do not use outdoors.
Do not use in the rain.
Wear a breathing Mask
Type and source of the danger: Failure to observe this danger notice
may cause physical injury or death.
Type and source of the danger:This danger notice warns of damager
to the appliance ,the environment or the other property.
Wear ear protector
Class II protection
This product is recyclable. If it cannot be used anymore,please take it to
waste recycling centre.

8
EN
WARNING Read all safety warnings instructions, illustrations and
specications provided with this power tool. Failure to follow all
instructions listed below may result in electric shock, re and/or serious injury.
Save all warnings and instructions for future reference.
The term "power tool"in the warnings refers to your mains-operated(corded)power tool or
battery-operated ( cordless)power tool.
1) Work area safety
a) Keep work area clean and well lit. Cluttered or dark areas invite accidents.
b) Do not operate power tools in explosive atmospheres, such as in the presence of
ammable liquids, gases or dust. Power tools create sparks which may ignite the dust or
fumes.
c) Keep children and bystanders away while operating a power tool. Distractions can
cause you to lose control.
2) Electrical safety
a) Power tool plugs must match the outlet. Never modify the plug in any way. Do not
use any adapter plugs with earthed (grounded)power tools. Unmodied plugs and
matching outlets will reduce risk of electric shock.
b) Avoid body contact with earthed or grounded surfaces, such as pipes, radiators,
ranges and refrigerators. There is an increased risk of electric shock if your body is earthed
or grounded.
c) Do not expose power tools to rain or wet conditions. Water entering a power tool will
increase the risk of electric shock.
d) Do not abuse the cord. Never use the cord for carrying, pulling or unplugging the
power tool. Keep cord away from heat, oil, sharp edges or moving parts. Damaged
or entangled cords increase the risk of electric shock.
e) When operating a power tool outdoors, use an extension cord suitable for outdoor
use. Use of a cord suitable for outdoor use reduces the risk of electric shock
f) If operating a power tool in a damp location is unavoidable, use a residual current
device(RCD) protected supply. Use of an RCD reduces the risk of electric shock.
SAFETY INSTRUCTIONS
General power tool safety warnings

9
EN SAFETY INSTRUCTIONS
3) Personal safety
a) Stay alert, watch what you are doing and use common sense when operating a power
tool. Do not use a power tool while you are tired or under the inuence of drugs,
alcohol or medication. A moment of inattention while operating power tools may result in
serious personal injury.
b) Use personal protective equipment. Always wear eye protection. Protective equipment
such as a dust mask, non-skid safety shoes, hard hat or hearing protection used for appropriate
conditions will reduce personal injuries.
c) Prevent unintentional starting. Ensure the switch is in the o-position before
connecting to power source and/or battery pack, picking up or carrying the tool.
Carrying power tools with your nger on the switch or energising power tools that have the
switch on invites accidents.
d) Remove any adjusting key or wrench before turning the power tool on. A wrench or
a key left attached to a rotating part of the power tool may result in personal injury.
e) Do not overreach. Keep proper footing and balance at all times. This enables
better control of the power tool in unexpected situations.
f) Dress properly. Do not wear loose clothing or jewellery. Keep your hair and clothing
away from moving parts. Loose clothes, jewellery or long hair can be caught In moving parts.
g) If devices are provided for the connection of dust extraction and collection facilities,
ensure these are connected and properly used. Use of dust collection can reduce dust-
related hazards.
h) Do not let familiarity gained from frequent use of tools allow you to become
complacent and ignore tool safety principles. A careless action can cause severe injury
within a fraction of a second.
4) Power tool use and care
a) Do not force the power tool. Use the correct power tool for your application.The
correct power tool will do the job better and safer at the rate for which it was designed.
b) Do not use the power tool if the switch does not turn it on and o. Any power tool
that cannot be controlled with the switch is dangerous and must be repaired.
c) Disconnect the plug from the power source and/or remove the battery pack, if
detachable, from the power tool before making any adjustment, changing
accessories, or storing power tools. Such preventive safety measures reduce the risk of
starting the power too/ accidentally.
d) Store idle power tools out of the reach of children and do not allow persons
unfamiliar with the power tool or these instructions to operate the power tool.
Power tools are dangerous in the hands of untrained users.

10
EN
MIXER SAFETY INSTRUCTION
Mixer safety instructions
a) Hold the tool with both hands at the intended handles. Loss of control can cause
personal injury.
b) Ensure sucient ventilation when mixing ammable materials to avoid a hazardous
atmosphere. Developing vapour may be inhaled or be ignited by the sparks the power tool
produces.
c) Do not mix food. Power tools and their accessories are not designed for processing food.
d) Keep the cord away from the working area. The cord may be entangled by the mixer basket.
e) Ensure that the mixing container is placed in a rm and secure position. A container
that is not properly secured may move unexpectedly.
f) Ensure that no liquid splashes against the housing of the power tool. Liquid that has
penetrated the power tool can cause damage and lead to electric shock.
g) Follow the instructions and warnings for the material to be mixed. Material to be
mixed may be harmful.
h) If the power tool falls into the material to be mixed, unplug the tool immediately
and have the power tool checked by a qualied repair person. Reaching into the
bucket with the too/ still plugged in can lead to electric shock.
i) Do not reach into the mixing container with your hands or insert any other objects
into it while mixing. Contact with the stirrer basket may lead to serious personal injury.
j) Start up and run down the tool in the mixing container only. The stirrer basket may
bend or spin in an uncontrolled manner
e) Maintain power tools and accessories. Check for misalignment or binding of moving
parts, breakage of parts and any other condition that may aect the power tool's
operation. If damaged, have the power tool repaired before use. Many accidents are
caused by poorly maintained power tools.
f) Keep cutting tools sharp and clean. Properly maintained cutting tools with sharp cutting
edges are less likely to bind and are easier to control.
g) Use the power tool, accessories and tool bits etc. in accordance with these
instructions, taking into account the working conditions and the work to be
performed. Use of the power tool for operations dierent from those intended could result
in a hazardous situation.
h) Keep handles and grasping surfaces dry, clean and free from oil and grease. Slippery
handles and grasping surfaces do not allow for safe handling and control/ of the tool in
unexpected situations.
5) Service
a) Have your power tool serviced by a qualied repair person using only identical
replacement parts. This will ensure that the safety of the power tool is maintained.
EN
11
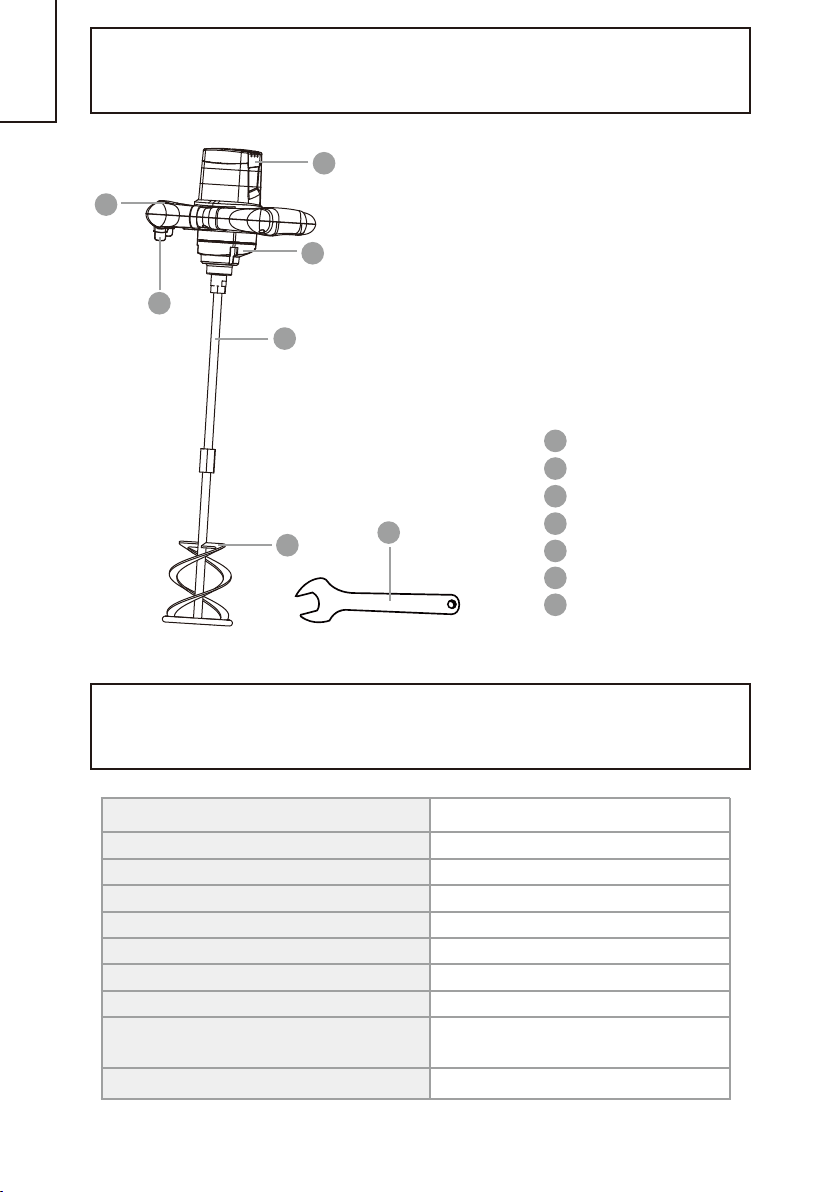
DESCRIPTION
1Switch
Handle
Back cover
Gear housing
Shaft
Mixing paddle
Wrench
2
3
4
5
6
7
7
6
5
4
3
2
1
TECHNICAL DATA
Model R6121-1
Power Input 1200W
Voltage 220-240V~50Hz
Number of Gears
Classe II
M14
0-680min
Protection/ Class of Protection
Thread for xing the Shaft
Mixing Paddle (φ max.)
Noise emission value
No-Load-Speed
120mm
1
LpA:92dB(A); LWa:103dB(A)
KpA:3dB; KWa:3dB
Vibration emission value ah,DS=4.675 m/s K=1.5 m/s
-1
22
12
EN
TECHNICAL DATA
NOTE:
-The declared vibration total value and the declared noise emission values have been measured in
accordance with a standard test method and may be used for comparing one tool with another;
-The declared vibration total value and the declared noise emission values may also be used in a
preliminary assessment of exposure.
WARNING:
-The vibration and noise emissions during actual use of the power tool can dier from the declared
values depending on the ways in which the tool is used especially what kind of work piece is
processed;
-To avoid vibration and noise emission:
-wear hearing protection
-shorten trigger time
-wear anti-vibration gloves
BEFORE USE
DANGER! Risk of injury due to electric shock.
Warning! Do not plug in before installation is fully completed!
ASSEMBLY AND ADJUSTMENT
Attaching
•Align the stirrer with the paddle. Screw the stirrer clockwise onto the lower end.
•Lock the welded nut of the shaft with one mounting spanner and secure the stirrer clockwise with
the other gripping the welded nut.
•Align the shaft with the paddle. Screw the shaft end with welded nut clockwise into the socket.
•Lock the socket with one mounting spanner and secure the shaft clockwise with another mounting
spanner gripping the welded nut.
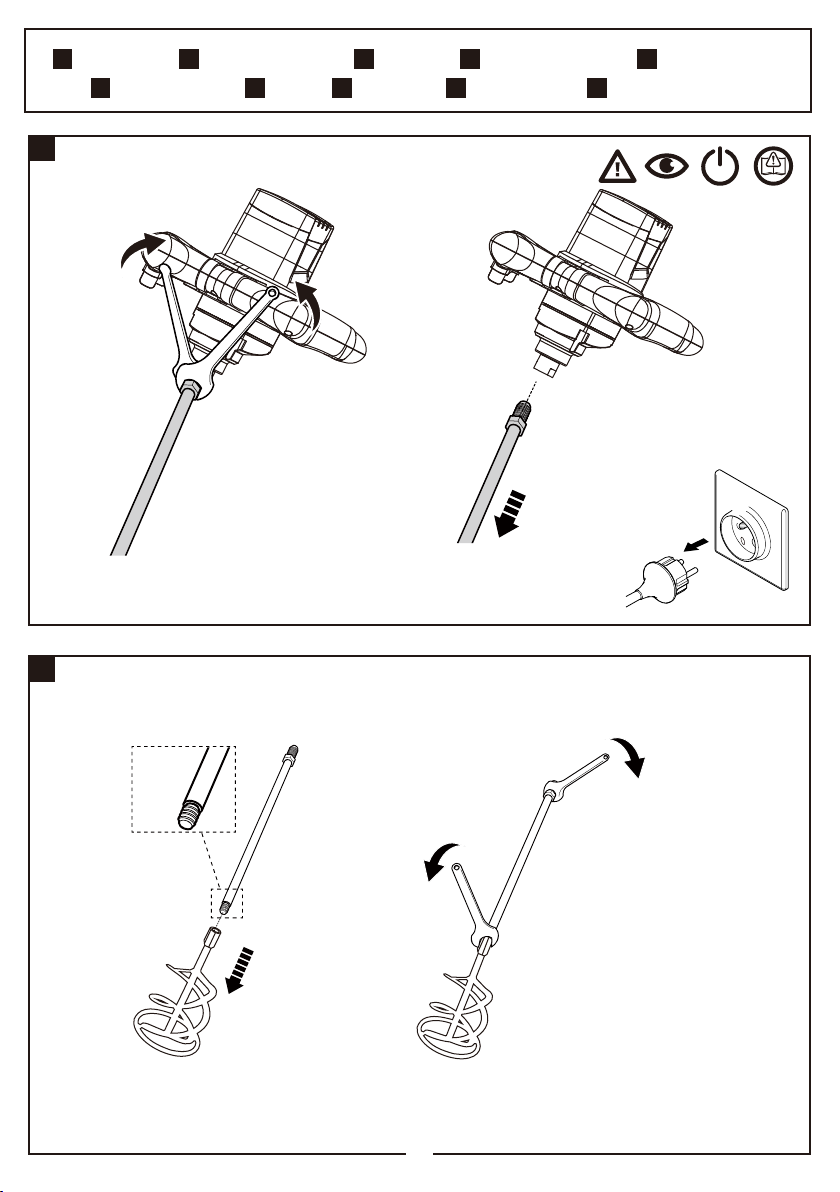
Removing/Replacing
•Lock the socket with one mounting spanner and loosen the paddle anticlockwise with another
mounting spanner gripping the welded nut.
•Loosen the welded nut anticlockwise and remove the paddle from the socket.

13
EN BEFORE USE
Stirrer
•Lock the welded nut of the paddle with one mounting spanner and loosen the stirrer anticlockwise
with another mounting spanner gripping the welded nut.
•Loosen the welded nut anticlockwise and remove the stirrer from the paddle.
•Attach a new paddle/stirrer as required.
Speed dial
•Rotate the product speed dial to change the speed of operation.
Instant Mode
•Switch the product on by pressing the On/o switch.
•Switch the product o by releasing the On/o switch.
Continuous mode
•Switch the product on by pressing the On/o switch and hold it in position.
•Press the lock-on button and hold it in position to lock the On/o switch.
•Release the lock-on button and On/o switch to switch the product o.
OPERATION
•Ensure that the air vents are always unobstructed and clear. Clean them if necessary with a soft
brush. Blocked air vents may lead to overheating and damage the product.
•Switch the product o immediately if you are disturbed while working by other people entering
the working area.
•Always let the product come to complete stop before putting it down.
•Do not overwork yourself. Take regular breaks to ensure you can concentrate on the work and
have full control over the product.
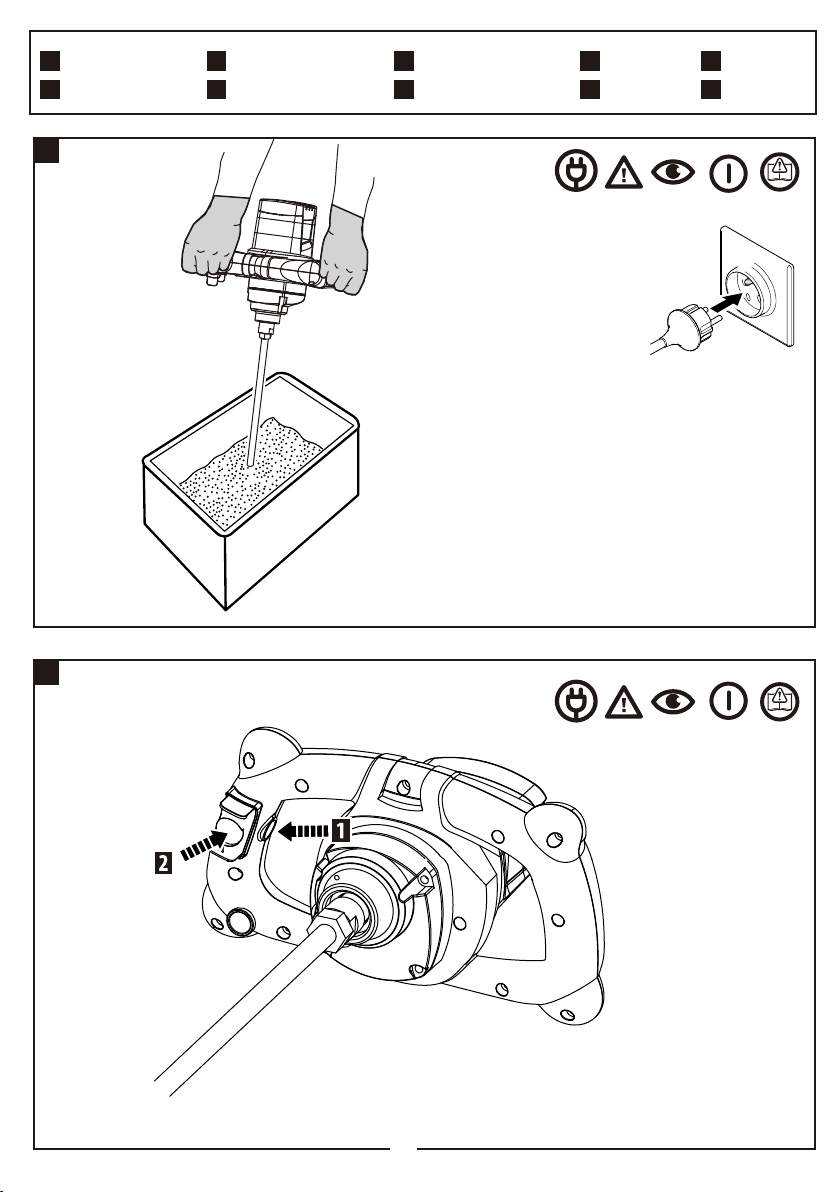
DANGER! Risk of injury due to electric shock.
Warning! Do not plug in before installation is fully completed!
•Plug in in the socket out-let of 220-240V~.
•Hold the product with hands on both handles and insert the stirrer into the material.
•Gently rotate speed dial to start operation at a low speed.
•Move the stirrer through the material until it is evenly and completely mixed.
•Switch o the product by releasing the on/o switch. Let the stirrer come to a complete
stop before lifting it out of the mixing material.
14
EN
OPERATION
•The stirrer will come to a stop during operation if the material is too thicker! Switch the product
o, lift the stirrer out of the material and inspect the material before using the product again! A
blocked stirrer may cause overheating of the motor. Hold the product rmly during operation.
•Do not let the stirrer touch the bucket! This can cause damage to the stirrer and bucket!
MAINTENANCE
DANGER! Risk of injury due to electric shock.
Warning! Always remove the plug from the socket before servicing,
cleaning or storage. If the supply cord is damaged, it must be
replaced by the manufacturer, its service agent or similarly qualied
persons in order to avoid a hazard
•Keep the product clean. Remove debris from it after each use and before storage.
•Regular and proper cleaning will help ensure safe use and prolong the life of the product.
•Inspect the product before each use for worn and damaged parts. Do not operate it if you nd
broken and worn parts.
•Clean the product with a dry cloth. Use a brush for areas that are hard to reach.
•In particular clean the air vents after every use with a cloth and brush.
•Remove stubborn dirt with high pressure air (max. 3 bar).
•Note: Do not use chemical, alkaline, abrasive or other aggressive detergents or disinfectants to
clean this product as they might be harmful to its surfaces.
•Check for worn or damaged parts. Replace worn parts as necessary or contact an authorised service
center for repair before using the product again.
•Before and after each use, check the product and accessories (or attachments) for wear and
damage.
•If required, exchange them for new ones as described in this instruction manual. Observe the
technical requirements.
•Your tool has been designed to operate over a long period of time with a minimum of maintenance.
Continuous satisfactory operation depends upon proper tool care and regular cleaning.
•Regularly clean the ventilation slots in your tool using a soft brush or dry cloth.
•Regularly clean the motor housing using a damp cloth. Do not use any abrasive or solvent-based
cleaner.

15
EN TROUBLE SHOOTING
Problems Probable causes Corrective actions
Product does not
start
Not connected to power supply
Power cord or plug is defective
Other electrical defect to the product
Connect to power supply
Connect to power supply
Check by a specialist electrician
Product does not
reach full power
Unsatisfactory
result
DANGER! Risk of injury due to electric shock.
Warning! Before any trouble shooting, switch o the tool and
remove the plug from the socket.
Extension cord not suitable for
operation with this product Use a proper extension cord
Power source (e.g.generator) has too
low voltage Connect to another power source
Air vents are blocked Clean the air vents
Stirrer is worn Replace with new one
Replace with new one Use proper stirrer

16
EN
CAUTION! This product has been marked with a symbol relating to removing electric
and electronic waste. This means that this product shall not be discarded with household
waste but that it shall be returned to a collection system which conforms to the European
WEEE Directive. Contact your local authorities or stocks for advice on recycling. It will then
be recycled or dismantled in order to reduce the impact on the environment. Electric and
electronic equipment can be hazardous for the environment and for human health since
they contain hazardous substances.
DISPOSAL AND RECYCLING
WARRANTY
1. The products are designed to highest DIY quality standards. We oer a 24-month warranty for its products,
from the date of purchase. This warranty applies to all material and manufacturing defects which may
arise. Further claims of any nature, whether direct or indirect, with regard to persons and/or materials,
are not possible.
2. In the event of a problem or defect, you should rst always consult your dealer. In most cases, the dealer
will be able to solve the problem or correct the defect.
3. Repairs or the replacement of parts will not extend the original warranty period.
4. Defects which have arisen as a result of improper use or wear are not covered by the warranty.
Amongst other things, this relates to switches, protective circuit switches and motors, in the event of wear.
5. Your claim upon the warranty can only be processed if:
• Proof of the purchase date can be provided in the form of a receipt
• No repairs and/or replacements have been carried out by third parties
• The appliance has not been subjected to improper use (overloading of the machine or tting non-approved
accessories).
• There is no damage caused by external inuences or foreign bodies such as sand or stones.
• There is no damage caused by non-observance of the safety instructions and the instructions for use.
6. The warranty stipulations apply in combination with our terms of sale and delivery.
7. Faulty tools to be returned to via your dealer will be collected by as long as the product is properly
packaged. If faulty goods are sent directly to by the consumer, we will only be able to process these goods
if the consumer pays the shipping costs.
8. Products which are delivered in a poorly packaged condition will not be accepted.
17
EN

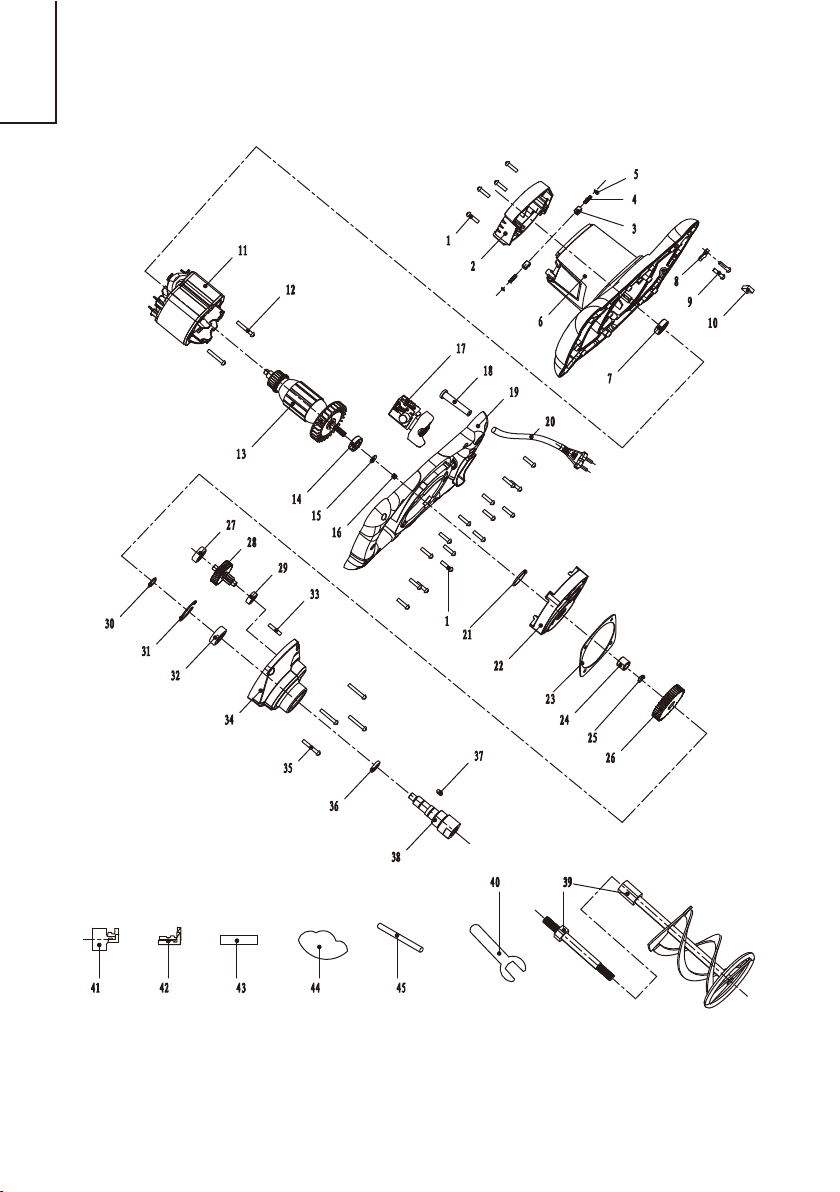
18
EN
No. Dexcription Qty No. Dexcription Qty
screw
back cover
brush set
carbon brush
brush cover
housing
bearing
palte
screw
capacitance
stator
screw
rotor insulation
rotor
bearing
woolen eece
rotor spring
switch
cable sleeve
handle cover
cable
Oring
paper wahser
paper washer
needle bearing
circlp
627 bearing
secondary gear set
big gear
607 bearing
circlp
circlp
6002 bearing
gear housing
screw
oil seal
pin
outshift
paddle
wrench
brush frame side
buckle
heat shrink tubing
oil
tubes
1
1
1
1
1
1
1
1
1
1
1
4
1
1
1
1
2
2
2
2
35
19
1
2
2
2
1
1
1
2
1
1
2
1
1
1
1
1
1
1
1
1
1
1
2
3
4
5
6
7
8
9
10
11
12
13
14
15
16
17
18
19
20
21
22
23
24
25
26
27
28
29
30
31
32
33
34
35
36
37
38
39
40
41
42
43
44
45

19
EN EC DECLARATION OF CONFORMITY
We ADEO SERVICES
135 Rue Sadi Carnot - CS 00001
59790 RONCHIN - France
Declare that the product detailed below:
Electric Mixer R6121-1
meets the requirements of the following Council directives:
The Machinery Directive 2006/42/EC
EMC Directive 2014/30/EU
ROHS Directive(EU)2015/863 amending Directive 2011/65/EU
and conforms to the following norms:
EN 62841-1:2015
EN 62841-2-10:2017
EN 55014-1:2017
EN 55014-2:2015
EN 61000-3-2:2014
EN 61000-3-3:2013
IEC 62321-3-1:2013
IEC 62321-4:2013
IEC 62321-5:2013
IEC 62321-6:2015
IEC 62321-7-1:2015
IEC 62321-7-2:2017
IEC 62321-8:2017
Serial No.:2076780005041901280703
Last two numbers of CE printing: 19
Richie PERMAL
Supplier Quality Leader
Authorized representative of Julien Ledin, ADEO Quality Leader
ADEO Services 135 Rue Sadi Carnot - CS 00001 59790 RONCHIN – France 31/07/19
Table of contents
Popular Mixer manuals by other brands


Northern Industrial Tools
Northern Industrial Tools 998251 owner's manual

gako unguator
gako unguator B/R Operatng Instructons and Producton Recomendatons

Linea 2000
Linea 2000 DOMO DO449BL Instruction booklet

Sima
Sima SFX-4 instructions

Audio Technica
Audio Technica SmartMixer AT-MX381 Software manual

Larius
Larius NOVA MIX 2K Operating and maintenance instruction