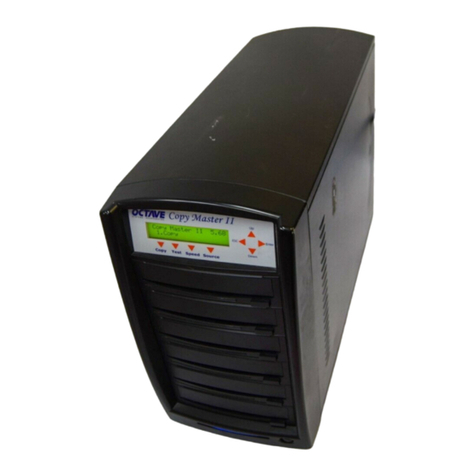
ADJ AH01T User manual

Code: 120-00014

2
ADJ vi ringrazia per l’acquisto di questo prodotto. Per un’assistenza
completa vi invitiamo a consultare il sito: www.adj.it
Non tentare di aprire o riparare da soli il prodotto. Non usare il prodotto in ambienti
umidi. Per la pulizia del dispositivo, utilizzare un panno asciutto. Il presente dispositivo
è conforme alle norme più importanti e agli altri requisiti pertinenti dei regolamenti
europei applicabili. Il prodotto deve essere utilizzato esclusivamente per le finalità
secondo cui è stato progettato. É vietato ogni altro utilizzo o modifica.
Garanzia
Questo prodotto è garantito da ogni difetto di fabbricazione, in base a quanto definito
dal D.Lgs. 2 febbraio 2002, n. 24. In caso di guasto, si prega di rivolgersi al punto vendita
dove è stato eettuato l’acquisto. Per le norme di garanzia consultare il sito www.adj.it
Il simbolo del cestino barrato riportato sull’apparecchio indica che il prodotto,
alla fine della propria vita utile, dovendo essere trattato separatamente dai rifiuti do-
mestici, deve essere conferito in un centro di raccolta dierenziata per apparecchiature
elettriche ed elettroniche oppure riconsegnato al rivenditore al momento dell’acquisto
di una nuova apparecchiatura equivalente. L’adeguata raccolta dierenziata per l’avvio
successivo dell’apparecchio al riciclaggio, al trattamento e allo smaltimento ambiental-
mente compatibile contribuisce ad evitare possibili eetti negativi sull’ambiente e sulla
salute e favorisce il recupero dei materiali di cui è composto. L’utente è responsabile
del conferimento dell’apparecchio a fine vita alle appropriate strutture di raccolta. Per
informazioni più dettagliate inerenti i sistemi di raccolta disponibili, rivolgersi al servizio
locale di smaltimento rifiuti, o al negozio dove è stato eettuato l’acquisto. Chiunque
abbandona o cestina questo apparecchio e non lo riporta in un centro di raccolta die-
renziata per rifiuti elettrici-elettronici è punito con la sanzione amministrativa pecunia-
ria prevista dalla normativa vigente in materia di smaltimento abusivo di rifiuti.
Prodotto in Cina - Importato e distribuito da IoT Tecnologie s.r.l.
Via della Faeta, 1 - 00030 San Cesareo (RM) - ITALY
Italiano
http://www.adjpoint.com/catalogo/index.html
Sfoglia il
catalogo
on line!
3
1.0 Introduzione
La docking station AH01T può essere utilizzata sia per leggere due HDD SATA che per
clonare o eseguire il backup di un HDD. Questo dispositivo supporta sia hard disk da 2.5”
SATA che hard disk da 3,5” SATA. Dispone anche di un indicatore di stato a luce LED, One
Touch Backup e pulsante di Duplicazione. Inoltre è progettato con una semplice interfac-
cia USB 3.0 plug-and-play.
La docking station AH01T è compatibile con Win 7, Win 8, Win 8.1, Win 10, Mac OS 9.1,
Linux 2.4.X o successivi.
2.0 Specifiche Tecniche
• Interfaccia USB 3.0 con velocità di trasferimento fino a 5Gbps (max)
• Compatibile con USB 2.0 ad alta velocità (480 Mbps), USB 1.1 a bassa velocità (1.5 Mbps)
• Compatibile con gli hard disk 2.5” SATA e 3,5” SATA
• Con interfaccia hot-swap
• Indicatore LED di funzionamento
• Può eettuare la copia di un HDD su un altro HDD di dimensioni uguali o maggiori
rispetto all’originale
• Requisiti di Sistema: Win 7, Win 8, Win 8.1, Win 10, Mac OS 9.1, Linux 2.4.X o successivi
• Dimensioni: 126.5mm(L) x 114.5mm(W) x 83mm(H)
• Colore: Nero
3.0 Requisiti di Sistema
Requisiti PC
• Requisito minimo: Processore Intel Pentium II/50MHz, 64MB RAM
• Win 7, Win 8, Win 8.1, Win 10
• Porta USB attiva
Requisiti MAC
• Requisiti minimo: Processore Apple G, 64MB RAM
• Mac OS 9.1, 9.2, 10.1.5, 10.2, 10.3 o superiore
• Porta USB attiva
4.0 Contenuti della confezione
• HDD Docking Station
• Alimentatore (12V/2.5A)
• Manuale
• Cavo USB 3.0

4
5.0 Configurazione hardware
Funzionamento del dispositivo (tramite collegamento con cavo USB 3.0)
• Inserire l’hard disk correttamente all’interno della docking station
• Collegare la docking station al computer tramite cavo USB
• Collegare il cavo di alimentazione alla docking station e accenderla
• Il computer dovrebbe rilevare il nuovo hardware automaticamente.
Per Win 7/8/8.1/10, non è necessaria nessuna installazione del driver, passare al punto
6.0 per formattare l’unità.
Modalità clonazione HDD
• Inserire 2 hard disk nella docking station. Assicurarsi di posizionare l’unità con i dati
che si desidera copiare (sorgente) nell’alloggiamento “Sorgente”. Il disco di destinazione
(Target) deve essere uguale o maggiore della capacità del disco di origine.
• Collegare il cavo di alimentazione alla docking station e accenderla.
• Dopo circa 10 secondi, tenere premuto il pulsante Clona per 3 secondi per iniziare la
duplicazione. L’indicatore di avanzamento della clonazione inizia a funzionare:
25%, 50%, 75% e 100% (4 Stati di avanzamento).
Luce LED Verde: 25%
Luce LED Rossa: 50%
Luce LED Gialla: 75%
Luce LED Arancione: 100%
Luce LED Verde, Rossa, Gialla, Arancione insieme: Processo terminato
Nota: Non si può utilizzare la docking station in modalità clonazione se è collegata con
cavo USB al computer.
6.0 Formattare l’hard disk
(Se l’unità appare già in “Risorse del computer”, Vi invitiamo a passare al punto 6.2)
6.1 Un’unità nuova non-partizionata o non formattata normalmente non viene visualiz-
zata automaticamente in “Risorse del computer” la prima volta.

Si prega di attenersi alla seguente procedura:
Per Win 7/8/8.1/10
• Cliccare con il tasto destro del mouse su “Risorse del computer”, scegliere “Gestione”,
scegliere “Gestione del disco” della lista.
• L’interfaccia di funzionamento viene visualizzata sul computer, cliccare sull’unità
con il tasto destro e scegliere “Formatta”.
6.2 Vai su “Risorse del computer”, individuare il disco rimovibile, fate clic destro su di
esso e selezionare “formatta” dal menu a discesa, seguire le istruzioni per completare
il processo di formattazione.
FAQ:
D: Non riesco a trovare l’unità in Risorse del computer, perché?
R: Assicurarsi che il nuovo hard disk è stato partizionato.
D: Dopo aver collegato la porta USB, l’unità non funziona, perché?
R: Questo di solito significa che il cavo di alimentazione non è stato ancora collegato .
D: Dopo aver installato l’unità, perché si visualizza ancora come “Periferica sconosciuta”?
R: Questo significa che l’installazione del driver non va a buon fine, si prega di installare
il driver di nuovo.
D: Posso usare un hub esterno USB?
R: Si, l’hub esterno USB funziona allo stesso modo delle porte USB integrate nel
computer.
D: Il mio computer non dispone di porte USB 3.0, posso usare l’adattatore USB 3.0?
R: L’adattatore USB 3.0 funziona nello stesso modo di una porta integrata USB 3.0.
5

http://www.adjpoint.com/catalogo/index.html
6
ADJ thanks you for purchasing this product. For extensive service, please visit the web-
site: www.adj.it
Do not open or repair this device. Do not use the divice in a damp environment. Clean the
device with a dry cloth. The device meets the essential requirements and other relevant
conditions of the applicable European directives. Please use the product only for the pur-
pose for which it was designed. It is forbidden any other use or modification.
Warranty
This product is guaranteed against any manufacturing defect, based on the D.Lgs. Fe-
bruary 2, 2002, No 24. In case of failure, please contact the retailer where you purchased
it. Please check www.adj.it for warranty conditions.
The symbol of the crossed out trash indicates that the product, at the end of
its useful life, must be treated separately from domestic waste and must be
taken to a recycling center for electrical and electronic equipment or delivered to the
seller when buying a replacement. The separate waste collection contributes in preven-
ting possible adverse eects on the environment and health and promotes the recovery
of which it is made. You are responsible for assigning the equipment in question at the
appropriate waste disposal center. For more detailed information contact your local wa-
ste disposal service or the shop where it was purchased. Anyone who does not carry the
product in a recycling center for electrical and electronic waste shall be punished with
administrative penalty provided by law on the illegal disposal of waste.
Made in China - Imported and distributed by IoT Tecnologie s.r.l.
Via della Faeta, 1 - 00030 San Cesareo (RM) - ITALY
English

7
1.0 Introduzione
The AH01T Double Hard Drive Dock/Stand-Alone Duplicator is a versatile, practical unit
that functions as both a hard drive dock and stand-alone HDD duplicator. This device
supports SATA 2.5-inch and SATA 3.5-inch hard drives.
It also features the LED progress indicator, One Touch Backup or Duplicate button.
It is also designed with a straightforward, uncomplicated USB 3.0 plug-and-play
interface. The AH01T Double Hard Drive Dock/Stand-Alone Duplicator is compatible with
Win 7, Win 8, Win 8.1, Win 10, Mac and Linux operating systems.
Please read this manual carefully before using this device.
2.0 Features/Specifications
• USB 3.0 interface transfer rate up to 5Gbps (max)
• Complies with USB 2.0 high speed (480Mbps), USB 1.1 low speed (1.5Mbps)
• Supports all 2.5” SATA and HDD 3,5” SATA
• Support hot-swapping
• LED progress indicator
• Delivers a 1-to-1 clone equal to or greater in size than original
• System requirements: Win 7, Win 8, Win 8.1, Win 10, Mac OS 9.1, Linux 2.4.X or later
• Dimensions: 126.5mm(L) x 114.5mm(W) x 83mm(H)
• Color: Black
3.0 System Requirement
PC Requirements
• Minimum: Intel Processor Pentium II/50MHz, 64MB RAM
• Win 7, Win 8, Win 8.1, Win 10
• Active USB port
MAC Requirements
• Minimum: Apple G Processor, 64MB RAM
• Mac OS 9.1, 9.2, 10.1.5, 10.2, 10.3 or above
• Active USB port
4.0 Package Contents
• HDD Docking Station
• Power Adapter (12V/2.5A)
• User manual
• USB 3.0 cable

8
5.0 Hardware Setup
Device Mode (USB3.0 to SATA External Dual Hard Drive)
• Install your SATA hard drive properly to the port connector on the docking station
• Connect the docking station to your computer by USB cable
• Connect the power adapter to the enclosure and power up the docking station
• The computer should now detect the new hardware .
For Win 7/8/8.1/10, no driver setup is necessary .
Please Proceed to step 6.0 to format your drive.
Duplicator Mode
• Install 2 hard drives into the dock. Make sure to place the drive with the data you want
copied (Source) into the “Source” bay. The target disk (Target) should be equal or larger in
capacity than the source disk.
• Connect the power adapter to the enclosure and press the POWER button to power up
the docking station.
• After about 10 seconds, keep pushing the CLONE button for 3 seconds to begin
duplication. Clone Progress indicator(25%,50%,75% and 100%, 4 status) would be
acted.
Green LED flash: 25%
Red LED flash: 50%
Yellow LED flash: 75%
Orange LED flash: 100%
Green, Red, Yellow, Orange LED all on: Finish
Note: Can’t connect the docking station to your computer by USB cable for duplicator
mode.
6.0 Format your Hard Drive
(If the drive already appears in “My Computer”, Please skip to 6.2)
6.1 For an un-partitioned or un-formatted new drive , it normally does not automatically
appear in “My Computer” the first time. Please follow these steps:
For Win 7/8/8.1/10
• Right key of Mouse beat ”My computer”, Choose “Manager” choose “Disk manager”
of the list.

9
• The operating interface will show on the computer, Subarea Format following the
operating interface.
6.2 Go to “My Computer” , locate the removable disk, right click on it, and select “format”
from the drop-down list, follow the instructions to complete the formatting process.
Note: By this method to format your drive it will result in a single partition in largest drive
capacity, which is also highly recommended.
FAQs:
Q: I can’t find the drive under my computer, why?
A: Please make sure your new hard disk has been partitioned.
Q: After plugging the USB port, the drive is not spinning at all, why?
A: This usually means the AC adapter is not connected yet, so there is no power (for 3.5”
HDD enclosure).
Q: After installing the drive. Why it is still recognized as “Unknown device”?
A: This means the driver installation is not successful, please install the driver one more
time.
Q: Can I use external USB hub?
A: Yes, USB hub works in the same way as the computer USB ports.
Q: My computer doesn’t have USB 3.0 port, Can I use USB 3.0 host adaptor?
A: USB 3.0 host adapter works in the same way as the built-in USB ports.

http://www.adjpoint.com/catalogo/index.html
10
Nederlands
ADJ dankt u voor uw aankoop van dit product. Voor uitgebreide service, bezoek de web-
site: www.adj.it
Open of herstel dit apparaat niet zelf . Gebruik het apparaat niet in een vochtige omge-
ving. Reinig het apparaat met een droge doek. Het apparaat voldoet aan de essentiële
eisen en andere relevante voorwaarden van de toepasselijke Europese richtlijnen. Het
product mag enkel gebruikt worden waarvoor het bestemd is. Het is verboden om wijzi-
gingen aan te brengen aan het product of het gebruik ervan.
Garantie
Dit product is gegarandeerd tegen fabrieksfouten, gebaseerd op de wet D.Lgs. February
2, 2002, No 24. In geval van niet functioneren, gelieve de retailer te contacteren waar
u het product heeft gekocht. Bezoek www.adj.it voor de garantievoorwaarden .
Dit symbool betekent dat dit product (Afgedankte Elektronische en Elektrische
Apparatuur) niet als ongesorteerd afval mag worden verwijderd, maar apart moet wor-
den ingezameld in een voor u beschikbaar inleverings- en inzamelingssysteem of moet
worden teruggebracht naar de verkoper om de mogelijke gevolgen voor het milieu en de
volksgezondheid te beperken.
Made in China - Imported and distributed by IoT Tecnologie s.r.l.
Via della Faeta, 1 - 00030 San Cesareo (RM) - ITALY
on line!

11
1.0 Inleiding
Deze Double Hard Drive Dock/Stand-Alone Duplicator is een praktisch apparaat dat zowel
als HDD Docking en als HDD-copier functioneert. Dit apparaat ondersteunt harde schijven
SATA 2.5-inch en SATA 3.5-inch. Met LED-voortgang-indicator. One Touch Backup of du-
pliceer toets. Met USB 3.0 plug-and-play interface. Deze Double Hard Drive Dock/Stand-
Alone Duplicator is compatibel met Win 7, Win 8, Win 8.1, Win 10, Mac en Linux operating
systems.
Gelieve deze handleiding zorgvuldig te lezen alvorens het apparaat te gebruiken.
2.0 Kenmerken
• USB 3.0 Interface transfer snelheid tot 5Gbps ( Max )
• Compatibel met USB 2.0 high speed ( 480Mbps ) , USB 1.1 low speed ( 1.5 Mbps )
• Ondersteunt alle 2.5” SATA Harde Schijven en 3.5” SATA
• Ondersteunt hot-swapping
• LED – indicator
• Mogelijkheid om HDD te kopiëren van hetzelfde of groter formaat als het origineel
• Systeemvereisten : Win 7, Win 8, Win 8.1, Win 10, Mac OS 9.1, Linux 2.4.X of later
• Afmetingen : 126.5mm(L) x114.5mm(B) x 83mm(H)
• Kleur: Zwart
3.0 Systeemvereisten
Pc Vereisten
• Minimum : Processor Intel Pentium II/50MHz, 64MB RAM
• Win 7, Win 8, Win 8.1, Win 10
• Actieve USB-poort
MAC Vereisten
• Minimum : Apple G Processor, 64MB RAM
• Mac OS 9.1, 9.2, 10.1.5, 10.2, 10.3 of hoger
• Actieve USB-poort
4.0 Inhoud Verpakking
• HDD Docking Station
• Power Adapter (12V/2.5A)
• Handleiding
• USB 3.0 kabel

12
5.0 Hardware Setup
Device Modus (USB3.0 to SATA External Dual Hard Drive)
• Verbind uw HDD met de poortconnector op uw Docking station
• Verbind uw behuizing met uw computer dmv de USB-kabel
• Verbind de power adapter met uw behuizing en zet deze aan .
• De computer zou nu uw nieuwe hardware moeten detecteren.
Voor Win 7, Win 8, Win 8.1, Win 10, is er geen driver setup nodig, gelieve naar stap 6 te
gaan om uw HDD te formatteren.
Duplicator Modus
• Installeer de 2 harde schijven in het dock. Zorg ervoor dat u de harde schijf met de te
kopiëren data ( Bron) in de “Souce”-bay stopt . De doel- harde schijf moet van gelijke of
grotere capaciteit zijn als de bron .
• Verbind de power adapter met de behuizing en druk op de POWER toets om het
docking station aan te zetten .
• Na ongeveer 10 seconden, druk gedurende 3 seconden op de CLONE toets om het klonen
te beginnen .
Voortgang-indicator ( 25%,50%,75% en 100% )
Groene LED: 25%
Rode LED: 50%
Gele LED: 75%
Oranje LED: 100%
Groen, Rood, Geel, Oranje LED allemaal aan : Klonen beëindigd
Opmerking: Voor de duplicator modus kunt u het dock niet verbinden met uw computer
via de USB-kabel
6.0 Uw Harde Schijf formatteren
(Indien de schijf reeds verschijnt in “My Computer”, kunt u meteen naar stap 6.2 gaan )
6.1 Een niet gepartitioneerde of ongeformatteerde schijf, verschijnt normaal niet automa-
tisch in “ My Computer”. Gelieve deze stappen te volgen :
Win 7, Win 8, Win 8.1, Win 10
• Rechter-klik met muis op ”My computer”, Kies “Manager” kies “disk manager” in
de lijst.

13
• Het bestandssysteem verschijnt op de computer. Formatteer de partities naargelang
uw bestandssysteem.
Opgelet :
Voor Win 7, Win 8, Win 8.1, Win 10, gelieve NTFS Format te gebruiken, als de capaciteit
lager is als 32GB, kunt u FAT32 format gebruiken .
6.2 Ga naar “My Computer”, localiseer de draagbare schijf, rechter klik op de schijf en
selecteer “format” uit de drop-down lijst . Volg de instructies om uw schijf te
formatteren.
Opmerking : Bij deze methode van formatteren zult u een enkele partitie krijgen met de
grootste capaciteit, wat ten zeerste aanbevolen is .
FAQ:
V: Wat als ik de schijf niet kan vinden in mijn computer?
A: Gelieve ervoor te zorgen dat uw schijf gepartitioneerd is .
V: Na het verbinden van de USB-kabel, draait mijn schijf helemaal niet ; Waarom ?
A: De USB kabel is niet correct aangesloten .
V: Na het installeren van de schijf is het nog steeds herkend als “ Onbekend Apparaat” ,
waarom ?
A: Dit betekent dat de schijf niet correct is geïnstalleerd. Gelieve deze installatie nogma-
als uit te voeren .
V: Kan ik een externe USB hub gebruiken?
A: Ja, USB-hubs werken op dezelfde manier als USB poorten op een computer .
V: Mijn computer heeft geen USB 3.0 poort, kan ik een USB 3.0 host adaptor gebruiken ?
A: Ja, een USB 3.0 host adapter werkt op dezelfde manier als ingebouwde USB-poorten .

http://www.adjpoint.com/catalogo/index.html
14
Français
ADJ vous remercie d’avoir acheté ce produit. Pour un service complet,
veuillez consulter le site : www.adj.it
Ne pas ouvrir ou réparer l’appareil. N’utilisez pas cet appareil dans un environnement
humide. Nettoyez l’appareil avec un chion sec. L’appareil répond aux exigences
essentielles et aux autres conditions des directives européennes applicables. Le produit
ne peut être utilisé que pour l’utilisation pour laquelle le produit a été destiné. Toute
modification ou autre utilisation est interdite.
Garantie
Ce produit est garanti contre tout défauts de fabrication, basé sur le d Lgs. 2 février
2002, N° 24.
En cas de non-fonctionnement, veuillez contactez le détaillant où vous avez acheté le
produit. Visitez www.adj.it pour les conditions de garantie.
Sur votre produit, sa batterie, sa documentation ou son emballage, le symbole
de la poubelle barrée d’une croix a pour objet de vous rappeler que les produits électri-
ques et électroniques, les batteries et les accumulateurs doivent faire l’objet d’une col-
lecte sélective en fin de vie. Cette exigence s’applique aux pays de l’Union Européenne.
Ne jetez pas ces produits dans les ordures ménagères non sujettes au tri sélectif.
Made in China - Imported and distributed by IoT Tecnologie s.r.l.
Via della Faeta, 1 - 00030 San Cesareo (RM) - ITALY
on line!

15
1.0 Introduction
• Station d’accueil USB v3.0 pour 2 disques durs SATA 3.5’’/2.5’’
• Bouton de sauvegarde OTB sous Windows® avec utilitaire
• Copiez un disque dur via un bouton sans PC
• Compatible USB v2.0/v1.1 & Win 7, Win 8, Win 8.1, Win 10
• Avec indicateur LED
Il est également conçu avec une interface de plug-and-play USB 3.0 simple. Le Double
Hard Drive Dock/Stand-Alone duplicateur est compatible avec Win 7, Win 8, Win 8.1,
Win 10. Veuillez lire attentivement ce manuel avant d’utiliser cet appareil.
2.0 Specifications
• Interface USB 3.0 vitesse de transfert de données jusqu’à 5GBps ( Max )
• Compatible avec USB 2.0 high speed ( 480Mbps ) , USB 1.1 low speed ( 1.5 Mbps )
• Supporte tous les disques durs 2.5” Sata et 3.5” Sata
• Supporte Hot-Swap
• Indicateur LED
• Possibilité de copier un disque sur un autre disque plus grand
• Conditions de système : Win 7, Win 8, Win 8.1, Win 10, Mac OS 9.1, Linux 2.4.X ou plus
tard
• Dimensions : 126.5mm(L)x 114.5mm (L)x83mm(H)
• Couleur : Noir
3.0 Configuration requise
Requise PC
• Minimum: Intel Processor Pentium II/50MHz, 64MB RAM
• Win 7, Win 8, Win 8.1, Win 10
• Port USB active
Requise MAC
• Minimum: Apple G Processor, 64MB RAM
• Mac OS 9.1, 9.2, 10.1.5, 10.2, 10.3 ou plus tard
• Port USB active
4.0 Contenu de la boite
• Docking Station DD
• Alimentation ( 12V/2.5A)
• Manuel d’utilisation
• Câble USB 3.0

16
5.0 Connection
Dispositif Mode (USB3.0 pour SATA double disque dur externe)
• Reposer vos disques durs SATA correctement au connecteur du station d’acceuil
• Branchez le station d’accueil à votre ordinateur par câble USB
• Connectez l’adaptateur a l’appareil et allumez l’ordinateur
• La station d’accueil doit maintenant détecter le nouveau hardware .
Pour Win 7, Win 8, Win 8.1, Win 10, aucune installation de pilote n’est nécessaire.
S’il vous plaît, passez à l’étape 6.0 pour formater votre disque.
Mode Duplicateur
• Installez 2 disques durs dans le dock. Assurez-vous de placer le lecteur contenant
les données que vous voulez copier (Source) dans la baie de « Source ». Le disque Target
doit être égale ou supérieure en qualité que le disque source.
• Branchez l’adaptateur d’alimentation au boîtier et appuyez sur le bouton POWER pour
mettre la station d’accueil en marche.
• Après environ 10 secondes, continuer à pousser le bouton CLONE pendant 3 secondes
pour commencer le copie.
Indicateur de progression de Clone (25 %, 50 %, 75 % et 100 % ) .
LED Verte: 25 %
LED Rouge: 50 %
LED Jaune: 75 %
LED Orange: 100 %
Vert, Rouge, Jaune, Orange allumée tous : Fin de copie
Remarque : impossible de se connecter la station d’accueil à votre ordinateur par un câble
USB pour le mode duplicateur.
6.0 Formater votre disque dur
(Si le disque dur est déjà detecté dans “My Computer” , veuillez avancer à 6.2 )
6.1 Un nouveau disque non partitionné ou non-formaté,il normalement n’apparaît pas
automatiquement dans « My Computer ». S’il vous plaît suivez ces étapes :

Win 7, Win 8, Win 8.1, Win 10
• Clic droite sur « Mon ordinateur », choisissez « Manager » choisissez « disk
manager » de la liste
• Le fonctionnement interface s’ache sur l’ordinateur
Attention : Sur Win 7, Win 8, Win 8.1, Win 10, veuillez choisir le Format NTFS, lorsque la
capacité est moins de 32GB ,vous pouvez choisir le format FAT32.
6.2 Aller à « My Computer », localisez le disque dur, faites un clic droit dessus et
sélectionnez « formater » dans la liste déroulante, suivez les instructions pour
terminer le processus de formatter le disque .
Remarque : Par cette méthode pour formater votre disque, qu’il en résultera en une
partition unique dans la plus grande capacité de disque, qui est également fortement
recommandé
FAQs:
Q: Je ne peux pas trouver le lecteur sous mon ordinateur, pourquoi ?
R: S’il vous plaît assurez-vous que votre nouveau disque dur est partitionné.
Q: Après avoir branché au port USB, le disque ne tourne pas du tout, pourquoi ?
R: Le câble USB n’est pas connecté avec succès.
Q: Après avoir installé le disque pourquoi il est toujours reconnu comme « Périphérique
inconnu » ?
R: Cela signifie que le pilote installation n’a pas réussi, veuillez installer le pilote une fois
de plus.
Q: Puis-je utiliser Hub USB externe ?
R: Oui, hub USB fonctionne de la même manière que les ports USB ordinateur.
Q: Mon ordinateur n’a pas un port USB 3.0, puis-je utiliser adaptateur hôte USB 3.0 ?
R: USB 3.0 hôte adaptateur fonctionne de la même manière que les ports USB intégrés.
17


This manual suits for next models
1
Table of contents
Languages: