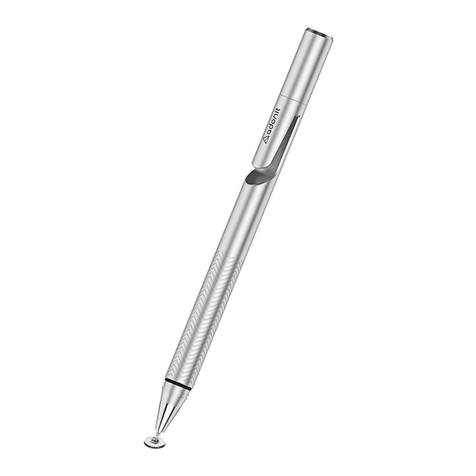
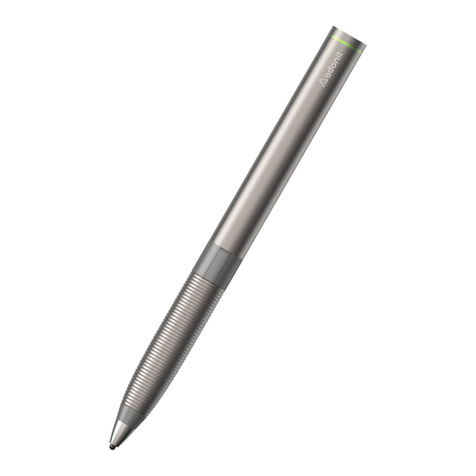
Adonit Jot Touch User manual

+Jot touch
We empoWer the
thinkers, doers, and
makers to build a
more vibrant World.
if you are never
satisfied by What is,
but imagine What
could be, then you
are one of us.
Create.
www.adonit.net
For 1 Year Limited Warranty and Return Policy
Visit support at adonit.net
Patents Pending
Adonit & Jot are registered trademarks of Adonit Corp.
© 2012. Reproduction in whole or part is
prohibited. All rights reserved.

JOT TOUCH
Touch screens have simplified technology, but
there has yet to be a way to capture the precision
of a calligrapher or the stroke of an artist. Not only
should it meet your needs, but a stylus should have
style. We would like to fix that.
Keeping up with the Jot family tradition, Jot Touch
is the next evolutionary step for precision styluses.
COLORS
The Jot Touch is available in three colors; red,
green, and purple.
PRESSURE SENSITIVITY
Not all lines are created equally. Jot Touch reacts
to the amount of pressure you apply to deliver more
accurate interpretations of your strokes.
SHORTCUTS
Get to software tools quickly. Switch to your eraser
with the flick of a finger. Minimize your navigation.
Maximize your creation.
BLUETOOTH® CONNECT
Easily pairs with Bluetooth-ready devices. Once
connected, it gives you more tools like Pressure
Sensitivity and Shortcuts.
STAY JUICED
Plug the USB charger into your computer, tablet,
or iPad / iPhone charger to replenish Jot Touch and
keep those creative juices flowing.
PRECISION EVERYWHERE
Even if the app isn’t setup to read pressure input, you’re
still using the most precise stylus on the market. Jot
Touch’s precision disc works naturally with any app on
any touch screen: iOS, Android, and Windows.
WRITING ANGLE
The Jot Touch is designed to provide a range of
writing angles, but is optimized for a minimal angle
of 45 degrees. Hold your stylus at the angle you’re
most comfortable with. Jot gives you the freedom
to write or sketch like you’re used to.
COMPATIBILITY
The Jot Touch will work with any capacitive screen
including iPads, iPhones, MacBook Trackpads,
Magic Trackpads, HTC, Samsung, Nokia, Motorola,
Blackberry. It will not work with Wacom tablets or
Cintiq monitors, since these use
different technology.
It will only function on a PC if a capacitive touch
monitor is being used, but will not work with a
regular monitor. Note that the risk of scratching
is minimal when the Jot Touch is used with a
hardened glass capacitive touch screen, but touch
screen monitors for PCs may not use such
a glass screen.
JOT TOUCH TERMINOLOGY
1. Precision Disc
Mimics the capacitance signature of your
finger while allowing you to see exactly
where you’re drawing
2. Pressure Sensitive Tip
3. Button A
Shortcut Button
4. Power Button
Power On / Off and Bluetooth pairing
5. Button B
Shortcut Button
6. Indicator Light
Notifies you of Bluetooth connection,
battery level, and when charging
7. Charging Tip
Charging Tip sits on USB charger
8. USB charger
Plugs into any USB port
9. Protective Cap
Twists on to front and back
Replacement Tip
Located behind instruction manual
1
2
3
4
6
5
7
+Jot touch
Product Information

GETTING CONNECTED / BLUETOOTH PAIRING
1. On your device, navigate to Settings >
General > Bluetooth, then turn it on.
2. Without touching the tip of the stylus,
press and hold the power button in the
grip area. Touching the disc will
incorrectly calibrate Jot Touch to it’s
zero position. If pressed simply
shut off and restart.
3. Continue holding until you see the
red / green flashing.
4. Select Jot Touch after it appears in
the list of pairable items in your
device’s settings.
5. Once selected, enter the pin
“0000” to confirm your pairing with
the correct device.
6. Once successfully paired, the
indicator light will flash green and the
device settings will show that Jot Touch
is connected.
7. If unsuccessful, the indicator light
will flash red.
8. If this happens, please turn Jot Touch
completely off and restart the sequence.
9. To turn your Jot Touch off, press and
hold the power button until the indicator
light flashes red.
BATTERY
The non-replaceable battery in Jot Touch will
provide you with up to 12 hours of constant use.
When it needs to recharge, the indicator light will
flash red every 15 seconds when the battery’s
capacity reaches 10%.
CHARGING THE BATTERY
When your Jot Touch needs charging,
simply plug your provided adaptor into
any standard USB connection, following
these instructions.
1. Place the rear of the stylus on the
open contacts of the charger; it should
attach magnetically, and adhere firmly.
2. Jot Touch’s indicator light will turn on,
either red or green.
3. Red indicates that the Jot Touch is charg-
ing, but that charge value
is below 90%.
4. Green indicates that Jot Touch
is fully charged.
POWERING UP
1. Without touching the tip of the stylus,
press and hold the power button, until
the indicator light flashes green.
2. The green indicator light should flash
again once a successful connection has
been made with the device.
RESETTING
1. Turn your Jot Touch off.
2. On your device, navigate to Settings >
General > Bluetooth, then turn
on Bluetooth.
3. Touch the small right arrow next
to ‘Adonit Touch’, then tap ‘Forget this
Device’, and finally touch ‘OK’.
4. Turn your Jot Touch on, and repeat
the connection process.
THE DISC
Your stylus should be as sharp as your ideas. The
thin and clear disc gives you the accuracy you want
in a digital pen.
The small plastic disc on the tip of the Jot Touch is
the most important part of the stylus. The disc
must be attached when the stylus is used, and
should not be removed unless it is being replaced.
The disc should be kept clean and undamaged,
protected by the cap when not in use. If the disc is
damaged, however, it can be removed and replaced
with a new disc.
REMOVING THE TIP
1. To remove the tip, grip it firmly and
pull it directly out of the stylus. Do not
twist it or pull it at an angle, as damage
to the pressure mechanism may result.
+Jot touch
Product Information

REPLACING THE DISC
The Jot Touch’s disc can be replaced if the disc is
damaged, or if it is dislodged from the Jot Touch for
any reason. The disc is attached to the ball tip of the
stylus. The following image shows the ball tip of the
stylus, and the small recess in the disc, in to which
the ball tip is pushed.
To remove the Jot Touch’s disc, place the disc flat
on a hard surface, and position the stylus at an
angle so you can see the disc clearly. The stylus
should now look like the following image.
Hold the disc down firmly with two fingers on either
side of it, then pull the stylus up sharply with your
other hand. The stylus should pull out of the disc.
To put a new disc on the stylus, place the disc flat
on a hard surface. Hold the stylus directly above the
disc, and push straight down so that the ball tip is
inserted into the recess of the disc. It should look
like the following image.
CLEANING
Jot Touch does not like water, so don’t go swimming
with it. If you need to clean Jot Touch, please use
a slightly damp cloth. Do not attempt to open the
stylus, as there are no serviceable parts inside.
JOT READY APPS
Although Jot works with any app, some apps have
been calibrated for a precision stylus rather than
a finger. These apps have integrated Adonit’s Jot
Ready SDK so when used with Jots, they are the
best stylus experience on the market. Check them
out. If your app isn’t on the list, email us which app
you would like to see integration with. Also let that
app know you want integration. If you don’t tell
them, they won’t know.
For an updated list of Jot Ready apps please visit
http://adonit.net/product/jot-ready-apps/.
WHY IS THE WRITING OFFSET?
You may notice that in some applications your
writing on the screen is slightly offset from the Jot
Touch’s tip. This is because most software designed
for capacitive touch screen styli deliberately offsets
the point of contact from the center of the pen to
allow for imprecision in the stylus. The software is
causing the offset, not the Jot Touch.
SCREEN PROTECTORS
Jot Touch plays well with the majority of screen
protectors but, due to the large variety, there are
some that Jot does not. Jot Touch does NOT work
well with these screen protectors due to their extra
grip nature:
• Zagg Glossy Invisible Shield
(but Smudge-Proof Invisible Shield works well)
• Ghost Armor
• Bodyguardz
• Skinomi
• Wrapsol
However, as generally known, when any object, such
as a glass towel, a stylus or your finger, contacts
and moves on an unprotected screen, scratches
may happen due to the particles between the screen
and the object. Therefore, a screen protector is
recommended to be used to maintain the condition
of the screen. If there is wear to the screen
protector, it is recommended to replace a new
one. In any case, it is advised to keep your screen
clean of dust and particles. For further instructions
regarding protecting your screen, please contact the
manufacturer of your appliance for assistance.
JOT TOUCH & IOS5
iOS5 causes problems with various applications,
which then have to be updated; these problems can
result in poor Jot Touch performance.
1. Go to >Settings >General >Keyboard
>International Keyboards >Add new keyboard
>Chinese - Simplified (Handwriting).
2. Press the menu button, to bring up the keyboard
in any application.
3. Press the globe key until you the hand writing
recognition option appears.
4. Try the Jot Touch now; it should perform
correctly. If the Jot Touch performs correctly in this
application, the performance fault is the result of
software issues with other applications.
+Jot touch
Product Information
This manual suits for next models
1
Other Adonit Accessories manuals


