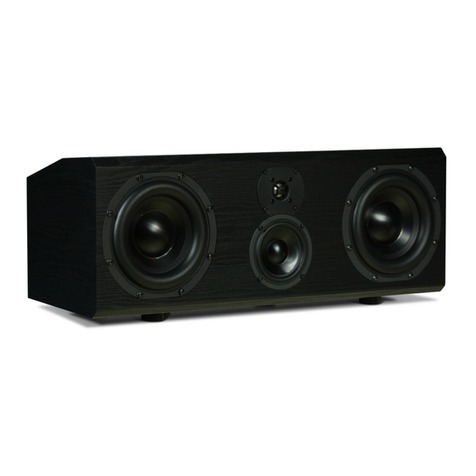
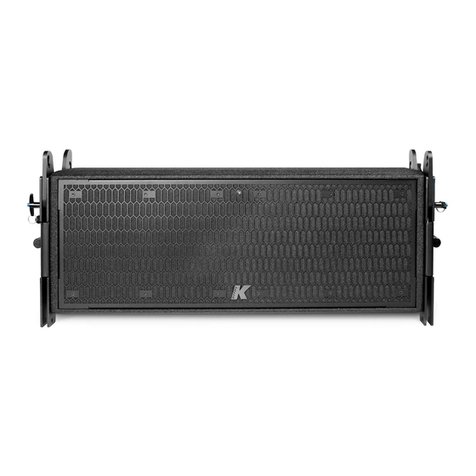
Advanced Native Technologies B-TWIG 8 Mobile User manual

ACTIVE COLUMN SYSTEM WITH LITHIUM BATTERY & BLUETOOTH®
SISTEMA ATTIVO A COLONNA CON BATTERIA AL LITIO & BLUETOOTH®
SYSTÈME ACTIF À COLONNE AVEC BATTERIE LITHIUM & BLUETOOTH®
AKTIVES SÄULENSYSTEM MIT LITHIUMBATTERIE & BLUETOOTH®
SISTEMA ACTIVO DE COLUMNA CON BATERÍA DE LITIO Y BLUETOOTH®
EN USER MANUAL | SECTION 1
IT MANUALE D’USO | SEZIONE 1
FR NOTICE D’EMPLOI | SECTION 1
DE BEDIENUNGSANLEITUNG | KAPITEL 1
ES MANUAL DE USO | SECCIÓN 1

ENGLISH
B-TWIG 8 MOBILE | User manual
2
3
User manual | B-TWIG 8 MOBILE
The warnings in this manual must be observed together with the
“USER MANUAL - SECTION 2”.
1 |INTRODUCTION
Thank you for choosing a A.N.T - Advanced Native Technologies - product!!
In B-TWIG 8S MOBILE array column system we have put our passion and
our technological background gained over the years, to offer products that
meet your needs, maintaining the quality over time.
Specically designed for an immediate and user-friendly application,
meeting the needs of those who are looking for an audio system delivering
excellent performances, high connection versatility as well as the best
value in its category.
The subwoofer unit incorporates a rechargeable lithium-ion battery pack
which, thanks to its specic electronics, guarantees system operation
withoutmainspoweruptoamaximumof20hours.Inaddition,thededicated
ANT SPEAKER CONTROLLER app allows you to access various options and
additional control functions, ensuring maximum use flexibility.
Please, dedicate some minutes to read this instruction manual in order to
quickly achieve the best performances from this product.
For safety precautions, warranty and disposal, please refer to attached
Section 2.
For further information about all ANT products catalog, please visit our
website: www.ant-intomusic.com
PACKAGE CONTENT
• 1x B-TWIG 8S MOBILE active subwoofer
• 1x B-TWIG 8CS kit, including:
- n.1 support element
- n.1 array speaker
- n.1 transport bag
• 1x Mains cable (VDE)
• 1x User manual - Section 1
• 1x User manual - Section 2
TABLE OF CONTENTS
1| Introduction 3
2| Installation 4
3| Description 5
3.1 | Inputs & controls 5
3.2 | Power supply 8
3.3 | Battery management and safety procedures 9
3.4 | B-TWIG 8CS MOBILE KIT 12
4| System assembly and disassembly instructions 12
5| System control 15
5.1 | MAIN menu screen (g.1) 15
5.2 | CHANNEL menu screen (g.3) 16
5.3 | Bluetooth® menu screen (g.4) 16
5.3.1| Bluetooth®connection 18
5.4 | CONFIG menu screen (g.5) 18
5.5 | ABOUT menu screen (g.6) 19
5.6 | Menu MAIN screen (g.7) 19
6| Troubleshooting 21
7| Technical specications 22

ENGLISH
B-TWIG 8 MOBILE | User manual
4
5
User manual | B-TWIG 8 MOBILE
1 CHANNEL 1 LINE / HI-Z / MIC
This selector allows you to choose channel 1
input sensitivity.
LINE: line signal, most frequent application.
HI-Z: high impedance signal from a musical
instrument.
MIC: microphone signal, dynamic microphone
connected to channel 1
2 CHANNEL 1 LEVEL
This control adjusts the level of channel 1.
Turn the knob clockwise to raise the volume or
counterclockwise to lower it.
3 CHANNEL 1 CONNECTOR
Balanced input with Combo socket (XLR-F +
6.35mm jack). Accepts line, microphone or high
impedancesignals(egelectro-acousticorelectric
guitar). The microphone can be also connected
with an unbalanced jack cable.
4 CHANNEL 2 LINE / HI-Z / MIC
This selector allows you to choose channel 2
input sensitivity.
LINE: line signal, most frequent application.
HI-Z: high impedance signal from a musical
instrument.
MIC: microphone signal, dynamic microphone
connected to channel 2
5 CHANNEL 2 LEVEL
This control adjusts the level of channel 2.
Turn the knob clockwise to raise the volume or
counterclockwise to lower it.
6 CHANNEL 2 CONNECTOR
Balanced input with Combo socket (XLR-F +
6.35mm jack). Accepts line, microphone or high
impedancesignals(egelectro-acousticorelectric
guitar). The microphone can be also connected
with an unbalanced jack cable.
3.1 |INPUTS & CONTROLS
2| INSTALLATION
ThesystemiscomposedbytheactivesubwooferB-TWIG8SMOBILE,plusB-TWIG8CSkit:
A | Top recessed handle.
B| Battery compartment.
C| Sliding locking system for elements quick lock and release.
D| Support element/stand.
E| Passive column speaker.
Download ANT SPEAKER CONTROLLER APP for use with
Apple iPhone to access additional options and features.
ED
A C
B
B-TWIG 8S MOBILE B-TWIG 8CS
3 |DESCRIPTION
3
6
2 1
4
5

ENGLISH
B-TWIG 8 MOBILE | User manual
6
7
User manual | B-TWIG 8 MOBILE
life cycle. In order to preserve battery duration
and reliability over time, avoid battery complete
discharge during operation.
13 STATUS
Pressfor3secondsthis buttontoviewthecharge
status of the internal battery. Reporting occurs
when the system is off (OFF) or when the unit is
connected to the mains with the POWER switch
in the CHARGE position.
14 DIGITAL MATRIX CONTROLLER
LCDcontrolinterfaceanddigitalmenudisplay;for
details see chapter 5 SYSTEM CONTROL.
15 SETUP/MAIN LEVEL
Thisrotaryknobwithintegratedpushbuttonisthe
primary controller of system digital functions. It
allowsaccesstothecontrolmenuandadjustment
of the parameters selected according to the
connected devices or application preferences.
It also acts as a classic MAIN LEVEL knob for
adjusting the overall system output volume.
16 SIG/CLIP
Two-color output level indicator
Green LED: the signal is present
Red LED: the signal is very strong and is close
to distortion.
IftheredLEDlightsupcontinuously,itisnecessary
to reduce the MAIN LEVEL level or, otherwise,
adjust the levels/parameters of CH1, CH2, CH3.
7 STEREO AUX IN
Unbalanced input with 3.5mm mini-jack stereo socket.
Connecttothisinputthesignalfromanexternaldevicesuch
as Smartphone, Tablet or PC. It is possible touse this input
and the Bluetooth®signal at the same time, but for better
levels management, we do not recommend this option.
8 CHANNEL 3 LEVEL
Thiscontroladjustschannel3level.Turntheknobclockwise
to increase the volume or counterclockwise to decrease it.
9 LED PAIRING
Status LED for Bluetooth®connection:
- Flashing green light, synchronization and pairing with
the mobile device.
- Steady green light, audio streaming in progress.
Tosynchronizeandconnect mobilephonesor tablets,refer
to chapter 5 SYSTEM CONTROL.
10 MAIN OUT CONNECTOR
BalancedXLR-Moutputforconnectiontoanotherpowered
system. The signal of this output depends on the levels of
the input channels. Using the APP menu the output can
be set as LINK OUT or MIX OUT.
11 BATTERY LEVEL
Internal battery status LEDs, in descending order
1st LED: steady green light, battery fully charged
2nd LED: steady green light, battery half charged
3rd LED: steady green light, battery one quarter charged
4th LED: steady red light, battery close to discharging,
recharge the battery as soon as possible.
12 CHARGE LED
While the internal battery is charging, this LED is lit.
When the battery is fully charged, the process stops
automatically and the CHARGE LED turns off.
In order to charge the battery, it is necessary to connect
the power cable to the wall socket and place the POWER
button in CHARGE mode. Battery total charge is achieved
in about 5 hours.
It is also possible to recharge the battery less effectively,
even during system operation connecting the unit to the
mains and moving the POWER button to ON position.
WARNING:Lithium-ionbatteries,iffullydischargedtozero,
can suffer irreparable damage that abruptly shortens their
14
16
15
10
12 13
8
11
7 9

ENGLISH
B-TWIG 8 MOBILE | User manual
8
9
User manual | B-TWIG 8 MOBILE
1 POWER ON/OFF/CHARGE
Three position switch
ON: Power on
OFF: Power off
CHARGE: Internal battery charging
2 FUSE
Protection fuse.
WARNING: Replace the fuse only with one of the same type and with
the same values. If the fuse continues to blow, contact an authorized
service center.
3 MAINS INPUT
IEC input socket with integrated mains lter. Insert the power cord, supplied with
the system, in this socket. Check that the unit is turned off before connecting
the cable to mains. For your safety, never disconnect the grounding pole.
4 COOLING FAN AND VENTILATION SLOTS
The cooling process of the amplier and panel temperature maintenance
within the legal limits is guaranteed by proper device ventilation, therefore it
is recommended not to obstruct or cover in any way subwoofer rear frame
ventilation slot.
3.3 |BATTERY MANAGEMENT AND SAFETY PROCEDURES
The B-TWIG 8S MOBILE subwoofer incorporates a 28.8V - 5000 mAh li-ion
battery equipped with all protections complying with current safety regulations.
The internal battery offers the following features:
• Charge indicator integrated with the system: the internal electronic circuits
allow you to monitor the state of charge. The upper panel relevant indicators
will light up showing the state of charge as a percentage of the full battery
charge.
• Safety and reliability: the numerous integrated safety protections provide
protection for individual cells as well as for users.
• Quick charge: Lithium-ion batteries, not requiring a long-term compensating
charge, charge quickly to their maximum capacity.
• Partial recharges tolerance: since the li-ion cells tolerate partial recharges,
the suspension of the charge procedure and the use of the battery before full
charge, when required by the installation needs, have no impact on battery
life cycle.
The access compartment to the battery pack is at the bottom of the subwoofer.
To access the battery, remove the cover xing screws (Fig.1)
3.2 | POWER SUPPLY
1
2
4
3

ENGLISH
B-TWIG 8 MOBILE | User manual
10
11
User manual | B-TWIG 8 MOBILE
PRECAUTIONS FOR USE
Li-ion batteries are characterized by small size with high energy density. Be
careful while handling the battery pack; incorrect or improper use could cause
physical injury and/or material damage.
Strictly follow the following safety instructions:
• Do not short circuit: Make sure the terminals are not in contact with metal or
other conductive materials during transportation and storage.
• Do not drop, crush or pierce the battery. Improper use can cause damage
and internal short circuits, which are not always visible externally.
• Do not install the battery pack with reversed polarity.
• Do not expose the battery to contact with liquids.
• Do not ignite the battery or expose it to temperatures above 60°C degrees.
• Do not attempt to open the battery pack or disassemble the cells inside.
If the battery has dropped or hit a hard surface, regardless of outer frame
condition:
• Immediately stop using.
• Dispose the battery complying with local regulations.
BATTERY LIFE
The life of a Li-ion battery depends on the frequency and duration of use. If used
correctly, the cells inside have a duration of about 500 charge/discharge cycles,
on average 3 years according to the wear associated with daily use. The risk of
battery failures increases with time and with the conditions of use, such failures
can cause the battery to overheat which, in rare cases, can cause the battery
burning or exploding.
DISPOSAL
Before disposal, discharge the battery and insulate the terminals with tape.
Promptlydisposeoftheusedorfaultybattery,applyingdisposalregulationsinforce.
WARNING
: To replace the battery, it is recommended to contact qualied and authorized
personnel, i.e. personnel with technical knowledge, experience and specic instructions
sufcient to guarantee safety and correct connection of the power supply terminals.
WARNING
: Use only exactly the same battery pack in compliance with the indications and
technical characteristics shown in Fig.2. This specially designed high-performance battery
is the only one approved to ensure safe and effective use with the B-TWIG 8 MOBILE system.
BATTERY MAINTENANCE
Battery maintenance starts as soon as you get hold of a new battery and maintenance
continuesforbatteryentirelifecycle.Thefollowingtableshowsthemainmaintenanceactivities:
ACTIVITY EXECUTION
Perform a visual inspection
Before inserting the battery inside the unit.
Check the terminals for correct polarity, red positive (+)
and black negative (-). Check the integrity of the frame
and any dent/perforation.
Charge the battery
Upon delivery, after use or in the event of a low battery
indication.
To optimize performance, the battery that is completely
(or almost completely) discharged should be charged as
soon as possible.
Store the battery in a state of charge
between 20% and 40% When not used for an extended period of time.
RECHARGEABLE LI-ON BATTERY PACK
Model: PL18650/8S2P - 28.8V - 5000mAh
Rated: 28.8V - 5000mAh - 144Wh
Manufacturer Name: GUANGDONG PAILI
NEW ENERGY CO.,LTD
Polarity: Red (+) Black (-)
0769003191029
Li-ion
CAUTION: Risk of fire and burns. Do not open, crush, heat
above 45°C or incinerate. Follow manufacturer’s instructions.
ATTENTION: Riques d'ncendie et de brulure. Ne pas ouvrir,
écraser ou faire chauffer a une temperature superieure a 45°C
ou faire bruler. Suivre les instructions du fabricant.
Fig.2 - Battery labelFig.1

ENGLISH
B-TWIG 8 MOBILE | User manual
12
13
User manual | B-TWIG 8 MOBILE
INSTALLATION:
1. Place the subwoofer on a flat surface with no unevenness (Fig.1)
2. Secure element Aby sliding it into the slide coupling mechanism (Fig.2).
3. Repeat the operation to x element Bin the upper part of the system (Fig.3)
3.4 |B-TWIG 8CS MOBILE KIT
Thekit,suppliedwiththeappropriatecarrying case, consistsof two column elements: a stand
(element A) and a speaker (element B). Both are equipped with slide connection mechanism,
allowing quick coupling and release of the elements composing the system, ensuring perfect
functionality in complete safety.
4 |SYSTEM ASSEMBLY AND DISASSEMBLY INSTRUCTIONS
To install the appliances and to ensure their correct operation, strictly follow the following
instructions:
• Place the subwoofer upright on a flat and stable surface, making sure that all lower rubber
feets are perfectly adherent to the floor or surface.
• Never install the system on movable carts, chairs, tables, or similar objects that are not
stable or able of bearing system weight.
• Do not use the handle to suspend the system.
• Never obstruct the ventilation slots located on subwoofer rear frame.
• To allow proper dissipation of the amplication heat, leave a sufcient distance between
the rear panel of the subwoofer and other objects such as walls, corners, curtains, and
never place the unit near heat sources of any kind.
Fig.3 Side
View
Final assembly
Rear
View
A
Hook Bby pushing
towards arrow direction
B
Click
A
B
Hook Aby pushing
towards arrow direction
A
Click
Fig.2
A
Fig.1
Top view
Plug Side Socket Side
Audio Contacts
BA

ENGLISH
B-TWIG 8 MOBILE | User manual
14
15
User manual | B-TWIG 8 MOBILE
5 |SYSTEM CONTROL
The B-TWIG 8 MOBILE system is incredibly simple to quickly set up.
An advanced graphic interface allows you to enter directly into the heart of the
system allowing you to congure each parameter, change presets, save or recall
scenes, adjust the volume, set the equalization and create a mix for different uses
to MIX OUT output. All setup operations are made easy by the use of a rotary
encoder equipped with a conrmation button, making conguration of the entire
system extremely fast and simple.
5.1 |MAIN MENU SCREEN (Fig.1)
When the system is turned on, the rst screen shows the three-channel mixer with
its levels, status indicator (SIG/CLIP) and signal type (LINE/HI-Z/MIC), the channel
dedicated to the Main output, with its own level and signal indicator, the icons for
activating the Bluetooth® - APP - Audio Streaming connection, and, nally, the
Bluetooth®CONFIG and ABOUT menus.
You can highlight the icon, menu or desired parameter by simply turning the
appropriate rotary knob to the right or to the left and press to select the desired
function.
The arrow indicators aside of CH1-CH2-CH3 graphically represent the position
and level of the analog knobs on the unit.
The -
APP
- , icons, if activated, change the color status to green (Fig.2),
in detail:
: The system is synchronized via Bluetooth®with your Mobile device
APP
: The system can be fully controlled by “ANT SPEAKER CONTROLLER” app
: Audio Streaming from the mobile device is activated and working.
UNINSTALLING:
1. Push backwards element Bto release it from the stand (Fig.4)
2. Repeat the operation to release element Afrom the subwoofer (Fig.5)
Fig.1 Fig.2
CH1 CH2 CH3 MAIN
LINE MIC -5 dB
/AUX
CONFIG ABOUT
APP
CH1 CH2 CH3 MAIN
LINE MIC /AUX -5 dB
CONFIG ABOUT
APP
A
Release Bby pushing
towards arrow direction
B
Release Aby pushing
towards arrow direction
A
Fig.5Fig.4
A
B
A

ENGLISH
B-TWIG 8 MOBILE | User manual
16
17
User manual | B-TWIG 8 MOBILE 17
desire controlling the system with the dedicated APP. It is possible to interrupt
the synchronization to the secondary system by pressing ABORT (Fig.4D) or
permanently disconnect it at the end of your session by pressing UNPAIR (Fig.4E)
Note: For iPhone users it is not necessary to press this button as the
synchronization between two systems, carefully congured, takes place
automatically after 10 seconds after APP launch.
It is always possible to return to the main menu by pressing the green arrow
5.2 |CHANNEL MENU SCREEN (Fig.3)
Press the desired channel button to enter this menu. Once entered, it is possible to view and
adjust the parameters of CH1-CH2-CH3, in detail:
- 3-band equalizer, HIGH/MID/LOW, operating from -12 dB to +12 dB
- HPF lter, frequency from 20 Hz to 400 Hz (only for CH1 and CH2 )
Once the adjustments have been made, you can return to the main menu by pressing the
green arrow.
5.3 |BLUETOOTH®MENU SCREEN (Fig.4)
The B-TWIG 8 MOBILE system is equipped with a Bluetooth®5.0 stereo receiver, which
allows you to make a data connection with the APP and simultaneously stream audio from
your mobile device.
Press the button to access this menu. Once entered, it is possible to enable or disable
the APP CONNECT and AUDIO STREAMING functions, in detail:
APP CONNECT ON: if activated, allows data synchronization with the “ANT SPEAKER
CONTROLLER” app, available for Apple iPhone only. This function is already active in factory
setting. Anyway, be sure to activate this function before opening the APP from your phone.
APP CONNECT SLAVE: if activated (Fig.4A), it congures the unit as an additional secondary
system (Slave) perfectly controllable via APP. In this way it is possible to choose between
Mono (Fig.4B) or Stereo (Fig.4C) listening. Make sure that the APP CONNECT control is set
to ON in the main system (Master)
AUDIO STREAMING ON: if activated, allows audio streaming from your mobile device. This
function is already active in factory setting. Be sure to enable this function before pairing
your device via the Bluetooth®connection
PAIR: if pressed, activates synchronization via Bluetooth®between the main (Master) and
secondary (Slave) systems The PAIR button is generically designed for those who do not
Fig.4D Fig.4E
APP
ON
AUDIO
STREAMING
APP CONNECT ON
ABORT
APP
ON
AUDIO
STREAMING
APP CONNECT ON
UNPAIRMONO STEREO
Fig.4 Fig.4A
SLAVE
APP
ON
AUDIO
STREAMING
APP CONNECT
PAIR
APP
ON
AUDIO
STREAMING
APP CONNECT ON
PAIR
Fig.4CFig.4B
APP
ON
ON
AUDIO
STREAMING
APP CONNECT
MONO STEREO UNPAIR
APP
L R
ON
ON
AUDIO
STREAMING
APP CONNECT
STEREO UNPAIRMONO
Fig.3
CH1
LINE
HIGH
MID
LOW
HPF
12dB-
0dB
0dB
210Hz
APP

ENGLISH
B-TWIG 8 MOBILE | User manual
18
19
User manual | B-TWIG 8 MOBILE
Turning on the unit for the rst time, due to factory setting, this function is disabled.
It is always possible to return to the main menu by pressing the green arrow.
5.5 |ABOUT MENU SCREEN (Fig.6)
Press the ABOUT key to access this menu. Once entered, it is possible to view the
rmware version and recall the factory settings using the dedicated RESTORE
DEFAULT SETTINGS key (Fig.6A)
5.6 |MENU MAIN SCREEN (Fig.7)
Press the MAIN channel to access this menu. Once entered, you can congure
the system with different equalization presets, adjust the DELAY and set the
output mode on the MAIN OUT output. In detail:
PRESET: press on this control and use the rotary knob to choose between the
four presets
PLAYBACK: For music listening and using (CD players, MP3 players, etc.), low
and high frequencies are emphasized.
DJ SOUND: For all situations of background music diffusion. In this case the low
frequencies are extended and enhanced, in order to create a more wrap-around
sound even at low sound level.
5.3.1 |BLUETOOTH®CONNECTION
Make sure the mobile device to be paired is switched on and ready to be connected with
the system:
Activate Bluetooth®synchronization by setting the AUDIO STREAMING control to ON. In this
phase the status LED flashes quickly.
Check that the device searches for the available devices and identies the system showing
the message “B-TWIG 8 MOBILE”.
Select “B-TWIG 8 MOBILE” from the list to synchronize the system with the mobile device.
The status LED remains lit.
Now you can play the selected songs from the connected remote device.
Note: when the data connection via APP is active, a second non-selectable identication
“B-TWIG 8 MOBILE” will appear in the Bluetooth®menu of your mobile device. It is normal
and allows the user to check the data connection between the APP and the system (Fig.4F)
5.4 |CONFIG MENU SCREEN (Fig.5)
Press the CONFIG key to access this menu. Once entered, it is possible to enable or disable
the AUTO STEREO PAIRING and SCREENSAVER functions. In detail:
AUTO STEREO PAIRING ON: if activated, it automatically allows audio and data
synchronization via Bluetooth®between the main unit (Master) and the secondary unit
(Slave). In the factory setting, and when the system is rst turned on, this function is disabled.
SCREENSAVER: if activated, it enables the graphic display to be turned off after 5 seconds
of system inactivity. This function allows you to extend the average life of the display and
to preserve battery life while the system is operating. Press any APP control or the system
control panel to disable the screensaver.
Fig.5
CONFIG
ON
AUTO STEREO
PAIRING
SCREENSAVER OFF
APP
Fig.6 Fig.6A
ABOUT
RESTORING DEFAULT SETTINGS
WILL REMOVE ALL PREFERENCES
THAT YOU CONFIGURED
FOR YOUR AUDIO SETUP.
DO YOU WANT
TO CONTINUE?
YESNO
APP
ABOUT
VERSION 1.0
RESTORE
DEFAULT SETTINGS
APP
Fig.4F
AUDIO
APP

ENGLISH
B-TWIG 8 MOBILE | User manual
20
21
User manual | B-TWIG 8 MOBILE
6| TROUBLESHOOTING
PROBLEM LED SOLUTION
No sound or very low sound
level
Power LED turned off.
Make sure the device is
properly connected to the
mains outlet.
Power LED turned on, but
channel levels.
Check the connections
between the sources and
the inputs, than raise
desired channel levels.
LEVEL raised, with no signal Check input selectors
Channel 3 LEVEL raised but
no Bluetooth®signal
Check input selector
Sync again the Bluetooth®
signal
Distortion
ON/LIMIT LED lit red Lower channel levels
ON/LIMIT LED lit green Check the source level
Check proper connection
between subwoofer and A/B
elements
Booming sound
Check EQ LOW level
Try distancing the system
from the walls
Check the perfect
connection between
subwoofer and A/B
elements
Harsh sound Check EQ HIGH level
Lower frequencies small
attenuation Check EQ LOW level
LIVE SOUND: To be used during live performances. Suitable for musicians and singers.
SPEECH: To be used for speech (presentations, demos, cabaret, etc ..). Unwanted low
frequency low frequencies, outside voice range, are reduced.
DELAY: acts on the entire system by introducing a playback delay. Range from 0m to 12m
with 1m steps.
MAIN OUT: this control allows you to determine which signal to send to the MAIN OUT output
ontherearframe ofthesubwoofer.UsetheLINKmode toconnectinparallelthesignalpresent
on CH1-CH2-CH3. In this case the signal is taken before each single channel volume control.
Set the MIX mode to have a mix of the signals present on CH1-CH2-CH3. In this case the
output signal is determined by the volume controls of each individual channel and by the
MAIN LEVEL.
It is always possible to return to the main menu by pressing the green arrow.
Fig.7
PLAYBACK
MIX OUT
PLAYBACK
MIX OUT
PRESET
DELAY
MAIN OUT
5m/15Ft
APP

ENGLISH
B-TWIG 8 MOBILE | User manual
22
23
User manual | B-TWIG 8 MOBILE
LITHIUM POWER PACK
Type of cell 3.6V - INR18650S / 2500mAh
Battery pack 28.8V / 5000mAh -
Battery indicators 5 LEDs
Battery Life
Charging Time: about 5 hours
Discharge Time @ full power: 6.30 hours
Discharge Time @ 80% of power: 10 hours
Discharge Time @ 25% of power: 19 hours
DIGITAL MATRIX CONTROLLER
Available I/O Bluetooth®, AUX IN
Bluetooth®version 5.0 Dual Mode with Qualcomm TrueWireless
Stereo®
APP Ant Speaker Controller available from Apple
Store
7 | TECHNICAL SPECIFICATIONS
System type Active column system
Subwoofer (B-TWIG 8S) Vented enclosure
1 x 8” Ferrite - 1.5” VC - custom speaker
Array speaker
(B-TWIG 8CS) 6 x 2.75” - 0.75” VC - neodymium custom speakers
Average dispersion Horizontal 120°
Frequency response 50Hz - 20kHz
MAX SPL 120dB
Amplication D class
Peak power (LF + HF) 1000W
Crossover 24dB/Oct @ 250Hz
I/O connectors
CH 1, CH2: Combo XLR-F + jack 6,35mm (1/4”)
CH3: 2 x RCA (L+R), 1 x AUX jack 3,5mm
MIX OUT: 1 x XLR-M
Controls Channel levels, input signal selectors, High and Low EQ, Bluetooth®
Pair button
Power supply 100-240V~ 50-60Hz
Fuse T5A L 250V~
Fastening mechanism Custom slide connector, with automatic lock
Cabinet Polypropylene
B-TWIG 8S MOBILE B-TWIG 8CS
Dimensions (W x H x D) 304 x 385 x 443 mm
11.9” x 15.1” x 17.4”
92 x 800 x 90.5 mm
3.6” x 31.5” x 3.6”
Weight 12,3kg - 27,1lbs 4,1kg - 9lbs

ITALIANO
B-TWIG 8 MOBILE | Manuale d’uso
24
25
Manuale d’uso | B-TWIG 8 MOBILE
Le avvertenze nel presente manuale devono essere osservate
congiuntamente al “MANUALE D’USO - SEZIONE 2”.
1 |INTRODUZIONE
GrazieperaveracquistatounprodottoA.N.T-AdvancedNativeTechnologies!
Nel sistema a colonna B-TWIG 8S MOBILE abbiamo profuso la nostra
passione ed il nostro know-how maturato nel corso degli anni per offrirvi un
prodotto che soddis le vostre esigenze e mantenga la sua qualità nel tempo.
Progettato appositamente per un utilizzo estremamente immediato e
semplice, risponde alle esigenze di quanti desiderano un sistema audio
in grado di fornire ottime prestazioni, versatilità di connessioni e il miglior
rapporto qualità/prezzo possibile nella sua categoria.
L’unità subwoofer incorpora un pacco batterie ricaricabile agli ioni di litio che,
grazie alla sua elettronica specica, garantisce il funzionamento del sistema
senza alimentazione di rete no a un massimo di 20 ore.
Inoltre, l’app dedicata ANT SPEAKER CONTROLLER, consente di accedere
a diverse opzioni e funzioni aggiuntive di controllo garantendo la massima
flessibilità di utilizzo.
Ritagliatevi qualche minuto per leggere questo manuale di istruzioni in modo
taledaottenererapidamenteilmassimodelleperformancedaquestoprodotto.
Perleistruzionirelativeasicurezza,leprecauzioni,lagaranziaelosmaltimento
fate riferimento all'allegato sezione 2.
Per ulteriori informazioni su tutti i prodotti del catalogo A.N.T consultate il
nostro sito: www.ant-intomusic.com
CONTENUTO DELL’IMBALLO
• 1x Sub attivo B-TWIG 8S MOBILE
• 1x Kit B-TWIG 8CS comprendente:
- n.1 elemento di sostegno
- n.1 diffusore a colonna
- n.1 custodia da trasporto
• 1x cavo di alimentazione (VDE)
• 1x Manuale d’uso - Sezione 1
• 1x Manuale d’uso - Sezione 2
INDICE
1| Introduzione 25
2| Installazione 26
3| Descrizione 27
3.1 | Ingressi & controlli 27
3.2 | Alimentazione 30
3.3 | Gestione della batteria e procedure di sicurezza 31
3.4 | KIT B-TWIG 8CS MOBILE 34
4| Istruzioni di montaggio e smontaggio del sistema 34
5| Controllo del sistema 37
5.1 | Schermata menu PRINCIPALE (g.1) 37
5.2 | Schermata menu CANALE (g.3) 38
5.3 | Schermata menu Bluetooth® (g.4) 38
5.3.1 | Connessione Bluetooth® 40
5.4 | Schermata menu CONFIG (g.5) 40
5.5 | Schermata menu ABOUT (g.6) 41
5.6 | Schermata menu MAIN (g.7) 41
6| Soluzione dei problemi 43
7| Caratteristiche tecniche 44

ITALIANO
B-TWIG 8 MOBILE | Manuale d’uso
26
27
Manuale d’uso | B-TWIG 8 MOBILE
2| INSTALLAZIONE
Il sistema è composto da un subwoofer attivo B-TWIG 8S MOBILE e dal kit B-TWIG 8CS:
A | Maniglia superiore incassata.
B| Vano di alloggiamento della batteria.
C| Connettore a slitta di attacco e sgancio rapido degli elementi.
D | Elemento di sostegno/stativo.
E | Diffusore passivo a colonna.
Scarical'appANTSPEAKERCONTROLLERperAppleiPhone
per accedere a opzioni e funzionalità aggiuntive
ED
A C
B
B-TWIG 8S MOBILE B-TWIG 8CS
1 LINE / HI-Z / MIC CHANNEL 1
Questo selettore permette di scegliere la
sensibilità di ingresso del canale 1.
LINE: segnale di linea, condizioni di impiego più
frequenti.
HI-Z:segnaleadaltaimpedenzadaunostrumento
musicale.
MIC: segnale microfonico, microfono dinamico
collegato al canale 1
2 LEVEL CHANNEL 1
Questocontrolloregolaillivellodelcanale1.Girate
la manopola in senso orario per alzare il volume
o in senso antiorario per abbassarlo.
3 CONNETTORE CHANNEL 1
Ingresso bilanciato con presa Combo (XLR-F
+ Jack da 6,35mm). Accetta segnali linea,
microfonici o ad alta impedenza (es. chitarra
elettroacustica o elettrica). È possibile collegare
un microfono anche con cavo jack sbilanciato.
4 LINE / HI-Z / MIC CHANNEL 2
Questo selettore permette di scegliere la
sensibilità di ingresso del canale 2.
LINE: segnale di linea, condizioni di impiego più
frequenti.
HI-Z:segnaleadaltaimpedenzadaunostrumento
musicale.
MIC: segnale microfonico, microfono dinamico
collegato al canale 2
5 LEVEL CHANNEL 2
Questocontrolloregolaillivellodelcanale2.Girate
la manopola in senso orario per alzare il volume
o in senso antiorario per abbassarlo.
6 CONNETTORE CHANNEL 2
Ingresso bilanciato con presa Combo (XLR-F
+ Jack da 6,35mm). Accetta segnali linea,
microfonici o ad alta impedenza (es. chitarra
elettroacustica o elettrica). È possibile collegare
un microfono anche con cavo jack sbilanciato.
3 |DESCRIZIONE
3.1 |INGRESSI & CONTROLLI
3
6
2 1
4
5

ITALIANO
B-TWIG 8 MOBILE | Manuale d’uso
28
29
Manuale d’uso | B-TWIG 8 MOBILE
7 STEREO AUX IN
Ingresso sbilanciato con presa stereo su mini-jack da
3,5mm.
Collegate a questo ingresso il segnale proveniente da
un dispositivo esterno come Smartphone, Tablet o PC. È
possibileutilizzarecontemporaneamentequesto ingresso
e il segnale BT, ma per una gestione migliore dei livelli,
sconsigliamo questa opzione.
8 LEVEL CHANNEL 3
Questo controllo regola il livello del canale 3. Girate la
manopola in senso orario per aumentare il volume o in
senso antiorario per abbassarlo.
9 LED PAIRING
IndicatoreluminosodistatoperlaconnessioneBluetooth®:
-luceverdelampeggiante,sincronizzazioneeaccoppiamento
con il dispositivo mobile in corso.
- luce verde ssa, streaming audio in corso.
Per sincronizzare e collegare telefoni cellulari o tablet
consultate il capitolo 5 CONTROLLO DEL SISTEMA
10 CONNETTORE MAIN OUT
Uscita XLR-M bilanciata per il collegamento ad un altro
sistema amplicato. Il segnale di questa uscita dipende
dai livelli dei canali di ingresso. Tramite il menu della APP
l’uscita può essere impostata come LINK OUT o MIX OUT.
11 BATTERY LEVEL
Indicatoridistatodellabatteriainternainordinedecrescente
1° tacca: luce verde ssa, batteria completamente carica
2° tacca: luce verde ssa, batteria carica a metà
3° tacca: luce verde ssa, batteria carica a un quarto
4° tacca: luce rossa ssa, riserva di energia prossima alla
scarica, ricaricare la batteria al più presto.
12 LED CHARGE
Questoindicatoreluminososiaccendedurantelaprocedura
di ricarica della batteria interna.
Quando la batteria è completamente carica, il processo
si arresta automaticamente e il LED CHARGE si spegne.
Per poter caricare la batteria, è necessario collegare il cavo
di alimentazione alla presa di rete e posizionare il tasto
POWER in modalità CHARGE. La carica totale della batteria
avviene in un tempo di circa 5 ore.
É inoltre possibile ricaricare la batteria in maniera
meno efcace anche durante il funzionamento del
sistema collegato alla rete elettrica e con il tasto
POWER in posizione ON.
ATTENZIONE
: Le batterie agli ioni di litio, se
scaricate completamente a zero, possono subire
deidanniirreparabilicheaccorcianobruscamente
il loro ciclo di vita. Evitate di scaricare totalmente
la batteria durante il funzionamento in modo da
preservarne la durata e l’afdabilità nel tempo.
13 STATUS
Premete per 3” questo pulsante per visualizzare
lo stato di carica della batteria interna. La
segnalazione avviene a sistema spento (OFF)
oppure quando quest’ultimo è collegato alla rete
elettrica con l’interruttore POWER in posizione
CHARGE.
14 DIGITAL MATRIX CONTROLLER
Interfaccia LCD di controllo e visualizzazione del
menu digitale; per i dettagli consultate il capitolo
5 CONTROLLO DEL SISTEMA.
15 SETUP/MAIN LEVEL
Questa manopola rotativa dotata di pulsante
integrato è il controller principale delle funzioni
digitali del sistema.
Consente l’accesso al menu di controllo e la
regolazione dei vari parametri selezionati in base
ai dispositivi collegati o alle preferenze di utilizzo.
Inoltre agisce come un classico MAIN LEVEL per
la regolazione del volume di uscita generale del
sistema.
16 SIG/CLIP
Indicatore bicolore del livello di uscita
Led Verde: il segnale è presente
Led Rosso: il segnale è molto forte ed è prossimo
alla distorsione.
Se l’indicatore si accende con continuità, è
necessarioridurreillivelloMAINLEVELoregolare
diversamentei livelli/parametridiCH1,CH2,CH3.
10
12 13
8
11
7 9
14
16
15

ITALIANO
B-TWIG 8 MOBILE | Manuale d’uso
30
31
Manuale d’uso | B-TWIG 8 MOBILE
3.2 | ALIMENTAZIONE 1 POWER ON/OFF/CHARGE
Interruttore a tre posizioni
ON
: Accensione
OFF
: Spegnimento
CHARGE
: Ricarica batteria interna
2 FUSE
Fusibile di protezione.
ATTENZIONE: Sostituite il fusibile unicamente con uno dello stesso
tipo e con gli stessi valori. Se il fusibile continua a saltare rivolgetevi
ad un centro di assistenza autorizzato.
3 MAINS INPUT
Presa IEC di ingresso con ltro di rete integrato. Inserite in questa presa il
cavo di alimentazione in dotazione con l’apparecchio. Vericate che l’unità
sia spenta prima di collegare il cavo alla rete. Per la vostra sicurezza, non
scollegate mai il polo di messa a terra.
4 VENTOLA DI RAFFREDDAMENTO E FORI DI AREAZIONE
Il processo di raffreddamento dell’amplicatore e il mantenimento della
temperaturadelpannelloneilimitidileggeègarantitodaunacorrettaareazione
dell’apparecchio, pertanto si raccomanda di non ostruire né coprire in nessun
modo i fori di ventilazione presenti sul telaio posteriore del subwoofer.
3.3 | GESTIONEDELLABATTERIAEPROCEDUREDISICUREZZA
Il subwoofer B-TWIG 8S MOBILE incorpora una batteria agli ioni di litio da
28,8V - 5000mAh dotata di tutte le protezioni in conformità alle normative vigenti
sulla sicurezza.
La batteria incorporata nell’unità offre le seguenti caratteristiche:
• Indicatore di carica integrato con il sistema: l’elettronica interna consente
di monitorare lo stato di carica. Gli appositi indicatori presenti sul pannello
superiore dell’apparecchio si illuminano mostrando lo stato di carica in
percentuale rispetto alla carica completa della batteria.
• Sicurezza e afdabilità: le numerose protezioni di sicurezza integrate forniscono
protezione delle singole celle e per gli utilizzatori.
• Rapidità di carica: le batterie agli ioni di litio, non richiedendo una carica di
compensazione di durata prolungata, si caricano rapidamente al massimo
della loro capacità.
• Tolleranza di ricariche parziali: poiché le celle agli ioni di litio tollerano le
ricariche parziali, la sospensione della carica e l’utilizzo della batteria prima
della carica completa, quando richiesto dalle esigenze di installazione, non
hanno alcun impatto sul ciclo di vita della batteria.
1
2
4
3

ITALIANO
B-TWIG 8 MOBILE | Manuale d’uso
32
33
Manuale d’uso | B-TWIG 8 MOBILE
Il vano d’accesso al pacco batteria è nella parte inferiore del subwoofer. Per accedere alla
batteria rimuovete le viti di ssaggio del coperchio (Fig.1)
ATTENZIONE
: Per la sostituzione della batteria si raccomanda di rivolgersi a personale
qualicato e autorizzato, ossia personale con conoscenze tecniche, esperienza e istruzioni
speciche sufcienti a garantire la sicurezza e il collegamento corretto dei terminali di
alimentazione.
ATTENZIONE
: Utilizzate esclusivamente lo stesso identico pacco batteria in conformità alle
indicazioni e caratteristiche tecniche rafgurate in Fig.2. Questa batteria ad alte prestazioni,
appositamente progettata, è l’unica approvata per garantire un uso sicuro ed efcace con
il sistema B-TWIG 8 MOBILE.
MANUTENZIONE DELLA BATTERIA
La manutenzione della batteria ha inizio non appena si entra in possesso di una nuova
batteria e prosegue per il suo l’intero ciclo di vita. Nella seguente tabella sono indicate le
attività di manutenzione principali:
ATTIVITÀ ESECUZIONE
Eseguire un’ispezione visiva
Prima di inserire la batteria all’interno dell’unità.
Controllate i terminali che abbiano la polarità corretta,
rosso positivo (+) e nero negativo (-). Vericate
l’integrità del telaio ed eventuali ammaccature/
perforazioni.
Caricare la batteria
Alla consegna, dopo l’uso o in caso di indicazione di
batteria scarica.
Per ottimizzare le prestazioni, è necessario caricare al
più presto la batteria che è completamente (o quasi
completamente) scarica.
Conservare la batteria in uno stato di
carica compreso tra il 20% e il 40%
Quando non è utilizzata per un periodo di tempo
prolungato.
PRECAUZIONI PER L’USO
Le celle agli ioni di litio sono caratterizzate da dimensioni ridotte ad alta densità di
energia. Prestare attenzione mentre si maneggia il pacco batteria; un uso errato
o improprio potrebbe provocare lesioni siche e/o danni materiali.
Seguite scrupolosamente le seguenti istruzioni di sicurezza:
• Non mettere in corto circuito: accertarsi che i terminali non siano a contatto
con metallo o altri materiali conduttivi durante il trasporto e la conservazione.
• Non far cadere, schiacciare o forare la batteria. L’uso improprio può causare
danni e cortocircuiti interni non sempre visibili esternamente.
• Non installare il pacco batteria con polarità invertite.
• Non esporre la batteria al contatto di sostanze liquide.
• Non incendiare la batteria né esporla ad una temperatura superiore a 60°C.
• Non tentare di aprire il pacco batteria o smontare le celle al suo interno.
Se la batteria è caduta o ha urtato contro una supercie dura, indipendentemente
dalla condizione del telaio esterno:
• Interrompere subito l’uso.
• Smaltire la batteria in conformità alle normative vigenti.
DURATA DELLA BATTERIA
La durata di una batteria agli ioni di litio dipende dalla frequenza e dalla durata
di utilizzo. Se utilizzata correttamente, le celle al suo interno hanno una durata di
circa 500 cicli di carica/scarica, mediamente 3 anni in base all’usura associata
all’uso quotidiano. Il rischio di guasti alla batteria aumenta con il tempo e con le
condizioni di utilizzo, tali guasti possono provocare un surriscaldamento della
batteria che, in rari casi, può causarne la combustione o l’esplosione.
SMALTIMENTO
Primadellosmaltimentofarscaricarelabatteriaeisolareiterminalicondelnastro.
Smaltire tempestivamente la batteria usata o guasta, applicando le normative
vigenti per lo smaltimento.
RECHARGEABLE LI-ON BATTERY PACK
Model: PL18650/8S2P - 28.8V - 5000mAh
Rated: 28.8V - 5000mAh - 144Wh
Manufacturer Name: GUANGDONG PAILI
NEW ENERGY CO.,LTD
Polarity: Red (+) Black (-)
0769003191029
Li-ion
CAUTION: Risk of fire and burns. Do not open, crush, heat
above 45°C or incinerate. Follow manufacturer’s instructions.
ATTENTION: Riques d'ncendie et de brulure. Ne pas ouvrir,
écraser ou faire chauffer a une temperature superieure a 45°C
ou faire bruler. Suivre les instructions du fabricant.
Fig.2Fig.1

ITALIANO
B-TWIG 8 MOBILE | Manuale d’uso
34
35
Manuale d’uso | B-TWIG 8 MOBILE
3.4 |KIT B-TWIG 8CS MOBILE
Il kit, fornito dell’apposita custodia di trasporto, è composto da due elementi a colon
na:unostativo(elementoA)eundiffusore(elementoB).Entrambisonodotatidelmeccanismo
di connessione a slitta, che permette l’aggancio e lo sgancio rapido degli elementi che
compongono il sistema, assicurandone la perfetta funzionalità in tutta sicurezza.
4 |ISTRUZIONI DI MONTAGGIO E SMONTAGGIO DEL SISTEMA
Per l’installazione degli apparecchi e a garanzia del loro corretto funzionamento, attenetevi
scrupolosamente alle seguenti istruzioni:
• Posizionate il subwoofer in posizione verticale su una supercie piana e stabile,
assicurandovi che tutti i piedini inferiori in gomma siano perfettamente aderenti al
pavimento o alla supercie di appoggio.
• Non installate mai il sistema su carrelli mobili, sedie, tavoli o oggetti simili che non siano
stabili o in grado di sopportare il peso.
• Non usate la maniglia per sospendere il sistema.
• Non ostruite mai le feritoie di aerazione collocate sul telaio posteriore del subwoofer.
• Per consentire una corretta dissipazione del calore dell'amplicazione, lasciate una distanza
sufciente tra il panello posteriore del subwoofer e altri oggetti quali pareti, angoli, tende,
e non posizionate mai l’apparecchio vicino sorgenti di calore di qualsiasi tipo.
INSTALLAZIONE:
1. Collocate il subwoofer su una supercie piana e priva di qualsiasi dislivello
(Fig.1)
2 Assicurate l’elemento Afacendolo scorrere nel meccanismo di aggancio a
slitta (Fig.2).
3. Ripetete l’operazione per ssare l’elemento Bnellapartesuperioredelsistema
(Fig.3)
Vista superiore
Lato spina Lato presa
Contatti audio
BA
Fig.3 Vista
laterale
Montaggio completo
Vista
posteriore
A
Agganciare B spingendo
verso il senso della freccia
B
Click
A
B
Agganciare A spingendo
verso il senso della freccia
A
Click
Fig.2
A
Fig.1

ITALIANO
B-TWIG 8 MOBILE | Manuale d’uso
36
37
Manuale d’uso | B-TWIG 8 MOBILE
DISINSTALLAZIONE:
1. Spingete indietro l’elemento Bper sganciarlo dallo stativo (Fig.4)
2. Ripetete l’operazione per sganciare l’elemento Adal subwoofer (Fig.5)
5 |CONTROLLO DEL SISTEMA
Il sistema B-TWIG 8 MOBILE è incredibilmente semplice da congurare in
pochi istanti.
Una avanzata interfaccia graca permette di entrare direttamente nel cuore del
sistema consentendo di congurare ogni parametro, cambiare preset, salvare o
richiamare le scene, regolare il volume, settare l’equalizzazione e creare un mix
per utilizzi differenti attraverso l’uscita MIX OUT. Tutte le operazioni di setup
sono facilitate dall’utilizzo di un encoder rotativo dotato di pulsante di conferma,
rendendo estremamente veloce e semplice la congurazione dell’intero sistema.
5.1 |SCHERMATA MENU PRINCIPALE (Fig.1)
La prima schermata all’accensione del sistema mostra il mixer a tre canali con i
relativilivelli,indicatoredistato(SIG/CLIP)etipodisegnale(LINE/HI-Z/MIC),ilcanale
dedicato all’uscita Main anch’esso con il proprio livello e indicatore di segnale, le
icone di attivazione del collegamento Bluetooth® - APP - Audio Streaming, e, inne,
i menù Bluetooth®, CONFIG e ABOUT.
È possibile evidenziare l’icona, il menu o il parametro desiderato semplicemente
ruotandoadestraosinistral’appositamanopolarotativaepremereperselezionare
la funzione desiderata.
Gli indicatori a freccia presenti a lato dei canali CH1-CH2-CH3 rappresentano
gracamente la posizione e il livello delle manopole analogiche presenti sull’unità.
Le icone -
APP
- , se attivate, cambiano lo stato del colore in verde (Fig.2),
nel dettaglio:
: Il sistema è sincronizzato via Bluetooth®con il vostro dispositivo Mobile
APP
: Il sistema può essere interamente controllato dalla APP “ANT SPEAKER
CONTROLLER”
: L’audio Streaming dal dispositivo mobile è attivato e funzionante.
A
Sganciare B spingendo verso
il senso della freccia
B
Sganciare A spingendo verso
il senso della freccia
A
Fig.5Fig.4
A
B
A
Fig.1 Fig.2
CH1 CH2 CH3 MAIN
LINE MIC -5 dB
/AUX
CONFIG ABOUT
APP
CH1 CH2 CH3 MAIN
LINE MIC /AUX -5 dB
CONFIG ABOUT
APP

ITALIANO
B-TWIG 8 MOBILE | Manuale d’uso
38
39
Manuale d’uso | B-TWIG 8 MOBILE
5.2 |SCHERMATA MENU CANALE (Fig.3)
Premete sul tasto canale desiderato per accedere in questo menu.
Una volta entrati è possibile visualizzare e regolare i parametri dei canali CH1-CH2-CH3,
nel dettaglio:
- Equalizzatore 3 bande, HIGH/MID/LOW, intervento da -12dB a +12dB
- Filtro HPF, frequenza da 20Hz a 400Hz (solo per i canali CH1 e CH2)
Effettuate le regolazioni è possibile tornare al menu principale premendo sulla freccia verde.
5.3 |SCHERMATA MENU BLUETOOTH®(Fig.4)
Il sistema B-TWIG 8 MOBILE è equipaggiato con un ricevitore stereo Bluetooth®5.0, il quale
permette di eseguire una connessione dati con la APP e contemporaneamente lo streaming
audio dal vostro dispositivo mobile.
Premete sul tasto per accedere in questo menu. Una volta entrati è possibile abilitare o
disabilitare le funzioni APP CONNECT e AUDIO STREAMING, nel dettaglio:
APP CONNECT ON: se attivata, permette la sincronizzazione dati con la APP “ANT SPEAKER
CONTROLLER” disponibile solo per gli utenti Apple iPhone. Nell’impostazione di fabbrica
questa funzione è già attiva.
Assicuratevi di attivare questa funzione prima di aprire la APP dal vostro telefono.
APP CONNECT SLAVE: se attivata (Fig.4A), congura l’unità come sistema aggiuntivo
secondario (Slave) perfettamente controllabile via APP. In questo modo risulta possibile
scgliere l’ascolto in modalità Mono (Fig.4B) o Stereo (Fig.4C).
Assicuratevi che il comando APP CONNECT sia posizionato su ON nel sistema principale
(Master)
AUDIOSTREAMING ON:se attivata, permette l’audiostreamingdalvostrodispositivomobile.
Nell’impostazione di fabbrica questa funzione è già attiva.
Assicuratevi di abilitare questa funzione prima di associare il vostro dispositivo tramite la
connessione Bluetooth®
39
PAIR:sepremuto,attivalasincronizzazioneviaBluetooth®trailsistemaprincipale
(Master) e secondario (Slave)
Il tasto PAIR è pensato genericamente per chi non intende controllare il sistema
con l’APP dedicata. È possibile interrompere la sincronizzazione al sistema
secondario premendo ABORT (Fig.4D) o disconnetterlo denitivamente alla ne
della vostra sessione premendo UNPAIR (Fig.4E)
Nota: Per gli utenti iPhone non è necessario premere questo pulsante in quanto la
sincronizzazione tra due sistemi, accuratamente congurati, avviene in automatico
dopo 10” una volta aperta l’APP.
È sempre possibile tornare al menu principale premendo sulla freccia verde
Fig.3
CH1
LINE
HIGH
MID
LOW
HPF
12dB-
0dB
0dB
210Hz
APP
Fig.4D Fig.4E
APP
ON
AUDIO
STREAMING
APP CONNECT ON
ABORT
APP
ON
AUDIO
STREAMING
APP CONNECT ON
UNPAIRMONO STEREO
Fig.4 Fig.4A
SLAVE
APP
ON
AUDIO
STREAMING
APP CONNECT
PAIR
APP
ON
AUDIO
STREAMING
APP CONNECT ON
PAIR
Fig.4CFig.4B
APP
ON
ON
AUDIO
STREAMING
APP CONNECT
MONO STEREO UNPAIR
APP
L R
ON
ON
AUDIO
STREAMING
APP CONNECT
STEREO UNPAIRMONO
This manual suits for next models
2
Table of contents
Languages:
Other Advanced Native Technologies Speakers manuals
Advanced Native Technologies
Advanced Native Technologies iROLLER 8 User manual
Advanced Native Technologies
Advanced Native Technologies GREENHEAD 10 User manual
Advanced Native Technologies
Advanced Native Technologies BBM 3 User manual
Advanced Native Technologies
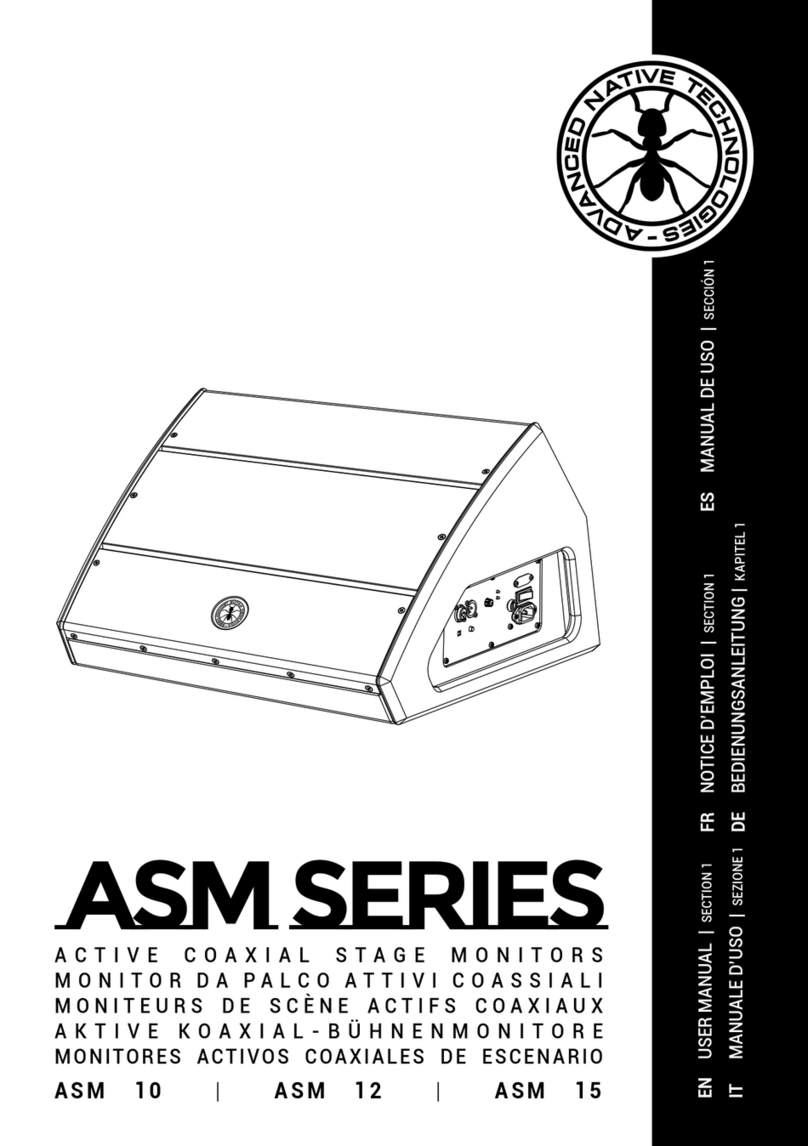
Advanced Native Technologies ASM 10 User manual
