Advanced Native Technologies iROLLER 8 User manual

BATTERY-POWERED PORTABLE COMBO
SISTEMA COMBO PORTATILE A BATTERIA
ENCEINTE COMBO PORTABLE À BATTERIE
MOBILES, BATTERIEBETRIEBENES KOMPLETTSYSTEM
SISTEMA COMBO PORTÁTIL DE BATERÍA
EN USER MANUAL | SECTION 1
IT MANUALE D’USO | SEZIONE 1
FR NOTICE D’EMPLOI | SECTION 1
DE BEDIENUNGSANLEITUNG | KAPITEL 1
ES MANUAL DE USO | SECCIÓN 1

ENGLISH
iROLLER 8 | User manual
2
3
User manual | iROLLER 8
TABLE OF CONTENTS
1| Introduction 3
2| Installation 3
3| Description 4
3.1| Inputs & controls 4
3.2| Power supply section 6
3.3| Battery use notes 8
3.4| Safety precautions and instructions for batteries correct disposal 8
4| Media player section 9
4.1| Bluetooth®section 10
4.2| USB menu 10
5| Troubleshooting 11
6 | Technicalspecications 12
7| Notes 13
The warnings in this manual must be observed together with the
“User manual - Section 2”.
1 |INTRODUCTION
ThankyouforchoosingaA.N.T–AdvancedNativeTechnologies – product!
iROLLER 8 combines all the essential requirements of all-in-one systems
and offers everything you need in just one box. Designed to be a perfect
balance between portability and convenience, it’s likely to be the best choice
for those looking for a portable system, ultra compact and lightweight, able
to fulll a wide range of applications.
iROLLER 8 is an advanced sound system with integrated battery, multiple
combinationsofI/Oprovidedbythe built-inmixerandBluetooth®technology
for synchronization with smartphones and tablets.
Finally, thanks to the telescoping handle and small wheels it can be easily
carried in any location, while the slanted hidden stand allows 35 degrees
system integration.
Please, dedicate some minutes to read this instruction manual in order to
quickly achieve the best performances from this product.
For safety precautions, warranty and disposal, please refer to attached Section 2.
For further information about all ANT products catalog, please visit our
website: www.ant-intomusic.com
PACKAGE CONTENT
• 1x Portable Combo unit
• 1x Mains cable (VDE)
• 1x User manual - Section 1
• 1x User manual - Section 2
2 |INSTALLATION
iROLLER 8 is equipped with:
A | Upper telescopic handle
B| Transport wheels
C| Carrying handle with built-in housing
for smartphone/tablet
D| Access to the battery compartment
E| Retractable support for system 35 degrees inclination
35°
35°
A
C
D
E
B

ENGLISH
iROLLER 8 | User manual
4
5
User manual | iROLLER 8
3| DESCRIPTION
3.1 |INPUTS & CONTROLS
6 CH3 MEDIA PLAYER
Media Player control section, for details read chapter 4.0 MEDIA PLAYER
SECTION.
7 MEDIA PLAYER DISPLAY
Shows the operation of the Media Player according to its commands; for
details see chapter 4.0 MEDIA PLAYER SECTION.
8 USB INPUT
Input for USB stick with capacity up to 32 GB. To select USB as the signal
source, use the MODE button, or insert the key into the type A socket.
9 AUX IN STEREO
3.5mm stereo input for connecting external devices having this analog
connection.
10 REVERB
This knob adjusts the volume of the effect for channels 1 & 2; rotate it to
the right to raise the level, to the left to decrease it.
11 PEAK
LEDindicatingthatoveralloutputvolumeistoohigh,thereforeitisnecessary
to reduce the level of the MASTER knob or of the input channel.
12 MASTER
General system volume control.
13 CONTOUR
Equalization control that evens out listening to low volumes.
14 LINE OUT
Line level output for connection to other amplied systems or another
iROLLER 8.
1 CH 1 LEVEL
This knob adjusts the level of the microphone channel, turn it to the right to raise
the level, to the left to decrease it.
2 CH1 MIC/LINE
This switch allows to choose input signal sensitivity.
3 CH1 INPUT
Balanced mic/line input (combo XLR-F/ jack 6,35mm. - 1/4”). An unbalanced jack
microphone cable can also be used.
4 CH 2 LEVEL
This knob adjusts the level of CH2, turn it to the right to raise the level, to the left
to decrease it.
5 L/MONO, R INPUT
2 x 6.35mm (1/4”) unbalanced line input jack sockets. In case of mono signal just
connect a jack to the L/MONO input.
5 9
7
12
11
14
8
1 4 6
2
10
3
13

ENGLISH
iROLLER 8 | User manual
6
7
User manual | iROLLER 8
15 BATTERY LEVEL LEDS
Power and internal battery status indicators
CHARGE: Lights up while the internal battery is being charged. When the battery is
fully charged, the CHARGE LED turns off. In order to charge the battery, the power
cable must be connected to the mains socket.
3: fully charged battery.
2: Battery half charged.
1: low battery, please recharge it soon.
LOW: low battery, connect the unit to the mains.
3.2 | POWER SUPPLY SECTION
1 POWER ON/OFF
Use this switch to turn On/Off the unit.
2 MAINS INPUT
IEC power socket with integrated fuse-holder. Plug the power cord into
this socket, but make sure the device is switched off before connecting
thepowercordtomains.Foryoursafety,neverdisconnecttheearthlead.
CAUTION: Replace the fuse only with one of the same type and with the
same value.
If the fuse blows repeatedly, contact an authorized service center.
3 BATTERY OPERATION
This selector allows you to activate or deactivate the battery included
inside the unit. Set the selector to OFF if the system is not used for a
long time, in order to preserve the life of the battery itself.
15
1
2
3

ENGLISH
iROLLER 8 | User manual
8
9
User manual | iROLLER 8
3.3 |NOTES ON BATTERY USE
The average battery life after a complete charge cycle is approximately 8 hours, a value
that can decrease to almost half according on system audio level.
This duration also depends on other factors such as:
- usage environment temperature (generally the battery discharges more
quickly at low temperatures)
- progressive state of wear due to the charge / discharge cycles
- possible improper use
The average time required for full recharge - depending on several factors - is about
6 hours.
3.4 |SAFETY PRECAUTIONS AND INSTRUCTIONS FOR CORRECT
DISPOSAL OF VRLA (LEAD-ACID VALVE REGULATED) BATTERIES
CAUTION: Under normal conditions of use and operation of the device, there are no
hazards or risks for the lead-acid battery. However it is recommended to take note
of the following characteristics and adopt following safety precautions.
• VRLA batteries include an electrolyte containing diluted sulfuric acid. Sulfuric acid
has corrosive effect and can cause severe chemical burn
• The lead compounds are classied as toxic (if ingested)
• In case of spillage use a binder, such as sand, to absorb spilled acid; use quicklime/
sodium carbonate to neutralize; dispose applying local regulations; do not allow entry
into sewers, ground or waterways.
• During the charge phase, or during operation, the lead-acid batteries may develop
hydrogen and oxygen gas, which in certain circumstances may form an explosive
mixture.
• Thelead-acidmaycontainaconsiderableamountofenergy,whichcanbeahighcurrent
source as well as a source of serious electrical shock in the event of a short circuit.
• In case of re don’t use water, but only re extinguishing media like CO2 or dry powder
extinguishing agent.
• To replace always refer to a qualied center.
• Keep indoors and away from heat - lead-acid batteries are not subject to freezing up
to a temperature of -50°C (-58°F).
• Whenever possible, charge the battery completely. Never store it completely empty or
half empty. If the device is inactive for a long period, disconnectthe battery, covers the
terminals and store the battery in a dry place away from heat sources, and regularly
recharge the battery.
CAUTION: This device contains a valve-regulated lead-acid VRLA battery, used
batteries are considered toxic waste and must be disposed in compliance with local
regulations.
4 |MEDIA PLAYER SECTION
In addition to the following 4 Media Player operating keys, this section
includes the user interface display.
1 MODE
Select the type of input or connected device. Pressed once it activates
the LINE / AUX input, pressed twice it switches to BLUETOOTH (bt)
sync, otherwise to USB; in the absence of connected inputs it shows
ND = NO DEVICE
2 PLAY/PAUSE
Press this button to start (PLAY) or pause (PAUSE) track playback
3 BACK ONE TRACK - VOLUME DECREASE
Press this button to play the previous track. Press and hold this button
for more than 2 seconds to decrease the volume (from 15 to 1).
4 FORWARD ONE TRACK – VOLUME INCREASE
Press this button to play the next track. Press and hold this button for
more than 2 seconds to increase the volume (from 1 to 15).
2
4
1
3

ENGLISH
iROLLER 8 | User manual
10
11
User manual | iROLLER 8
5| TROUBLESHOOTING
PROBLEM LEDS SOLUTION
No sound or
very low
sound level
Battery level leds off.
Make sure the device is
properly connected to the
power outlet and/or the
battery is not discharged.
Battery level leds on
but master lowered Raise MASTER level.
Battery level leds lit, master
raised but low input channel level.
Check the connections
between the sources and the
mixer.
Raise inputs LEVEL.
Battery level leds on, master up
and media player in playback.
Check CH 3 selector.
Check MEDIA PLAYER source
(LINE/AUX, USB or bt).
Adjust VOL via .
Battery status red light on. Charge the battery.
No system
power up in
battery mode
Verify that the BATTERY
OPERATION selector is set
to ON
Distortion Peak led lit. Lower level of CH1, 2, 3 inputs
and/or MASTER level.
Voice not clear Lower “REVERB” level
4.1 |BLUETOOTH®MENU
ThefollowingoperationsconcernBluetooth®modemenu.ForUSBstickoperations,refer
to section 4.2. The MP3 player is equipped with Bluetooth®technology, which makes
it possible to play audio les from another external device (such as a Smartphone) on
your iROLLER 8 as long as the distance between the two devices is within 10 meters.
To synchronize and connect the MP3 player with a device equipped with Bluetooth®
technology, use the following procedure:
1. Briefly press the MODE button until when the bt logo flashes.
2.Activate the Bluetooth®of your device to search for the receiver built into the
Media Player.
3. Indeviceslistdetectedbyyoursmartphoneor tablet, select“iROLLER8”tosynchronize
your device with the Media Player.
4. After synchronization, the bt logo remains lit on the display and the unit emits an
acoustic signal of procedure completion. Once nished you can start playing the
songs.
WARNING:SyncronizedBluetooth®devicemusicplaybackcanbestoppedandresumed
by pressing the PLAY/PAUSE button .
4.2 |USB MODE
USB stick has priority over the other inputs. By inserting the USB stick the Bluetooth®
and LINE/AUX inputs are automatically disabled. The listening level can be adjusted
using the and buttons.

ENGLISH
iROLLER 8 | User manual
12
13
User manual | iROLLER 8
6 | TECHNICAL SPECIFICATIONS
System type 2-way vented box
LF 8” custom woofer - 1.5 V.C.
HF 3” - 0.5” V.C.
Amplier D Class
Output power 20W RMS (d.c. power) – 50W RMS (a.c. power)
Frequency response 65Hz - 18kHz
MAX SPL 113dB
Protections Short circuit, overvoltage, overload protection
Controls CH 1 Level, CH 2 Level, Reverb, Master, Contour
Indicators Power, 5 battery status LEDs
Mic inputs 2x (1 alternative to instrument input CH 2)
Mic input connections XLR/6,35mm. (1/4”) jack combo
Line input 2x (1 alternative to CH 2 microphone input)
Line input connections CH2 - 2 x 6.35mm (1/4 ”) jacks, CH3 - 3.5mm jack.
Power supply 100-240V~ 50-60Hz
Fuse T1,6A L 250V~
Power consumption 50 W
Battery VRLA type rechargeable 12V / 5Ah
Battery protection ON/OFF switch
Cabinet material High density polypropylene
Dimensions
(W x H x D)
381 x 525 x 210 (mm)
15” x 20,7” x 8,3”
Weight 9,8kg (21.6 lbs)
Other features 2x transport wheels, telescopic handle, upper carrying handle,
retractable support for 35 degrees system inclination
MEDIA PLAYER
Available I/O Bluetooth, USB stick, AUX in
Bluetooth®version 5.0
Compatible formats MP3, WMA, WAV
Media Player controls Mode (AUX/Bluetooth/USB), Play/Pause, previous song, next song,
level increase, level decrease
Media Player display Dual 7-segment display
7 | NOTES

ITALIANO
iROLLER 8 | Manuale d’uso
14
15
Manuale d’uso | iROLLER 8
INDICE
1| Introduzione 15
2| Installazione 15
3| Descrizione 16
3.1| Ingressi & controlli 16
3.2| Alimentazione 18
3.3| Note sull’utilizzo della batteria 20
3.4| Precauzioni di sicurezza e istruzioni 20
per il corretto smaltimento delle batterie
4| Sezione media player 21
4.1| Menu Bluetooth®22
4.2| Menu USB 22
5| Soluzione dei problemi 23
6 | Specichetecniche 24
7| Note 25
Le avvertenze nel presente manuale devono essere osservate
congiuntamente al “Manuale d’uso - Sezione 2”.
1 |INTRODUZIONE
Grazieperaveracquistatounprodotto A.N.T–AdvancedNativeTechnologies!
Il sistema Combo iROLLER 8 unisce tutti i requisiti essenziali dei sistemi
all-in-one e offre tutto ciò che occorre in un unico box. Progettato per essere
un perfetto equilibrio fra portabilità e praticità, si presta ad essere la scelta
ideale per chi cerca un sistema portatile, ultra compatto e leggero, in grado
di soddisfare un’ampia gamma di applicazioni multiuso.
iROLLER 8 dispone è un avanzato sistema di amplicazione con batteria
integrata, molteplici combinazioni di I/O fornite dal mixer incorporato e
tecnologia Bluetooth®per la sincronizzazione di smartphone o tablet.
Inne, grazie alla maniglia telescopica e alle comode rotelle può essere
trasportatoagevolmenteinqualsiasilocation,mentreilsupportoascomparsa
consente l’inclinazione del sistema di 35°.
Ritagliatevi qualche minuto per leggere questo manuale di istruzioni in modo
taledaottenererapidamenteilmassimodelleperformancedaquestoprodotto
Perleistruzionirelativeasicurezza,leprecauzioni,lagaranziaelosmaltimento
fate riferimento all’allegato sezione 2.
Per ulteriori informazioni su tutti i prodotti del catalogo ANT consultate il
nostro sito: www.ant-intomusic.com
CONTENUTO DELL’IMBALLO
• 1x Sistema combo portatile
• 1x Cavo di alimentazione (VDE)
• 1x Manuale d’uso - Sezione 1
• 1x Manuale d’uso - Sezione 2
2 |INSTALLAZIONE
iROLLER 8 è fornito di:
A| Maniglia telescopica superiore
B| Rotelle di trasporto
C| Maniglia per il trasporto con alloggiamento
incluso per smartphone/tablet
D| Accesso al vano batteria
E| Supporto a scomparsa per inclinazione del diffusore di 35°
35°
35°
A
C
D
E
B

ITALIANO
iROLLER 8 | Manuale d’uso
16
17
Manuale d’uso | iROLLER 8
3 |DESCRIZIONE
3.1 |INGRESSI & CONTROLLI
6 CH3 MEDIA PLAYER
Sezione di controllo del lettore, per i dettaglileggere il capitolo 4.0 SEZIONE
MEDIA PLAYER
7 DISPLAY MEDIA PLAYER
Mostra il funzionamento del Media Player secondo i relativi comandi; per
i dettagli consultate il capitolo 4.0 SEZIONE MEDIA PLAYER
8 USB INPUT
Ingresso per chiavetta USB con capacità no a 32 GB. Per selezionare
USB come sorgente del segnale usate il tasto MODE o inserite la chiavetta
nella presa di tipo A.
9 AUX IN STEREO
Ingresso stereo da 3,5mm per collegamento di dispositivi esterni che
hanno questa connessione analogica
10 REVERB
Questa manopola regola il volume dell’effetto per i canali 1 & 2; ruotatela
verso destra per alzare il livello, verso sinistra per diminuirlo.
11 PEAK
Questoledindicacheilvolumediuscitageneraleètroppoelevato,pertantoè
necessarioridurreillivellodellamanopolaMASTERodelcanalediingresso.
12 MASTER
Controllo generale di volume del sistema
13 CONTOUR
Controllo di equalizzazione che uniforma l’ascolto ai bassi volumi
14 LINE OUT
Uscita di livello linea per il collegamento ad altri sistemi amplicati o un
altro iROLLER 8
1 CH1 LEVEL
Questa manopola regola il livello del canale CH1, ruotatela verso destra per alzare
il livello, verso sinistra per diminuirlo
2 CH1 MIC/LINE
Questo interruttore consente di scegliere la sensibilità del segnale in ingresso
3 CH1 INPUT
Ingresso microfono/linea bilanciato (combo XLR-F/jack da 6,35mm. - 1/4”). È
possibile usare anche un cavo microfonico jack non bilanciato.
4 CH2 LEVEL
Questa manopola regola il livello del canale CH2, ruotatela verso destra per alzare
il livello, verso sinistra per diminuirlo
5 L/MONO, R INPUT
Ingressi con 2 prese jack da 6,35mm. (1/4”) sbilanciate di linea. In caso di segnale
mono basta collegare un jack all’ingresso L/MONO
5 9
7
12
14
8
1 4 6
2
10
3
13
11

ITALIANO
iROLLER 8 | Manuale d’uso
18
19
Manuale d’uso | iROLLER 8
15 LED BATTERY LEVEL
Indicatori di stato della batteria interna e di accensione
CHARGE: Si accende durante la procedura di ricarica della batteria interna. Quando
la batteria è completamente carica, il LED CHARGE si spegne. Per poter caricare la
batteria, è necessario collegare il cavo di alimentazione alla presa di rete
3: batteria completamente carica.
2: batteria carica a metà.
1: batteria quasi scarica, ricaricarla al più presto.
LOW: batteria scarica, collegate l’apparecchio alla rete elettrica.
3.2 | ALIMENTAZIONE
1 POWER ON/OFF
Interruttore di accensione/spegnimento dell’apparecchio
2 MAINS INPUT
PresaIECdialimentazioneconporta-fusibileintegrato.Inseriteinquesta
presailcavoperl’alimentazioneelettricamaaccertatevichel’apparecchio
sia spento prima di collegare il cavo alla rete. Per la vostra sicurezza,
non scollegate mai il polo di terra
ATTENZIONE: Sostituire il fusibile unicamente con uno dello stesso tipo
e con gli stessi valori.
Se il fusibile continua a saltare, rivolgetevi ad un centro di assistenza
autorizzato.
3 BATTERY OPERATION
Questo selettore permette di attivare o disattivare la batteria inclusa
all’interno dell’unità. Posizionate il selettore su OFF in caso di inutilizzo
prolungato del sistema, in modo tale da preservare la vita della batteria
stessa.
15
1
2
3

ITALIANO
iROLLER 8 | Manuale d’uso
20
21
Manuale d’uso | iROLLER 8
4 |SEZIONE MEDIA PLAYER
Oltre ai 4 seguenti tasti operativi del player questa sezione comprende il
display di interfaccia utente
1 MODE
Seleziona il tipo di ingresso o dispositivo collegato. Premuto una volta
attiva l’ingresso LINE/AUX, premuto 2 volte passa al sync del Bluetooth®
(bt), altrimenti a USB; in assenza di ingressi collegati mostra ND = NO
DEVICE
2 PLAY/PAUSE
Premete questo tasto per avviare (PLAY) o interrompere (PAUSE) la
riproduzione di un brano
3 INDIETRO DI UN BRANO – ABBASSAMENTO DEL VOLUME
Premetequestotastoperriprodurreil branoprecedente.Tenetepremuto
questo tasto per più di 2” per diminuire il volume (da 15 a 1)
4 AVANTI DI UN BRANO – AUMENTO DEL VOLUME
Premetequestotastoperriprodurreil branosuccessivo.Tenetepremuto
questo tasto per più di 2” per aumentare il volume (da 1 a 15)
3.3 |NOTE SULL’UTILIZZO DELLA BATTERIA
La durata media della batteria dopo un ciclo completo di carica è di circa 8 ore, valore
che può diminuire no a quasi dimezzarsi in base al livello audio di utilizzo impostato
sul diffusore. Tale durata dipende anche da altri fattori quali:
- temperatura ambiente di utilizzo (generalmente la batteria si scarica più rapidamente
a basse temperature)
- stato di usura progressivo dovuto ai cicli di carica/scarica
- eventuale utilizzo improprio
Il tempo medio necessario per la ricarica completa, anch’esso dipendente da vari fattori,
è di circa 6 ore.
3.4 |PRECAUZIONI DI SICUREZZA E ISTRUZIONI PER IL
CORRETTO SMALTIMENTO DELLE BATTERIE AL PIOMBOACIDO
REGOLATE DA VALVOLA VRLA
ATTENZIONE: Nelle normali condizioni di impiego e funzionamento dell’apparecchio,
noninsorgonopericoliorischiperlabatteriaalpiombo-acido.Tuttaviasiraccomandadi
prenderenotadelleseguenticaratteristicheeadottarequesteprecauzionidisicurezza.
• Le batterie VRLA includono un elettrolita che contiene acido solforico diluito. L’acido
solforico svolge azione corrosiva e può causare gravi ustioni da sostanze chimiche
• I composti di piombo sono classicati come tossici (se ingeriti)
• In caso di fuoriuscite usare un legante, come la sabbia, per assorbire l’acido versato;
usare calce viva/carbonato di sodio per neutralizzare; smaltire prestando debita
attenzione ai regolamenti locali in vigore; non consentire l’immissione nella rete
fognaria, nel terreno o in corsi d’acqua.
• Durante la fase di carica, o durante il funzionamento, le batterie al piombo-acido
possono sviluppare gas di idrogeno e ossigeno, che in talune circostanze possono
formare una miscela esplosiva.
• Le batterie al piombo-acido possono contenere una notevole quantità di energia,
che può essere una sorgente di alta corrente elettrica e di gravi scosse elettriche
nell’eventualità di un cortocircuito.
• Non usate acqua in caso di incendio, ma solo mezzi di estinzione idonei come CO2
o agente estinguente in polvere secca.
• Per la sostituzione rivolgetevi sempre a personale specializzato.
• Conservare al coperto e al riparo dal calore - le batterie al piombo-acido non sono
soggette a congelamento no a una temperatura di -50°C.
• Quando possibile, caricate interamente la batteria. Non immagazzinatela mai
completamente scarica, vuota o semi scarica. Se l’apparecchio rimane inattivo per un
lungo periodo, scollegate la batteria, riponete le coperture ai terminali e conservatela
in un luogo asciutto, lontano dalle fonti di calore, ricaricandola ad intervalli regolari.
ATTENZIONE: Questo apparecchio contiene una batteria al piombo-acido
regolata da valvola VRLA, le batterie esauste sono considerate riuti tossici
e devono essere smaltite in ottemperanza alla normativa vigente
2
4
1
3

ITALIANO
iROLLER 8 | Manuale d’uso
22
23
Manuale d’uso | iROLLER 8
5| SOLUZIONE DEI PROBLEMI4.1 |MENU BLUETOOTH®
Le successive operazioni sono relative al menu nella modalità Bluetooth®. Per le
operazioni con chiavetta USB fate riferimento alla sezione 4.2.
Il lettore MP3 è provvisto della tecnologia Bluetooth®, ciò rende possibile riprodurre i
le audio di un altro dispositivo
esterno (ad esempio di uno Smartphone) sul vostro iROLLER 8 purché la distanza tra
i due dispositivi sia entro 10 metri. Per sincronizzare e collegare il lettore MP3 con un
dispositivo dotato di tecnologia Bluetooth®usate la seguente procedura:
1. Premete brevemente il tasto MODE no a visualizzare la scritta bt lampeggiante
2. Attivate il Bluetooth®del vostro dispositivo per cercare il ricevitore incorporato nel
MEDIA PLAYER.
3. Nell’elenco degli apparecchi rilevati dal vostro smartphone o tablet selezionate
“iROLLER 8” per sincronizzare il vostro dispositivo con il MEDIA PLAYER.
4. A sincronizzazione avvenuta la scritta bt rimane ssa sul display e l’unità emette un
segnale acustico di completamento della procedura. Una volta terminata è possibile
iniziare la riproduzione dei brani.
ATTENZIONE: La riproduzione musicale dal dispositivo Bluetooth®collegatopuò essere
interrotta e ripresa premendo il tasto PLAY/PAUSA .
4.2 |MODO USB
La chiavetta USB ha priorità sugli altri ingressi, inserendola sono disattivati
automaticamente gli ingressi Bluetooth
®
e LINE/AUX. Il livello di ascolto può essere
regolato tramite i tasti e .
PROBLEMA SPIE LUMINOSE SOLUZIONE
Nessun suono
o suono troppo
basso
Led BATTERY LEVEL spenti
Assicuratevi che l’apparecchio
sia collegato correttamente
alla presa di corrente e/o che la
batteria non sia scarica
Led BATTERY LEVEL accesi ma
MASTER abbassato Alzate il livello del MASTER
Led BATTERY LEVEL accesi,
MASTER alzato ma LEVEL dei canali
di ingresso abbassati.
Controllate i collegamenti tra le
sorgenti ed il mixer.
Alzate LEVEL degli ingressi.
Led BATTERY LEVEL accesi,
MASTER alzato e MEDIA PLAYER in
riproduzione.
Controllate il selettore del CH 3
Controllate la sorgente (LINE/
AUX, USB o bt) del MEDIA
PLAYER.
Regolate VOL tramite .
Spia rossa accesa dello stato della
batteria. Mettete in carica la batteria.
Nessuna
accensione
del sistema
in modalità
batteria
Vericate che il selettore
BATTERY OPERATION sia
posizionato su ON
Distorsione Led PEAK acceso Attenuate il livello degli ingressi
CH1, 2, 3 e/o del MASTER.
Voce poco
presente. Attenuate il livello di “REVERB”

ITALIANO
iROLLER 8 | Manuale d’uso
24
25
Manuale d’uso | iROLLER 8
6 | CARATTERISTICHE TECNICHE
Tipo Bass reflex 2-vie
LF 8” custom woofer - 1.5 V.C.
HF 3” - 0.5” V.C.
Amplicatore Classe D
Potenza di uscita 20W RMS (alimentazione DC) – 50W RMS (alimentazione AC)
Risposta in frequenza 65Hz - 18kHz
MAX SPL 113dB
Protezioni Cortocircuito, sovratensione, protezione da sovraccarico
Controlli CH 1 Level, CH 2 Level, Reverb, Master, Contour
Indicatori Peak, 5 led di stato della batteria
Ingressi Mic 2x (1 alternativo a ingresso line CH 2)
Connessioni ingressi Mic Combo XLR/jack da 6,35mm. (1/4”)
Ingresso linea stereo 2x (1 alternativo a ingresso microfono CH 2)
Connessioni ingressi linea CH2 - 2 jack da 6,35mm.(1/4”), CH3 - jack da 3,5mm.
Alimentazione 100-240V~ 50-60Hz
Fusibile T1,6A L 250V~
Max assorbimento di potenza 50W
Batteria Tipo VRLA ricaricabile 12V/5Ah
Protezione della batteria Selettore ON/OFF
Materiale cabinet Polipropilene ad alta densità
Dimensioni (L x A x P) 381 x 525 x 210 (mm) 15” x 20,7” x 8,3”
Peso 9,8kg (21.6 lbs)
Altre caratteristiche 2x rotelle di trasporto, maniglia telescopica, maniglia superiore per il
trasporto, supporto a scomparsa per inclinazione di 35° del sistema
MEDIA PLAYER
I/O disponibili Bluetooth®, chiavetta USB, AUX IN
Versione Bluetooth®5.0
Formati compatibili File MP3, WMA, WAV
Comandi Media Player Mode (AUX/Bluetooth/USB), Play/Pause, brano precedente, brano
successivo, aumento livello, diminuzione livello
Visualizzazione Media Player Doppio display a 7 segmenti
7 | NOTE

26
27
Notice d’emploi | iROLLER 8
FRANÇAIS
iROLLER 8 | Notice d’emploi
TABLE DES MATIÈRES
1| Introduction 27
2| Installation 27
3| Description 28
3.1| Entrées & contrôles 28
3.2| Alimentation 30
3.3| Remarques sur l’utilisation de la batterie 32
3.4| Mesures de sécurité et instructions pour 32
une mise au rebut correcte des batteries
4| Section media player 33
4.1| Menu Bluetooth®34
4.2| Menu USB 34
5| Dépannage 35
6 | Spécicationstechniques 36
7| Notes 37
Respecter impérativement les avertissements ou mises en garde con-
tenus dans la présente notice ainsi que les indications de la « Notice
d’emploi - Section 2 ».
1 |INTRODUCTION
Nous vous remercions d’avoir acheté un produit A.N.T. - Advanced Native
Technologies !
L’enceinteComboiROLLER8possèdetouslesqualitésd’unsystèmetout-en-
un, répondant ainsi à toutes vos exigences. Parfait équilibre entre portabilité
et facilité d’utilisation, cette enceinte se révèle être le meilleur choix pour
ceuxquirecherchentun systèmeportableultra-compact,légeretpolyvalent.
Le iROLLER 8 est un système audio vraiment complet intégrant une batterie,
denombreusespossibilitésdeconnexiongrâceàsatabledemixageintégrée
et à sa connectivité Bluetooth®permettant la synchronisation avec les
tablettes et Smartphones.
Deplus,grâceàsapoignéetélescopiqueetsesroulettes,ilpeutêtrefacilement
transportélorsdevosdéplacements,tandisquelesupportrétractablepermet
de l’incliner de 35°.
Les quelques instants que vous consacrerez à la lecture de cette notice
d’emploi vous permettront de bien connaître ce produit et de bénécier
pleinement de ses performances.
Pour les consignes de sécurité, les précautions, la garantie et l’élimination,
se référer à la section 2.
Pour d’autres informations sur tous les produits du catalogue A.N.T, veuillez
consulter notre site : www.ant-intomusic.com
CONTENU DE L’EMBALLAGE
• 1x Enceinte combo portable
• 1x Câble d’alimentation (VDE)
• 1x Notice d’emploi - Section 1
• 1x Notice d’emploi - Section 2
2 |INSTALLATION
Le iROLLER 8 est équipé des éléments suivants :
A | Poignée télescopique sur le dessus
B| Roulettes de transport
C| Poignée pour le transport avec logement pour
smartphone/tablette
D| Accès au compartiment à piles
E| Support rétractable pour l’inclinaison de l’enceinte de 35°
35°
35°
A
C
D
E
B

28
29
Notice d’emploi | iROLLER 8
FRANÇAIS
iROLLER 8 | Notice d’emploi
3| DESCRIPTION
3.1 |ENTRÉES & CONTRÔLES
6 CH3 MEDIA PLAYER
Section de contrôle du lecteur. Pour de plus amples détails, lire le chapitre
4.0 SECTION MEDIA PLAYER.
7 DISPLAY MEDIA PLAYER
Indique le fonctionnement du Media Player sur la base de ses
commandes ; pour de plus amples détails, consulter le chapitre 4.0
SECTION MEDIA PLAYER.
8 USB INPUT
Entrée pour clé USB jusqu’à 32 Go. Utiliser le bouton MODE ou introduire la
clé dans la prise A pour sélectionner le port USB comme source du signal.
9 AUX IN STEREO
Entrée stéréo de 3,5 mm pour la connexion de dispositifs externes dotés
de cette connexion analogique.
10 REVERB
Ce bouton permet le réglage du volume de l’effet des canaux 1 & 2. Tourner ce
bouton vers la droite pour augmenter le niveau, vers la gauche pour le baisser.
11 PEAK
Cette led indique que le volume général de sortie est trop élevé, il est donc
nécessaire de réduire le niveau du bouton MASTER ou du canal d’entrée.
12 MASTER
Contrôle général du volume de l’enceinte.
13 CONTOUR
Contrôle de l’égaliseur qui égalise l’écoute à faible volume.
14 LINE OUT
Sortie de niveau de ligne pour la connexion à d’autres enceintes ampliées
ou à un autre iROLLER 8.
1 CH1 LEVEL
Ce bouton règle le niveau du canal CH1. Tourner ce bouton vers la droite pour
augmenter le niveau, vers la gauche pour le baisser.
2 CH1 MIC/LINE
Ce commutateur permet de choisir la sensibilité du signal en entrée.
3 CH1 INPUT
Entrée microphone/ligne symétrique (combo XLR-F/jack 6,35 mm - 1/4”). Il est
possible d’utiliser un câble micro jack non symétrique.
4 CH2 LEVEL
Ce bouton règle le niveau du canal CH2. Tourner ce bouton vers la droite pour
augmenter le niveau, vers la gauche pour le baisser.
5 L/MONO, R INPUT
Entrées avec 2 prises de ligne jack asymétriques de 6,35 mm (1/4”). En cas de
signal mono, il suft de connecter un jack à l’entrée L/MONO.
5 9
7
8
1 4 6
2
3
12
11
14
10
13

30
31
Notice d’emploi | iROLLER 8
FRANÇAIS
iROLLER 8 | Notice d’emploi
15 LED BATTERY LEVEL
Indicateurs de niveau de charge de la batterie interne et d’allumage.
CHARGE : Ce voyant s’allume pendant la charge de la batterie interne. Quand la
batterie est complètement chargée, le voyant CHARGE s’éteint. Pour charger la
batterie, le cordon d’alimentation doit être branché à la prise secteur.
3 : batterie complètement chargée.
2 : batterie chargée à moitié.
1 : batterie faible, à recharger rapidement.
LOW : batterie déchargée, connecter l’appareil au secteur.
3.2 | ALIMENTATION
1 POWER ON/OFF
Utiliser ce bouton pour allumer/éteindre l’appareil.
2 MAINS INPUT
Prise d’alimentation IEC avec porte-fusible intégré. Insérer le câble
d’alimentation dans cette prise, mais s’assurer que l’appareil est bien
éteintavantdebrancherlecâbleausecteur.Pourdesraisonsdesécurité,
ne jamais débrancher la mise à la terre.
ATTENTION: remplacer le fusible par un composant du même type et
de la même puissance.
Si le fusible continue à sauter, contactez un centre de service agréé.
3 BATTERY OPERATION
Ce sélecteur permet d’activer ou de désactiver la batterie à l’intérieur de
l’unité.PositionnerlesélecteursurOFFlorsquel’enceinten’estpasutilisée
sur une longue période an de préserver la durée de vie de la batterie.
15
1
2
3

32
33
Notice d’emploi | iROLLER 8
FRANÇAIS
iROLLER 8 | Notice d’emploi
4 |SECTION MEDIA PLAYER
Outre les 4 boutons de commande du lecteur, cette section traite également
de l’afchage de l’interface utilisateur.
1 MODE
Permet de sélectionner le type d’entrée ou le dispositif connecté.
L’enfoncerunefois pour activerl’entrée LINE/AUX,deux fois pour passer
à la synchronisation du Bluetooth®(bt), ou à l’USB ; à défaut d’entrées
connectées, le message ND = NO DEVICE apparaît.
2 PLAY/PAUSE
Appuyer sur cette touche pour lancer (PLAY) ou interrompre (PAUSE) la
lecture du morceau musical
3 PISTE PRÉCÉDENTE – DIMINUTION DU VOLUME
Appuyer sur ce bouton pour reproduire la piste précédente. Appuyer sur
ce bouton en le maintenant enfoncé pendant plus de 2” pour diminuer
le volume (de 15 à 1).
4 PISTE SUIVANTE – AUGMENTATION DU VOLUME
Appuyer sur ce bouton pour reproduire la piste suivante. Le maintenir
enfoncé pendant plus de 2” pour augmenter le volume (de 1 à 15).
3.3 |REMARQUES SUR L’UTILISATION DE LA BATTERIE
La durée de fonctionnement moyenne de la batterie après un cycle complet de charge
est d’environ 8 heures. Cette valeur peut se réduire de moitié selon le niveau audio
programmé sur l’enceinte. Ce temps dépend aussi d’autres facteurs, notamment :
- la température ambiante d’utilisation (la batterie peut se décharger plus vite à basse
température)
- l’état d’usure consécutif au nombre de cycles de charge/décharge
- l’utilisation impropre
Le temps moyen nécessaire à une charge complète, qui dépend aussi de différents
facteurs, est d’environ 6 heures.
3.4 |
MESURES DE SÉCURITÉ ET INSTRUCTIONS POUR UNE MISE
AU REBUT CORRECTE DES BATTERIES AU PLOMB-ACIDE
ÉGLÉES PAR UNE VALVE VRLA (LEAD-ACID VALVE REGULATED).
ATTENTION: En cas d’utilisation normale de l’appareil, il n’y a pas de danger ou de
risque pour la batterie. Il est cependant recommandé de suivre les consignes de
sécurité suivantes.
• Les batteries VRLA contiennent un électrolyte composé d’acide sulfurique dilué.
L’acide sulfurique est très corrosif et peut causer de sévères brûlures chimiques.
• Le plomb est un produit toxique (si ingéré).
• En cas de fuite, utiliser des matières absorbantes telles que du sable, an d’absorber
l’acide renversé ; utiliser de la chaux vive ou du carbonate de sodium pour neutraliser
l’acide ; éliminer en respectant les réglementations locales en vigueur ; ne pas laisser
pénétrer dans le réseau d’égouts, le sol ou les cours d’eau.
• Pendant la phase de charge, ou durant le fonctionnement, les batteries au plomb-
acide peuvent produire de l’hydrogène et de l’oxygène, ce qui peut dans certaines
conditions former un mélange explosif.
• Une batterie au plomb-acide peut accumuler une grande quantité d’énergie, un
courant électrique très important et de graves décharges électriques peuvent alors
se produire en cas de court-circuit.
• En cas d’incendie, ne pas utiliser d’eau mais uniquement un extincteur à CO2 ou à
poudre.
• Pour le remplacement de la batterie, toujours s’adresser au personnel qualié.
• Conserver à l’intérieur et à l’abri des sources de chaleur. Les batteries au plomb-acide
ne gêlent pas jusqu’à -50°C.
• Si possible, charger complètement la batterie. Ne pas conserver la batterie
complètement déchargée, vide ou à moitié déchargée. Si l’appareil doit rester inutilisé
sur une longue période, déconnecter la batterie, isoler les bornes et la conserver dans
un endroit sec et à l’abri de la chaleur en la chargeant régulièrement.
CAUTION: This device contains a valve-regulated lead-acid VRLA battery,
used batteries are considered toxic waste and must be disposed in
compliance with local regulations.
2
4
1
3

34
35
Notice d’emploi | iROLLER 8
FRANÇAIS
iROLLER 8 | Notice d’emploi
5| DÉPANNAGE
PROBLÈME VOYANTS LUMINEUX SOLUTION
Aucun son ou
son trop faible. Voyants BATTERY LEVEL éteints
S’assurer que l’appareil
est bien branché à la prise
de courant et/ou que la
batterie n’est pas totalement
déchargée
Voyants BATTERY LEVEL allumés
mais MASTER baissé
Augmenter le niveau du
MASTER
Voyants BATTERY LEVEL allumés,
MASTER augmenté mais LEVEL
des canaux d’entrée bas.
Contrôler les branchements
entre les sources et le
mélangeur.
Augmenter le niveau (LEVEL)
des entrées.
Voyants BATTERY LEVEL allumés,
MASTER augmenté et MEDIA
PLAYER en lecture.
Contrôler le sélecteur du CH 3.
Contrôler la source (LINE/AUX,
USB ou bt) du lecteur (MEDIA
PLAYER).
Régler le VOL à l’aide de .
Voyant du niveau de batterie allumé
en rouge. Charger la batterie.
Aucun
allumage de
l’enceinte en
mode batterie.
S’assurer que le sélecteur
BATTERY OPERATION est bien
sur ON.
Distorsion. Voyant PEAK allumé. Baisser le niveau des entrées
CH1, 2, 3 et/ou du MASTER.
Voix pas claire. Baisser le niveau « REVERB ».
4.1 |MENU BLUETOOTH®
LesopérationssuivantesconcernentlemenuenmodalitéBluetooth®.Pourlesopérations
avec clé USB, se référer à la section 4.2.
Le lecteur MP3 est équipé de la technologie Bluetooth®, ce qui permet de lire des chiers
audio depuis un autre dispositif
externe (par exemple un Smartphone) sur votre iROLLER 8 à condition que la distance
entre les deux appareils ne dépasse pas 10 mètres. Pour synchroniser et connecter
le lecteur MP3 à un appareil équipé de la technologie Bluetooth®, suivre la procédure
décrite ci-après :
1. Appuyer brièvement sur le bouton MODE jusqu’à visualiser le message bt qui clignote
2. Activer le Bluetooth®du dispositif pour chercher le récepteur incorporé au MEDIA
PLAYER.
3. Dans la liste des appareils détectés par le Smartphone ou la tablette, sélectionner
« iROLLER 8 » pour synchroniser le dispositif au lecteur.
4. Au terme de la synchronisation, le message bt reste xe sur l’écran et l’unité émet
un signal sonore indiquant la conclusion de la procédure. Au terme de la procédure,
il est possible de lancer la lecture des pistes.
ATTENTION: Il est possible d’interrompre ou de reprendre la lecture des pistes depuis
le dispositif Bluetooth®connecté en appuyant sur le bouton PLAY/PAUSE .
4.2 |USB MODE
La clé USB a la priorité sur les autres entrées, son introduction désactive
automatiquement les entrées Bluetooth
®
et LINE/AUX. Pour régler le volume, se
servir des touches et .

36
37
Notice d’emploi | iROLLER 8
FRANÇAIS
iROLLER 8 | Notice d’emploi
6 | CARACTÉRISTIQUES TECHNIQUES
Type 2-voies bass reflex
LF 8” custom woofer - 1,5 V.C.
HF 3” - 0,5” V.C.
Amplicateur Classe D
Puissance de sortie 20 W RMS (alimentation DC) – 50 W RMS (alimentation AC)
Réponse en fréquence 65 Hz - 18 kHz
MAX SPL 113 dB
Protections Court-circuit, surtension, protection de surcharge
Contrôles CH 1 Level, CH 2 Level, Reverb, Master, Contour
Indicateurs Peak, 5 voyants d’état de la batterie
Entrées Mic 2 x (dont 1 sur l’entrée line CH 2)
Connexions entrées Mic Combo XLR/jack de 6,35 mm (1/4”)
Entrée ligne stéréo 2 x (dont 1 sur l’entrée microphone CH 2)
Connexions entrées ligne CH2 - 2 jack de 6,35 mm (1/4”), CH3 - jack de 3,5 mm
Alimentation 100-240 V~ 50-60 Hz
Fusible T1,6 A L 250 V~
Absorption de puissance max. 50 W
Batterie Type VRLA rechargeable 12 V/5 Ah
Protection de la batterie Sélecteur ON-OFF
Matériau caisson Polypropylène haute densité
Dimensions (L x H x P) 381 x 525 x 210 (mm) 15” x 20,7” x 8,3”
Poids 9,8 kg (21,6 lbs)
Autres caractéristiques 2 x roulettes de transport, poignée télescopique, poignée sur le
dessus pour le transport, support rétractable pour l’inclinaison de
l’enceinte de 35°
MEDIA PLAYER
Entrées/sorties disponibles Bluetooth®, clé USB, AUX IN
Version Bluetooth®5.0
Formats compatibles Fichiers MP3, WMA, WAV
Commandes lecteur
(Media Player)
Mode (AUX/Bluetooth®/USB), Play/Pause, piste précédente, piste
suivante, augmentation du niveau, diminution du niveau
Afchage lecteur
(Media Player)
Double afcheur 7 segments
7 | NOTES

38
39
Bedienungsanleitung | iROLLER 8
DEUTSCH
iROLLER 8 | Bedienungsanleitung
INHALTSVERZEICHNIS
1| Einleitung 39
2| Installation 39
3| Beschreibung 40
3.1| Eingänge & bedienelemente 40
3.2| Stromversorgung 42
3.3| Hinweise zum gebrauch der batterie 44
3.4| Sicherheitsmassnahmen und anweisungen 44
für die ordnungsgemässe entsorgung der batterien
4| Abschnitt media player 45
4.1| Bluetooth®menü 46
4.2| USB menü 46
5| Problembehebung 47
6| Technische daten 48
7| Notizen 49
Die Hinweise in der vorliegenden Bedienungsanleitung sind ebenso zu
befolgen wie die in der „Bedienungsanleitung – Kapitel 2“.
1 |EINFÜHRUNG
Vielen Dank, dass Sie sich für ein Produkt von A.N.T – Advanced Native
Technologies entschieden haben!
Unser System deckt alle wesentlichen Anforderungen an ein All-in-One-
System ab. Alles was Sie benötigen ist hier in einer Box vereint. Bravourös
meistert iROLLER 8 den Spagat zwischen Mobilität und Komfort. Es ist
die denkbar beste Wahl für alle, die ein tragbares, ultrakompaktes und
leichtgewichtiges System suchen, das in der Lage ist, ein breites Spektrum
von Anwendungen zu bedienen.
iROLLER 8 ist ein modernes Soundsystem mit integrierter Batterie. Das
eingebauteMischpultbietetmehrerekombinierte Aus-undEingängeunddie
Bluetooth®-Technologie ermöglicht die Synchronisation mit Smartphones
und Tablets.
DankdemTeleskopgriffunddenkleinenRädernlässtsichdasGerätüberallmühelos
mitnehmen. Der verdeckte Halter ermöglicht die 35°-Neigung des Systems.
Bitte nehmen Sie sich einige Minuten Zeit, um diese Bedienungsanleitung
zu lesen, damit Sie dieses Produkt optimal nutzen können.
Für Sicherheitshinweise, Vorsichtsmaßnahmen, Garantie und Entsorgung
siehe Teil 2.
Weitere Informationen über alle Produkte des Katalogs von A.N.T nden Sie
auf unserer Website: www.ant-intomusic.com
2 |INSTALLATION
iROLLER 8 ist ausgestattet mit:
A | Teleskopgriff oben
B| Transporträder
C| Transportgriff mit integriertem Smartphone/Tablet-Fach
D| Batteriefach-Zugang
E| Verdeckter Halter zur 35°-Neigung des Lautsprechers
LIEFERUMFANG
• 1x mobiles Komplettsystem
• 1x Netzkabel (VDE)
• 1x Bedienungsanleitung – Teil 1
• 1x Bedienungsanleitung – Teil 2
35°
35°
A
C
D
E
B
Table of contents
Languages:
Other Advanced Native Technologies Speakers manuals
Advanced Native Technologies
Advanced Native Technologies GREENHEAD 10 User manual
Advanced Native Technologies
Advanced Native Technologies ASM 10 User manual
Advanced Native Technologies
Advanced Native Technologies BBM 3 User manual
Advanced Native Technologies
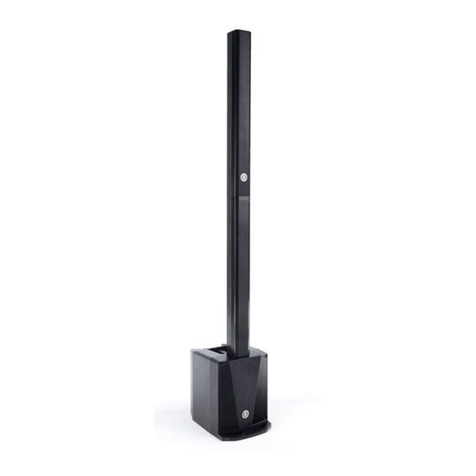
Advanced Native Technologies B-TWIG 8 Mobile User manual

