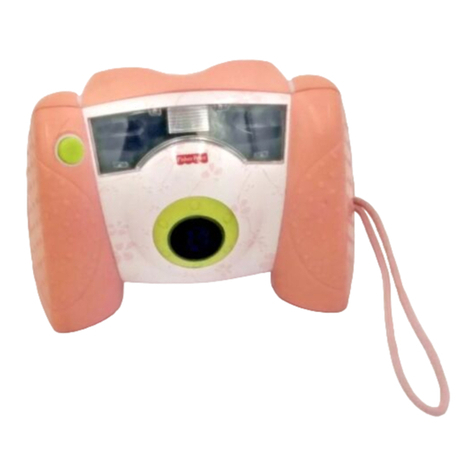
Advanced Plus CD310T1GF-PMS4-1 User manual

Digital Camera UserManual
CD310T1GF-PMS4-1
Pleasereadthismanual carefully
Beforeusing yourDigital Camera

1
Introduction...........................................................................................................................................................2
KeyFeatures.........................................................................................................................................................2
Whatyourcameraincludes ................................................................................................................................2
ComputerSystem RequirementsforWindows2000/XP.................................................................................3
ComputerSystem RequirementsforWindowsVista ......................................................................................3
ComputerSystemRequirementsforMacintosh...................................................................................................3
AQuickLookatYourCamera.............................................................................................................................4
PreparingYourCameraforUse..........................................................................................................................5
BatteryInstallation...............................................................................................................................................5
InstallingSDMemoryCard .................................................................................................................................6
StartingYourCamera...........................................................................................................................................7
CameraMode........................................................................................................................................................9
Taking photos .......................................................................................................................................................9
PlaybackMode....................................................................................................................................................17
Installing PhoTagsExpressSoftware..............................................................................................................21
Everythingyouneedtoget themost fromyourphotos......................................................................................24
Transferringphotosto yourPC........................................................................................................................25
PhoTagsExpress softwareownermanual .....................................................................................................29
MaintenanceofYourDigital Camera ...............................................................................................................30
AppendixA:Specifications...............................................................................................................................30
AppendixB:Troubleshooting ..........................................................................................................................31

2
Introduction
Thankyouforpurchasingthis5.1MegapixelDigitalCamera,yourcameranot onlycantakedigitalphotos,
butalsocan beshootsqualityvideo clips,an SDcompatiblememorycardof up to8GBneedstobeinserted
fornormal useandtoexpandthememoryof yourcamera.
Everything you needtotakedigital qualityphotosisincluded withyourcamera.It enrichesyourlife.
Key Features
ØDigital ImageResolution-5M(2592x1944pixels),3M(2048x1536pixels), 2M(1600x1200pixels),VGA
(640x480pixels)
ØSDRAM16MB, support SD/MMCmemorycard(notincluded)upto8GB.
Ø1.5inchTFT ColorLCD
ØAntishakefunction
ØPhoTagsExpress softwareformanagingandenhancingyourphotos,addcaptions,sendE-mail, printing
andmuchmore.
Whatyourcamera includes
ŸDigital Camera
ŸPhoTagsExpress softwareInstallation CD
ŸUSB cable
ŸUser smanual

3
Computer System RequirementsforWindows2000/XP
TobeabletodownloadphotostoyourPC,you willneedthefollowingminimumconfiguration:
ŸPentiumprocess orabovewithwindows2000, XP
Ÿ64 MBRAM,morethan 250MBfree disk space
ŸAvailableUSBinterface
ŸCD-ROMDrive
ŸRecommended screenresolution 24bitorhigher
Ÿ256colororhigherdisplayadaptor
Ÿ
Computer System RequirementsforWindowsVista
TobeabletodownloadphotostoyourPCyourwillneedthefollowingminimumconfiguration:
ŸWindowsVista
Ÿ800MHzprocessorand512MBofsystemmemory
Ÿ20GBharddriverwithatleast15GBof availablespace
ŸSupport forSuperVGAgraphics
ŸAvailableUSBInterface
ŸCD-ROMdrive
Computer System RequirementsforMacintosh
ŸPowerMacintoshG3500 MHzorhigher
ŸMacOSXversion10.2.6orlater
Ÿ128MBormoreavailablesystemRAM(256MBrecommended),150 MBfree disk space
Ÿ800x600orhigher-resolution monitordisplayingmillionsofcolors
Note: Thishardwareisplugandplaycompatiblewhen usedon aMac, however, theincluded softwarecanbe
usedon Windowsoperatingsystemsonly.

4
AQuick LookatYourCamera

5
PreparingYourCamera forUse
BatteryInstallation
Yourcamerarequires4AAAalkalinebatteries(included).Itisrecommendedtousealkalinebatteries.Please
refertothefollowing diagramforinstallation:
1. Slideandopen thebatterycompartmentandInsertbatteriesaccordingtothecorrect polarityasshownin
thebatterycompartment.
2. Putbatteriesintothebatterycompartment following thecorrectpolarityinsidethebatterycompartment.
3. Closethebatterycompartment.
Whenthe “NoPower”isdisplayingontheLCD,it indicatesyourcamerahasinsufficientbatteryleverandit will
beoff,you needtodownloadphotostoyourPCifthereisnoSDcardinsertedin.
Note: 1.ifyou don tintend touseyourcameraforan extended period,pleaseremovethebatteriestoavoid
batteryleakageandcorrosion.

6
2.Pleasedontremovethebatteryawayorpoweroffyourcameraatwill,otherwisethetestphotoin
yourDigital Camerawillbelost if without SDmemorycard, sopleasedownloadyourtestphototoPCassoon
aspossible.
3. Donotmixoldand newbatteries.
4. Donotmixalkaline,standard(carbon-zinc),orrechargeable(nickel-cadmiummetalhydride)
batteries.
InstallingSDMemory Card
Yourcamerahasamemorycardslotthatenablesyou toinsertany “SD”compatiblememorycard. Addinga
memorycardwill allowyou toincreasethecapacityofyourcamerabeforeyou havetotransferphotostoPC.
Installing theSDmemorycardasbelow:
1. LocatetheMemoryCardslot.
2. InserttheMemorycardintotheslot ascorrectdirection.(lookonthephotosasbelow)

7
3. Pushthecardinuntilyoufeel it “click”intoposition.Thetopofthecardshouldbeflushed withthesurface
ofthecamera.Anicon will appearon theLCD screenafteryouturnonyourcamera.
4. Oncean external memorycardisinserted inthecameraall theimagestaken will bestored on the
external memorycard.
Note:
1. Limitedinternalmemoryisprovided fortestimages. Theimagewill bedeleted whencamerapoweris
turned off. Pleasedownloadtheimagesbeforepoweroff.SDmemorycardisrequired fornormal use.
2. Anexternal memorycardisrequired fornormal use,yourcamerasupportsanycompatibleSDmemory
card.
Starting YourCamera
Power on
Press andholdthePowerbutton for3secondstoturnon yourcamera.TheLCD will lightupand yourcamera
isreadyforuse.
Power off
Press and holdthepowerbutton topoweroff yourcamera, “Goodbye”will appearontheLCD screen.
Hold yourCameracorrectly
Pleasehold yourcameracorrectlyfollowingthebelowdiagram:

8
How to rotatethelenscorrectly
Pleaserefertothefollowingmethod forcorrectlylensrotate:

9
Press andholdthePowerbutton toturnonyourcamera, theLCD screenwillbelight up,Thiswillconfirmthat
yourcameraison andreadyforuse.
Press and holdthePowerbuttonabout3secondstopoweroff yourcamera.
CameraMode
Taking photos
Poweron yourcamera, thedefaultmodeiscameramode.
HoldthecamerasteadyandcomposeyourobjectwithLCD screen.Press Shutterbutton,amomentlater,one
photoistaken.
Digital Zoomfunction
You can magnifyyoursubject using thedigital zoom.Usethe UP button and Down buttontoadjustthezoom
up to8X.Press the UP buttontozoominon yoursubject. Pushthe Down buttontozoombackout.
ChangeImageResolution
The build-inmemoryallowsyoutotakeone 3.0 Mega-PixeltestingphotowithoutSDmemorycard,inserteda
SDmemorycardtogetmoreimagesizeselections.
1. Press theMenubutton.
2. Press theUp/Downbutton toselectthe RESOLUTION”option.
3. Press theShutter/Right button.
4. Press theUp/Downbutton toselect oneofthefollowingresolutions-5M, 3M,2M,VGA.

10
5. Press theShutter/OKbutton againtoconfirmyourselection.
6. Press theMENU button toexit.
Quality
Thequalityofyourphotosalsoaffectsthenumberof shotsyou can take.AHIGHsetting meansyou can take
fewerphotos,but theywillbeof betterquality.ThedefaultvalueisSTANDARD.
1. Press theMenubutton.
2. Press Up/Downbuttontoselect “Quality”option.
3. Press theShutter/Right button.
4. Press theUp/Downbutton toselect “SuperFine”, “Fine”or “Normal”.
5. Press theShutter/OKbutton tosaveyourchoice.
6. Press theMENU button andexittothecamerastandbymode.
WhiteBalance
Thissetting allowsthecameratoadjustthecolorof yourphotosaccordingtothecolorof yourlightsource.
1. Press Menubutton toenter
2. Press Up/Downbuttontoselect “AWB”option.
3. Press theShutter/Right button.
4. Press Up/DownbuttontoselectaWhiteBalanceoption fromtheMenu thatappears:
Auto Daylight Cloudy Fluorescent Tungsten

11
5. Press theShutter/OKbutton tosaveyourchoice.
6. Press theMENU button andexittothecamerastandbymode.
7. The LCDscreen will beadjusted aspertheWhiteBalanceoptionyouselected.
Exposure
Thissettingallowsyoutocontrol thebrightness of yourimages.
1.Press theMENU button.
2.Press theUp/Downbutton toselect Exposure”option.
3.Press theShutter/Right button.
4.Press theUp/DownbuttonstoselectanExposurevalue(from2brightestto-2darkest)fromthe
Menuthatappears:
5.Press theShutter/OKbutton tosaveyourchoice.
6.Press theMENU button andexittothecamerastandbymode.
7.The Exposureicon fortheoption youselected appearson thebutton oftheLCD.
Self-Timer
You can includeyourselfin aphotobyusingthisfeaturetodelaythetimebetweenyoupressingthe
Shutterbuttonandwhenthephotoisactuallytaken.It isrecommended thatyouuseatripodorplacethe
cameraonaflatandsturdysurfacewhenusingtheself-timer.
1. Press theMENU button.

12
2. Press theUp/Downbutton toselectthe Selftimer”option.
3. Press theShutter/Right button.
4. The Self-TimermenuappearsinthecenteroftheLCD.
5. Press theUp/Downbutton toselect oneoftheselftimeroptions,10Sor2S.
6. Press theShutter/OKbutton toconfirm, saveyourchoice
7. Press theMENU button andtoexitthecamerastandbymode.
8. The Self-Timericon selected willappearon thetop of theLCD screen.
Color
Thissettingallowsyoutothecolorof yourimages.
1. Press theMenubutton.
2. Press theUp/Downbutton toselecttheColoroption.
3. Press theShutter/Right button.
4. Press theUp/Downbutton toselect acolorfrommenu.
5. Press theShutter/OKbutton toconfirm, saveandexittothecamerastandbymode.
6. Press theMENU button toexitthecamerastandbymode.
Anti-shakefunction
YourDigital Camerahasafunction thatpreventsphotoscomingoutblurryasaresultof trembling orshaking
when takingthephoto.Becauseofthisfunction,you arenotrequired touseatripodandtakegoodquality

13
photos.Tosetasbelow:
1. Press theMenubutton.
2. Press Up/DownbuttontoselectAnti-shake.
3. Press theShutter/Right button.
4. UseRight/Leftbutton toselect:
“On”-toactivateandturntheanti-shakeon. Icon willshowon thescreen.
“Off”-toexitorturntheanti-shakeoff. Icon willappearon thescreen.
5. Press Shutterbutton toconfirm.
6. Press theMENU button toexitthestandbymode.
Setup Frequency:
Selectthelightfrequencyforthelocal environment.Generally,60HZisfortheU.S.and50HZfor
EuropeandJapan.Thedefault setting is60HZ
1. Press theMenubutton.
2. Press theLeft/Rightbutton toenterSetupmenu.
3. Press theUp/Downbutton toselect “Frequency”option.
4. Press theShutter/Right button.
5. Press theUp/Downbutton toselect60HZor50HZ.

14
6. Press theShutter/OKbutton toconfirmyourchoice.
7. Press theMENU button toexitthecamerastandbymode.
PowerSave
1. Press theMENU button.
2. Press theLeft/Rightbutton toenterSetupmenu.
3. Press theUp/Downbutton toselect”PowerSave”option.
4. Press theShutter/Right button.
5. Press theUp/Downbutton toselect “1min”,”3min”or “5min”frommenu.
6. Press theShutter/OKbutton toconfirmyourchoice.
7. Press theMENU button toexit.
Date&Time
Thisallowsyoutoset thesystemtimewhichwill bedisplayedon thephotos.
1.Press theMENU button.
2.Press theLeft/Rightbutton toenterSetupmenu.
3.Press theUp/Downbuttonstoselectthe “Date&Time”option.
4.Press theShutter/Right button.
5.Press theUp/DownbuttonstosetDate&Time.

15
6.Press theLeft/Rightbutton toselect next.
7.Press theShutter/OKbutton toconfirmyoursetting.
8.Press theMENU button toexit.
Format
Thisfunctionwillformatthememorycardandwill eraseall filesin memoryincludingfilesthat
havebeenprotected.
Important: Pleaseusethisfunction withcaution.Onceformattedalltheimagesstoredinthe
memorywillbeerase. Thisprocess isirreversible.Pleasedownload allimagestothePCbefore
formatting thecard.
1.Press theMENU button
2.Press theLeft/Rightbutton toenterSetupmenu.
3. Press theUp/DowntoselecttheFormatoption fromthemenu.
4.Press theShutter/Right button.
5.Press theUp/Downbutton toselectYesorNO..
6.Press theShutter/OKbutton toconfirmyourchoice.
7.OncetheSDcardisformatted alltheimagessittingon thecardwillbeerased andthe
camerawillreverttothecamerastandbymode.
Default
Youcan restoreyourcameratothe originalfactorysettings.

16
1. Press theMENU button.
2. Press theLeft/Rightbutton toenterSetupmenu.
3. Press theUp/Downbutton toselectDefaultinthemenu.
4. Press theShutter/Right button.
5. Press theUp/Downbutton toselectYesorNO.
6. Press the Shutter/OK button toconfirm.
Videomode
Note:
You needtopressandholdtheModebuttonfewsecondsto enterVideo modewhenyourdeviceis
in Cameramode.
Shootingvideos:
InVGAmodetheresolution ofthevideoscaptured aretwicethesizeasthevideoscapturedinQVGAmode.
“Inserta SDmemorycard”will showontheLCDuntilyou haveinsertedanSDmemorycard.
The rotatablelensallowsyoutocapturevideosof yourself orrotatethelensintheotherdirection facingthe
objectyouwishtocapture.
1. ComposeyourobjectasappearsintheLCD screen.
2. Press theShutterbuttontobeginshootingyourvideo.
3. Ared spotwillappearandflashatthetopoftheLCD screenindicatingthat avideo isbeing
recorded.
4. Press theShutterbuttonagain tostop the video recording.

17
Note:
1. Pleaseinsertan SDmemorycardtotakephoto/videosfornormal using.
2. Pleasedonot rotatethelenswhen video recordingthatwillcausetherecordingfailed.
3. “MemoryFull!”willappearon theLCD ifyou attempttopress theshootingvideo button when theSD
memorycardisfull.
4. The shootingtimevariesdependson theavailablespaceon yourSDcard.
5. Videoscapturedinthismodewill besavedin AVIformat, anditcan beplayed backonyourcomputerwith
QuicktimeorWindowsMediaPlayer.
Playback Mode
Press theModebutton oncetoenterthePlaybackmode.The iconwillappearonthetop leftcornerof
theLCDscreen.A “NoFiles”messagewillappearon theLCD screenifthereisnofileinyourCommunicator.
Viewing Photos
InPlaybackmode,press theleftorrightbutton toselectandviewthephotos and videosthatyou have
captured.

18
PlayVideo fileinyourcamera
Usetheleftorright button toselectthevideo (AVI file).The icon willappearon thebottomleft cornerof
theLCDscreen.
1. Press theShutter/OKbutton toplaybackthevideo.
2. Press theShutter/OKbuttonagain tostop playingthevideo orwaitforittoautomaticallystop when
playingisover.
Morphing
1. SettheCameratoplayback modebyPressingMODEbutton.
2. Press theMenubutton.
3. Press theUp/Downbutton toselectMorphingoption frommenu.
4. Press theShutter/Right button.
5. Press theUp/Downbutton toselectPinch,Stretch, Bubble, DistortorBlot.
6. Press theShutter/OKbutton toconfirmyourchoice.
7. Press theMENU button toexit.

19
Color
Thisfeaturewillallowyoutosetthephotographscolor
1.SettheCameratoplayback modebyPressingMODEbutton.
2.Press theMenubutton.
3.Press theUp/Downbutton toselectColoroptionfrommenu.
4.Press theShutter/Right button.
5.Press theUp/Downbutton toselect acolor..
6.Press theShutter/OKbutton toconfirmyourchoice.
7.The LCDscreen will appear “Waiting…..”message.Then, thePhotoscolorwill changebyyourchoice.
8.Press theMENU button toexit.
Rotate
Thisfunction willallowyoutorotatephotos.
1.SettheCameratoplayback modebyPressingMODEbutton.
2.Press theMenubutton.
3.Press theUp/Downbutton toselect Rotateoption frommenu.
4.Press theShutter/Right button.
5.Press theUp/Downbutton toselectRotate, SaveorBack.
6.Ifyouselect “Rotate”option, youneedpress theShutter/OKbutton oncetorotatephoto.
7.Press theShutter/OKbutton againtoconfirmyourchoice.
8.Ifyouselect “Save”option, Press theShutter/OKbutton tosaveyourchoice.
9.If you select “Back”option,Press theShutter/OKbuttontoconfirm.
SlideShow
1. Setthecameratoplaybackmodebypressing MODEbutton.
Table of contents
