Advante Alkaline Plus H2O AP-S User manual


PRODUCT DESCRIPTION
H2O AP-S
1. POWER Indicator Light
2. HOT Water Indicator Light
3. COLD Water Indicator Light
4. HOT Water Safety Button
5. HOT Water Tap
6. COLD Water Tap
7. Drip Tray
8. Bottom Front Cover (AP-S only)
17. Water Drainage Outlet
18. Compressor
19. Power Cord
20. EARTH
21. Adjustable Feet (AP-S only)
22. Screws (Top Cover)
9. Top Cover
10 .COLD Water Thermostat
11. HOT Water Heater Switch
12. Fuse
13. COLD Water Tank
14. HOT Water Tank
15. Condenser Coil
16. Water Inlet

INSTALLATION
1. Select an indoor premise especially where there is free of direct sun rays, dampness and / or
rain to install this H2O AlkalinePlus System.
2. Install the System on a hard, firm surface or flat floor. Unbalance installation may cause noise
and trembling.
3. Install the System where there is good ventilation condition. Poor ventilation condition may
cause a reduction of cooling effect. For this purpose, please leave at least 10cm of space
between the System and the wall.
4. Connect the ¼” hose from the Water Supply Valve to the Water Inlet Q.
5. Detach the Top Cover Jby removing the Screws Won the rear.
6. Lift the COLD Water Tank Cover and place it in a clean bucket.
7. Turn on the water supply and flush the filter cartridges until water runs clear.
(about 3 - 5 minutes)
8. Shut water supply and place COLD Water Tank Cover, and Top Cover back in position. Tighten
screws Wof Top Cover.
9. Turn on water supply. Allow 10-15 minutes for the water to fill the HOT and COLD Water
Tanks. Make sure water can be dispensed from the HOT Fand COLD Gwater tap before
proceeding to the next step.
10. Insert plug into a 13Amp socket, turn switch ON. The compressor will start working to chill
the COLD Water Tank.
11. Turn on HOT Water Heater Switch Lto have hot water supply.
NOTE:
Cold Water
Tank Cover
P
lease allow at least a 5 minute interval turning on the Main Power Switch once it is off.
The COLD Water Thermostat Kis already set for optimal performance in the factory.
Please do not adjust the setting.
WARNING:
Do Not Plug the System into the socket until water flows through both taps.
Water supply
valve
close
open
¼”hose to
System
H2O AP-T

PROPER CARE AND CLEANING
WARNING:
Always remove the plug from the electric socket before performing any
maintenance or cleaning.
General
1. For best results, it is recommended to change the filters every 3000 litres or 12 months,
whichever comes first.
2. It is also recommended to drain off the water within the dispenser every month by releasing
water through the Water Drainage Outlet R.
Beware: Water flowing out can be very hot.
3. The spilled water in the Drip Tray Hmust be removed and cleaned regularly.
Cleaning HOT and COLD Water Tank
1. Turn off power supply and remove plug from socket.
2. Close water supply and turn off HOT Water Heater Switch
L.
3. Drain all the water in the COLD Water Tank through the
COLD Water Tap G.
4. Remove the cap of the Water Drainage Outlet R.
(BE CAREFUL not to get burned by the hot
water when opening the cap.)
5. Remove the 2 screws Won the rear side on the
Top Cover Jwith a Phillips Screwdriver.
6. Lift up the Top Cover Jfrom the rear and
detach from the dispenser. Then separate the COLD Water
Tank Cover in the unit. (When separating the tank cover,
be careful not to damage the rubber seal. The cold water
tank is made of stainless steel be careful not to hurt your
hands)
7. Remove the Separating Disc by pulling up vertically.
8. Clean the inside of the COLD Water Tank by
pouring water into it. After water drains out,
close the Water Drainage Outlet R.
9. Clean and dry the Stainless Steel COLD Water
Tank with a clean cloth or kitchen towel. DO NOT
USE any chemical or detergent.
10. Reposition the Separating Disc, COLD Water Tank
Cover and Top Cover Jin order.
11. Secure Top Cover Assembly with the screws Wat
the rear side of the dispenser.
12. Turn on the water supply valve and look out for
leakage when the HOT and COLD Water Tanks are being
filled.
13. Make sure water can be dispensed from the HOT Fand
COLD Gwater tap before proceeding to the next step.
14. Insert plug into a 13Amp socket, turn switch ON. The
compressor will start working to chill the COLD Water
Tank.
15. Turn on HOT Water Heater Switch Lto have hot water
supply.
(If you notice something unusual, contact Service Centre for
assistance.)
COLD Water
Tank Cover
Stainless
Steel
COLD
Water
Tank
Separating
Disc
Separating
Disc
Support
(DO NOT REMOVE)

WATER FILTRATION PROCESS
Stainless Steel
COLD Water Tank
COLD Water Tap
HOT Water Tap
(1) Sediment
Filter
(2) Carbon Block
Filter
(3) UF Membrane
Filter
(4) Antioxidant
Alkaline Filter
Water Supply
Valve
Water Supply
Float Valve
close
open
HOT Water Tank
Cleaning the Condenser Coil
We recommend that you move the dispenser away from the wall and vacuum or brush the
Condenser Coil P at the rear of the unit at least 4 times a year. Some operating environments
require more frequent cleaning.
REPLACING FILTER CARTRIDGES
WARNING:
Always remove the plug from the electric socket before performing any
maintenance or cleaning.
1. Before replacing the filters, remove plug
from socket and shut water supply
valve.
2. Remove drip tray.
OFF
3. Push down the Bottom Front Cover
I
and pull it to the front and separate it.
3.1 Loosen left and right screws
W
of top
cover at the back of the unit, slide
towards yourself and lift to separate
the cover.
Model: H2O AP-S Model: H2O AP-T

4. After replacing filters, reassemble parts in
reverse order.
5. Turn on the water supply valve and plug
into the socket.
• Push to retract the Collet and remove the Quick
Connect Coupling.
• Insert the hose into the Quick Connect Coupling and
retract lightly to extend the Collet.
Water supply
valve
close
open
¼”hose to
System
in out
Collet
Quick Connect
Coupling
When using the unit for the first time or replacing filters, do
water flushing process to each filter cartridge for about
5 minutes, until white, black or bubbly water doesn’t come out
from the filter.
(Water flushing : a process of cleaning inside of the filter)
It is strongly recommended to replace the filter cartridges at least once a
year.
If the filters are not replaced regularly, it could degrade the water
quality.
The filter replacement cycle may vary depending on feed water quality
and consumption.
When replacing filters, only use our genuine ones.
(We cannot guarantee filter efficacy and water quality with third party
cartridges)
¤ We do not take responsibilty for any damage caused by replacing filters
by unauthorised personnel.
When replacing filters, ensure the Water Flushing Process is performed.
Filter change is based on capacity or time, whichever comes first. Even if your water consumption
is not as much, replace filter when the time is up.
The filter replacement cycle is based on normal feed water condition and 3000 litres of water
filtering efficiency. (The cycle doesn’t mean quality guarantee period.)
The period is based on 8 litres use in a day. (Based on 4-6 people).

FREQUENTLY ASKED QUESTIONS
The following are solutions to some common problems. Please check before calling Service
Centre for assistance.
¤ If a problem comes up, contact Service Centre and order Filter Replacements or arrange collection for
malfunction rectification.
¤ Please do not attempt to repair the unit yourself. We do not take responsibility for damages caused by
unauthorised personnel. Warranty will be void.

SAFETY INSTRUCTIONS
• This dispenser is designed for INDOOR USE ONLY and should not be used outdoors.
• Always turn off and unplug before proceeding to any maintenance or cleaning.
• Repair or replace immediately, all electrical cords that have become frayed or otherwise
damaged. Do not use a cord that shows crack or abrasion damage along its length and on the
plug.
• To protect against electric shock, do not immerse cord, plug, or other parts of the unit in water.
• This dispenser should not be recessed or built into a enclosed cabinet. It is designed for
freestanding installation only.
• Do not use any chemicals, abrasives, bleach, detergents, solvents or metal scouring pads on any
part of the unit.
• When moving, the unit must be in vertical position. Never lean the water dispenser at the
angle of more than 45º as this may cause possible damage to the unit.
• Do not power on the dispenser immediately after switching off. Interval of 5 minutes is
recommended.
• It Is recommended to turn off the electric mains if the unit is unattended for long hours.
• Do not use water that is microbiologically unsafe or of unknown quality without adequate
disinfection before or after the system.
TECHNICAL SPECIFICATION
Model:
Rated Voltage:
Rated Frequency:
Total Power Consumption:
Heating Power:
Cooling Power:
HOT Water Tank:
COLD Water Tank:
Water Temperature (HOT):
Water Temperature (COLD):
Refrigerant:
Test Pressure:
Climate Class:
Max. Inlet Water Pressure:
Dimension:
H2O AP-T
220 - 240V
50Hz
600W
480W
0.6A
1.2 litres
3.6 litres
80 - 90°C
4 - 10°C
R134a / 30g
260PSI
T
0.68MPa
H51x W26 x D48cm
H2O AP-S
220 - 240V
50Hz
600W
480W
0.6A
2.1 litres
3.6 litres
80 - 90°C
4 - 10°C
R134a / 36g
260PSI
T
0.68MPa
H111 x W26 x D35.5cm
This manual suits for next models
1
Table of contents
Popular Water Dispenser manuals by other brands
Elkay
Elkay EZ Series Installation, care & use manual

Crystal Mountain
Crystal Mountain Storm Service manual
Greenway Home Products
Greenway Home Products Polar PWD5975BLS specification
Elkay
Elkay VRC8 1A Series Installation, care & use manual
Breville
Breville URN6 Instructions for use
Elba
Elba ETP-F5082 owner's manual
Precision
Precision PWS 5-3 owner's guide
Bristan
Bristan Colonial Tap Series Installation instructions & user guide
Haws
Haws H1107.8 Installation, operation & maintenance instructions
YVE-BIO
YVE-BIO Alstar 700 All-in-One Instructions for Construction
Oase
Oase Filtoclear 3000 Directions for use
Aquaport
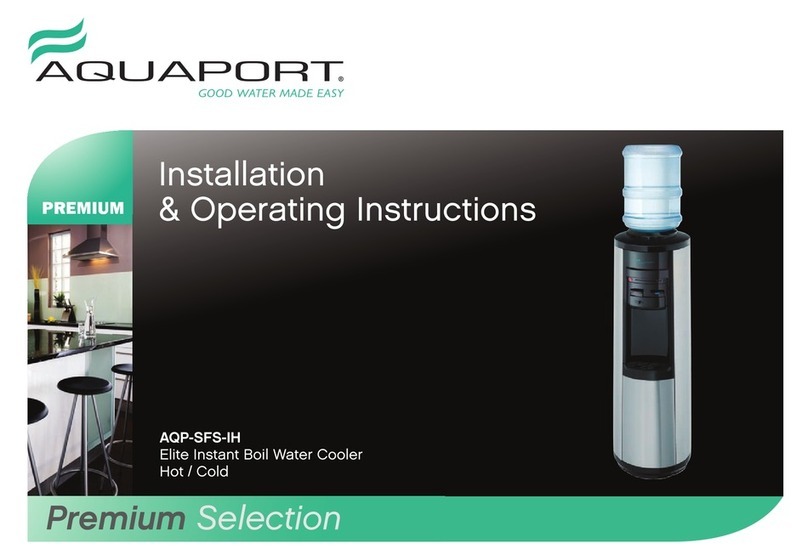
Aquaport AQP-SFS-IH Installation & operating instructions


