Advocate Genteel PetTest User manual

4.0 PREPARE GENTEEL FOR LANCING
PREPARATION: Clean the surface of Genteel and other testing supplies.Verify Contact Tip is securely affixed
to Nozzle.
4.1 Prime Genteel: Press the Push Cap to prime the PetTest/Genteel, device clicks if done correctly.
4.2 Remove Nozzle: Twist counterclockwise and pull gently to remove.
4.3 Insert a Lancet: While the PetTest/Genteel is primed, insert either a Blue Butterfly or PetTest Maroon lancet into
Shuttle and the #1 Blue Contact Tip to start the test. Carefully twist off the protective cover from lancet and put aside.
(The PetTest Maroon Twist Top lancets are 6 steps more aggressive than the Blue Butterfly Touch lancets.)
Note: You want to use the thickest Contact Tip that gets the right amount of blood with little to no discomfort.
Contact Tips going from thickest to thinnest: #1 Blue #2 Yellow, #3 Green, #4 Clear, #5 Orange, #6 Violet.
NOTE: Different test sites may require a different Contact Tip.
4.4 Replace Nozzle: Line up the Nozzle Slots with the Front End Tabs. Gently push together and rotate clockwise
into place.
5.0 PERFORM BLOOD DRAW
Wash hands with soap and water. Clean test site. Have your meter and test strip ready to wick up your blood sample.
5.1 Place Genteel on skin: Pick your test site from the diagram in 3.0 at the top right. Make sure you have a seal
between Contact Tip and skin by gently and flatly holding the device perpendicular to the skin. Do not press Genteel
forcibly into the skin, as this can cause pain during testing.
NOTE: Hold Genteel like a pen, with index finger on the Activation Button.
5.2 Press Activation Button: Using gentle pressure, hold down the Activation Button for at least 4 seconds, or until
you see a blood drop form.
NOTE: With your finger over the Activation Button, the plunger will rise slowly to the halfway point, but not fully extend
(you should not see the red Vacuum Indicator).
5.3 Release Activation Button: BEFORE pulling Genteel away from your skin, lift your finger off the Activation Button.
Pull Genteel away from the skin. If done out of order, blood drop may smear.
NOTE: Hold Activation Button longer to get a larger blood drop. If no blood is produced, choose the next thickest
Contact Tip in order depending on the lancet and body site chosen.
5.4 Test Blood Sugar: Apply the meter’s test strip to the blood drop and follow the instructions for the test strips and
meter.
5.5 Remove Lancet: Prime Genteel again (see 4.1) and remove Nozzle (see 4.2). Carefully insert lancet needle into
its protective cap. Once needle is safely in its protective cap, remove the lancet.
5.6 Lancet Disposal: Safely dispose of the used lancet according to local laws for Sharps disposal.
6.0 CLEANING GENTEEL
6.1 Surface cleaning: Before every use, wipe the outside of the device with a clean damp cloth.
IMPORTANT: If the Push Shaft rises past its halfway point—while holding the Activation Button, this may be a vacuum
leak caused by dirt or other contaminants inside Genteel. If you experience this vacuum loss symptom—perform (6.2).
If symptom persists—perform (6.3). If cleaning doesn't resolve vacuum leak, call customer support +1 (866) 373-2824.
6.2 Quick Clean (inside):
6.2.1 Remove Piston Assembly: De-prime Genteel by pressing Activation Button. Twist Piston Assembly base
counter-clockwise until you can pull it out of the Vacuum Tube.
6.2.2 O-ring Wipe: Wipe the O-ring on the Piston Assembly with your clean finger to remove surface dirt or other
contaminants.
6.3 Deep Clean (inside):
6.3.1. Remove Piston Assembly: Repeat step 6.2.1
6.3.2. Flush Vacuum Tube: Run fast moving, warm water through the Vacuum Tube and out the Nozzle while
repeatedly pressing the Activation Button.
6.3.3. Flush Piston Assembly: While running the Piston Assembly under fast-moving, warm water repeat 6.2.2.
6.3.4. Dry: Let Genteel air dry thoroughly. Do not reassemble Genteel with moisture in the Vacuum Tube.
6.3.5. Reassemble: Put Piston Assembly back inside the Vacuum Tube and twist base clockwise until it locks into
place securely. Verify device functions as intended.
6.3.3
6.2.2
6.3.2
6.2.1
4.4
4.3
4.2
4.1
Rev. 04/2021
5.6
5.5
5.4
5.2
5.3
5.1
800-01001C
1
2
3
6
8
9
10
12
11
13
14
7
4
E
B
F
A
D
C
BASE OF TAIL
(shave area to
create a
sufficient seal)
UPPER LIP
INNER EAR
NEAR NAIL PAW PADS
ELBOW
CALLUSES
(for bigger dogs)
1.0 PETTEST / GENTEEL PARTS
(1) Contact Tip
(2) Nozzle
(3) Nozzle Slots
(4) Lancet
(5) Shuttle
(6) Front End Tabs
(7) Front End
(8) Activation Button
(9) Hole In Activation Button
(10) Vacuum Tube
(11) Push Shaft
(12) Vacuum Indicator
(13) Push Cap
(14) Piston Assembly
2.0 GATHER SUPPLIES NEEDED
With clean hands, gather supplies
needed for testing:
(A) PetTest/Genteel Lancing Device
(B) Contact Tip Card
(contains 6 Contact Tips)
(C) Advocate Twist Top or
Butterfly Touch Lancets
(D) Alcohol (not included)
to clean contact tip
(E) Clean, damp cloth (not included)
for cleaning Genteel's surface)
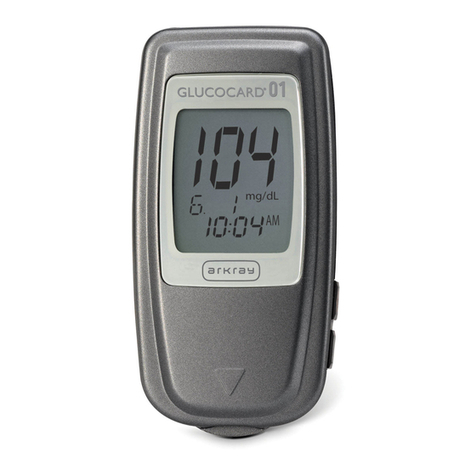
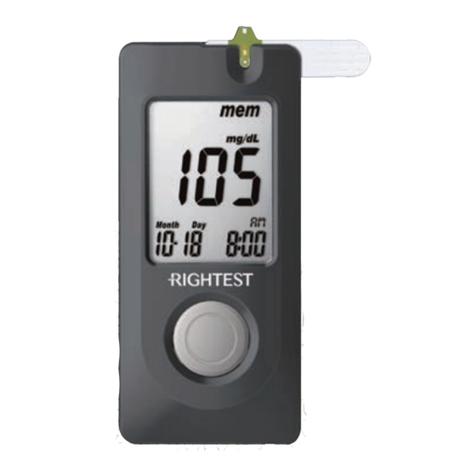
(F) Meter and test strips
3.0 TESTING SITES FOR DRAWING BLOOD
Cats have one testing site while dogs have up to six to
choose from.
Having a pet with diabetes can be stressful. It takes a dedicated owner to manage their pet’s blood sugar, requiring
time and money. Here at PetTest®, we are pet owners ourselves and stand behind our products with excellent service
and competitive pricing. Search for the PetTest® page in your Facebook search bar.You will nd blogs written by
owners with diabetic pets, photos of our customers’ pets, plus other valuable information. You can also nd promo
codes for great pricing on all our PetTest products.
The Pain-Free Blood Glucose Monitoring System
User Instructions for the Genteel® Lancing Device
Distributed By
Diabetic Supply of Suncoast, Inc.
PO Box 2102, Vega Alta, PR 00692
1-866-373-2824 /www.ShopPetTest.com
(24 hours a day / 7 days a week)
Follow us on:
Facebook.com/PetTest
Health Solutions for Pets STOP! If you need troubleshooting assistance or more help
with your Genteel blood draw experience,
PLEASE DO NOT WAIT TO CONTACT US.
WE ARE HERE TO HELP!
For more information visit www.ShopPetTest.com/Genteel
Email us at [email protected]
Call our 24/7 support line at +1 (866) 373-2824
For products and service visit www.shoppettest.com | Email us at [email protected] | 1 (888) 469-3579
5

4.0 PREPARAR EL GENTEEL PARA PUNZAR
PREPARACIÓN: Limpie la superficie de Genteel y otros suministros de prueba. Verifique que la boquilla de contacto
esté firmemente fijada a la boquilla.
4.1 Prepare el Genteel: Presione el botón de presión para preparar Genteel, el dispositivo hace clic si lo hizo correctamente.
4.2 Retirar la boquilla: gire en sentido antihorario y tire suavemente para retirarla.
4.3 Inserte una lanceta: Mientras Genteel está preparado, inserte una lanceta Mariposa Azul o PetTest Marrón en la
Lanzadera y la Punta de Contacto Azul nº 1 para iniciar la prueba. Gire con cuidado la cubierta protectora de la lanceta
y déjela a un lado. (Las lancetas Twist Top PetTest Marrón son 6 pasos más agresivas que las lancetas Mariposa Azul).
NOTA: Desea utilizar la punta de contacto más gruesa que obtenga la cantidad correcta de sangre con poca o ninguna
molestia. Puntas de contacto que van del más grueso al más delgado: # 1 Azul # 2 Amarillo # 3 Verde # 4 Transparente,
# 5 Naranja, # 6 Violeta.
NOTA: Los diferentes sitios de prueba pueden requerir una punta de contacto diferente.
4.4 Reemplazar la boquilla: alinear las ranuras de la boquilla con las pestañas frontales. Empujar suavemente ambas
y girar en sentido horario para colocarlos en su lugar.
5.0 REALIZAR DIBUJO DE SANGRE
Lávese las manos con agua y jabón. Limpie el sitio de prueba. Ten tu medidor y tira de prueba lista para recoger la muestra
de sangre.
5.1 Colocar Genteel en la piel: Elija su sitio de prueba del diagrama 3.0 de la parte superior derecha. Asegúrese de tener
un sello entre la boquilla de contacto y la piel, sujetando de manera suave y plana el dispositivo perpendicular a la piel. No
presione Genteel a la fuerza en la piel, ya que esto puede causar dolor durante la prueba.
NOTA: Sostenga el Genteel como un bolígrafo, con el dedo índice en el Botón de activación.
5.2 Presione el botón de activación: Suavemente presione y mantenga presionado el Botón de Activación durante al menos
4 segundos, o hasta que vea una gota de sangre.
NOTA: con el dedo sobre el botón de activación, el émbolo se elevará lentamente hasta el punto medio, pero no se extiende
completamente (no debería ver el Indicador de vacío rojo).
5.3 Liberación del Botón de Acttivación: ANTES de retirar el Genteel de la piel, levante el dedo del botón de activación.
Aleje el Genteel de la piel. Cuando lo haya retirado, la gota de sangre puedría manchar.
NOTA: Mantenga presionado el botón de activación por más tiempo para obtener una gota de sangre más grande. Si no hay
presencia de sangre, elija la siguiente boquilla de contacto más gruesa en orden dependiendo de la lanceta y sitio del cuerpo
elegido para tomar la muestra.
5.4 Prueba de azúcar en la sangre: poner en contacto la tira reactiva del medidor a la gota de sangre y siga las instrucciones
para el uso de las tiras reactivas y el medidor.
5.5 Retire la Lanceta: Prepare el Genteel nuevamente (consulte 4.1) y retire la Boquilla (consulte 4.2). Inserte cuidadosamente
la aguja de lanceta en su tapa protectora. Una vez que la aguja esté segura en su tapa protectora, retire la lanceta.
5.6 Eliminación de lancetas: deseche de manera segura la lanceta usada de acuerdo con las leyes locales para la eliminación
de objetos punzantes.
6.0 LIMPIEZA DEL GENTEEL
6.1 Limpieza de la superficie: antes de cada uso, limpie el exterior del dispositivo con un paño limpio y húmedo.
IMPORTANTE: Si el eje de pistón se eleva más allá de su punto medio, mientras sujeta el botón de activación, esto puede ser
una fuga de vacío causada por suciedad u otro contaminante dentro del Genteel. Si experimenta este síntoma de pérdida de
vacío: realizar (6.2). Si el síntoma persiste, realice (6.3). Si la limpieza no resuelve la fuga de vacío, llame al servicio de atención
al cliente +1 (866) 373-2824.
6.2 Limpieza rápida (interior):
6.2.1 Retirar el conjunto del pistón: Desactive el Genteel presionando el Botón de Activación. Gire la base del conjunto
de pistón en sentido antihorario hasta que pueda sacarlo del tubo de vacío.
6.2.2 Limpieza de la junta tórica: limpie la junta tórica del conjunto del pistón con su dedo limpio para eliminar la suciedad
de la superficie u otros contaminantes.
6.3 Limpieza profunda (interior):
6.3.1 Retire el conjunto del pistón: repita el paso 6.2.1
6.3.2 Nivelar el Tubo de Vacío: haga correr agua tibia a poca presión a través del tubo de vacio y que salga por la boquilla
mientras presiona repetidamente el botón de activación.
6.3.3 Nivelar el Conjunto del Pistón: mientras se ejecuta el conjunto de pistón debajo movimiento rápido de agua tibia
repetir 6.2.2.
6.3.4 Secar: deje que Genteel se seque bien al aire. No vuelva a armar Genteel con humedad en el tubo de vacío.
6.3.5 Vuelva a armar: coloque el conjunto del pistón nuevamente dentro del tubo de vacío y gire la base en el sentido de las
agujas del reloj hasta que encaje en su lugar de forma segura. Verificar funciones del dispositivo como está destinado a
funcionar.
6.3.3
6.2.2
6.3.2
6.2.1
4.4
4.3
4.2
4.1
5.6
5.5
5.4
5.2
5.3
5.1
Rev. 04/2021800-01001C
E
B
F
A
D
C
Tener una mascota con diabetes puede ser estresante. Se necesita de un dueño dedicado para controlar el nivel
de azúcar en la sangre de su mascota, lo que requiere tiempo y dinero. Aquí en PetTest®, somos dueños de mascotas
y respaldamos nuestros productos con un excelente servicio y precios competitivos. Busque la página PetTest®
en su barra de búsqueda de Facebook. Encontrará blogs escritos por dueños de mascotas diabéticas, fotos de
las mascotas de nuestros clientes, además de otra información valiosa. También puede encontrar códigos de
promoción para obtener excelentes precios en todos nuestros productos PetTest.
Para ordenar productos y servicios, visite www.shoppettest.com
1.0 PARTES DE PETTEST / GENTEEL
(1) Anillo o boquilla de contacto
(2) Boquilla
(3) Ranuras de Boquilla
(4) Lanceta
(5) Lanzadera
(6) Pestañas Frontales
(7) Tope Frontal
(8) Botón de Activación
(9) Orificio del Botón de Activación
(10) Tubo de Vacío
(11) Eje de Empuje
(12) Indicador de Vacío
(13) Tapa de Empuje
(14) Conjunto del Pistón
2.0 CONJUNTO DE ACCESORIOS NECESARIOS
Con las manos limpias, reúna los suministros
necesarios para las pruebas:
(A) Dispositivo de punción
PetTest / Genteel
(B) Anillos o Boquillas de Contacto
(contiene 6 anillos de contacto)
(C) Lancetas Twist Top
Lancetas de Torque Mariposa
(D) Toallita con alcohol (para limpiar
la boquilla de contacto) (no incluido)
(E) Paño limpio y húmedo (para limpiar
la superficie de Genteel) (no incluido)
(F) Medidor y tiras reactivas
3.0 SITIOS DE PRUEBA PARA EXTRAER LA SANGRE
Los gatos tienen un sitio de prueba, mientras que los perros
tienen hasta seis para elegir.
BASE DE COLA
(afeitar el área a
crear un sello
suficiente)
LABIO
SUPERIOR
OÍDO INTERNO
CERCA DE
LAS UÑAS
CALLOSIDAD
DEL CODO
(para perros más
grandes) ALMOHADILLAS
DE LAS PATAS
El Sistema de Monitoreo de Glucosa en Sangre,
Sin Dolor! Instrucciones para el Usuario del
Dispositivo de Punción Genteel®
®
Distribuido por:
Diabetic Supply of Suncoast, Inc.
PO Box 2102, Vega Alta, PR 00692
1-866-373-2824 / www.ShopPetTest.com
(24 horas al día / 7 días a la semana)
Llámenos al +1 (866) 373-2824
Siguenos en:
Facebook.com/PetTest
Soluciones de Salud para Mascotas ¡PARE! Si necesita ayuda para solucionar problemas o
requiere más información para mejorar tu experiencia de
extracción de sangre con Genteel,
POR FAVOR NO ESPERE EN CONTACTARSE CON
NOSOTROS. ¡ESTAMOS AQUÍ PARA AYUDAR!
Para más información visite www.shoppettest.com/learn
1
2
3
6
8
9
10
12
11
13
14
7
4
5
Table of contents
Languages:
Other Advocate Blood Glucose Meter manuals
