Advocate Redi-Code+ BMB-EA001 User manual
In-Sevice
Presentation
Redi-Code+
Glucose Meter

Thank you for considering Advocate.
We believe that you will nd our products and service to be
of the highest quality.
Our mission is to provide the highest quality home healthcare
supplies and services in a cost-effective manner. We strive
to improve the health of diabetic patients in a manner
that distinguishes us in our industry. We have customers
in Central and South America, Europe, Canada and Asia.
Pharma Supply, Inc. prides itself on our customer service
and the availability of products.
Pharma Supply, Inc., through our research and
development department, is proud to announce that we are
the sole distributors of the new product line The Advocate
Redi-Code+ speaking glucose meter. One of only a
few talking meters in our industry.
Redi-Code+
Glucose Meter 2

Benefits of Using the Advocate
Redi-Code+ Glucose Meter
- Advocate Speaks for you
Hear and see the results in English and Spanish.
- No Coding Required
Insert test strip and you are ready to go.
- Quick Results
Hear and see the results in 5 seconds.
- Tiny Sample Size
Requires only a tiny drop of blood.
- Before/After Meal Testing Modes
- 6 Preset Alarms Available to Record Data
- Data Management
400 memory results with 7, 14, 21, 28,
and 60 day averaging
- Free Downloadable Software
- Alternate Site Testing (AST)
Test from the palm, upper arm, calf, thigh
and forearm.
3
Redi-Code+
No Coding Required!
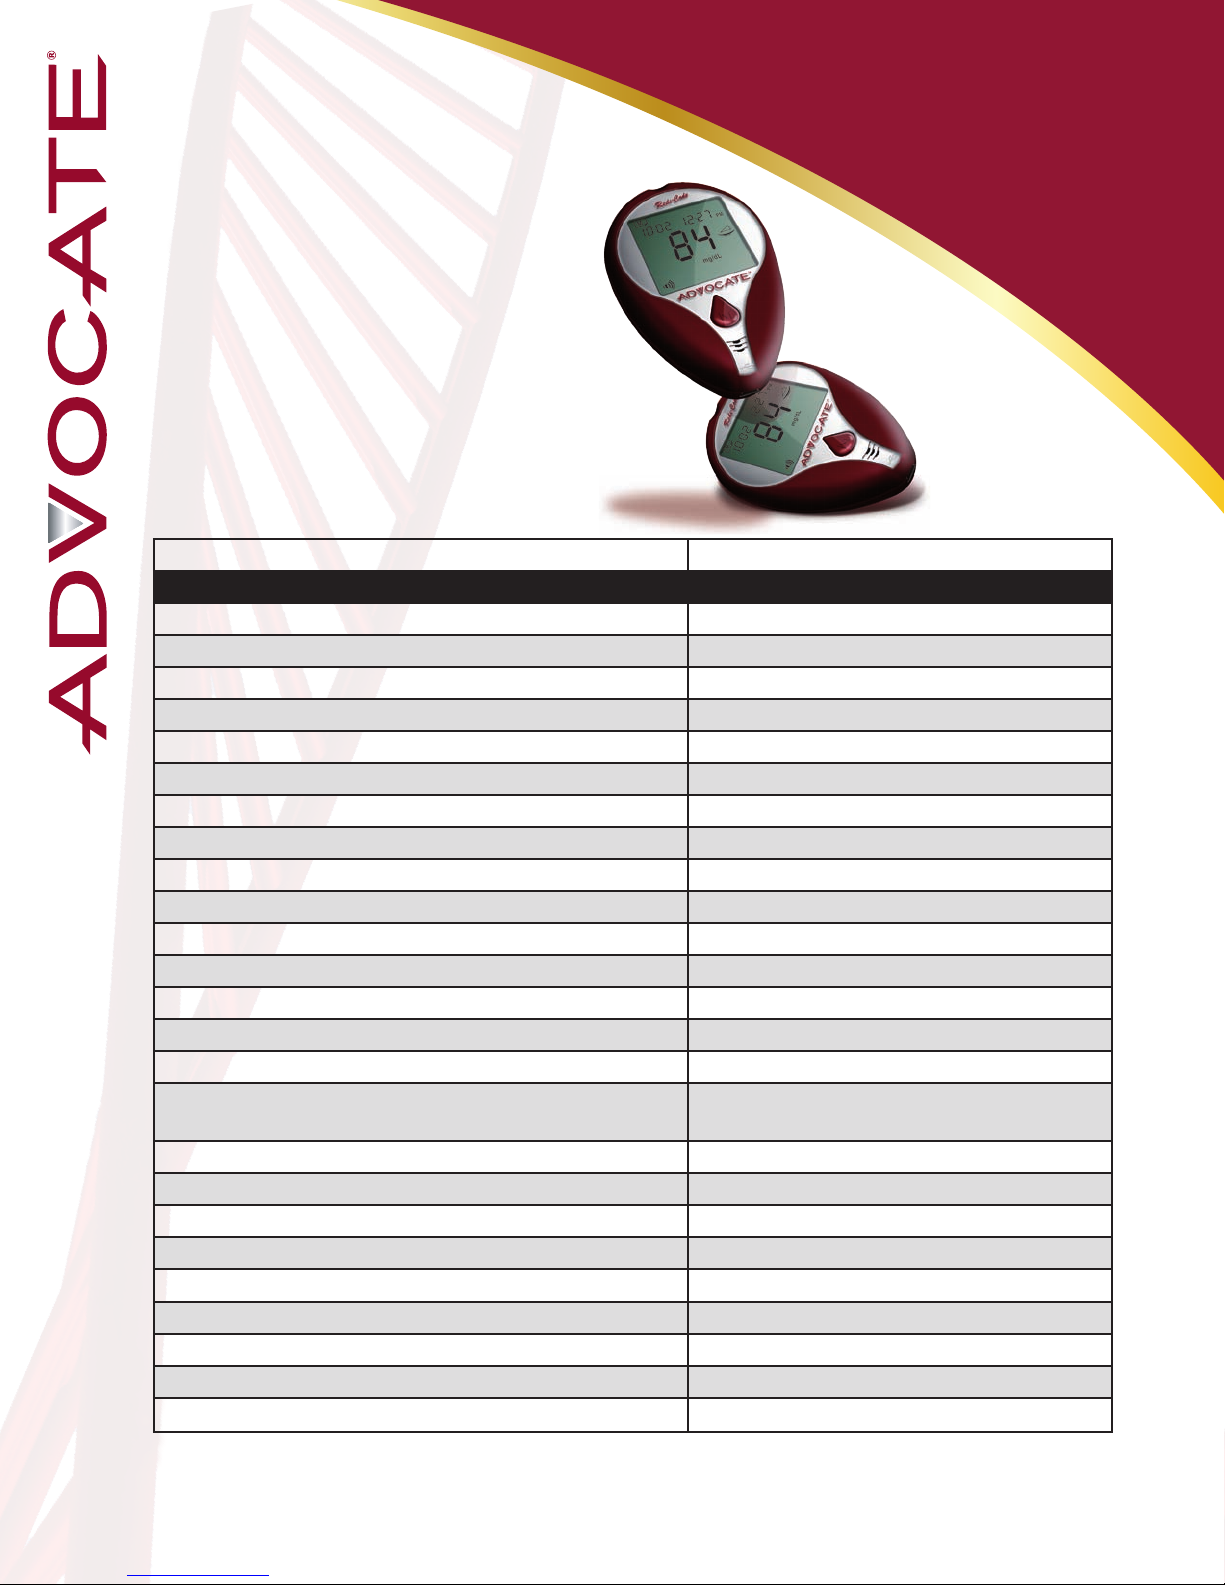
Meter Specifications
Advocate Redi-Code+ BMB-EA001/BMB-EA001S Blood Glucose Monitor
Characteristics Specications
Dimensions (mm) 64 x 95 x 29
Weight (g) 53 (without batteries)
Micro Controller Name and Specications MSP430FG439
Power Source (2) 1.5V AAA alkaline batteries
Battery Low Warning Function (Voltage) 2.75V±0.1
Battery Empty Warning Function (Voltage) 2.65V±0.1
Leakage Current on Sleeping Mode (uA) Less than 250uA
Leakage Current on Standby Mode (mA) Less than 5mA
Maximum Current on Testing Mode (mA) Less than 9mA
Battery Lifetime Over 500 tests
LCD Display 41 x 37 (mm) TN LCD
Memory Capacity Over 500 Spk/Over 1,000 for Non Spk
Auto Turn-off 3 minutes
Date and Time Express Method Month-Day / Hour: Minutes / AM/PM
Daily Alarm Function 6 Sets
Meter Storage / Transportation Condition
(Temperature/Humidity)
Humidity: 15%~85%
Temperature 50ºF~104ºF (10 ºC~40 ºC)
Meter Operating Condition (Temperature/Humidity) Humidity: 15%~85%
Temperature -4ºF~140ºF (-20 ºC~60 ºC)
Measurement Units mg/dL USA / mg/dL (mmol/L) Int’l
Measurement Range 20~600 mg/dl (1.1~33.3 mml/L)
Test Time 5 seconds
Compatible with Test Strips (Model Nº) BMB-BA006A
Test Sample Volume 1 µ L depends on BMB-BA006A
PC Interface USB
The device has been certied to meet the electrical and safety requirements of:
IEC 61010-1, EN 61010-1, IEC 61010-2-101, EN 61010-2-101, IEC 61326-1, EN 61326-1, IEC 61326-2-6, EN 61326-2-6.
4

Advocate Redi-Code+ BMB-BA006A Blood Glucose Test Strips
Analysis Method Electrochemical
Physical Characteristics
Dimensions (mm) 30.9 x 6 0.58
Connector (pins) 6
Material
Base Material PET
Conductive Layer Ag & Carbon
Electrode Carbon
Chemical Components
Enzyme Glucose Oxidase
Mediator Electron Shuttle
Others Non-reactive ingredients
Function
Test Sample Whole Blood
Sample Size 1 µL
Test Time (sec.) 5 sec. / 7 sec.
Performance
Linear Range 20-600 mg/dL (1.1~33.3 mmol/L)
Precision CV < 5%
Accuracy <75 mg/dL ± 15mg/dL ; ≥ 75mg/dL ± 20%
Environmental Condition
Operation (Temp. / Humidity) 10°C - 40°C / RH below 85%
Storage (Temp. / Humidity) 4°C - 40°C / RH below 85%
Stability
Opened vial (days) 90 days
Closed vial (months) 24 months
Warning:
- Do not use expired strip
- This strip is only used with Advocate Redi Code+ Meters
- Close the can immediately after strip has been removed
- Fluoride: Cannot put uoride into blood as the preservative
- Iodoacetic Acid: It is impossible to put Iodoacetic Acid into blood as the preservative as well.
- New Born Baby: New born babies are not recommended to do this test.
- Reductant: High density of Vitamin C or uric acid may inuence glucose value
- Hematocrit: Hematocrit above 60% may cause lower glucose results. Hematocrit lower than 20% may cause higher
glucose results.
No Coding Required!
Test Strip
Specifications
5

Redi-Code+
Orientation & Functions
Front View
Test Strip Slot
Strip is inserted
here for testing.
LCD Display
Display readings
and messages.
Speaker
Allows you to
hear your results.
Port
Download port to be
used with Advocate’s
free software.
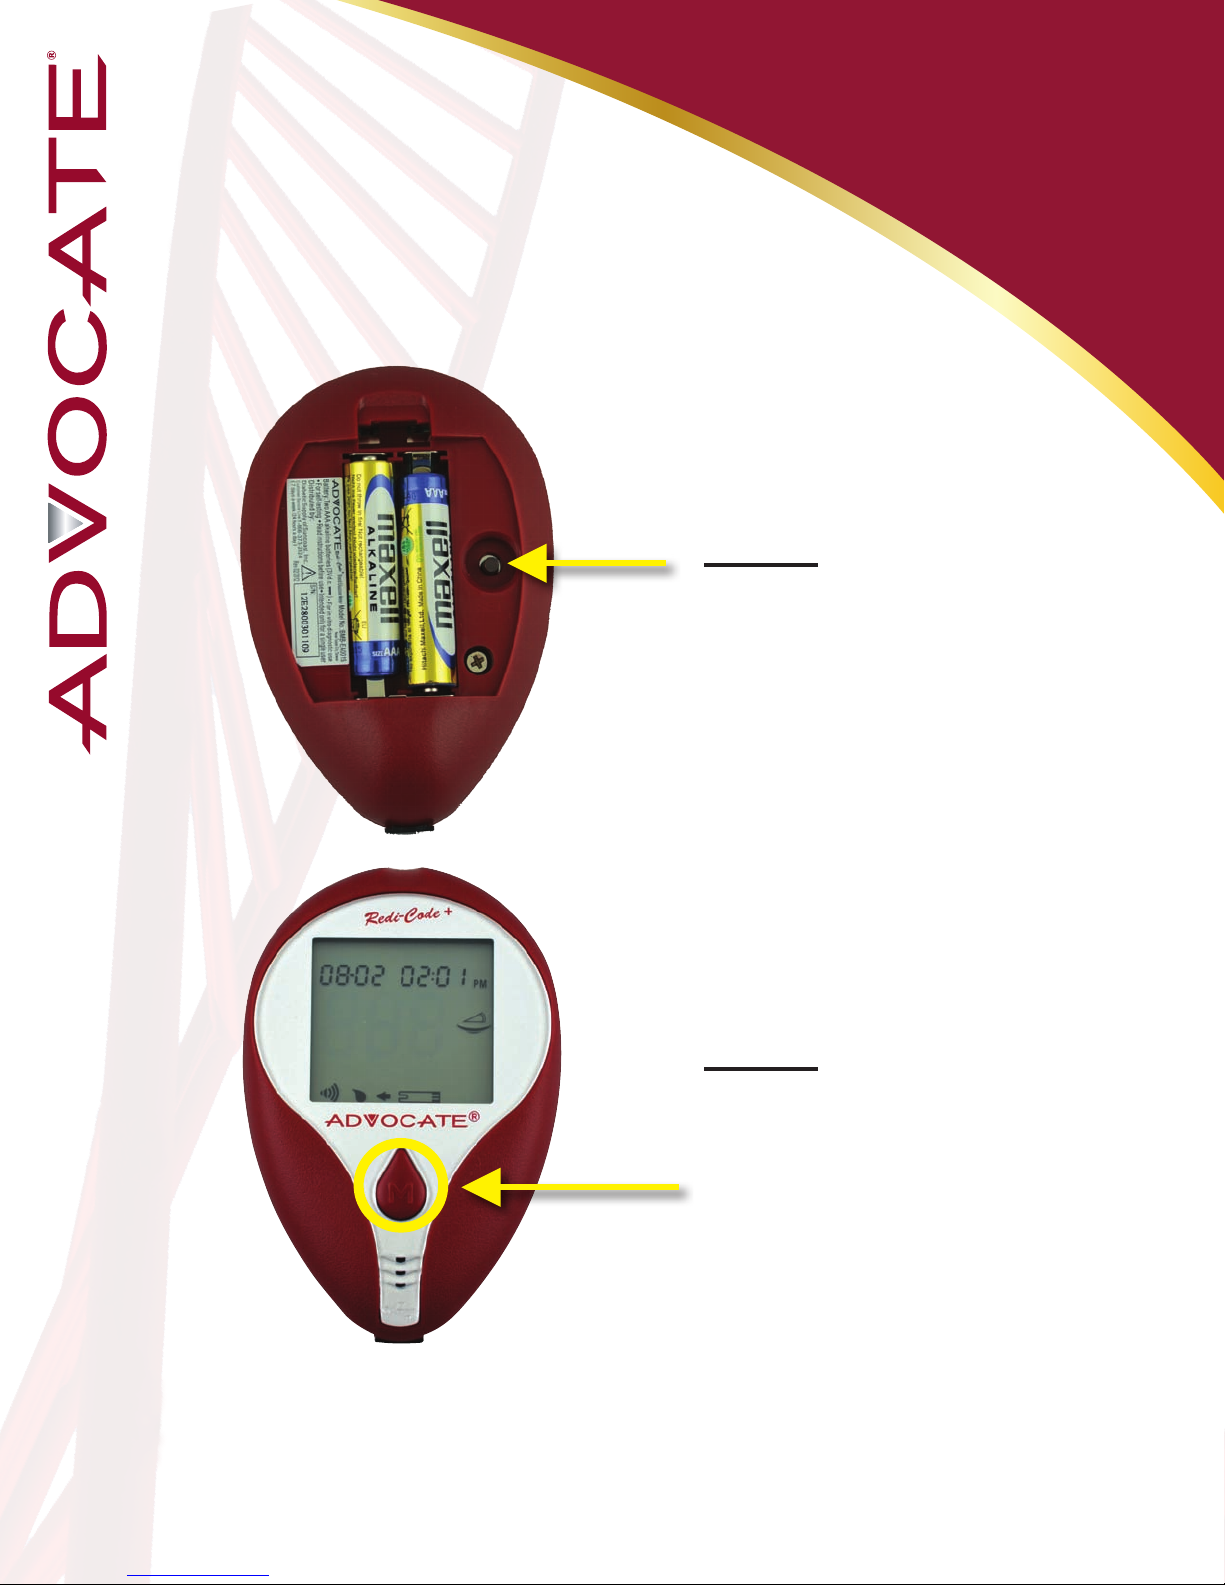
Main Button “M”
Turns meter on to
enter memory mode.
6

Orientation & Functions
Back View - Closed
Release Button
Battery Compartment
Battery Door
Back View - Open
Set Button
7
Press to enter settings mode
which allows changing data,
time, setting the alarms and
for memory deletion.
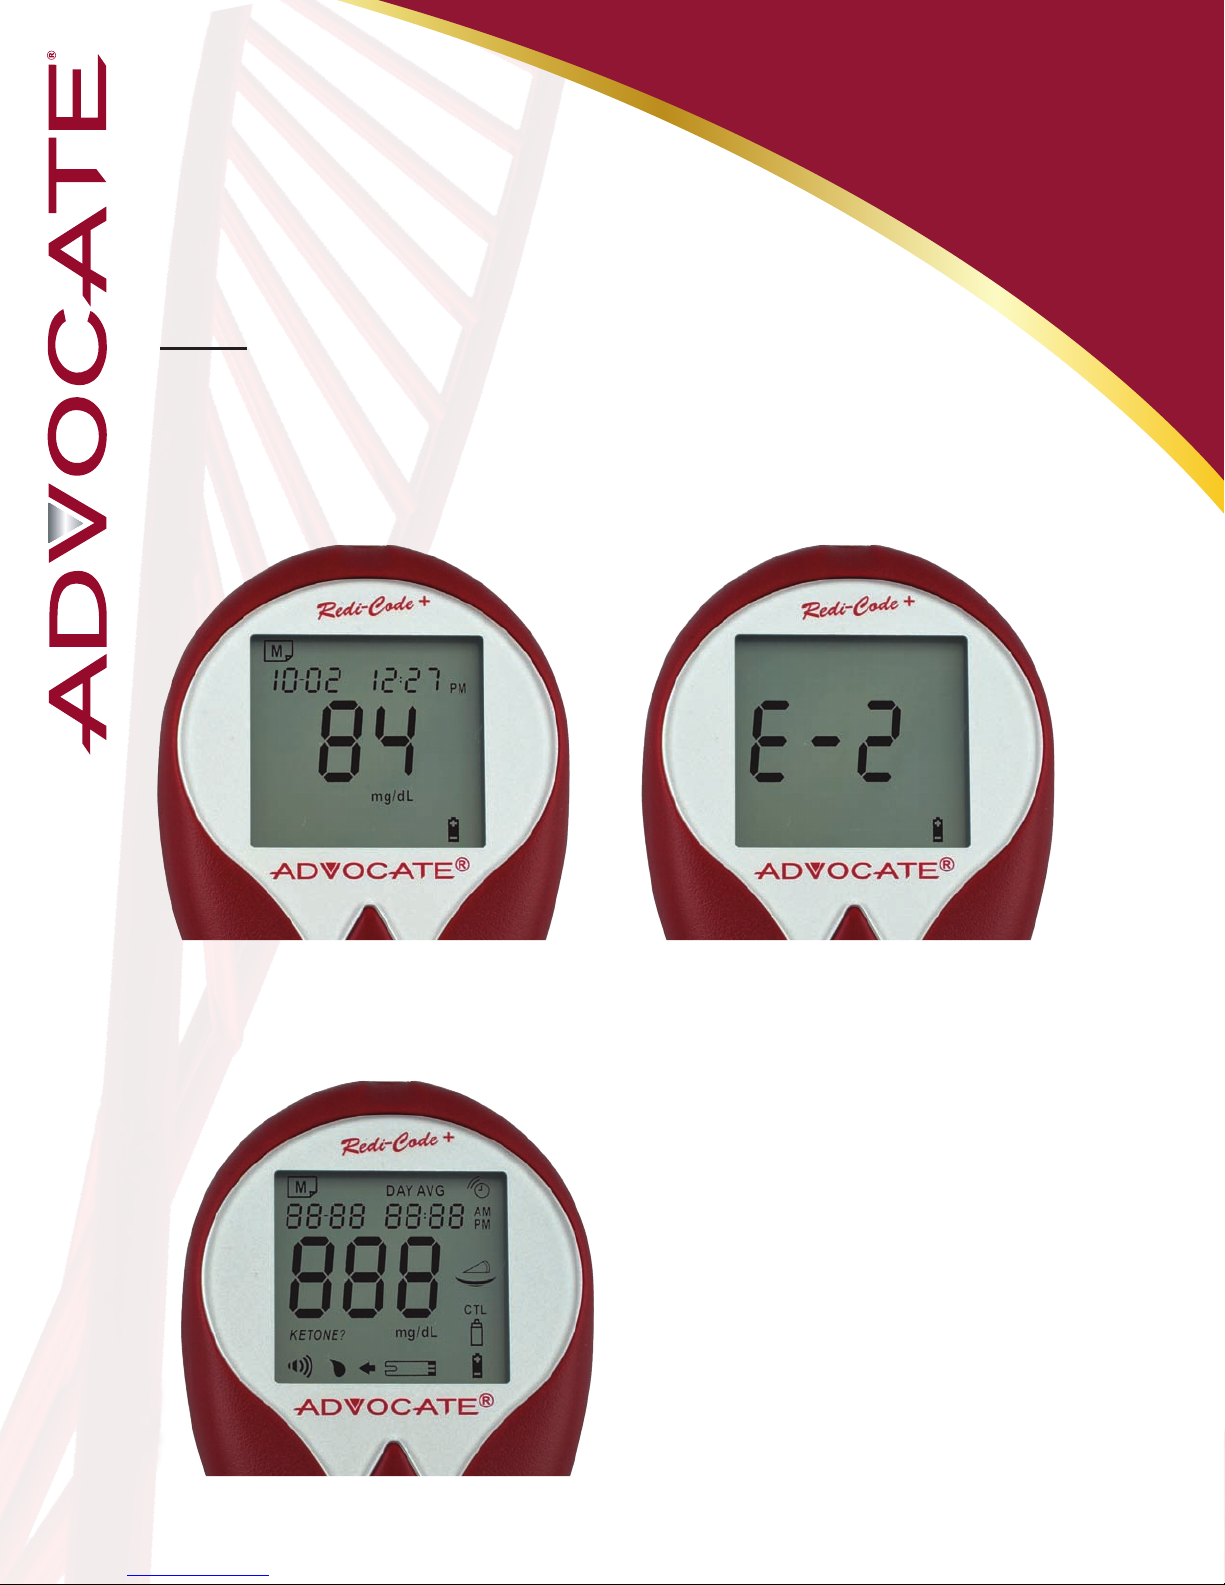
Notes:
• Batteries should be replaced when your meter power is
getting low indicated by displaying battery symbol, or the
meter briey shows “E-2” with battery symbol.
• After replacing new batteries, the display check will appear briey.
That means the batteries are installed successfully.
• Replacing the batteries does not
affect the meter’s memory; however,
the meter’s setting (date, time, and
alarms) may need reset.
• Batteries might leak if not used for
a long time. Remove the batteries if
you are not going to use this system
for an extended period (i.e., 3
months or more).
Orientation & Functions
Batteries
8
9
Setting your Meter
Step 1: Enter Setting
Mode
Your meter allows you to set the year, month,
date, time, alarm, speaking language and
volume, as well as delete memory.
Start with the meter off.
Press the “Set” button (on the
back of the meter).
Step 2: Exit Setting
Mode
Anytime you want to exit
setting mode, press and hold
the “Set” button for 2 seconds
until the meter turns off.
*Note: Move Setting Faster
Hold the “M” button down to scroll forward quickly until the number
you desire appears.
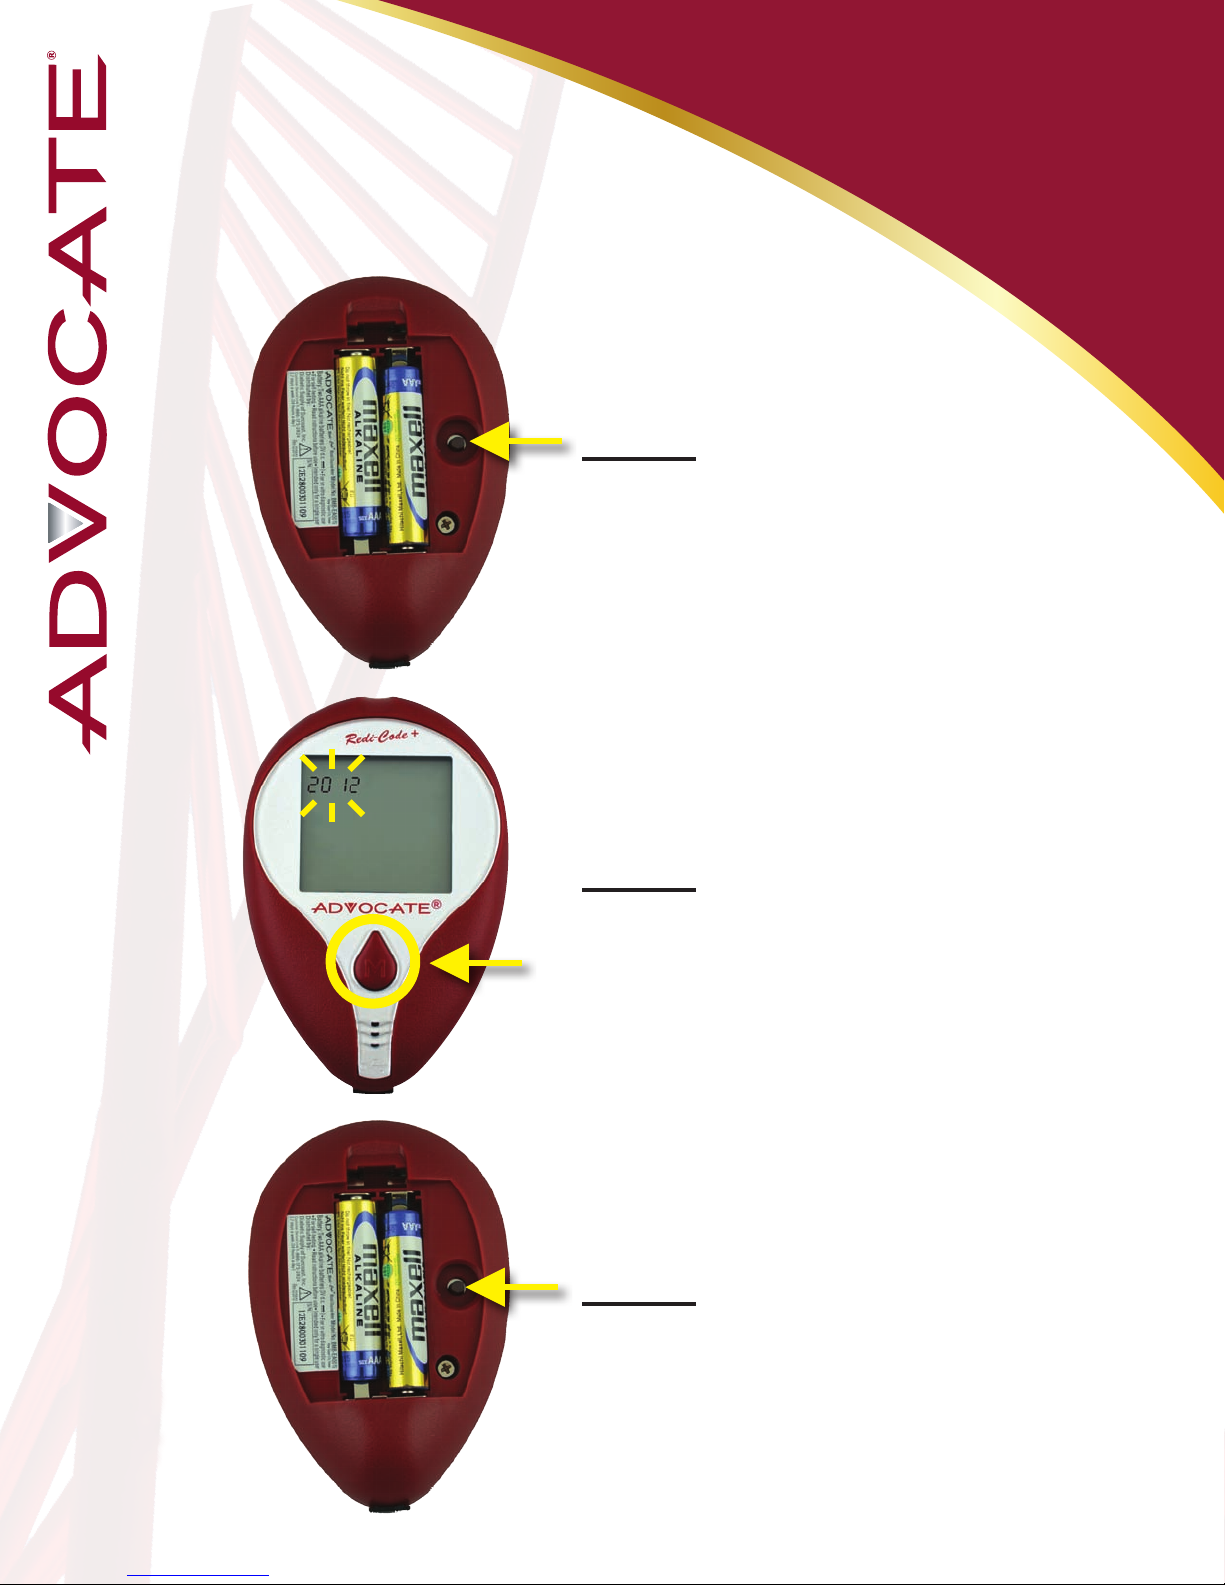
Meter Setup: Year
10
Step 3: Press the “Set”
button to enter Settings
mode. The year will be
ashing.
Step 4: Press and release the
“M” button until the correct
year appears.
Step 5: Press the “Set” button
to move to the month setting.
11
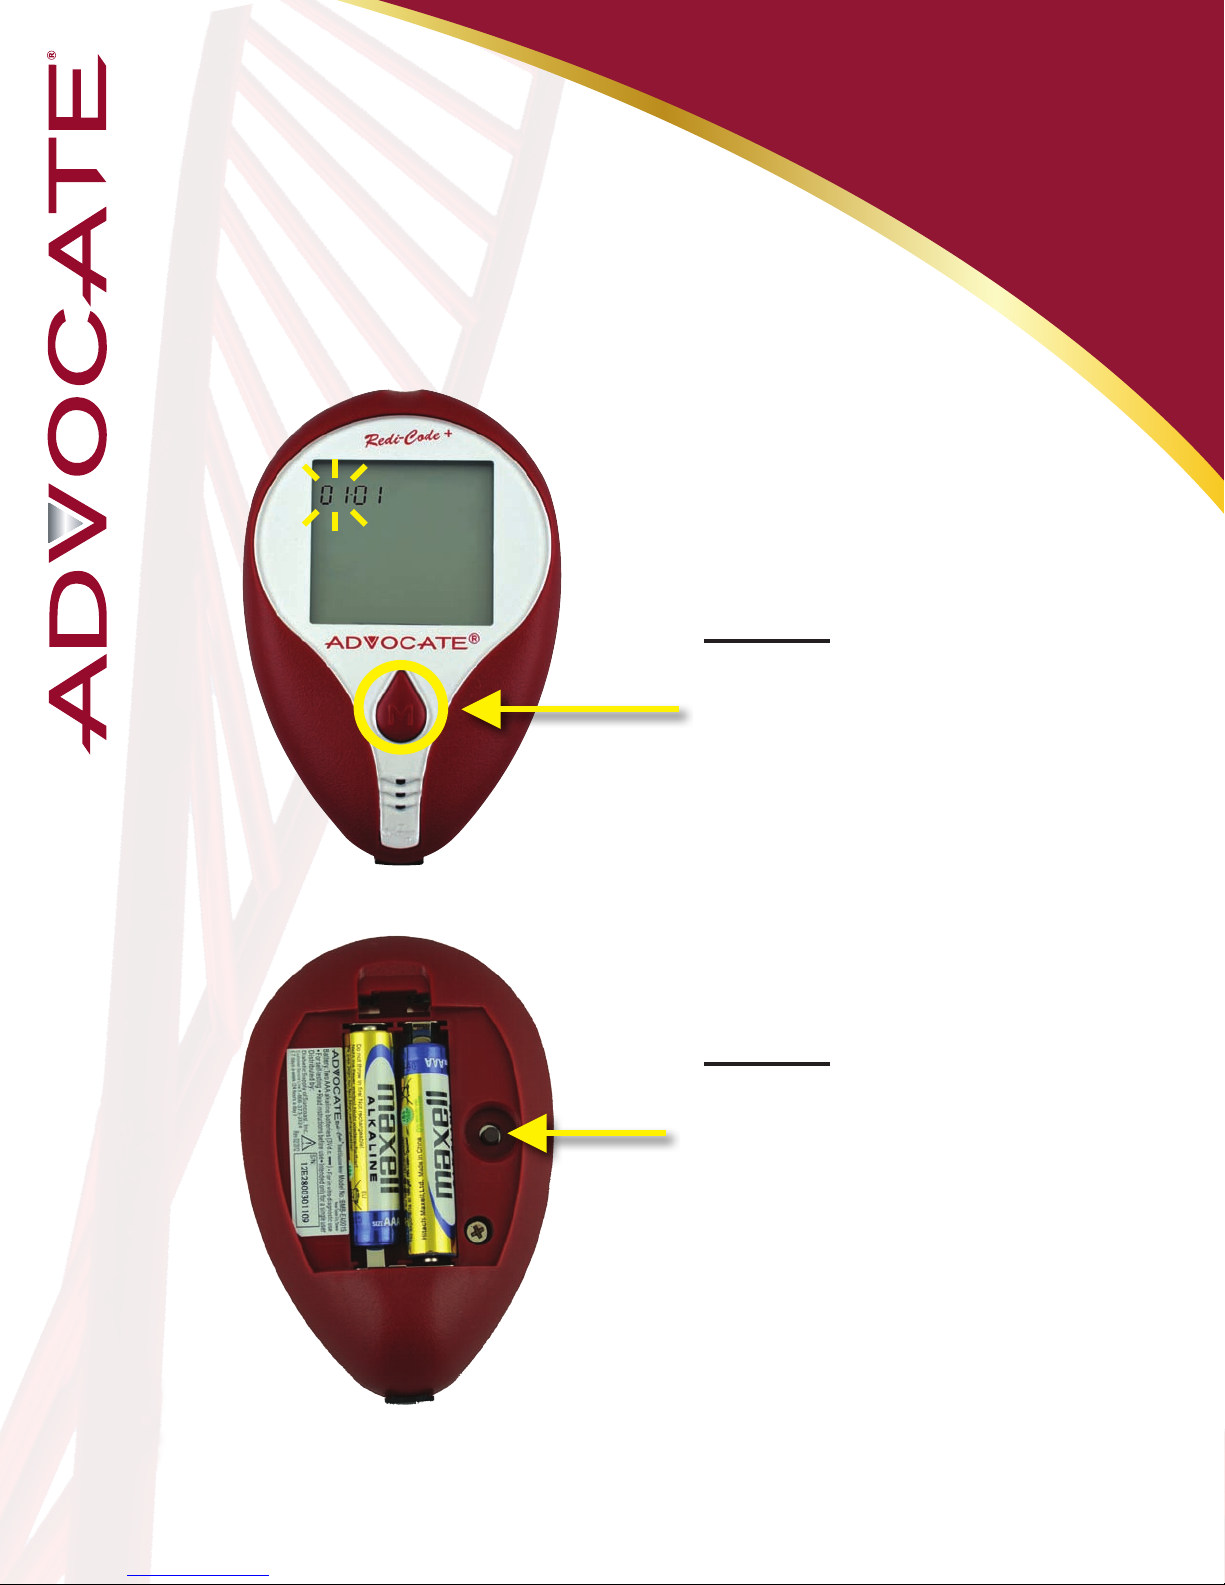
Meter Setup: Month
Step 6:
With the month ashing,
press and release the “M”
button until the correct
month appears.
Step 7:
Press the “Set” button
to move to the day
setting.

12
Meter Setup: Day
Step 8:
With the day ashing,
press and release the “M”
button until the correct
day appears.
Step 9:
Press the “Set” button
to move to the hour
setting.

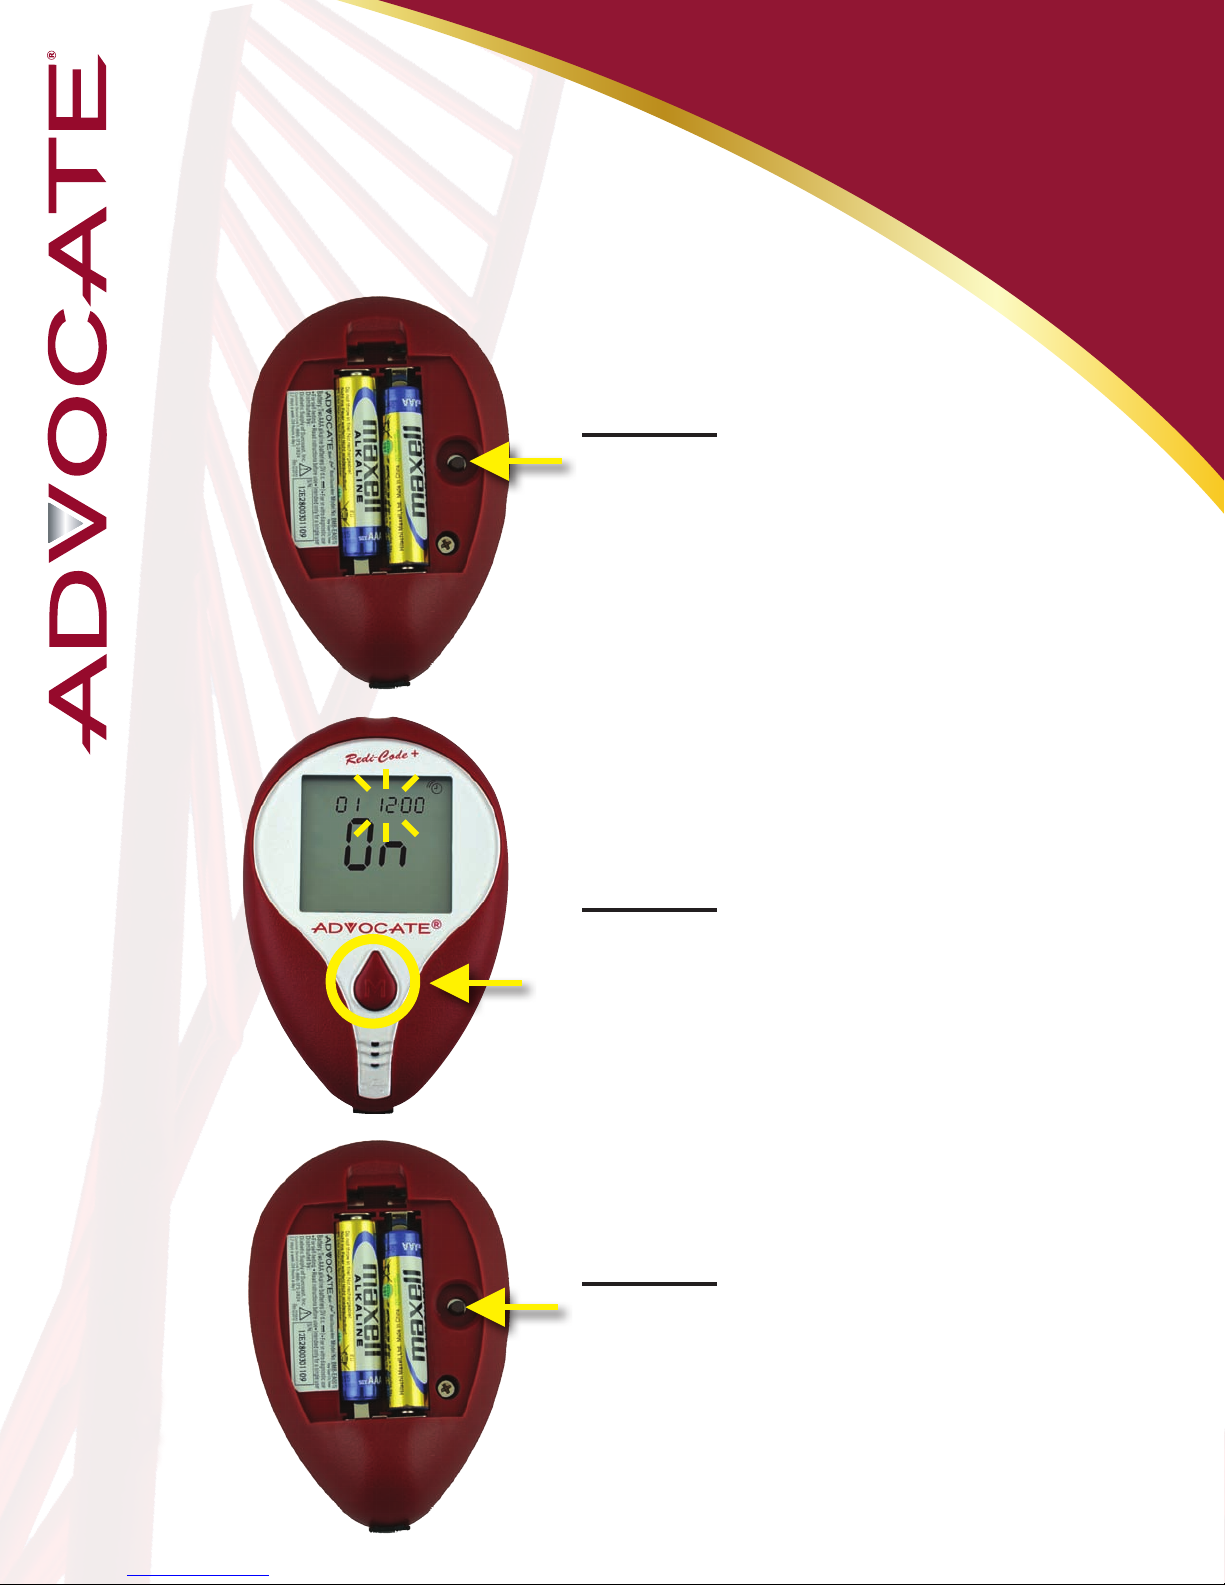
Meter Setup: Hour
Step 10:
With the hour ashing,
press and release the “M”
button until the correct
hour appears.
Step 11:
Press the “Set” button
to move to the minutes
setting.
13

14
Meter Setup: Minutes
Step 12:
With the minutes ashing,
press and release the “M”
button until the correct
minutes appears.
Step 13:
Press the “Set” button
to move to the units of
measurement setting.

mg/dL = Milligrams per deciliter (USA)
mmol/L = Millimoles per liter (Canada & much of the rest of the world)
Meter Setup:
Unit of Measurement
Step 14:
With the mg/dL (mg/dL is
the default setting) ashing,
press and release the
“M” button to change to
mmol/L.
Step 15:
Press the “Set” button
to move to the alarms
setting.
15
*Note: the version for USA
available in (mg/dL) only
Meter Setup: Alarms
Step 16: 01 (Alarm1) and the
alarm icon with ashing “On”
displays, press the “Set”
button to enter the hour
setting.
Step 17: With the hour
ashing, press and release
the “M” button until the
correct hour appears.
Step 18: Press the “Set”
button to move to the minutes
setting.
*The meter provides six alarms (1-6).
You may set up any or all of them.
*Follow the previous steps in order to set
up the minutes (incriments of 15, 30, and
45 minutes)
16

Meter Setup: Language
Step 19:
Press the “M” button to
toggle the language from
English to Spanish.
Step 20:
Press the “Set” button
to move to the volume
setting mode.
“E” = English
“S” = Spanish
17
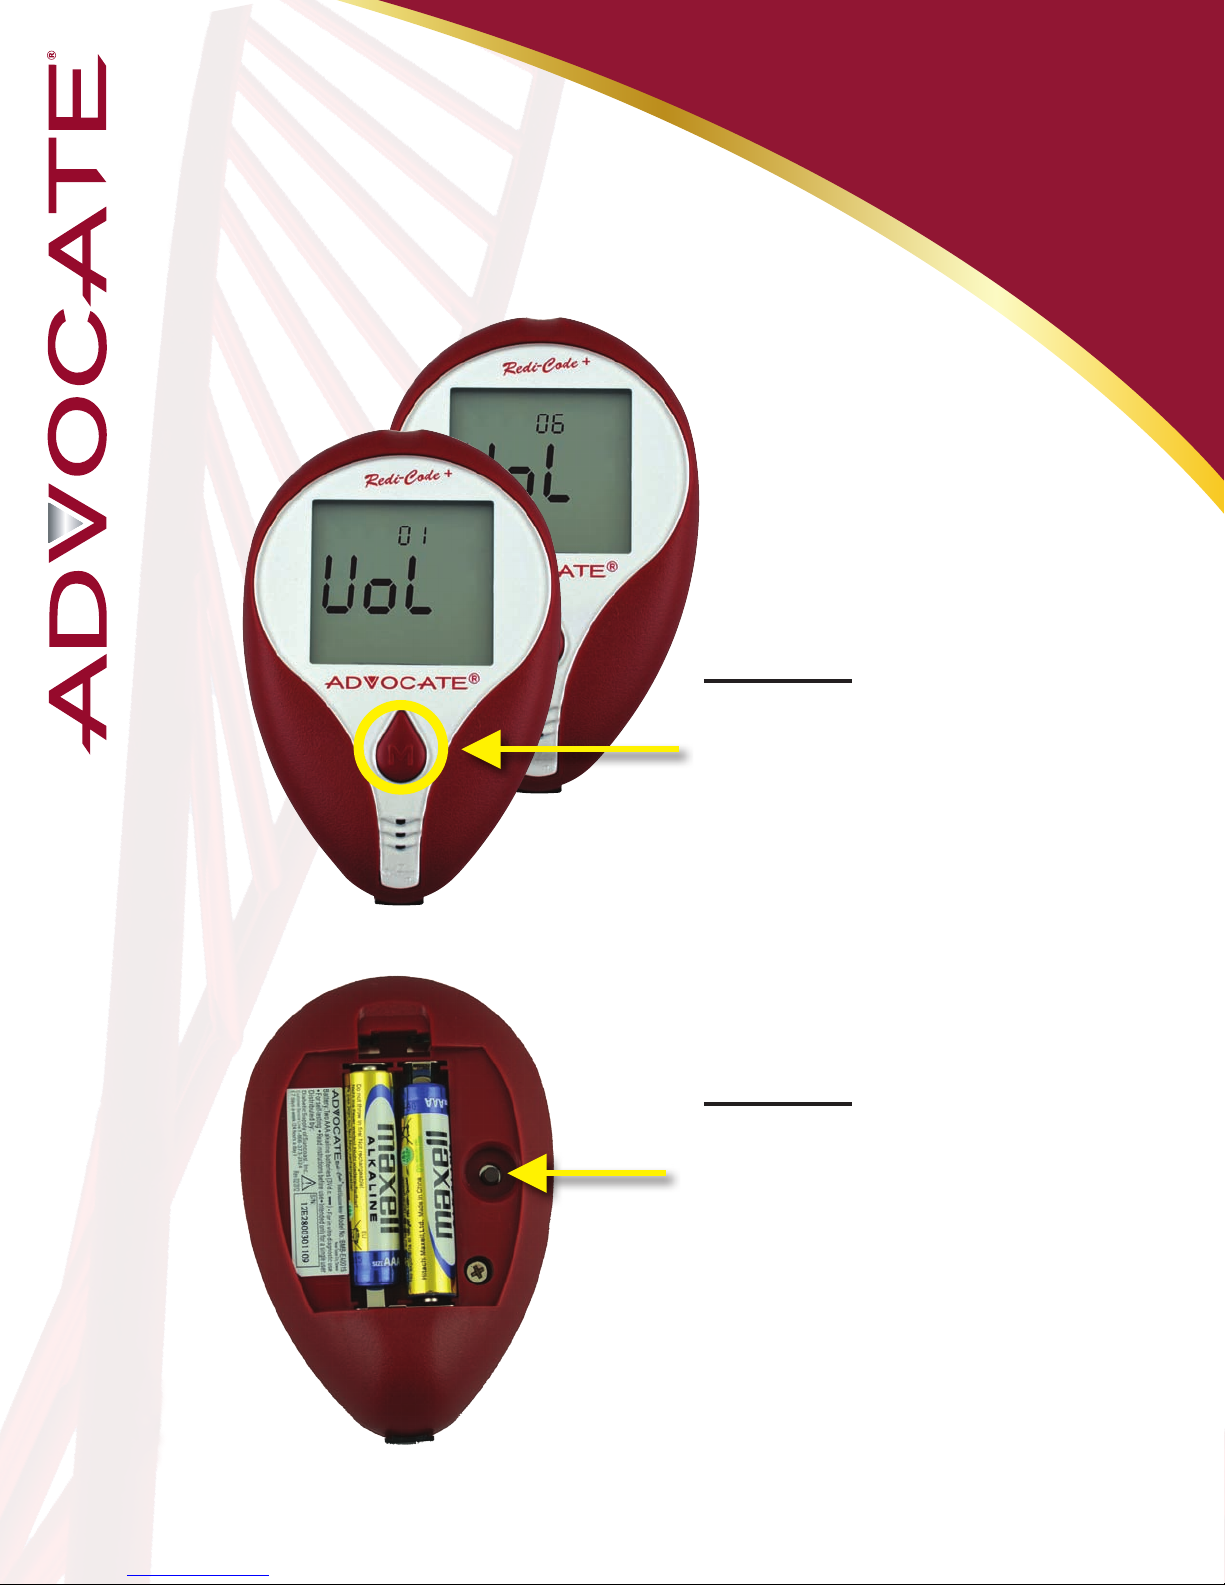
Meter Setup: Volume
Step 21:
Press the “M” button
to adjust the speaking
volume (0 for the silent
mode and 6 for the loudest
speaking volume).
Step 22:
Press the “Set” button
to move to memory
deletion mode.
18
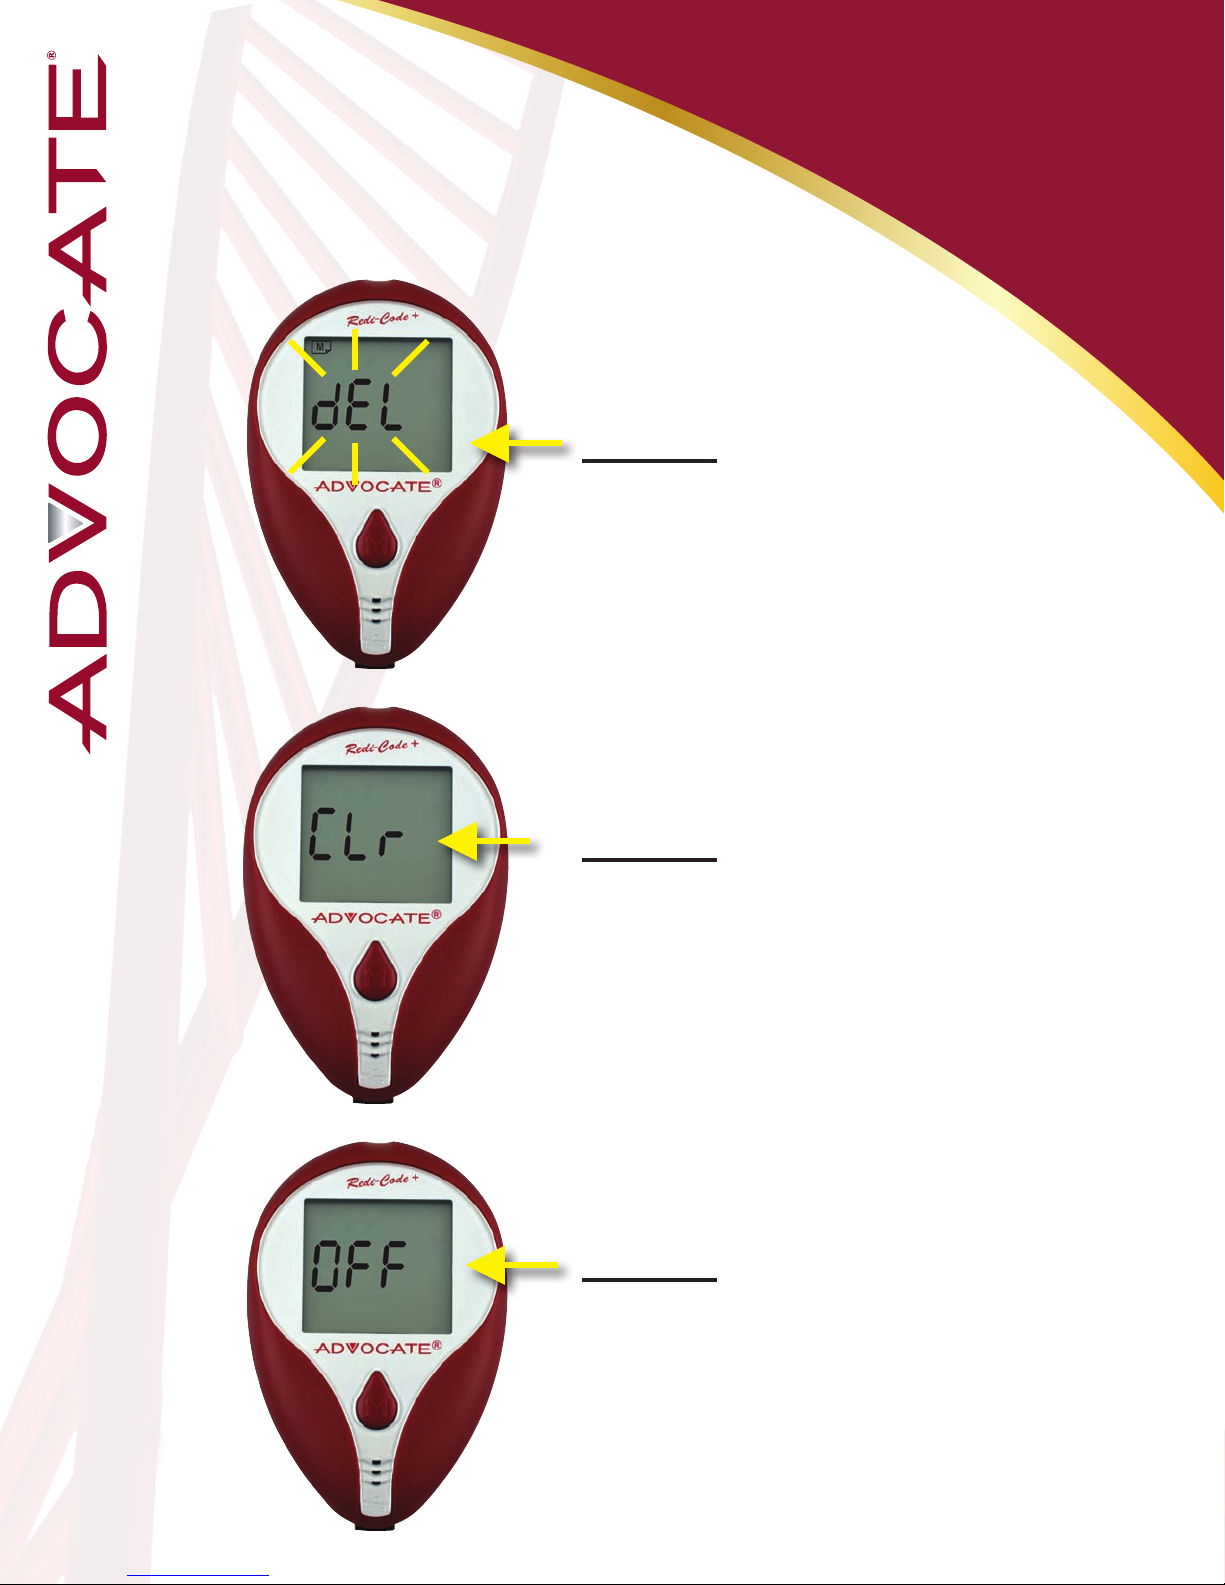
Meter Setup:
Delete Memory Option
Step 23: With memory
symbol and ashing “dEL”
appears, press the “M”
button for 2 seconds to clear
ALL memory.
Step 24: With “CLr”
displaying, that means ALL
memory is deleted.
Step 25: After pressing the
“Set” button or deleting
memory, the meter set-up is
completed. The meter will
showw “OFF” and turn off
automatically.
19

Control Solution Test
You will need the following items
to perform a Control test:
- Advocate Redi-Code+ Glucose Meter
- Advocate Test Strips
- Advocate Control Solution
Step 1: Insert a test strip into the Test
Strip Slot
You will hear the Advocate Redi-Code
Meter say: “Please apply blood to the
strip”
Only use Advocate Redi-Code Control Solution
and Advocate Redi-Code Test Strips
Step 2: While the “ ” symbol appears on
the display, press the “M” button. The “CTL”
symbol will appear on the display informing
the user that he or she is now in the Control
Solution Mode.
Test results will not be stored in the meter
memory.
20
Other manuals for Redi-Code+ BMB-EA001
1
This manual suits for next models
1
Table of contents
Other Advocate Blood Glucose Meter manuals


