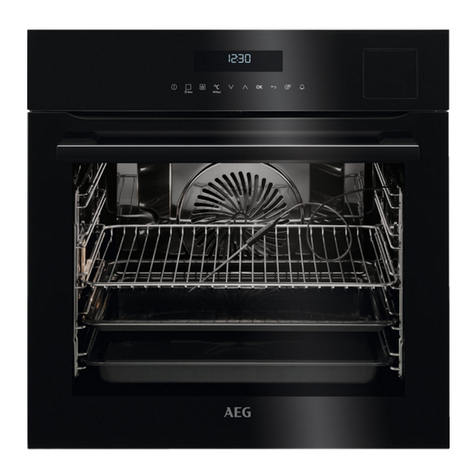
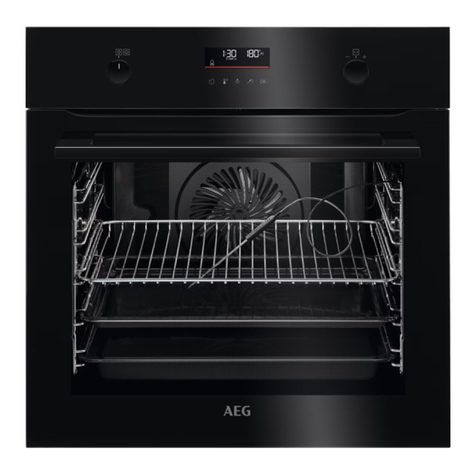
AEG BEK722910M User manual

USER
MANUAL
EN User Manual
Oven
79669GO-MN
BEK722910M

22
1. IMPORTANT SAFETY INSTRUCTIONS..........................................3
2. FOR YOUR SAFETY .........................................................5
3. DESCRIPTION OF YOUR APPLIANCE ..........................................6
79669GO-MN ...........................................................6
BEK722910M ............................................................7
4. CONTROL PANEL – ELECTRONIC PROGRAMMER...............................8
5. DISPLAY ...................................................................9
6. BEFORE FIRST USE ........................................................10
7. DAILY USE ................................................................10
8. HEATING FUNCTIONS .....................................................12
9. SPECIALS.................................................................13
10. CLOCK FUNCTIONS .......................................................13
11. ADDITIONAL FUNCTIONS ..................................................14
12. HINTS AND TIPS...........................................................16
13. INSTALLING YOUR OVEN ACCESSORIES......................................17
14. BEFORE USING THE APPLIANCE ............................................18
15. GETTING TO KNOW YOUR GAS COOKTOP ...................................20
16. USING YOUR OVEN........................................................21
17. COOKING TEST ...........................................................21
18. STEAM ASSISTED COOKING ................................................22
19. COOKING GUIDE .........................................................23
20. DEALING WITH COOKING PROBLEMS .......................................27
21. CLEANING YOUR APPLIANCE ...............................................28
22. CLEANING YOUR OVEN ACCESSORIES.......................................29
23. STORAGE COMPARTMENT .................................................31
24. SOLVING PROBLEMS.......................................................32
25. INSTALLATION OF THE APPLIANCE ..........................................33
26. WIRING REQUIREMENTS ...................................................40
27. ELECTRICAL & GAS CONNECTION LOCATIONS ...............................41
28. NATURAL GAS CONVERSION ...............................................42
29. TESTING THE OPERATION OF THE GAS COOKER .............................42
30. WARRANTY...............................................................43
FOR PERFECT RESULTS
Thank you for choosing this AEG product. We have created it to give you impeccable performance for many years,
with innovative technologies that help make life simpler – features you might not find on ordinary appliances.
Please spend a few minutes reading to get the very best from it.
Visit our website for:
Get usage advice, brochures, trouble shooter, service information:
www.aeg.com
Register your product for better service:
www.aeg.com/productregistration
Buy Accessories, Consumables and Original spare parts for your appliance:
www.aeg.com/shop
CUSTOMER CARE AND SERVICE
We recommend the use of original spare parts. When contacting Service, ensure that you have the following data
available. The information can be found on the rating plate. Model, PNC, Serial Number.
CONTENTS

33
Do not hang any objects from the hob as it may
block the air vents.
Do not modify this appliance.
To maintain safe operation, it is recommended
that the product be inspected every 5 years by
an authorised service person.
Do not install an aftermarket lid or cover over
this appliance.
The cooking process must be supervised. A
short term cooking process must be supervised
continuously.
Installation, cleaning and servicing
An authorised person must install this appliance
(Certificate of Compliance to be retained).
Before using the appliance, ensure that all
packing materials are removed from the
appliance.
In order to avoid any potential hazard, the
enclosed installation instructions must be
followed.
Ensure that all specified vents, openings and
airspaces are not blocked.
Where the appliance is built into a cabinet, the
cabinet material must be capable of withstanding
85°C.
Only authorised personnel should carry out
servicing (Certificate of Compliance to be
retained).
Always ensure the appliance is switched off
before cleaning or replacing parts.
Do not use steam cleaners, as this may cause
moisture build up.
Always clean the appliance immediately after
any food spillage.
This appliance must be earthed.
Due to the weight (freestanding 95-100kg,
built in 70kg) and size of cookers, 2 persons are
required to manually manoeuvre them. Remove
loose items such as trivets, oven racks & trays to
minimise weight.
Do not use the handle to lift the cooker, instead
open the oven door and lift the roof of the oven
cavity.
Take care when lifting to avoid any sharp edges
not intended for lifting.
Appliance must not be installed behind a
decorative door in order to avoid over heating.
These warnings have been provided in the interest of
safety. You MUST read them carefully before installing
or using the appliance.
The symbols you will see in this booklet have
these meanings:
Warning / Caution-Safety information
General information and tips
Environmental information
This symbol indicates never to do this
This symbol indicates to always do this
WARNING!
General warnings
This appliance must not be used as a space
heater.
In order to avoid fire, the appliance must be
kept clean and vents kept unobstructed.
Do not spray aerosols in the vicinity of this
appliance whilst it is in operation.
Do not use or store flammable materials in this
appliance storage drawer or near this appliance.
Do not line the bottom of the oven with foil or
cookware.
Always use gloves when handling hot items
inside the oven.
Always turn the grill off immediately after use as
fat left behind may catch fire.
IMPORTANT SAFETY INSTRUCTIONS
IMPORTANT INFORMATION THAT
MAY IMPACT YOUR MANUFACTURER’S
WARRANTY
Adherence to the directions for use in this
manual is extremely important for health
and safety. Failure to strictly adhere to the
requirements in this manual may result in personal
injury, property damage and affect your ability
to make a claim under the AEG manufacturer’s
warranty provided with your product. Products
must be used, installed and operated in
accordance with this manual. You may not be able
to claim on the AEG manufacturer’s warranty in
the event that your product fault is due to failure
to adhere this manual.
4
WARNING!
Oven
During use the appliance becomes hot. Care
should be taken to avoid touching the hot
surfaces inside the oven.
Switch the appliance off before removing the
oven light glass for globe replacement.
To avoid an accident, ensure that oven shelves
and fittings are always inserted into the
appliance in accordance with the instructions.
Do not use the door as a shelf.
Do not push down on the open oven door.
Do not cover the grill insert with foil, as fat left
there may catch fire.
Always keep the grill dish clean as any fat there
may catch fire.
Gas cooktops
Do not allow pots to boil dry, as damage to
both pan and cooktop may result.
Do not operate the cooktop for an extended
period of time without a pot or pan on
the burner.
Do not allow large cookware to overhang the
cooktop onto the adjacent benchtop. This will
cause scorching to the benchtop surface.
Do not allow cooking pots or pans to intrude
into the area which is close to the controls.
Ensure burner bodies and trivets are
properly located.
In order to avoid fire, do not store items on the
cooking surface.
The hob is not intended to be operated by
means of external timer or separate remote
control.
Unattended cooking with oil or fats on hob can
be dangerous and result in fire.
WARNING!
Child safety
This appliance is not intended for use by
persons (including children) with reduced
physical, sensory or mental capabilities, or lack
of experience and knowledge, unless they
have been given supervision or instruction
concerning use of the appliance by a person
responsible for their safety.
Children should be supervised to ensure that
they do not play with the appliance.
During use this appliance becomes hot. Care
should be taken to avoid touching hot surfaces,
eg. Oven door, heating elements..
Accessible parts will also become hot when in
use. To avoid burns and scalds children should be
kept away.
Always turn pan handles to the side or rear to
prevent accidental knocking and to keep out of
reach of children.
IMPORTANT SAFETY INSTRUCTIONS

5
FOR YOUR SAFETY
If you smell gas
• Turn off gas supply at source.
• Extinguish all naked flames.
• Do not operate any electrical appliances.
• Ventilate the area.
• Check for leaks as detailed in this manual.
If odour persists, contact your dealer or gas supplier
immediately.
Do not tamper with the appliance.
Burn-back (fire in burner tube
or chamber)
In the event of a burn-back, where the flame burns
back to the jet, immediately turn off the gas supply
at the control valve on the panel. After ensuring the
flame is extinguished, wait for 1 minute and re-light
the appliance in the normal manner. Should the
appliance again burn back, close the control valve
and call a service technician. Do not use the appliance
again until the service technician has declared that it
is safe to do so.
Gas-pressure regulator
This appliance is supplied setup for LPG usage.
It requires an operating pressure of 2.8 kPa at the
appliance. A suitable LPG regulator that complies
with the requirements of SANS 1237 must be installed.
Refer to page 43 for NG conversion.
Important information for the user
This appliance may only be installed by a registered
LP Gas installer. All registered installers are issued
with a card carrying their registration number. Ask to
be shown the card before allowing the installation
work to commence and make a note of the Installer
QCC number. Upon completion of the installation, the
installer is required to explain the operational details of
the appliance together with the safety instructions. You
will be asked to sign acceptance of the installation and
be provided with a completion certificate. You should
only sign for acceptance of the installation when the
installation is completed to your satisfaction.
Note that your invoice is required in the event that you
wish to make a guarantee claim.
Important information for the installer
This appliance may only be installed by a LP gas
installer registered with the Liquefied Petroleum Gas
Association of Southern Africa. The appliance must be
installed in accordance with the requirements of SANS
10087-1 and any fire department regulations and / or
local bylaws applicable to the area. If in doubt check
with the relevant authority before undertaking the
installation. Upon completion of the installation you are
required to fully explain and demonstrate to the user
the operational details and safety practices applicable
to the appliance and the installation.
Consumer energy saving quick tips
The “Eco Cooking” (function 7) contains features which
help you save energy during everyday cooking. This
function is used to define the energy efficiency class
(SANS 60350-1).
Minimize conventional oven preheating. Except for
breads, baked goods and pastries, most foods do not
need a preheated oven.
Use the microwave, toaster and “crock pots” rather
than the oven. These smaller appliances consume 1/3
to 1/2 as much electricity as conventional ovens for
cooking the same food item.
Turn off the oven five to ten minutes before cooking
time is finished and let the residual heat finish the
cooking. Avoid opening the oven door repeatedly
to check food that is cooking, as this allows heat
to escape and results in the use of more energy to
complete the cooking of your food. Instead watch the
clock or use a timer.

6
DESCRIPTION OF YOUR APPLIANCE
Control Panel
Gas Hob
Model 79669GO-MN
Freestanding gas hob with flame safeguard, programmable touch control electric oven
Removable wok trivet
Stainless steel splashback
Removable cast iron trivet
Gas burner
Control panel
Oven door
Storage compartment
Stainless steel kick panel
Programmable controller Gas hob burner controlsGas hob burner controls
Medium heat burnerMedium heat burner
Low heat burner High heat burner
Intense heat wok burner

7
Control Panel – oven programmable controller
Model BEK722910M
Built-in programmable touch control electric oven
Programmable controller

8
CONTROL PANEL – ELECTRONIC PROGRAMMER
Sensor eld Function Comment
1-Display Shows the current settings of the appliance.
2ON / OFF To turn on and off the appliance.
3Heating Functions
Press the sensor eld to choose the menu: Heating Functions.
To turn on or turn off the light, press the eld for 3 seconds.
You can turn on the light also when the appliance is turned off.
4Favourites To save and access your favourite programmes.
5Temperature selection
To set the temperature or show the current temperature in the
appliance. Press the eld for 3 seconds to turn on or turn off
the function: Fast heat up.
6Down key To move down in the menu or to adjust settings.
7Up key To move up in the menu or to adjust settings.
8OK To conrm the selection or setting.
9Back key To go back one level in the menu. To show the
main menu, press the eld for 3 seconds.
10 Time and additional
functions
To set different functions. When a heating function operates,
press the sensor eld to set the timer or the functions: Function
Lock, Favourites, Heat + Hold, Set + Go.
11 Minute Minder To set the function: Minute Minder.
21 3 4 5 8 9 10 1176
Use the sensor elds to operate the appliance

9
DISPLAY
Sensor eld Function Comment
1-Display Shows the current settings of the appliance.
2ON / OFF To turn on and off the appliance.
3Heating Functions
Press the sensor eld to choose the menu: Heating Functions.
To turn on or turn off the light, press the eld for 3 seconds.
You can turn on the light also when the appliance is turned off.
4Favourites To save and access your favourite programmes.
5Temperature selection
To set the temperature or show the current temperature in the
appliance. Press the eld for 3 seconds to turn on or turn off
the function: Fast heat up.
6Down key To move down in the menu or to adjust settings.
7Up key To move up in the menu or to adjust settings.
8OK To conrm the selection or setting.
9Back key To go back one level in the menu. To show the
main menu, press the eld for 3 seconds.
10 Time and additional
functions
To set different functions. When a heating function operates,
press the sensor eld to set the timer or the functions: Function
Lock, Favourites, Heat + Hold, Set + Go.
11 Minute Minder To set the function: Minute Minder.
21 3 4 5 8 9 10 1176
Icon Function
Minute Minder The function operates.
Time of day The display shows the current time.
Duration The display shows the necessary time for cooking.
End Time The display shows when the cooking time is complete.
Temperature The display shows the temperature.
Time Indication The display shows how long the heating function operates.
Press and at the same time to reset the time.
Heat-up Indicator The display shows the temperature in the appliance.
Fast Heat Up Indicator The function is active. It decreases the heat up time.
Weight Automatic The display shows that the automatic weight system is active
or that weight can be changed.
Heat + Hold The function is active.
Sensor
field
Function Comment
10
Time and addi-
tional functions
To set different functions. When a heating func-
tion operates, press the sensor field to set the tim-
er or the functions: Function Lock, Favourites,
Heat + Hold, Set + Go. You can also change the
settings of the core temperature sensor.
11 Minute Minder To set the function: Minute Minder.
5.2 Display
A
DE
B C
A. Heating function
B. Time of day
C. Heat-up indicator
D. Temperature
E. Duration time or end time of a
function
Other indicators of the display:
Symbol Function
Minute Minder The function operates.
Time of day The display shows the current time.
Duration The display shows the necessary time
for cooking.
End Time The display shows when the cooking
time is complete.
Temperature The display shows the temperature.
Time Indication The display shows how long the heat-
ing function operates. Press and
at the same time to reset the time.
Calculation The appliance calculates the time for
cooking.
Heat-up Indicator The display shows the temperature in
the appliance.
Fast Heat Up Indicator The function is active. It decreases the
heat up time.
www.aeg.com10
Other indicators of the display:
A. Heating function
B. Time of day
C. Heat-up indicator
D. Temperature
E. Duration time or end
time of a function

10
WARNING! Refer to Safety chapters.
Initial Cleaning
Remove all accessories and removable shelf supports
from the appliance.
Refer to “Care and cleaning” chapter.
Clean the appliance and the accessories before rst
use. Put the accessories and the removable shelf
supports back to their initial position.
• Please wipe out the oven interior prior to operation
with warm soapy water and polish dry with a soft
clean cloth. Do not close the oven door until the
oven is completely dry.
• New appliances can have an odour during rst
operation. It is recommended to ‘run in’ your oven
before you cook for the rst time. Run the oven at
180°C for 2-4 hours and ensure that the room is well
ventilated.
• DO NOT line the oven with foil, it will damage the
enamel.
First Connection
When you connect the appliance to the mains or after
the power cut, the display contrast, the display brightness
and the time of the day need to be set.
1. Press or to set the value.
2. Press to conrm.
WARNING! Refer to Safety chapters.
Navigating the menus
1. Activate the appliance using
2. Press or to select the menu option.
3. Press to move to the submenu
or accept the setting
At each point you can go back
to the main menu with
BEFORE FIRST USE DAILY USE

11
DAILY USE – MAIN MENU
Sensor eld Submenu Description
Heating Functions Contains a list of heating functions
Favourites Contains a list of favourite cooking programmes created by the user
Basic Settings Used to set the appliance conguration
Specials Contains a list of additional heating functions
Set Time of Day Sets the current time on the clock.
Time Indication When ON, the display shows the current time when you deactivate the
appliance.
Fast heat up When ON, the function decreases the heat-up time.
Set + Go To set a function and activate it later with a press of any symbol on the
control panel.
Heat + Hold Keeps the prepared food warm for 30 minutes after a cooking cycle
nished.
Time Extension Activates and deactivates the time extension function.
Display Contrast Adjusts the display contrast
Display Brightness Adjusts the display brightness
Buzzer Volume Adjusts the volume of press-tones and signals by degrees.
Key Tones Activates and deactivates the tone of the touch elds. It is not possible
to deactivate the tone of the ON / OFF touch eld.
Alarm/Error Tones Activates and deactivates the alarm tones.
DEMO mode Activation / deactivation code: 2468
Service Shows the software version and conguration.
Factory Settings Resets all settings to factory settings.

12
HEATING FUNCTIONS
Heating Function Application
Conventional
Cooking To bake and roast food on one shelf position.
True Fan
Cooking
To bake on up to three shelf positions at the same time and to dry food. Set the
temperature 10 - 20°C lower than for the function: Conventional Cooking.
Fan Cooking
PLUS
Cooking with steam is a great addition to straight ‘hot air’ cooking. Steam brings
out all the natural avours and goodness in the food, cooks evenly from surface to
centre and retains more nutrients and vitamins. Steam-assisted cooking consistently
produces juicy, succulent interiors with crisp, golden exteriors.
Fan Assist
Cooking
Heat comes from two elements, one above and one below the food. The fan circulates
the hot air around the oven cavity so that you can put the food in different places in
the oven and still cook them at the same time. You should only use a maximum of two
shelves with ‘Fan Assist Bake’. Do not use the bottom shelf. If the two shelves are used,
food on the shelf in the higher position will cook rst and should then be removed to
allow the food on the lower shelf to nish cooking.
Pizza Setting To bake food on one shelf position for a more intensive browning and a crispy bottom.
Set the temperature 20 - 40 °C lower than for the function: Conventional Cooking.
Roast
The Roast function is designed for roasting meats and poultry by utilising heat from all
elements in combination with the fan to surround the food. This provides even cooking
throughout and enhanced browning. This function starts at a higher temperature to seal
the meat. The oven will then automatically reduce to the selected temperature to cook
the meat for as long as desired. For example, if you use the default 200°C the “Roast”
cycle will start at 220°C and then lower to 200°C.
Frozen Foods To make convenience food like e.g. french fries, potato wedges or spring rolls crispy.
Grilling
The ‘Grill’ functions directs radiant heat from the powerful upper element onto the food.
You can use the ‘Grill’ function for tender cuts of meat, steak, shops, sausages, sh,
cheese toasties and other quick cooking foods.
Grill with the oven door closed.
Preheat your grill for 3 minutes to get the best results. This will help seal in the natural
juices of steak, chops etc. for better avour.
Full Grilling To grill at food and to toast bread. Grill with the oven door closed.
Turbo Grilling
‘Turbo Grill’ offers you the benets of both fan assist bake and traditional grill functions.
The grill element turns on and off to maintain set temperature while the
fan circulates the heated oven air. Grill with the oven door closed. You can use ‘Turbo
Grill’ for large cuts of meat, which gives you a result similar to ‘rotisserie’ cooked meat.
Put your food on a shelf in the second lowest shelf position. Put the grill dish on the
lowest shelf position to catch any spills. When using ‘Turbo Grill’ it is not necessary to
turn the food over during the cooking cycle.
Bottom Heat To bake cakes with crispy bottom and to preserve food.
Moist Fan
Baking
To bake breads, cakes and cookies. To save energy during cooking. This function
must be used in accordance with the Moist Fan Baking table in order to achieve the
desired cooking result. To get more information about the recommended settings,
refer to the Hints and Tips chapter, Moist Fan Baking table. This function was used to
dene the energy efciency class acc. to EN 60350-1.
The lamp may automatically deactivate at a
temperature below 60°C during some oven functions.

13
SPECIALS CLOCK FUNCTIONS
Heating Function Application
Conventional
Cooking To bake and roast food on one shelf position.
True Fan
Cooking
To bake on up to three shelf positions at the same time and to dry food. Set the
temperature 10 - 20°C lower than for the function: Conventional Cooking.
Fan Cooking
PLUS
Cooking with steam is a great addition to straight ‘hot air’ cooking. Steam brings
out all the natural avours and goodness in the food, cooks evenly from surface to
centre and retains more nutrients and vitamins. Steam-assisted cooking consistently
produces juicy, succulent interiors with crisp, golden exteriors.
Fan Assist
Cooking
Heat comes from two elements, one above and one below the food. The fan circulates
the hot air around the oven cavity so that you can put the food in different places in
the oven and still cook them at the same time. You should only use a maximum of two
shelves with ‘Fan Assist Bake’. Do not use the bottom shelf. If the two shelves are used,
food on the shelf in the higher position will cook rst and should then be removed to
allow the food on the lower shelf to nish cooking.
Pizza Setting To bake food on one shelf position for a more intensive browning and a crispy bottom.
Set the temperature 20 - 40 °C lower than for the function: Conventional Cooking.
Roast
The Roast function is designed for roasting meats and poultry by utilising heat from all
elements in combination with the fan to surround the food. This provides even cooking
throughout and enhanced browning. This function starts at a higher temperature to seal
the meat. The oven will then automatically reduce to the selected temperature to cook
the meat for as long as desired. For example, if you use the default 200°C the “Roast”
cycle will start at 220°C and then lower to 200°C.
Frozen Foods To make convenience food like e.g. french fries, potato wedges or spring rolls crispy.
Grilling
The ‘Grill’ functions directs radiant heat from the powerful upper element onto the food.
You can use the ‘Grill’ function for tender cuts of meat, steak, shops, sausages, sh,
cheese toasties and other quick cooking foods.
Grill with the oven door closed.
Preheat your grill for 3 minutes to get the best results. This will help seal in the natural
juices of steak, chops etc. for better avour.
Full Grilling To grill at food and to toast bread. Grill with the oven door closed.
Turbo Grilling
‘Turbo Grill’ offers you the benets of both fan assist bake and traditional grill functions.
The grill element turns on and off to maintain set temperature while the
fan circulates the heated oven air. Grill with the oven door closed. You can use ‘Turbo
Grill’ for large cuts of meat, which gives you a result similar to ‘rotisserie’ cooked meat.
Put your food on a shelf in the second lowest shelf position. Put the grill dish on the
lowest shelf position to catch any spills. When using ‘Turbo Grill’ it is not necessary to
turn the food over during the cooking cycle.
Bottom Heat To bake cakes with crispy bottom and to preserve food.
Moist Fan
Baking
To bake breads, cakes and cookies. To save energy during cooking. This function
must be used in accordance with the Moist Fan Baking table in order to achieve the
desired cooking result. To get more information about the recommended settings,
refer to the Hints and Tips chapter, Moist Fan Baking table. This function was used to
dene the energy efciency class acc. to EN 60350-1.
Heating Function Application
Defrost
This function can be used
for defrosting frozen foods,
such as vegetables and
fruits. The defrosting time
depends on the amount
and size of the frozen food.
Keep Warm To keep food warm.
Plate Warming To preheat plates for
serving.
Preserving
To preserve fruits and
vegetables in sterilized
cans and jars
Drying
To dry sliced fruit (e.g.
apples, plums, peaches)
and vegetables (e.g.
tomatoes, zucchini,
mushrooms).
Dough
Proving
For controlled rising of
yeast dough before baking.
Slow Cooking To prepare tender,
succulent roasts.
Bread Baking To bake bread.
Activating a heating function
1. Activate the appliance
2. Select the menu: Heating Functions
3. Press to conrm
4. Select a heating function.
5. Press to conrm.
6. Set the temperature.
7. Press to conrm.
Heat-up indicator
When you activate a heating function, the bar on the
display comes on. The bar shows that the temperature
increases. When temperature is reached the buzzer
sounds 3 times and the bar ashes and then disappears
Activating a fast heat up
This function decreases the heat-up time.
Do not put food in the oven when
the Fast heat up function operates.
To activate / deactivate the function,
hold for 3 seconds. The heat-up indicator
alternates. (This function is enabled by default)
Residual heat
When you deactivate the appliance, the display
shows the residual heat. You can use the heat to
keep the food warm.
Clock Function Application
Minute
Minder
To set a countdown
(max. 2 h 30 min).
This function has no
effect on the operation
of the appliance. You can
also activate it when the
appliance is deactivated.
Use to activate the
function. Press or
to set the minutes and
to start
Duration
To set the length of a
cooking operation (max.
23 h 59 min).
End Time
To set the switch-off time
for a heating function
(max. 23 h 59 min).
If you set the time for a clock function, the time starts to
count down after 5 seconds.
If you use the clock functions: Duration, End
Time, the appliance deactivates the heating
elements after 90 % of the set time. The appliance uses
the residual heat to continue the cooking process until
the time ends (3 - 20 minutes).
Setting the clock functions
Before you use the functions: Duration, End Time,
you must set a heating function and temperature
rst. The appliance deactivates automatically. You can
use the functions: Duration and End Time at the same
time if you want to automatically activate and
deactivate the appliance on a given time later. The
functions: Duration and End Time do not work when
you use the core temperature sensor.
1. Set a heating function.
2. Press again and again until the display shows the
necessary clock function and the related symbol.
3. Press or to set the necessary time.
4. Press to conrm.
When the time ends, an acoustic signal sounds.
The appliance deactivates.
The display shows a message.
5. Press any symbol to stop the signal.

14
CLOCK FUNCTIONS (CONTINUED) ADDITIONAL FUNCTIONS
Heat + Hold
Conditions for the function:
• The set temperature is more than 80°C.
• The function: Duration is set.
The function: Heat + Hold keeps prepared food warm
at 80 °C for 30 minutes.
It activates after the baking or roasting procedure ends.
You can activate or deactivate the function in the menu:
Basic Settings.
1. Activate the appliance.
2. Select the heating function.
3. Set the temperature above 80 °C.
4. Press again and again until the display shows:
Heat + Hold.
5. Press to conrm. When the function ends, an
acoustic signal sounds.
The function stays on if you change the heating
functions.
Time Extension
The function: Time Extension makes the heating
function continue after the end of Duration.
Applicable to all heating functions
with Duration
1. When the cooking time ends, an acoustic signal
sounds. Press any symbol. The display shows the
message.
2. Press to activate or to cancel.
3. Set the length of the function.
4. Press .
Favourites
You can save your favourite settings, such as duration,
temperature or heating function. They are available in
the menu: Favourites. You can save 20 programmes.
Saving a programme
1. Activate the appliance.
2. Set a heating function or an automatic
programme.
3. Touch again and again until the display shows:
SAVE.
4. Press to conrm. The display shows the rst
free memory position.
5. Press to conrm.
6. Enter the name of the programme.
The rst letter ashes.
7. Touch or to change the letter.
8. Press . The next letter ashes.
9. Do step 7 again as necessary.
10. Press and hold to save. You can overwrite a
memory position. When the display shows the rst
free memory position, touch or and press
to overwrite an existing programme. You can
change the name of a programme in the menu:
Edit Programme Name.
Activating the programme
1. Activate the appliance.
2. Select the menu: Favourites.
3. Press to conrm.
4. Select your favourite programme name.
5. Press to conrm.
6. Press to go directly to menu: Favourites. You
can also use it when the appliance is deactivated.
Using the Child Lock
When the Child Lock is on, the appliance cannot be
activated accidentally.
If the Pyrolysis function operates, the door locks
automatically.
A message comes on in the display when you
touch any symbol.
1. Touch to activate the display.
2. Touch and at the same time until the display
shows a message. To deactivate the Child Lock
function repeat step 2.
Function Lock
This function prevents an accidental change of the
heating function. You can activate it only when the
appliance operates.
1. Activate the appliance.
2. Set a heating function or setting.
3. Press again and again until the display shows:
Function Lock.
4. Press to conrm.

15
ADDITIONAL FUNCTIONS
If the Pyrolysis function operates, the door is
locked and the symbol of a key comes on in
the display.
To deactivate the function, press . The display
shows a message. Press again and then to
conrm.
When you deactivate the appliance, the lock
function also deactivates.
Set + Go
The function lets you set a heating function (or a
programme) and use it later with one press of any
symbol.
1. Activate the appliance.
2. Set a heating function.
3. Press again and again until the display shows:
Duration.
4. Set the time.
5. Press again and again until the display shows: Set
+ Go
6. Press to conrm.
Press any symbol (except for ) to start the function:
Set + Go. The set heating function starts. When the
heating function ends, an acoustic signal sounds.
• Function Lock is on when the heating function
operates.
• The menu: Basic Settings lets you activate and
deactivate the function: Set + Go.
Automatic Switch-Off
For safety reasons the appliance turns off
automatically after some time if a heating function
operates and you do not change any settings.
Temperature (°C) Switch-off time (h)
30 - 115 12.5
120 - 195 8.5
200 - 245 5.5
250 - maximum 1.5
The Automatic switch-off does not work with the
functions: Light, Food Sensor, Duration, End Time.
Brightness of the display
There are two modes of display brightness:
• Night brightness - when the appliance is
deactivated, the brightness of the display is lower
between 10 PM and 6 AM.
• Day brightness:
– when the appliance is activated.
– if you touch a symbol during the night brightness
(apart from ON / OFF), the display goes back to
the day brightness mode for the next 10 seconds.
– if the appliance is deactivated and you set the
function: Minute Minder. When the function ends,
the display goes back to the night brightness.
Cooling Fan
When the appliance operates, the cooling fan
activates automatically to keep the surfaces of the
appliance cool. If you deactivate the appliance,
the cooling fan can continue to operate until the
appliance cools down.

16
HINTS AND TIPS
WARNING! Refer to Safety chapters.
The temperature and baking times
in the tables are guidelines only. They depend
on the recipes and the quality and quantity of
the ingredients used.
Advice for special heating functions of
the oven
Keep Warm
Use this function if you want to keep food warm. The
temperature regulates itself automatically to 80 °C.
Plate Warming
For warming plates and dishes.
Distribute plates and dishes evenly on the wire shelf.
Move stacks around after half of the warming time
(swap top and bottom). The automatic temperature is
70 °C.
Dough Proving
You can use this automatic function with any recipe for
yeast dough you like. It gives you a good atmosphere
for rising. Put the dough into a dish that is big enough
for rising and cover it with a wet towel or plastic foil.
Insert a wire shelf on the rst shelf position and put
the dish in. Close the door and set the function:
Dough Proving. Set the necessary time.
Baking
• For best baking results preheat oven for
30 minutes
• Your oven may bake or roast differently to the
appliance you had before. Adapt your usual
settings such as temperature, cooking time and
shelf position to the values in the tables.
• Use the lower temperature the rst time.
• If you cannot nd the settings for a special recipe,
look for the similar one.
• You can extend baking times by 10 – 15 minutes if
you bake cakes on more than one shelf position.
• Cakes and pastries at different heights do not
always brown equally at rst. If this occurs, do not
change the temperature setting. The differences
equalize during the baking procedure.
• Trays in the oven can twist during baking. When
the trays become cold again, the distortions
disappear.
Cooling/Venting fan
Your built-in appliance is fitted with a cooling fan.
This prevents your kitchen cabinet from overheating
and reduces the condensation inside the oven. It will
operate whenever you are using your oven or grill and
will blow warm air across the top of the oven door.
In some appliances the cooling fan may continue to
operate after the appliance is turned off. It will switch
off by itself once oven is cool.
Condensation
Excess condensation may fog the oven door. This may
happen when you are cooking large quantities of food
from a cold start. You can minimize condensation by:
• Keeping the amount of water used whilst cooking
to a minimum.
• Making sure that the oven door is firmly closed.
• Baking custard in a baking dish that is slightly
smaller than the water container.
• Cooking casseroles with the lid on.
NOTE: If you are using water in cooking, this will turn
to steam and may condense outside your appliance.
This is not a problem or fault with your oven.

17
Positioning the dishes on the grill dish
carrier
INSTALLING YOUR OVEN ACCESSORIES
Installing the side racks
• The side racks attach to each side of your oven.
There is a left hand and right hand version
(see image below for details).
• Insert the rear peg into the rear access hole
provided, ensuring that the peg is fully inserted.
• Then locate the front peg into the front access hole
and push in firmly.
Front Peg Rear Peg
Left Hand
Side Rack
Fitting the shelves and grill dish carrier
between the side rack wires
The shelves are designed so that they have maximum
extension but cannot be accidentally pulled right out.
The grill dish carrier is designed the same way and can
slot straight into the side racks.
To t a shelf or grill dish carrier to side racks:
1. Locate the rear edge of the shelf/carrier
in between guide rails of the side rack -
see diagram.
2. Ensure the same rail positions on both
sides of the oven are being engaged.
With the front edge raised, begin to
slide the shelf into the oven.
3. Once the detents have passed the front
edge of the side rack, the shelf can
be pushed completely in. When fully
inserted the shelf/carrier should not
interfere with the closed oven door.
Left hand side rack
Front peg Rear peg

18
Installing the trivets
1.
Position the 2 side trivets onto the hob rst,
ensuring the 2 corner location recesses are
to the back of the hob.
2. Position the middle trivet ensuring the trivet
ngers are aligned with the side trivet
ngers.
3. The wok support sits on top of the trivet
above the wok burner.
1Side trivet
2Wok support
3Middle trivet
4Side trivet
5Standard burner cap
6Standard burner crown
7Standard burner cup
8Standard burner spark plug
9 Standard burner ame
safeguard sensor
10 Wok burner ame
safeguard sensor
11 Wok burner spark plug
12 Wok burner inner cap
13 Wok burner outer cap
14 Wok burner crown
15 Wok burner body
16 Low heat burner
17 Medium heat burner
18 High heat burner
BEFORE USING THE APPLIANCE – GAS HOB MODEL
17
17
18
16
5
6
7
8
9
1 2 3 4
11
10
15
14
13
12

19
Installing the standard burners
1. The burner crown must be tted correctly onto
the burner cup or damage will occur during
operation.
2. To do this, align the outer hole and outer recess
of the burner crown around the spark plug and
ame safeguard sensor. Drop down ensuring the
location ribs on the bottom of the crown drop
into the location recesses.
3. Burner cap and burner crown must be clean and
located correctly for the burner to light.
Installing the wok burners
1. The wok burner crowns must also be tted
correctly onto the wok burner cups.
2. To do this, align the outer recess of the burner
crown around the spark plug. Drop down
ensuring the location of the ribs on the bottom of
the crown drop into the location recesses.
3. The 2 burner caps are simply positioned over the
top of the burner crown.
NOTE: When the burners are correctly tted they will
sit level on the hob.
13 Wok burner outer cap
14 Wok burner crown
15 Wok burner body
16 Low heat burner
17 Medium heat burner
18 High heat burner
BEFORE USING THE APPLIANCE – GAS HOB MODEL (CONTINUED)

20
GETTING TO KNOW YOUR GAS COOKTOP
Using your gas hotplates
NOTE: Gas controls turn anticlockwise from ‘Off’ and
have limited movement.
Lighting burners
Electronic ignition
These hobs are fitted with mains powered electronic
ignition. When the appliance has been connected and
power is on, depressing any knob will release the spark
to all burners.
To light a burner, depress the corresponding knob and
while continuing to depress knob, turn anticlockwise to
“HI” position. After establishing the flame, continue to
hold the knob for 5 seconds, before releasing.
If the flame goes out when the knob is released, simply
depress the knob again, this time holding it down with
slightly more force for the same length of time.
Knob may be turned further anticlockwise to reduce the
flame as desired.
WARNING!
• Keep hands clear of burners when lighting.
• If burner does not light within 5 seconds, turn knob to
‘Off’ position, allow gas to disperse, then try
lighting again.
• Burners MUST be operated between ‘HIGH’ and
‘LOW’ settings only.
• Trivets get very hot. Allow plenty of time to cool
before touching.
To conserve gas, place the pan centrally over the
burner and adjust the flame so that it does not go past
the edge of the cookware.
NOTE: In the absence of electrical power, carry out the
ignition directly to the burner with a hand held ignition
source.
Model 79669GO-MN
1. Low heat burner
Used for simmering with small cookware items.
2. Medium heat burner
Used for normal cooking and simmering with mid
size cookware items.
3. High heat burner
Used for fast heating with large size
cookware items.
4. Intense heat wok burner
Used for very fast heating with woks and other
large size cookware items. Use wok trivet provided
when cooking with a wok.
1 3
22 4
This manual suits for next models
1
Table of contents
Other AEG Oven manuals