manuals.online logo
Brands
  1. Home
  2. •
  3. Brands
  4. •
  5. AEG
  6. •
  7. Ventilation Hood
  8. •
  9. AEG DD 8890 Specification sheet

AEG DD 8890 Specification sheet

Other manuals for DD 8890

5

This manual suits for next models

2

Other AEG Ventilation Hood manuals

AEG DH 1690 User manual

AEG

AEG DH 1690 User manual

AEG DPE4641M User manual

AEG

AEG DPE4641M User manual

AEG X66453MDO UK User manual

AEG

AEG X66453MDO UK User manual

AEG X94484MV10 User manual

AEG

AEG X94484MV10 User manual

AEG DGB1521S User manual

AEG

AEG DGB1521S User manual

AEG DCK6290HG User manual

AEG

AEG DCK6290HG User manual

AEG DI 8610 User manual

AEG

AEG DI 8610 User manual

AEG DUB2610W User manual

AEG

AEG DUB2610W User manual

AEG DBR9980HB User manual

AEG

AEG DBR9980HB User manual

AEG AWS6600GM User manual

AEG

AEG AWS6600GM User manual

AEG DPK5660B User manual

AEG

AEG DPK5660B User manual

AEG DK 4370 User manual

AEG

AEG DK 4370 User manual

AEG DK 4360 User manual

AEG

AEG DK 4360 User manual

AEG FM 2500DD-A User manual

AEG

AEG FM 2500DD-A User manual

AEG DL 600 N PROFI Line User manual

AEG

AEG DL 600 N PROFI Line User manual

AEG DK6393-M User manual

AEG

AEG DK6393-M User manual

AEG DLH6661B User manual

AEG

AEG DLH6661B User manual

AEG DS 603-w User manual

AEG

AEG DS 603-w User manual

AEG X79263MD0 User manual

AEG

AEG X79263MD0 User manual

AEG X67453MD10 User manual

AEG

AEG X67453MD10 User manual

AEG PERFEKT GLASS 36 User manual

AEG

AEG PERFEKT GLASS 36 User manual

AEG X91384MI02 User manual

AEG

AEG X91384MI02 User manual

AEG DVE5671HG User manual

AEG

AEG DVE5671HG User manual

AEG DPB2621S User manual

AEG

AEG DPB2621S User manual

Popular Ventilation Hood manuals by other brands

Gorenje S3 IHGC963S4X manual

Gorenje

Gorenje S3 IHGC963S4X manual

KOBE ISX2136SQB-1 Installation instructions and operation manual

KOBE

KOBE ISX2136SQB-1 Installation instructions and operation manual

U.S. Products ADVANTAGE-100H Information & operating instructions

U.S. Products

U.S. Products ADVANTAGE-100H Information & operating instructions

Kuppersberg DUDL 4 LX Technical Passport

Kuppersberg

Kuppersberg DUDL 4 LX Technical Passport

Framtid HW280 manual

Framtid

Framtid HW280 manual

Thermador HGEW 36 FS installation manual

Thermador

Thermador HGEW 36 FS installation manual

Electrolux LFT769X user manual

Electrolux

Electrolux LFT769X user manual

Broan B5836SS manual

Broan

Broan B5836SS manual

Heinner HDCH-6060RGBK quick start guide

Heinner

Heinner HDCH-6060RGBK quick start guide

Baumatic AS35SS instruction manual

Baumatic

Baumatic AS35SS instruction manual

Franke FTF 604 XS V2 Instructions for use and installation

Franke

Franke FTF 604 XS V2 Instructions for use and installation

Best UCB3I30SBW installation instructions

Best

Best UCB3I30SBW installation instructions

Gram EFU 503-90 X instruction manual

Gram

Gram EFU 503-90 X instruction manual

CIARRA CBCS6803 Installation and user manual

CIARRA

CIARRA CBCS6803 Installation and user manual

sauter SHG501 Instructions for installation and use

sauter

sauter SHG501 Instructions for installation and use

Franke 392-17 User instructions

Franke

Franke 392-17 User instructions

FALMEC Polar Black 35 Instruction booklet

FALMEC

FALMEC Polar Black 35 Instruction booklet

Remus 7783 089518L Installation instruction

Remus

Remus 7783 089518L Installation instruction

manuals.online logo
manuals.online logoBrands
  • About & Mission
  • Contact us
  • Privacy Policy
  • Terms and Conditions

Copyright 2025 Manuals.Online. All Rights Reserved.

DD 8890 - CHDD 8820
CHDD 8890
Köksfläkt
Ventilator
Liesituuletin
Emhætte
Cooker Hood
Instruktionsbok
Bruksanvisning
Käyttöoh e
Brugsve ledning
Operating and Installation Instructions
50
Contents
Safety warnings ................................................................................ 50
Description of the cooker hood .......................................................... 52
Control Panel .................................................................................... 53
Maintenance and cleaning................................................................. 55
Something Not Working .................................................................... 5
Special accessories .......................................................................... 59
Technical assistance service ............................................................. 59
Technical specifications .................................................................... 60
Installation ........................................................................................ 60
Safety warnings
This appliance is to be used solely as a household appliance. It has
been manufactured according to the international safety and quality
standards. Note that the safety devices alone are not capable of
eliminating all accident risks.
It is therefore very important to carefully read all the operating
instructions, recommendations and warnings prior to installation and
use of the appliance. Note in particular the text paragraphs with the
danger triangle design, to avoid damages to persons or objects.
Keep this instruction booklet in a safe place: this booklet should
always accompany the appliance at such time as it is sold or given to
other persons for use.
Installation and service
 Any electrical installation of the cooker hood must be carried out by
a qualified electrician and the hood itself must be installed by
someone with experience. Installation made by an unqualified
person can lead to loss of function of the cooker hood and possible
damage to person and and/or property.
 The cooker hood must be at least 50 cm above electric hobs or
electric ranges, or at least 65 cm above gas burners or gas ranges.
If the instructions for installation for the gas hob specify a greater
distance, this has to be taken into account.
 Ensure that the power cable is not damaged during installation.
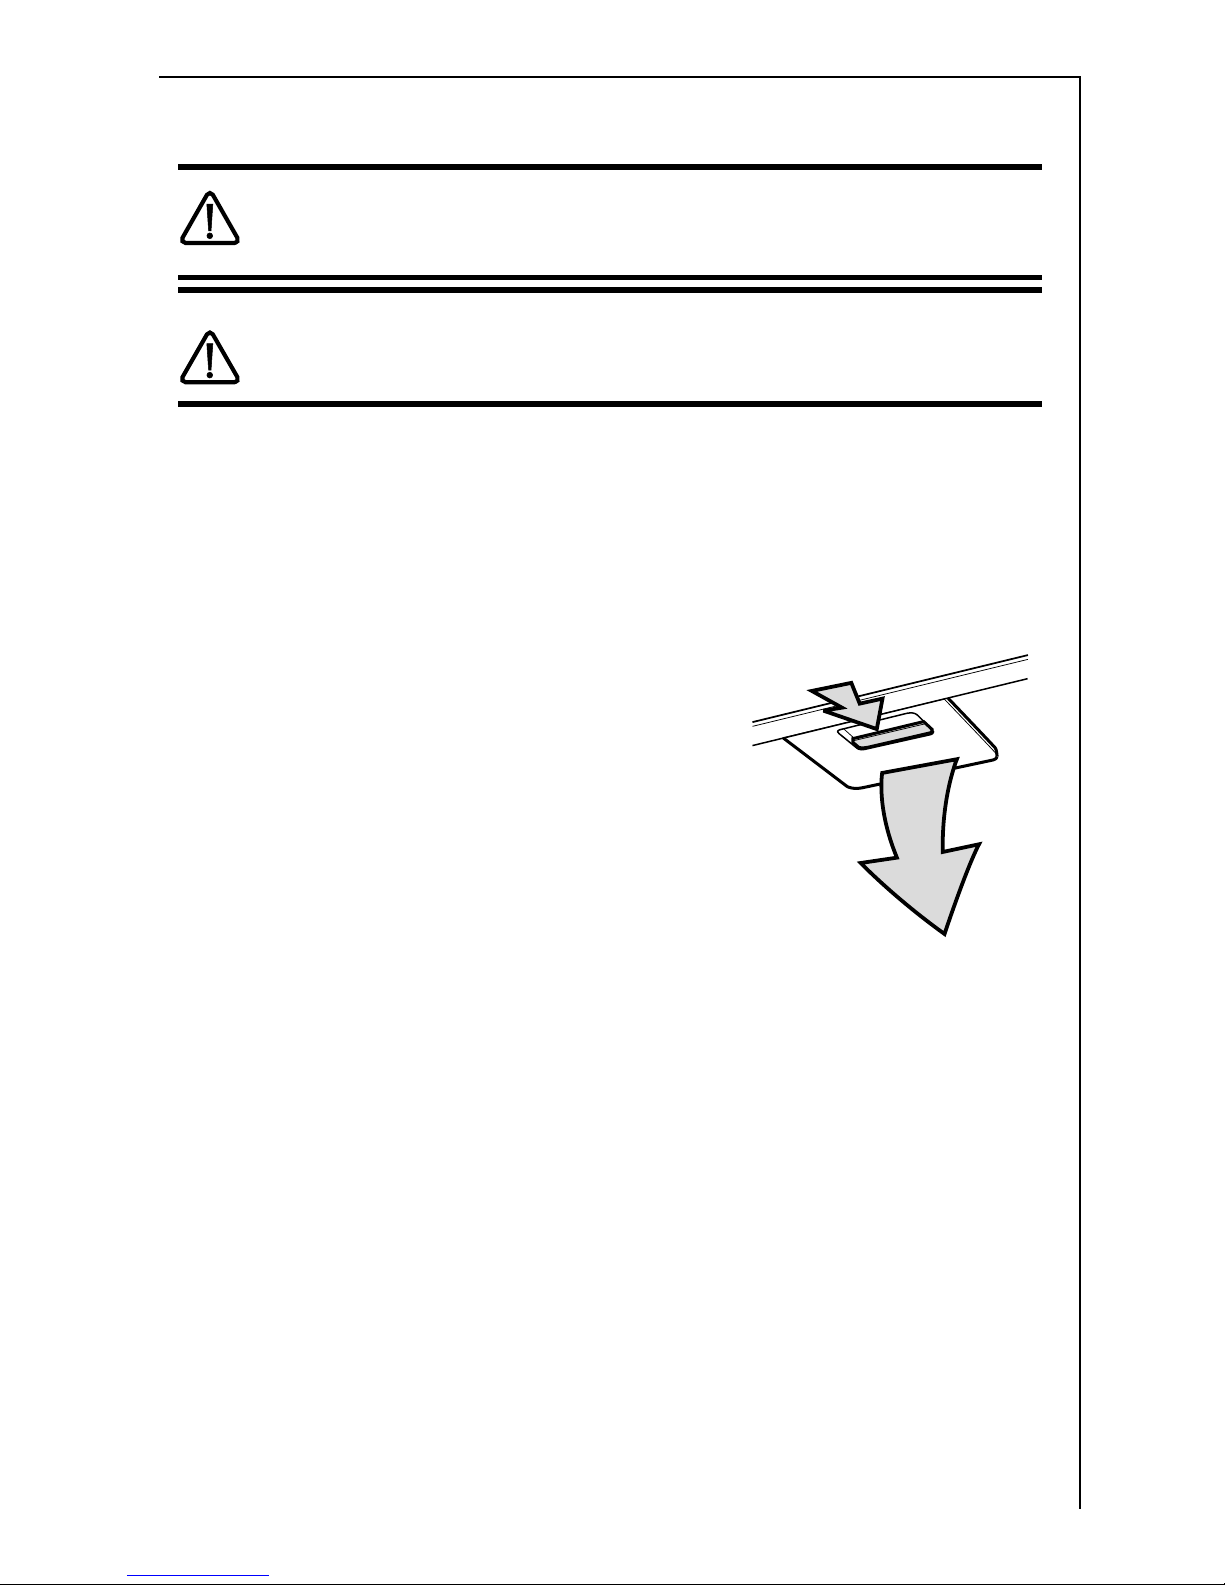
 The cooker hood is only in stand by mode unless the plug or the
fuse is disconnected.
 The cooker hood cannot be connected to flues of other appliances
S Innehållsförteckning ............................................................. 2
N Innholdsfortegnelse ............................................................ 14
FIN Sisällysluettelo .................................................................. 26
DK Indholdsfortegnelse ............................................................ 3
UK Contents ............................................................................ 50
51
that run on energy sources other than electricity. Please, keep to the
provisions of official directives regarding fume discharge.
Use of cooker hood
 This appliance is for domestic use only in a normal household.
 Never leave any deep-frying, melting fat, paraffin or any other
inflammable liquid unattended on the hob. In the event of fire:
Immediately switch off the cooker hood and the cooker. Note! Cover
the fire. Never use water.
 Never do any flambé cooking underneath the cooker hood. It can
cause a fire. Remember that overheated fat may spontaneously
ignite. Never leave the frying pan unattended.
 It is essential that the grease filter is regularly cleaned to help avoid
fat dripping on to the hot zone and causing a fire. Read the section
on Maintenance and Cleaning in the instruction book.
Disposal
 Prevent accidents when disposing of your cooker hood. Disconnect
the power plug from the wall socket and cut the power cord at the
hood inlet.Contact your local authority for information on where to
dispose the cooker hood.
52
Description of the Appliance
Functions
There are two possible systems:
 Extraction of air to the outside using an optional venting kit and
evacuation duct.
 Recirculation using an optional charcoal filter.
The air outlet must not be connected to chimney flues or combustion
gas ducts. The air outlet must under no circumstances be connected
to ventilation ducts for rooms in which fuel-burning appliances are
installed.
Accessories
The following are included with the cooker hood:
 1 hood canopy complete with controls, lighting and fan motor.
 1 telescopic chimney stack formed by: U-shaped upper section and
U-shaped lower section.
 1 recirculation spigot.
 1 plastic bag containing: 1 wall bracket to fix the hood, rawl plugs,
screws, and documentation.
The following can be ordered from your retailer:
 Charcoal filter, Type 20. The charcoal filter is to be used when the
hood is connected to the recirculation mode.
Only for CHDD 8890: The cooker hood is supplied ready for use as
a recirculation hood and may be used for extraction by removing the
charcoal filter which has been fitted inside the cooker hood.
Extractor version
 The air is discharged to the outside through a
pipe, which must be fitted to connection flange
A. Fig. 1.
 In order to obtain the best performance the
hose should have a diameter equal to the outlet
hole.
Filter Version
 The air is filtered through a charcoal filter and
returned to the kitchen.
 You will need an original AEG charcoal filter
Type 20 for the filtering function.
 Optionally, the position of the chimney
elements can be changed.
When using the hood in the filter version the
chimney must be fixed at the top, with the air
outlet grill at the side.
Fig. 1
A
53
Control Panel
 Best results are obtained by using a low speed for normal conditions
and a high speed when odours are more concentrated.
Turn the hood on a few minutes before you start cooking, you will
then get an under pressure in the kitchen. The hood should be left on
after cooking for about 15 minutes or until all the odours have
disappeared. The control switches are located on the units front
panel.
1- Mains switch, ON/OFF
Press for less than 1 1/2 seconds and the cooker hood goes into
the "stand by" position (point "b" is illuminated).
Press for more than 1 1/2 seconds and the cooker hood turns off,
ALL the controls (except the light push button) are disabled (the
display is off).
Press again for more than 1 1/2 seconds to reset the cooker hood
to "stand by".
2- Light ON/OFF
3- Display
4- Start and choice of motor speed 1-2-3-1-2.........
5- Intensive speed on/off. The Intensive speed runs for 5 minutes:
If the hood is on when the Intensive speed is activated, the hood
will revert to previous speed after 5 minutes.
If the hood is off when the Intensive speed is activated, the hood
will automatically turn off after 5 minutes.
To interrupt the Intensive speed, press button 1 or 4.
The letter P appears on the display and the remaining time (the
point a is flashing), if interrupted an acoustic signal is heard.
6- Self-Timer: times all the speed levels (the point b is flashing),
and then the cooker hood switches off:
The self-timer is set as follows: 1st speed level 20 minutes
2nd speed level 15 minutes
3rd speed level 10 minutes
The display shows the remaining operation time, at the end of the
time an acoustic signal is heard. Depressing the push-button
again exits the function.
Should the hood or the controls fail to operate: disconnect the power
supply for at least 5 seconds. After reconnecting the power supply wait
15 seconds and then check that the cooker hood is now operating
correctly.
123 456
ab
Fig. 2
54
Control device for grease and charcoal filters
This hood is fitted with a device that signals when it is necessary to
clean the grease filter or the charcoal filter (if the hood is used in the
recirculation version with a charcoal filter).
On delivery, the hood is not supplied with a charcoal filter, so the
saturation indicator will be disabled.
If the hood is to be used with a charcoal filter, the saturation
indicator light must be enabled as follows:
Press buttons 4 and 5 simultaneously and hold them for 3 seconds. At
first only the grease filter LED F will illuminate, but when the charcoal
filter LED C illuminates the saturation indicator will be enabled.
To disable it: Press buttons 4 and 5 again simultaneously and hold
them for 3 seconds, until the charcoal filter LED C goes out.
Grease filter LED (F)
LED F will start to flash when it is time to clean the grease filter.
Cleaning will be necessary after 40 working hours. Always comply with
the maintenance instructions for the grease filter.
Charcoal filter LED (C)
The charcoal filter LED C will start to flash when the charcoal filter
needs to be replaced.
This operation is necessary after approximately 160 working hours.
Resetting the saturation indicator
After cleaning or replacing the filters, press button 1 for 3 seconds until
the grease filter LED F or the charcoal filter LED C stops flashing.
Warning! The resetting of the saturation indicator MUST be done in
stand-by, never disconnect the hood from the mains.
55
Maintenance and care
Disconnect the cooker hood from the power supply prior to cleaning
the appliance, either by removing the plug (if fitted) from the mains or
removing the fuse.
Clean the filter regularly. The grease deposits in the filter and
discharge tube are fire hazards where a hotplate (or another heat
source) is left on by error.
Cleaning the hood
Clean the outside of the hood using a damp cloth and a mild detergent.
Never use corrosive, abrasive or flammable cleaning products.
Cleaning the grease filters
Clean the filter every month or every other
month according to how much the hood is
used.
The cleaner the filters, the more grease they
collect. To remove the filters, Fig. 3:
 First of all, push the stop on the metal
grease filter back, and then extract the filter
by pulling downward.
The filter is made of aluminium wires on which the
grease collects. Clean the filter in hot water using a
detergent, or in a dishwasher. Let the filter dry before
putting it back. Note that a dishwasher may discolour
the filter.discolouration of the filter can occur, this does not have any
impact on its performance.
 Clean the inner housing using a hot detergent solution only (never
use caustic detergents, abrasive powders or brushes).
Fig. 3
56
d
i
h
g
g
g
g
Charcoal filter
 The charcoal filter should only be used if you want to use the hood
in the recirculation function.
 To do this you will need an original AEG charcoal filter (available
from your local Service Force Centre).
Cleaning/replacing the carbon filter
Unlike other carbon filters, the LONGLIFE carbon filter can be
cleaned and reactivated. At normal use the filter should be cleaned
every second month (when using the hood 2,5 hours per day, in
avarage). The best way to clean the filter is in the dishwasher. Use
normal detergent and choose the highest temperature (65º C).
Wash the filter separately so that no food parts gets stuck on the
filter and later causes bad odours. To reactivate the carbon, the
filter should be dried in an oven for 10 minutes with a temperature
of maximum 100º C.
After approximately three years of use, the carbon filter should be
replaced with a new, as the odour reduction capacity will be
reduced.
Fitting
Remove the frame i which supports the filter h by turning 90° the
two knobs g.
Insert the charcoal filter inside the frame and put all parts back in
their place. Fig. 4.
To remove proceed in the reverse order.
 Always specify the hood model code number and serial number
when ordering replacement filters. This information is shown on the
registration plate located on the inside of the unit.
 The charcoal filter can be ordered from your local AEG Service
Force Centre.
Fig. 4
57
Warning
 Failure to observe the instructions on cleaning the unit and
changing the filters will cause a fire hazard. You are therefore
strongly recommended to follow these instructions.
 The manufacturer declines all responsibility for any damage to the
motor or any fire damage linked to inappropriate maintenance or
failure to observe the above safety recommendations.
Changing the light bulb
 Disconnect the cooker hood from the main supply.
 Remove the lamp cover, use a screw driver as a lever. Fig. 5.
 Replace the old bulb with a new one of the same type.
 Refit the lamp cover.
 If the light does not come on, make sure the bulb has been inserted
correctly before contacting your local Service Force Centre.
Fig. 5
5
Something Not Working
If your appliance fails to work properly please carry out the following
checks.
Symptom Solution
The cooker hood will not start. Check that:
The hood is connected to
the electricity supply.
Check that a fan speed has
been selected
The cooker hood is not working Check that:
The fan speed is set high
enough for the task.
The grease filters are clean.
The kitchen is adequately vented
to allow the entry of fresh air.
If set up for recirculation, check
that the charcoal filter is still
effective.
If set up for extraction, check that
the ducting and outlets are not
blocked.
The cooker hood has The safety cut-out device has been
switched off during operation. tripped.
Turn off the hob and then wait for
the device to reset.
If the hood has been installed
below the heights indicated in the
installation instructions the motor
will cut-out frequently which will
damage the hood.
If after all these checks, the problem persists, contact your local
Service Force Centre, quoting the model and serial number.
Please note that it will be necessary to provide proof of purchase for
any in-guarantee service calls.
In-guarantee customers should ensure that the above checks have
been made as the engineer will make a charge if the fault is not a
mechanical or electrical breakdown.