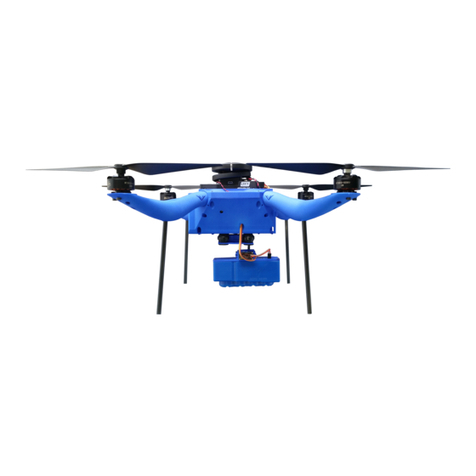
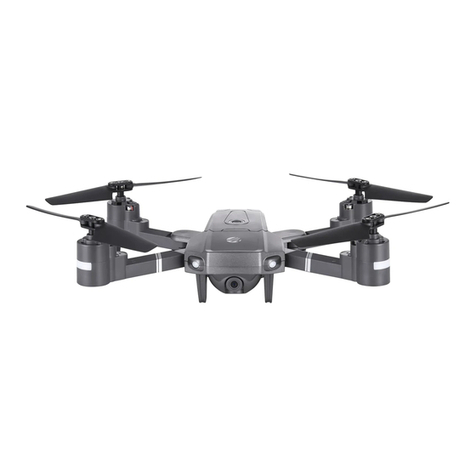
Aero Hawk Field Hawk User manual

Instructions Manual
Thank you for choosing the Field Hawk.

This product is NOT a toy and is not suitable for children under the age of 18. Adults
should keep the Aero Hawk UAV out of the reach of children and exercise caution when
operating this aircraft in the presence of children. It is mandatory that any pilot using this
product have a Small Unmanned Aircraft System- Remote Pilot Airman Certificate.
This product is a Aero Hawk product that offers easy to use flight when in good working
order as set forth below. Visit http://www.Aero-hawk.com for the most current instructions
and warnings and http://knowbeforeyoufly.org/ for more information about flight safety
and compliance.
The information in this document affects your safety and your legal rights and
responsibilities.
Read this entire document carefully to ensure proper configuration before use. Failure to
read and follow the instructions and warnings in this document may result in product loss,
serious injury to you, or damage to your aircraft.
By using this product, you hereby signify that you have read this disclaimer carefully and
that you understand and agree to abide by the terms and conditions herein. You agree
that you are solely responsible for your own conduct while using this product, and for any
consequences thereof. You agree to use this product only for purposes that are proper
and in accordance with all applicable laws, rules, and regulations, including international
and domestic airspace regulations, and all terms, precautions, practices, policies and
guidelines.
Aerohawk accepts no liability for damage, injury or any legal responsibility incurred
directly or indirectly from the use of this product. The user shall observe safe and lawful
practices including, but not limited to, those set forth in these Safety Guidelines.
Drone safety information for planes and copters
Drones can be hazardous if operated incorrectly. If you are new to drones, we
recommend learning the ropes first on a mini-drone or simulation software. Make safety
your first priority, and always follow these best practices. It is highly recommended that
any pilot using this product have a Small Unmanned Aircraft System- Remote Pilot
Airman Certificate.
Handling
Spinning propellers can cause serious injury. Become familiar with your drone’s arming
procedure, and always disarm before handling the propellers. On Pixhawk-powered
vehicles, the safety button provides an additional safety measure by blocking power to
the motors while the button is disabled (blinking red), allowing you to handle the drone
safely.
When flying, always make sure to keep a safe distance between
yourself and the drone. Don’t take off with the drone facing towards
you or fly directly over your head. It is your job to ensure the safety of
the people around you; make sure that spectators maintain a safe
distance from your drone at all times.
Disclaimer & Warning
1

Table of Contents
When this was printed you are required to register with the FAA if
you own this product.
If you are going to fly commercially you may be required to
acquire a license, please see links below.
For up to date information on registering your drone please visit
https://registermyuas.faa.gov/.
For additional help with regulations and guidance on UAS usage,
visit knowbeforeyoufly.org/.
2
Disclaimer and warning……………………………………….1
Table of contents…………………………………………………..2
What’s included.…………………………………………………..3
Fieldhawk diagram……………………………………………….4
Charging the LiHv battery…………………………………...5
Battery warnings…………………………………………………..6
Remote control diagram……………………………………….7
Using the remote control……………………………………..8
Charging the remote control battery…………………...9
Remote Basics………………………………………………………10
Connecting to the Field-hawk and camera………...11
Compass Calibration……………………………………….12-13
Using Mission Maker for Ardupilot…………………….14
Creating a flight plan using mission planner...15-16
Led symbol guide…………………………………………..…...17
Flying a mission…………………………………………………..18
Uploading Images………………………………………….…...19
Using Aero-hawk Maps………………………………….20-21
Maintenance……………………………………………………....22

❏Battery Charging Safety
Bag
❏Carrying Backpack
❏Usb Cable
❏8x Propellers
Optional:
❏Telemetry Antennas
❏Laptop
What’s Included
Please go through the list and ensure you received everything you purchased.
❏Manual
❏FieldHawk with Camera
❏Remote Control
❏2x LiHv Batteries
❏Battery Charger
❏Battery Charger Power
Supply
❏Battery Tester
3

Fieldhawk Diagram
4
1. Propellor
2. Motor
3. Battery Plug
4. Pixhawk 2
5. Gps Here+
6. Safety Switch
7. Led State Indicator
8. Leg
9. Battery Slot (rear of
drone)
10. Camera Array
11. Camera Power Wire
12. Camara Readiness Light
13. Camera Servo Gimbal
14. Pixhawk 2 Usb Port
15. Power & Signal wires
16. Drone Body
Silver Propeller
Black Propeller
Black Propeller
Silver Propeller

5
Charging The LiHv Battery
For a video follow this link: https://youtu.be/evqc9zkqoDU
Connections Setup
Plug the yellow connectors together, and Insert balance lead (white connector) into the 5 pin side
port. Then place battery inside lipo Guard. Press enter to open menus, left and right to adjust
settings, and press stop to go back. Shown below are the screens you should go through.
Begin by plugging the
power supply into a
120V AC wall outlet
and also plugging
into the battery
charger.
In the program select
menu go left or right until
you find the Field Hawk
battery type LiHv and Press
Enter
Program Select
LiHV Batt
Once in the LiHv menu scroll
left or right until you find LiHv
Balance Chg and press Enter
this will flash amount of
current going into the battery.
Set it to 3. Then press enter to
change the number of cells to
4s(4 celled battery). Press and
hold enter for 3 sec to start
program.
LiHV Balance
3.0A 15.2V(4S)
The charger will detect the
amount of cells. R is the
number of cells detected and S
is the number of cells you set.
These numbers must be
identical if not press STOP to
go back to the previous screen
to recheck the number of cells
you entered before
proceeding.
R:4SER S:4SER
Confirm (enter)
Time 0.0A 17.4V
Bal129:59 5200
You will see a warning
message when charging
LiHV batteries because
this program is specific to
these batteries and should
only be used on these
batteries . Charger beeps
when full or time limit is
reached.
Check your battery after
charging by connecting
the tester to the balance
lead with the black wire
connecting to the left
most pin. The tester will
show total voltage then
read out each individual
cell.

6
Battery Warnings
Bat Voltage Capacity
17.40V 100%
16.48V 80%
15.56V 60%
14.46V 40%
14.00V 30%
13.72V 20%
12.80V 0%
Battery failsafe activates and
the drone returns to launch
Land immediately when
voltage reaches 13.3
Proper Charge
We recommend charging the 4S batteries at 3
amps. This will help the batteries last beyond the
industry standard of 300 charge cycles. A full 4S
battery will indicate 4.3-4.4 Volts per cell, an
empty battery is 3.2 volts per cell. You will be able
to fly until each cell gets to about 3.5 volts per cell,
after that your battery will be too depleted to keep
the drone in the air.
Things to look out for
●Inspect battery for leaks, excessive warmth and bulging before use.
●Please be aware that lipo batteries can ignite if damaged.
●Do not charge the batteries an amperage above 5.2 Amps doing this may damage the
battery and reduce its life.
●Do not drop batteries this may damage them.
●Don’t use batteries that are bulging or leaking. These are signs of damage and the battery
should no longer be used.
●Don’t leave batteries unattended while charging.
●Don’t leave batteries in direct sunlight. Excessive heat may cause the battery to bulge
rendering it damaged and unsafe.
●Don’t charge or handle a battery that is too hot to touch. Excessive heat may cause
damage
●Dispose of malfunctioning batteries properly.
●Please treat them as dangerous fuel like gasoline.
●When you fly an unmanned aircraft the Responsibility is yours.
●Charge your LiHv batteries in a non conductive flame proof container.

7
Remote Control Diagram
1.Power Switch
2.Strap Hook
3.Digital Trim Adjustment
4.Carrying Handle
5.LCD Display
6.Antenna
7.Flight Mode Switch
8.Emergency Motor Shut Off
9.Speaker
10.Left Stick Throttle and Yaw
11.Right Stick Pitch and Roll
12.Battery Cover
13.Earphone Port
14.Trainer Port
15.Remote Control Battery Voltage
16.Remote Signal Strength Indicator
(RSSI)
17.Title
18.Switch Positions
19.Trims
(ensure they are at center as shown)
20.Page button
21.Menu button
22.Exit button
23.Enter button & up and down knob.

8
Using the Remote Control
Strong Signal
Flight mode switch:
UP: Loiter, accepts all input from
the sticks
CENTER: RTL, stands for Return
to launch site autonomously
DOWN: Auto, invokes the drone
to fly the most recently uploaded
mission.
Throttle stick: Dictates the
altitude of the drone in Loiter
mode
UP: 100%-80% Causes the
drone to climb up.
CENTER: 60%-40% Causes the
drone to hover at current rate.
DOWN: 20%-0% Causes the
drone to descend.
RIGHT: Causes the drone to
turn and face to the right.
LEFT: Causes the drone to turn
and face to the Left.
Directional stick: Dictates the
direction in which the drone moves
in loiter mode and while descending
in auto mode.
Assuming you are facing the drone
AND you are at the location the drone
was ARMED.
UP: Causes the drone to move
forward, away from you.
DOWN: Causes the drone to move
backward, towards you.
RIGHT: Causes the drone to move to
the right.
LEFT: Causes the drone to move to
the left.
Emergency motor cutoff switch. In
case you every need to shut off the
motors asap you can flip the switch
up and it will cut the signal to the
motors. Exercise caution and be
aware before risking motor cutoff.
Doing this in air will cause drone to
descend quickly and possible crash.
On button: press or slide
up to turn on remote.
Long press or slide
down to turn off the
remote.
Page: changes the
page you are seeing.
Menu and Exit: are
used to navigate the
remotes many menus
that may be useful for
the advanced user but
for the purpose of
agricultural mapping
they are hardly used
and so there won’t be
much detail here
about them.
Enter and Slider: enter
allows you to adjust
selected objects in
menus. Slider changes
your selection as you
slide it left to right.
Signal strength is
best when the
antenna is pointed
to the side as
shown.

9
Charging the Remote
Control Battery
1. To charge the QX7 battery remove the back
Lid of the remote by sliding it down. Exposing
the 2S Li-Io battery.
2. Gently remove the balance lead connector
from the back of the remote.
3. Plug the the balance lead and power lead
into the charger.
4. Set the Program on the charger for LiIo
press enter. (Very important to not cause
damage to the battery)
Program Select
LiIo Batt
5. Find LiIo Balance charge by pressing left or
right and then press enter to select it. Press enter
to change the charge current to 1.0 A. Press
enter again and Set the number of cells to 2S.
Then press and hold enter to start the program.
LiIo Balance
1.0 A 7.2V(2S)
6. The charger will detect the amount of cells. R
is the number of cells detected and S is the
number of cells you set. These numbers must be
identical if not press STOP to go back to the
previous screen to recheck the number of cells
you entered before proceeding.
R:2SER : 2SER
Confirm (enter)
7. Press enter to confirm and let the
battery charge.
Empty battery: 6.0V
Full battery: 8.4V

10
Left Stick
Commands
Left Stick Down
Below 40%:
Descend
Left Stick Right:
Nose Rotates
Right
Left Stick Left:
Nose Rotates Left
Side View
Top View
Left Stick Between
60%-40%: Hover
Side View
Left Stick Up
Above 60%:
Ascend
Side View
Top View
Remote Basics
This description is based on the operator remaining at the launch point of the drone and
assuming the operator is facing towards the drone, or the direction the drone came from.
Right Stick
Commands
Right Stick Up:
Fly away from
Operator
Right Stick Down:
Fly towards
Operator
Right Stick Right:
Move to the Right
Right Stick Left:
Move to the Left
Top
View

11
Connecting to the
Field-hawk and Camera
1-Via Usb Cable
Cable provides Power to drone
but not cameras.
Cable connection 3ft dist.
Fastest pic upload speed.
To Connect to computer plug
usb cable into computer then
into the Pixhawk cube.
For Mission uploading select the
comport that appears in
comport box. Comport
numbering is random just try a
different com until it connects.
For uploading pictures ensure
you are the drone is powered via
battery then connect to each
micro usb port on the side of the
camera.
2-Via Wi-Fi
Drone must be powered via
battery
Wireless 30ft connection,
slower than usb.
To connect wifi you must first
open the wifi settings on your
device, connect to ardupilot.
The password for ardupilot:
enRouteArduPilot
For mission maker you would
then go in the app and press
connect via UDP.
For Mission Planner you go to
the Upper right hand corner
and choose UDP.
For the Pic uploader when it
asks click yes to connect via
wifi
3-Via Telemetry antenna
Drone must be powered via
battery
Telemetry can be used on
computer or tablet.
Only available if telemetry
antennas were purchased but
highly recommended
Long distance connection up to 3
km, can’t be used for pic transfer
To connect via telemetry antenna
connect it to your device or
computer.
On a computer you select the
respective comport and change
the baud rate to 57600 as shown.
In the Mission Maker app you
choose USB.

12
Compass Calibration
You May/will need to calibrate the compass for your region. Follow the steps below to calibrate
your Field Hawk. Calibration must be performed in an area that is at least 20 meters from Metal
Objects and buildings. For a Video on how to calibrate your Field Hawk visit
https://www.youtube.com/watch?v=DmsueBS0J3E
ITEMS NEEDED:
• Computer with Mission
Planner Software
• Field Hawk
• Battery
1. Beginning by Inserting the battery into
the body of the drone. Plug the yellow
battery connector into the yellow port
located on the drone body. If the battery is
charged you will hear a series of beeps.
(The white connector on the battery is for
charging)
2. Turn on Laptop and open Wifi Setting
on the Laptop. Connect to “ardupilot”. You
won’t be able to connect in mission
planner if you’re not connected to
ardupilot wifi.
5. On the top left of the screen click
Initial Setup. From the dropdown click
Mandatory Hardware, then select
Compass.
6. Select Start, follow the
instructions on Page 9 to finish
Calibrating your Field Hawk.
3. Open the Mission Planner Software.
Once the software is open on the top right
of the screen you will select from the
dropdown UDP & 115200. Then CLick
connect.
4. Notice 'Ensure Port' Click
OK to proceed.

13
Compass Calibration Pt.2
7. Begin by physically moving the
drone around as outlined next. As
you move the drone around the
Mag 1 & Mag 2 will begin to fill on
your screen.
8. Start by grabbing the Field Hawk
by an arm and spinning it 360°. Do
this to each arm. Then spin it
upright and upside down and
repeat until Mission Planner asks
you to reboot for the changes to
take effect.
9. Reboot your Field Hawk by
unplugging the Battery Pack
and plugging it back in.
10. You are now ready to
program a mission. Please
continue onto next page on
how to create Mission Plans.

14
Using Mission Maker for
Ardupilot on an Android device
Using this app is simple but doesn’t do terrain following it is best used in flat locations.
Mission Maker for Ardupilot is available on the google play store for android devices.
2-Select the menu button
and then choose Editor.
3-Select the Squiggly
line. And change the
white box to Survey. To
adjust the visible map
unselect the squiggly
line.
4-Trace around the area
you want to survey. To
readjust the map deselect
the Squiggly line.
1-Begin by opening
Mission Maker for
Ardupilot and finding
the area you wish to
survey.
5- Select the green tile at
the bottom of the screen
to show options deselect
to hide options.
6- This table will open.
Select the camera you are
using (Aerohawk
M4HR). And check mark
Lock Copter Orientation
Prefetch Map
It is recommended to
Prefetch the map by
connecting to WiFi or
Data and not closing the
app because this may
cause your map to
disappear.
7-Once you are happy with your
settings deselect the tile. Then
Power up the drone via the
battery or usb cable. You can now
connect to the drone Via UDP or
USB see pg 12. In this screen by
selecting the 3 dots at the bottom
of the screen or in the Vehicle
data screen. You can also import
one of your previously saved
mission’s from you device or
export it into your device.
8-After you upload your mission
you can then go back to the vehicle
data screen where you will find lots
of useful information from battery
life to distance from home. You
will also see the drone on its path
when it is flying.
Bat. Volt
Mode
Heigh
t
Gps
Status

15
Creating a Flight Plan Using
Mission Planner
→https://youtu.be/MhHomssqD7k
1. Open Mission Planner
on Laptop and click on
flight plan tab.
3. Locate the area you want to survey.
Right click on the screen and choose
Draw polygon then add Polygon
Point.
4. Left click around the edges of your field
to choose your flight area.
5.Right click and select Auto WP
then select Survey (Grid)
2. In the Waypoints tab set Default alt to 400 ft.
Select Terrain from the drop down box. And
check the verify height box.
6. Under Simple select the name of the Camera you are
using(Aero-hawk_8mp). Adjust Altitude to Fly at 400ft and Flight
Speed of 20mph, with the 4 boxes checked. Change the angle to
reduce the number of strips for shorter flight times. Check photo
every and ensure that it is not less than 1.5 seconds.
7. In the Grid Options tab check the
box. You can adjust your
overlap, sidelap and path starting point. In
some cases you may have to adjust overlap
and sidelap. This will affect photo interval
so remember to check it .

16
Creating a Flight Plan Using
Mission Planner
→https://youtu.be/MhHomssqD7k
8. Select Accept. Confirm the Drone is connected in the top right
corner of the screen. Then select Write WPS.
9. Select the Flight
Data tab.
10. Below the Virtual horizon select status tab and move the slider
to the right and find terpend and terload.
11. Check if Terload and
Terpend are 0 Mission planner
has no stored terrain data for
the area. Connecting to an
internet connection will
download that terrain data into
mission planner. Terload and
Terpend will change when data
is being transferred to the
drone. When finished Terload
will stop at a number and
Terpend will go to zero. Please
wait at least 5 seconds to
confirm that all terrain data is
written then you will be able to
go and fly.
12. If the Field-hawk refuses to go into auto mode when switched to auto
mode it is an indication that it either doesn’t have terrain data, or it is
not close enough to the field. The fieldhawk will need to be close to the
flight path as well as have loaded the terrain data from mission planner.

17
Led Symbol Guide
Yellow Symbols:
-Double Flashing:
Failing pre arm
checks
-Single Flashing:
Radio Failsafe
activated.
-Flashing with tone:
Battery Failsafe
activated.
Red and Blue
Symbol: -Initializing
gyro’s, keep vehicle
still and level.
Blue Symbols:
-Flashing: Disarmed,
No gps lock
-Solid:armed, No gps
Lock
Green Symbols:
-Flashing Green: Gps
lock acquired
-Fast Flashing
Green:Gps is using
SBAS
Red Symbols:
-Solid Red with
tone:No SD Card
-Solid Red:Error
Red and Yellow
Symbol with tone:
-Ekf or Inertial Nav
failure
Yellow and Blue
Symbol with tone:
-Gps Glitch or Gps
Failsafe activated
Yellow and Purple
Symbol:
-Barometer Glitch

Loiter: Precision Maneuvering
RTL: Returns Drone to Arming Location
Auto: Initiates Mission
4. Arm the drone by pressing and
holding the safety button on top of
the drone until it is solid red. Then
back away at least 10 ft from the
drone.
18
Flying a Mission
Attention: Do not Arm Throttle before arming drone in Auto mode.
3. Turn on the Remote
Control. The LED
indicators on the camera
and drone will turn GREEN
and flash. The Camera led
will blink when it is waiting
for gps coordinates then
turn solid when its ready to
go.
5. Start the motors (Arm throttle) by holding the
throttle down and right until you see them start
up. If you need to stop the motors (Disarm
throttle) turn the throttle down and left.
Start motors Stop motors
6. Flip the flight mode switch to auto,
raise the throttle a little bit and the
drone will take off on its mission. Do
not move throttle side to side during
mission this will cause heading
change. Keep an eye on it.
7. When it is coming for a landing you can change
where it will try to land by moving the directional
stick. Once it lands, the motors will stop by
themselves.Push the flight mode switch down to
loiter. Disarm the drone and unplug the battery.
Each mission is separated by a reboot so make
sure to unplug the drone so your next mission
gets saved in a new folder. You are now ready to
upload your pictures to your AeroHawk Maps
software.
Flight Mode Switch
1. Once you have created your mission &
Uploaded it to your Field Hawk. Take your
Field Hawk to the location you wish to fly. For
the most accurate data it is best to fly between
the hours of 10am and 2pm. Also make sure
right before you fly to see if there aren’t any
clouds that are covering the sun or about to
cover the sun. A Flight with sun being partially
blocked or where the sunlight is blocked then
unblocked will give inaccurate data, and will
require a reflight.
2. Insert and plug the Battery pack into the Field Hawk
and place the Field Hawk on the Ground at least 30 ft
from metal objects like buildings and Vehicles.

19
Uploading Images
The Aerohawk File Transfer Wizard can be downloaded for windows at
https://aero-hawk.com/software/
1. To upload pictures, power on the Field Hawk with a
battery, and open AeroHawk File Transfer Wizard V2 on
your computer. A message will appear press yes for wifi or
no for Usb. Choosing WiFi is the easiest way to download
pics, but using usb can download pictures a little quicker.
Choosing wifi will disconnect you from your current WiFi.
4.Then in the tabs choose the camera you
wish to download pictures from. Then
choose a mission or all the missions. The
Camera only stores the last 3 missions, and
deletes the oldest mission (mission A).
Missions are separated each time the
drone is shut-off, so if you fly 2 mission’s
without shutting off the drone both of
those flight images will appear under one
mission.
3. Next click on Path &
choose the file location you
would like to store your
photos. Creating a file with
the flight details before hand
is the easiest method of
keeping files organized. The
default save location is the
Transfer Wizard folder.
Oldest Mission
2nd Oldest Mission
Most Recent Mission
2. Once you have selected WiFi or usb the
second screen will show you the status of the
camera’s. If you chose WiFi it should show all
the camera’s as detected. If they aren’t all
detected please refresh the program with the
refresh button. If you decided to use usb only
the camera you plugged into will be
detected, and you will have to refresh every
time you switch the cable to another camera.
5.After you are finished
downloading the
pictures you can press
exit or close out each
window.
Other manuals for Field Hawk
2
Table of contents
Other Aero Hawk Drone manuals
