manuals.online logo
Brands
  1. Home
  2. •
  3. Brands
  4. •
  5. Aeroe
  6. •
  7. Bicycle Accessories
  8. •
  9. Aeroe Spider Cradle User manual

Aeroe Spider Cradle User manual

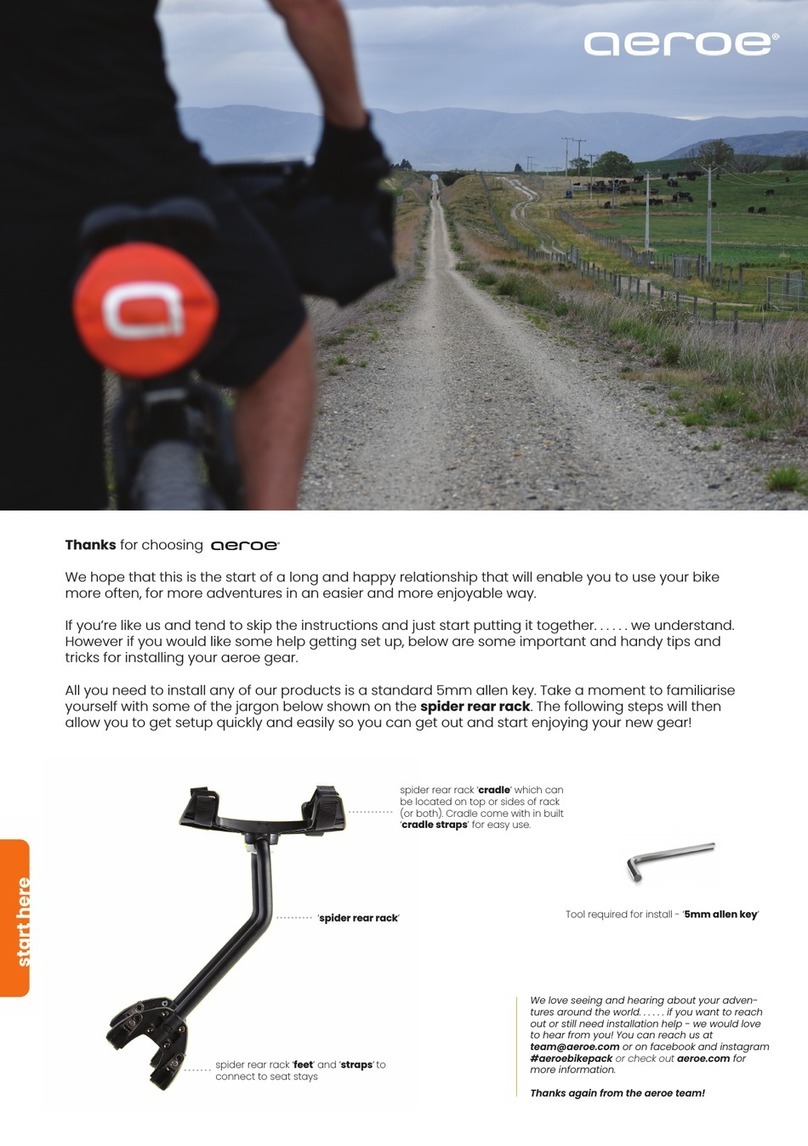
Thanks for choosing
We hope that this is the start of a long and happy relationship that will enable you to use your bike
more often, for more adventures in an easier and more enjoyable way.
If you’re like us and tend to skip the instructions and just start putting it together. . . . . . we understand.
However if you would like some help getting set up, below are some important and handy tips and
tricks for installing your aeroe gear.
All you need to install any of our products is a standard 5mm allen key. Take a moment to familiarise
yourself with some of the jargon below shown on the handle bar cradle. The following steps will then
allow you to get setup quickly and easily so you can get out and start enjoying your new gear!
Tool required for install - ‘5mm allen key’
handlebar cradle ‘feet’
and ‘straps’to connect
to handlebar
In built ‘cradle
straps’ for easy use.
‘handle bar cradle’
We love seeing and hearing about your
adventures around the world. . . . . . if you
want to reach out or still need installation
help - we would love to hear from you!
You can reach us at
[email protected] or on facebook and
instagram #aeroebikepack or check out
aeroe.com for more information.
Thanks again from the aeroe team!
image: nzcycling journal
Simply place your bag into the cradle and connect the straps. If using an aeroe
dry bag, loop through the eyelets for additional security, otherwise just tighten so
bag is secure. Adjust the rest of any excess strap to keep nice and tidy. Enjoy!
HOT TIPS Straps to hold gear can be connected across from each other or on
the diagonal to form a cross for additional security. Tuck strap under itself if carry
small load with excess strap to keep nice and tidy and add to stability.
HOT TIPS Our cradles have been designed specifically in a way that allows you
to use your own bag or tent, simply strap in and go - which is the beauty of the
system. However if you would like a purpose built fully waterproof bag with built
in eyelets that the straps can loop through for additional security, then check
out aeroe.com for our options - we have designed these bags specifically for
this purpose.
Thanks again and enjoy, from the aeroe team.
Once you have unpacked the handlebar cradle, before installing on bike, start
by unscrewing the bolts that loosen the 2 straps with allen key (see step 2 for
bolt location). If you are using on a carbon frame we recommend a layer of
standard bike tape or mastic tape on the handlebar location prior to install.
Once the straps are loose, position and wrap the straps one at a time around
your handlebar in a position that suits, ensuring that any cables are clear
and then position the cradle on the handlebars and connect the hole in the
strap with the lug in the feet on both sides of the strap as shown above. Note
the 2 holes in the straps. Choose the hole that best suits the thickness of your
handlebar.
Once your handlebar cradle is in position, it is now ready to take a bag with the in built
easy to use straps. Recommended max load in cradle is 5kg (12 pounds).
Once the feet are roughly in place, simply start tightening the straps using the allen
key in the bolts as shown. We suggest tightening one of the straps on the bike first
to about 75% tight, to form some stability and then, position the second strap and
tighten this to 75% also making sure the cradle is positioned upright and even on
both sides. Adjust as required before tightening further.
Once the handlebar cradle looks like its in the right place. Tighten straps to 100%.
Max tightening of 4Nm torque. We normally suggest this works out to be tightened to
a firm hand tighten with the allen key is about right, but you can use a torque tool to
measure this if required.
Your handlebar cradle should be starting to look like this. Depending on the size or
position of your handlebars, you can re-loosen the bolts and adjust the cradle up
and down to find your preferred position and then tighten the bolts again. Give the
cradle a firm wobble to make sure you are happy with the position and tightness.
image: 3,4 caleb smith 5 nzcycling journal

Other Aeroe Bicycle Accessories manuals

Aeroe spider pannier rack User manual

Aeroe

Aeroe spider pannier rack User manual

Aeroe Spider Rear Rack User manual

Aeroe

Aeroe Spider Rear Rack User manual

Popular Bicycle Accessories manuals by other brands

SZKTDZ KT-LCD9 user manual

SZKTDZ

SZKTDZ KT-LCD9 user manual

Shimano SLX BR-M7000 Dealer's manual

Shimano

Shimano SLX BR-M7000 Dealer's manual

Holux GPSPORT 260 PRO user guide

Holux

Holux GPSPORT 260 PRO user guide

DT SWISS O.D.L. manual

DT SWISS

DT SWISS O.D.L. manual

Giant Axact 9/11 manual

Giant

Giant Axact 9/11 manual

Bosch BBS240 Original operating instructions

Bosch

Bosch BBS240 Original operating instructions

Ananda D15 manual

Ananda

Ananda D15 manual

Gazelle 653540100 user manual

Gazelle

Gazelle 653540100 user manual

HOMCOM B71-056 Assembly & instruction manual

HOMCOM

HOMCOM B71-056 Assembly & instruction manual

Oreka O5 user manual

Oreka

Oreka O5 user manual

Garmin Edge installation instructions

Garmin

Garmin Edge installation instructions

BAFANG H600 Dealer's manual

BAFANG

BAFANG H600 Dealer's manual

PUIG 6805 Mounting instructions

PUIG

PUIG 6805 Mounting instructions

Arrow ARR-RBL owner's manual

Arrow

Arrow ARR-RBL owner's manual

Steco Front Carrier Assembly manual

Steco

Steco Front Carrier Assembly manual

RIESE & MULLER VBK0192 owner's manual

RIESE & MULLER

RIESE & MULLER VBK0192 owner's manual

Formula NERO R operating manual

Formula

Formula NERO R operating manual

Allen Sports T2 BIKE TRAILER Instructional owner's manual

Allen Sports

Allen Sports T2 BIKE TRAILER Instructional owner's manual

manuals.online logo
manuals.online logoBrands
  • About & Mission
  • Contact us
  • Privacy Policy
  • Terms and Conditions

Copyright 2025 Manuals.Online. All Rights Reserved.