SET ID
E. sales@aesglobalonline.com
www.aesglobalonline.com
T: +44 (0) 288 639 0 693
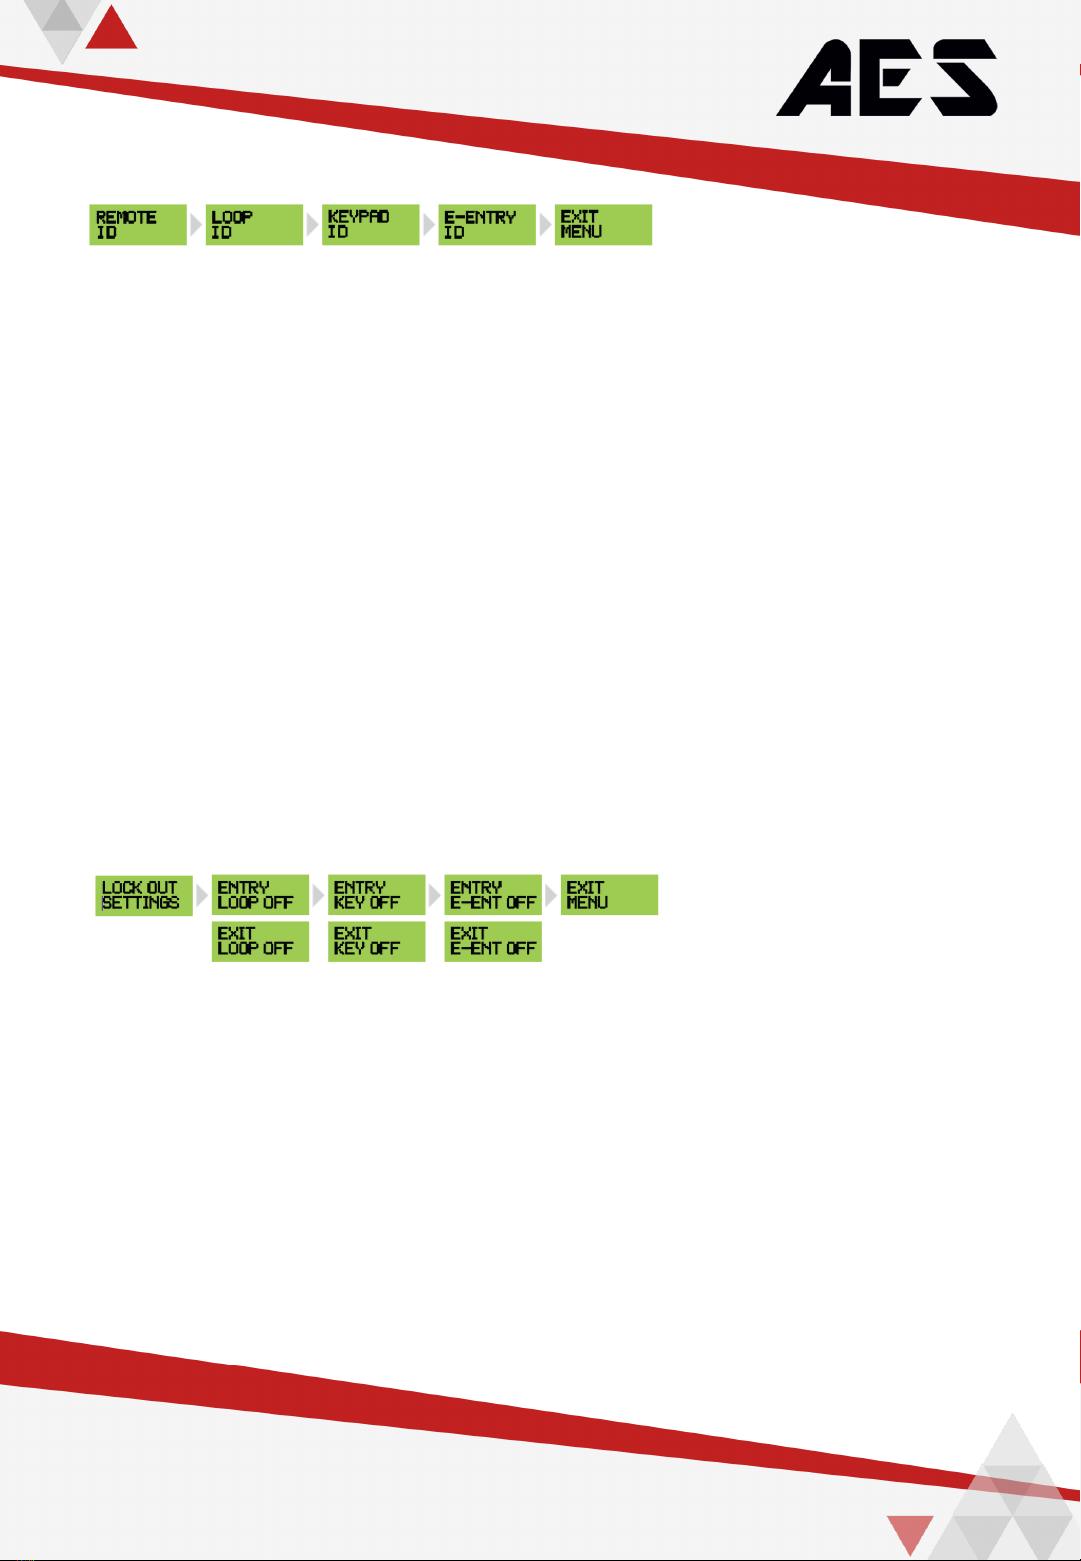
Setting REMOTE ID:
Press PB to enter, screen will display REM 1 / No ID.
Press PB again to enter selection, rotate dial right to select UNIT 1 –UNIT 200, rotate left to select SPARE.
Press PB to confirm and screen will now display REM 2 / No ID.
Follow the same procedure to change, or rotate left to EXIT MENU, then press PB to exit back to sub menu.
(NOTE: Only coded remotes will display, so if you have only 4 remotes coded, only 1-4 will display)
Setting LOOP ID:
Press PB to enter, screen will display LOOP 1 / No ID.
Press PB again to enter selection, rotate dial right to select LOOP 1 –EXIT, or rotate again to select LOOP 1 ENTRY.
Press PB to confirm and screen will now display LOOP 2 / No ID.
Follow the same procedure to change, or rotate left to EXIT MENU, then press PB to exit back to sub menu.
(NOTE: Only coded loops will display, so if you have only 2 loops coded, only 1-2 will display –maximum of 4)
Setting KEYPAD ID:
Press PB to enter, screen will display KEYPAD 1 / No ID.
Press PB again to enter selection, rotate dial right to select KEYPAD 1 –EXIT, or rotate again to select KEYPAD 1 ENTRY.
Press PB to confirm and screen will now display KEYPAD 2 / No ID.
Follow the same procedure to change, or rotate to EXIT MENU, then press PB to exit back to sub menu.
(NOTE: Only coded Keypads will display, so if you have only 2 keypads coded, only 1-2 will display –maximum of 4)
Setting E–ENTRY ID:
Press PB to enter, screen will display E–ENTRY 1 / No ID.
Press PB again to enter selection, rotate dial right to select E-ENTRY 1 –ENTRY, or rotate again to select E-ENTRY 1 EXIT.
Press PB to confirm and screen will now display E-ENTRY 2 / No ID.
Follow the same procedure to change, or rotate to EXIT MENU, then press PB to exit back to sub menu.
(NOTE: Only coded e-Entry remotes will display, so if you have only 2 e-Entry remotes coded only 1-2 will display –maximum of 4)
Setting LOOP LOCK OUT SETTINGS:
Press PB to enter, screen will display ENTRY LOOP / OFF.
Press PB again to enter selection, rotate dial right to select ENTRY LOOP / ON.
Press PB to confirm and screen will now display EXIT LOOP / OFF.
Follow the same procedure to change, or rotate to EXIT MENU, then press PB to exit back to sub menu.
Setting KEYPAD LOCK OUT SETTINGS:
Press PB to enter, screen will display ENTRY KEY / OFF.
Press PB again to enter selection, rotate dial right to select ENTRY KEY / ON.
Press PB to confirm and screen will now display EXIT KEY / OFF.
Follow the same procedure to change, or rotate to EXIT MENU, then press PB to exit back to sub menu.
Setting E–ENTRY LOCK OUT SETTINGS:
Press PB to enter, screen will display ENTRY EENT / OFF.
Press PB again to enter selection, rotate dial right to select ENTRY E-ENT/ ON.
Press PB to confirm and screen will now display EXIT E-ENT/ OFF.
Follow the same procedure to change, or rotate to EXIT SUB MENU, then press PB to exit back to main menu.
LOCK OUT SETTINGS