manuals.online logo
Brands
  1. Home
  2. •
  3. Brands
  4. •
  5. Yaesu
  6. •
  7. Transceiver
  8. •
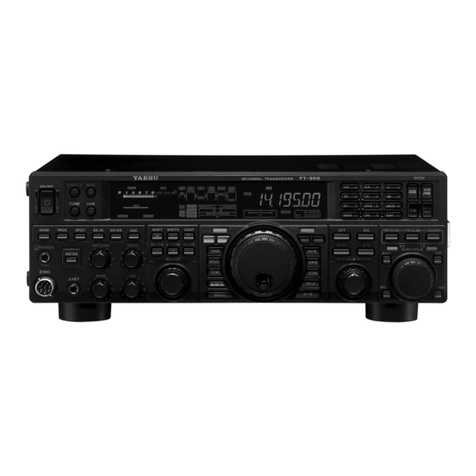
  9. Yaesu FTDX101MP Reference guide

Yaesu FTDX101MP Reference guide

Other manuals for FTDX101MP

5

This manual suits for next models

7

Other Yaesu Transceiver manuals

Yaesu FT DX 9000 - CAT OPERATION REFERENCE BOOK Service manual

Yaesu

Yaesu FT DX 9000 - CAT OPERATION REFERENCE BOOK Service manual

Yaesu FT-757GX II User manual

Yaesu

Yaesu FT-757GX II User manual

Yaesu FT-840 User manual

Yaesu

Yaesu FT-840 User manual

Yaesu FT-One User manual

Yaesu

Yaesu FT-One User manual

Yaesu FT-101ZD User manual

Yaesu

Yaesu FT-101ZD User manual

Yaesu FT-23R MKII Manual

Yaesu

Yaesu FT-23R MKII Manual

Yaesu FTA-720 User manual

Yaesu

Yaesu FTA-720 User manual

Yaesu VX-2500V User manual

Yaesu

Yaesu VX-2500V User manual

Yaesu FT DX 1200 User manual

Yaesu

Yaesu FT DX 1200 User manual

Yaesu FTM-400XDE Reference guide

Yaesu

Yaesu FTM-400XDE Reference guide

Yaesu FT-620B User manual

Yaesu

Yaesu FT-620B User manual

Yaesu FT5Dr User manual

Yaesu

Yaesu FT5Dr User manual

Yaesu CHATNOW 75028 Series Manual

Yaesu

Yaesu CHATNOW 75028 Series Manual

Yaesu VX-120 Series User manual

Yaesu

Yaesu VX-120 Series User manual

Yaesu FTA-450 series User manual

Yaesu

Yaesu FTA-450 series User manual

Yaesu FT-7800R User manual

Yaesu

Yaesu FT-7800R User manual

Yaesu FT-4XR User manual

Yaesu

Yaesu FT-4XR User manual

Yaesu FT-736R User manual

Yaesu

Yaesu FT-736R User manual

Yaesu FT-4VR User manual

Yaesu

Yaesu FT-4VR User manual

Yaesu FT-990 User manual

Yaesu

Yaesu FT-990 User manual

Yaesu FT-65R User manual

Yaesu

Yaesu FT-65R User manual

Yaesu FTM-3200DR Installation guide

Yaesu

Yaesu FTM-3200DR Installation guide

Yaesu FTDX5000 - SOFTWARE UPDATE INFORMATION... Technical manual

Yaesu

Yaesu FTDX5000 - SOFTWARE UPDATE INFORMATION... Technical manual

Yaesu FT-101 User manual

Yaesu

Yaesu FT-101 User manual

Popular Transceiver manuals by other brands

Kenwood ProTalk TK-3201 instruction manual

Kenwood

Kenwood ProTalk TK-3201 instruction manual

City Theatrical SHoW DMX SHoW Baby user manual

City Theatrical

City Theatrical SHoW DMX SHoW Baby user manual

Standart Horizont HX407 owner's manual

Standart Horizont

Standart Horizont HX407 owner's manual

B&G V90S quick start guide

B&G

B&G V90S quick start guide

VictelGlobal ALK300 series Operation manual

VictelGlobal

VictelGlobal ALK300 series Operation manual

Cactus Wireless Flash Transceiver V6 user manual

Cactus

Cactus Wireless Flash Transceiver V6 user manual

Skanti TRP 5000 instruction manual

Skanti

Skanti TRP 5000 instruction manual

ELECRAFT KX3 Installation and operation guide

ELECRAFT

ELECRAFT KX3 Installation and operation guide

American Lighting DMX512 quick start guide

American Lighting

American Lighting DMX512 quick start guide

Furuno FM-77 Operator's handbook

Furuno

Furuno FM-77 Operator's handbook

Mizuho MX-2 Operating & assembly instruction

Mizuho

Mizuho MX-2 Operating & assembly instruction

Kenwood TK-3180 Manuale di istruzioni

Kenwood

Kenwood TK-3180 Manuale di istruzioni

Blitz MJ-398U instruction manual

Blitz

Blitz MJ-398U instruction manual

Utilicom LongRanger 2050 Operator's manual

Utilicom

Utilicom LongRanger 2050 Operator's manual

Standart HX290UKA Service manual

Standart

Standart HX290UKA Service manual

Altronix Pace1PTM installation guide

Altronix

Altronix Pace1PTM installation guide

Kirisun PT2208 instruction manual

Kirisun

Kirisun PT2208 instruction manual

ELECRAFT KX2 manual

ELECRAFT

ELECRAFT KX2 manual

manuals.online logo
manuals.online logoBrands
  • About & Mission
  • Contact us
  • Privacy Policy
  • Terms and Conditions

Copyright 2025 Manuals.Online. All Rights Reserved.

Information for Customers Operating Transceivers in the UK
Thank you very much for purchasing this YAESU HF transceiver.
The Transceivers listed in this notice are congured at the factory with the WRC-15 5 MHz (60 m) allocation as shown
below as “B2”.
When your Transceiver is operated in the UK or a location where the 5 MHz allocation is the same as the UK shown
below as conguration “C2”, then you need to follow the instructions below for your model to change the 5 MHz (60 m)
conguration, before using the transceiver for the rst time.
5 MHz (60 m) band frequency range conguration “B2”
Factory Default Setting
5 MHz (60 m) band frequency range conguration “C2”
Selectable Setting
5.351500 MHz - 5.366500 MHz 5.250000 MHz - 5.406500 MHz
FTDX101MP / FTDX101D
1. Turn the transceiver OFF.
2. Press and hold in the [FUNC]and [MODE] buttons while
turning the transceiver ON.
The green LED Indicator will blink with intervals of 0.5 sec
(0.5 sec ON, 0.5 sec OFF).
3. Press and release the [MODE] button, and the Green LED
Indicator will now blink with interval of 1 sec (1 sec ON, 1
sec OFF).
4.
Press and hold in the [MODE] button, and the radio will re-
start automatically. Once restarted the change of 5 MHz
frequency configuration will have been completed suc-
cessfully.
Power Switch
FUNC Button
LED IndicatorMODE Button
FTDX5000 / FTDX3000 / FTDX1200
1. Turn the transceiver OFF.
2. Press and hold in the [MENU]and [C.S] buttons while
turning the transceiver ON.
The green LED Indicator will blink with intervals of 0.5 sec
(0.5 sec ON, 0.5 sec OFF).
3. Press and release the [MENU] button, and the Green LED
Indicator will now blink with interval of 1 sec (1 sec ON, 1
sec OFF).
4. Press and hold in the [MENU] button, and the radio will re-
start automatically. Once restarted the change of 5 MHz
frequency configuration will have been completed suc-
cessfully.
Power Switch
C.S Button
LED Indicator
MENU Button
FTDX5000
MENU Button
C.S Button
Power Switch LED Indicator
FTDX3000
MENU Button LED Indicator
C.S Button
Power Switch
FTDX1200
FT-891
1. Turn the transceiver OFF.
2. Press and hold in the [F]and [QMB] buttons while turning
the transceiver ON.
The green LED Indicator will blink with intervals of 0.5 sec
(0.5 sec ON, 0.5 sec OFF).
3.
Press and release the [F] button, and the Green LED Indica-
tor will now blink with interval of 1 sec (1 sec ON, 1 sec OFF).
4. Press and hold in the [F] button, and the radio will re-start
automatically. Once restarted the change of 5 MHz frequency
conguration will have been completed successfully.
F ButtonLED Indicator
Power Switch
QMB Button
FT-991A
1. Turn the transceiver OFF.
2. Press and hold in the [F]and [MODE] buttons while turning
the transceiver ON.
The green LED Indicator will blink with intervals of 0.5 sec
(0.5 sec ON, 0.5 sec OFF).
3. Press and release the [MODE] button, and the Green LED
Indicator will now blink with interval of 1 sec (1 sec ON, 1
sec OFF).
4. Press and hold in the [MODE] button, and the radio will re-
start automatically.
Once restarted the change of 5 MHz fre-
quency conguration will have been completed successfully.
MODE Button
LED Indicator
Power Switch F Button
* The FT-991A is an HF and VHF/UHF transceiver. Please note that the default ARS UHF repeater frequency coverage
and shifts for this model are di󰀨erent from normal UK usage. Selecting the “C2” conguration as below will enable cor-
rect repeater coverage and shifts for UK operation.
ARS Conguration “B2”
Factory Default Setting
ARS Conguration “C2”
Selectable Setting
ARS Frequency Range: 438.20 MHz - 439.45 MHz (- shift)
Repeater Shifts: 7.6 MHz
ARS Frequency Range: 433.00 MHz - 433.40 MHz (+ shift)
434.60 MHz - 435.00 MHz (- shift)
Repeater Shifts: 1.6 MHz
FT-450D
1. Turn the transceiver OFF.
2. Press and hold in the [A/B] button while turning the trans-
ceiver ON.
Setting Number “3” will appear in the display.
3. Rotate the [MAIN DIAL] knob and select the Setting Num-
ber “4”.
4. Press and hold in the [MODEp]button to store the Setting
Number “4” and the radio will re-start automatically. Once
restarted the change of 5 MHz frequency conguration will
have been completed successfully.
PH ON E S
KE Y
Setting Number
Power Switch MODE

Button A/B Button
MAIN DIAL Knob
Important Note
5 MHz (60m) 5.351500 MHz - 5.366500 MHz has not
been incorporated into the FT-450D.
By performing the procedure above, the channels
shown in the table are set to USB. These channels ap-
pear between the “last” PMS channel (MEM-P2U) and
the rst “regular” memory channel (MEM-001).
CH No. Frequency CH No. Frequency
UK5-FA 5.260000 MHz UK5-FL 5.373000 MHz
UK5-FB 5.280000 MHz UK5-FE 5.400000 MHz
UK5-FC 5.290000 MHz UK5-FM 5.405000 MHz
UK5-FK 5.368000 MHz - -
Caution:
NOTE: When changing the 5 MHz (60 m) band frequencies according to the procedures above, all saved data, such as
Menu and Memory settings, will be deleted. If you need to change the 5 MHz (60 m)band after using the radio,
make sure to back up your registered data or make a written note, before applying the setting change.
NOTE: The 5 MHz (60 m)band frequency range setting is NOT changed, even when executing the “Full Reset” to re-
store the transceiver to the factory defaults, as described in the Operating Manuals.