AETOOL BESA-12P User manual
BESA-12P User’s manual
-1 -
www.aetool.com
AETOOL LTD. Page 23
BESA-12P V13.08
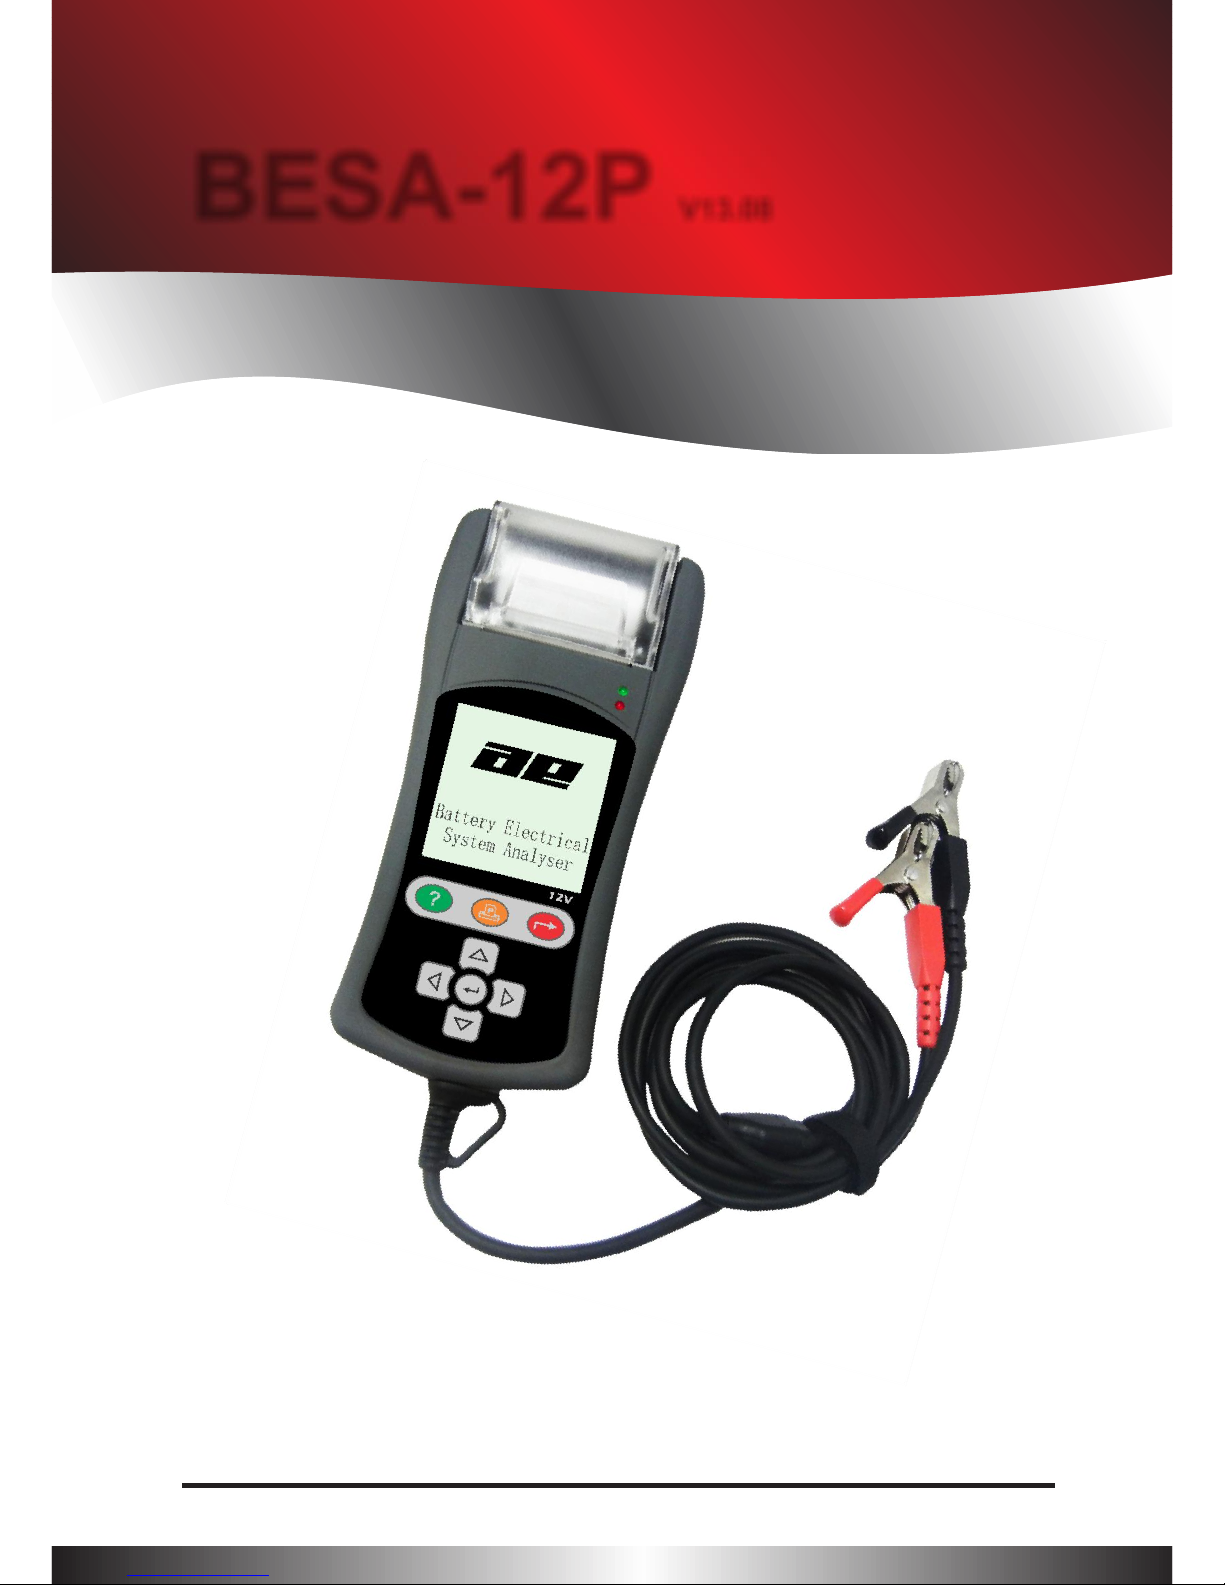
Battery Electrical System Analyser with integrated Printer
USER MANUAL

BESA-12P User’s manual
-2 -
www.aetool.com
AETOOL LTD. Page 23
Table of Contents
1.0 Introduction------------------------------------------------------------------------------------------
1.1 BESA -12P (Battery Electrical System Analyser) -----------------------------------------------------3
1.2 Specifications----------------------------------------------------------------------------------------------------4
2.0 Safety Measures------------------------------------------------------------------------------------
2.1 Safety Precautions---------------------------------------------------------------------------------------------5
2.2 Other Precautions----------------------------------------------------------------------------------------------6
3.0 Working with Batteries--------------------------------------------------------------------------7
4.0 The Battery Electrical System Analyser-------------------------------------------------------
4.1 BESA- 12P -------------------------------------------------------------------------------------------------------- 9
4.2 Key Functions---------------------------------------------------------------------------------------------------9
4.3 Functions of Individual Key--------------------------------------------------------------------------------10
5.0 BESA 12 Setup ------------------------------------------------------------------------------------
5.1 Paper Installation------------------------------------------------------------------------------------------- --11
5.2 Select Display Language----------------------------------------------------------------------------------- 11
5.3 LCD Brightness------------------------------------------------------------------------------------------------12
5.4 Printer-------------------------------------------------------------------------------------------------------------13
5.5 PC Link------------------------------------------------------------------------------------------------------------13
6.0 HELP Key-----------------------------------------------------------------------------------------14
7.0 Battery Test------------------------------------------------------------------------------------------
7.1 Start Testing ---------------------------------------------------------------------------------------------------16
8.0 Battery Rating Charts-----------------------------------------------------------------------------
8.1 Japanese Industrial Standards (JIS#) Rating Chart-----------------------------------------------29
8.2 DIN & EN Standards Rating Charts---------------------------------------------------------------------30
8.3 YUASA Battery Rating Chart -------------------------------------------------------------------- --------31
8.4 Rough CCA Guide-------------------------------------------------------------------------------------------- 31
9.0 Grounding Test -----------------------------------------------------------------------------------
9.1 Start Testing----------------------------------------------------------------------------------------------------33
10.0 Starter Test --------------------------------------------------------------------------------------
10.1 Begin Testing--------------------------------------------------------------------------------------------------37
11.0 Alternator Test----------------------------------------------------------------------------------
11.1 Start Testing----------------------------------------------------------------------------------------------------41
No load testing at 3,000 RPM-----------------------------------------------------------------------------43
Testing with load at 2,000 RPM--------------------------------------------------------------------------46
12.0 View Last Test Results-----------------------------------------------------------------------47
12.1 Printing the Last Test Results----------------------------------------------------------------------------49
13.0 PC Link --------------------------------------------------------------------------------------------
12.1 Installing Driver------------------------------------------------------------------------------------------------50
12.2 Printing Results from Normal Printer------------------------------------------------------------------54
12.3 Saving results--------------------------------------------------------------------------------------------------55
14.0 Warranty Information----------------------------------------------------------------------------
14.1 Limited Warranty----------------------------------------------------------------------------------------------55
14.2 Limitations of Warranty-------------------------------------------------------------------------------------56

BESA-12P User’s manual
-3 -
www.aetool.com
AETOOL LTD. Page 23
1.0 - Introduction
1.1- BESA-12P (Battery Electrical System Analyser)
This Analyser uses the modern technology in battery testing which can test
batteries as they are without charging before test. Testing procedures are quick
and easy with repeatable results. Test Results can be printed directly on its
attached printer or it can be stored in the computer for records.
1. Battery Test:
Analyses the battery condition using microprocessor controlled testing
methods without the need of fully charging it before test.
The unit consumes very little current during testing hence the test can be
repeated numerous times without worry of draining the battery and its
results are highly accurate.
Extremely safe as it does not create any sparks during clamp on and it
takes less than 7 seconds to obtain the full analysed results of tested
battery.
2. Grounding Test:
Analyses the condition of the electrical return circuit contacts resistance
which were connected to the engine or chassis body from the battery
terminal with results and recommendations display after test.
3. Starter Test:
Checks the cranking effectiveness of the battery to predict when the
battery will fail to crank a vehicle basing on voltage profiles with results
and recommendations display.
4. Alternator Test:
This test checks the alternator charging condition during load at 2,000
RPM and without load at 3,000 RPM with results and recommendations
display after each test.
This Analyser is maintenance free and does not require internal batteries. It
powers up when connected to the battery posts during testing or through an
external 12 Volts DC source for later review of the test results.
The operation is fast and simple. When hooked up to the battery posts, the
displayed instructions on the screen will lead you through and a warning tone to
caution you to perform the correct steps. In event that you need assistance,
there is a key. It will display information about each function when selected.
?

BESA-12P User’s manual
-4 -
www.aetool.com
AETOOL LTD. Page 23
Its result is consistent and repeatable and can be performed numerous times
without heating up the unit. It is very safe as it does not create any sparks when
connected to the battery terminals during testing on the vehicle.
After the test, the results will be stored in its memory and can be reviewed again
later. Also it can be printed directly on the attached mobile printer. It is equipped
with an USB port to be connected to the PC to store the results or have it printed
out from normal computer printer.
1.2 Specifications:
Operating Voltage: 9V ~ 15V DC (max)
Analysing Capacity (Amps): CCA: 100 A ~ 1700 A
SAE: 100 A ~ 1700 A
JIS#: 100 A ~ 1700 A
IEC: 100 A ~ 1700 A
DIN: 100 A ~ 1000 A
EN: 100 A ~ 1000 A
CA: 100 A ~ 1700 A
DC Volts Accuracy: ± 2% Reading
Battery analysing time: Less than 7 seconds.
Languages: Built-in with selection for 10 languages.
PC connection: Through USB port.
Printer head: Thermo print head.
Paper width: 57.5mm 0.5mm
Paper roll diameter: Max. 40mm OD.
Printing Speed: 50mm per sec.
Working Temperature: 0ºC ~ 50ºC.
Working Humidity: 10 % ~ 80 %
BESA-12P User’s manual
-5 -
www.aetool.com
AETOOL LTD. Page 23
2.0 Safety Measures:
For safety reasons, read this manual thoroughly before operating the Tool.
Always refer to and follow the safety instructions and testing procedures
provided by the car or equipment manufacturer. The safety messages presented
below and throughout this user‟s manual are reminders to the operator to exercise
extreme care when using this test instrument.
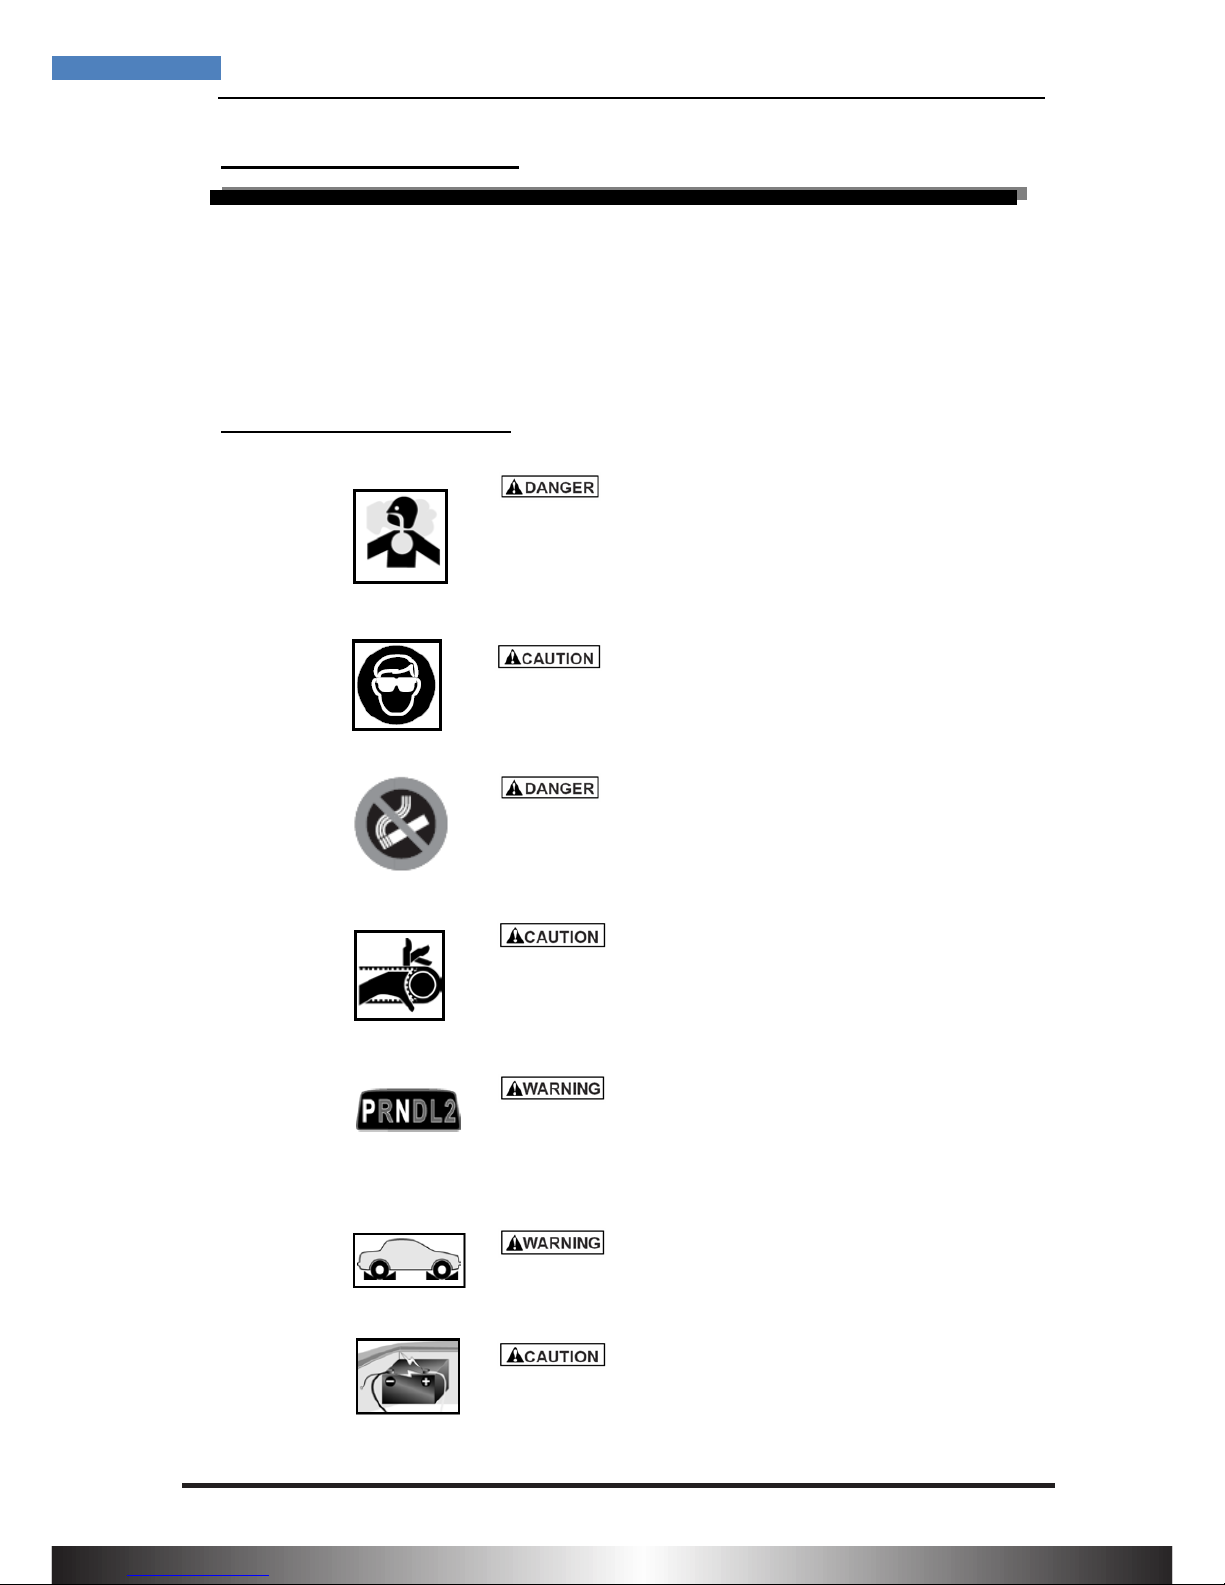
2.1 Safety Precautions:
When the engine is running, it produces carbon monoxide, a
toxic and poisonous gas. Always operate the vehicle in a well
ventilated area. Do not breathe exhaust gases –they are
hazardous that can lead to death.
To protect your eyes from propellant object such as caustic
liquids, always wear safety eye protection.
Fuel and battery vapors are highly flammable.
DO NOT SMOKE NEAR THE VEHICLE DURING TESTING.
When engine is running, many parts (such as pulleys,
coolant fan, belts, etc) turn at high speed. To avoid serious
injury, always be alert and keep a safe distance from these
parts.
Before starting the engine for testing or trouble shooting,
always make sure the parking brakes is firmly engaged. Put
the transmission in Park (automatic transmission) and
Neutral (manual transmission).
Always block the drive wheels.
Never leave vehicle unattended while testing.
Never lay tools on vehicle battery. You may short the
terminals together causing harm to yourself, the tools or the
battery.
BESA-12P User’s manual
-6 -
www.aetool.com
AETOOL LTD. Page 23
Engine parts become very hot when engine is running. To
prevent severe burns, avoid contact with hot engine parts.
Do not wear loose clothing or jewelry while working on
engine. Loose clothing can get caught in fan, pulleys, belts,
etc. Jewelry can conduct current and can cause severe
burns if comes in contact between power source and
ground.
When the engine is running, be cautious when working
around the ignition coil, distributor cap, ignition wires and
spark plugs. They are HIGH VOLTAGE components that can
cause electrical Shock.
Always keep a fire extinguisher readily available and easily
accessible in the workshop.
2.2 Other Precautions:
This Battery Analyser is meant for testing of 12 Volts batteries only.
Its operating voltage is from 9V ~ 15V DC and should not be tested on 24V
directly. It will cause damage the unit. For 12V x 2 batteries (in series or
parallel), disconnect the connections and test them individually.
Battery that has just been charged by the charger contains surface charge
and it should be discharged by turning ON the Head lights for 3~5 minutes
before testing.
Always attached the analyser clips on the lead side of the battery terminal
posts during testing so that it has a good contact. This will provide better
and accurate results.
Do not attach the analyser clips directly onto the steel bolt that tightened to
the battery terminal posts; this may give inaccurate readings or inconsistent
results. (Note: This also applies to all other battery testing methods.)
If the battery terminal posts were oxidised or badly corroded and the
connections were bad, the analyser will prompt you to check the connections.
In this case, clean the terminal posts and performs testing directly on the
terminal posts it-self.
BESA-12P User’s manual
-7 -
www.aetool.com
AETOOL LTD. Page 23
During testing on the battery whist it is still in the car, make sure the engine
is OFF.
Do not store the analyser near high humidity or temperature area. Exposing
to extreme temperatures will cause damage to the unit.
3.0 Working with Batteries
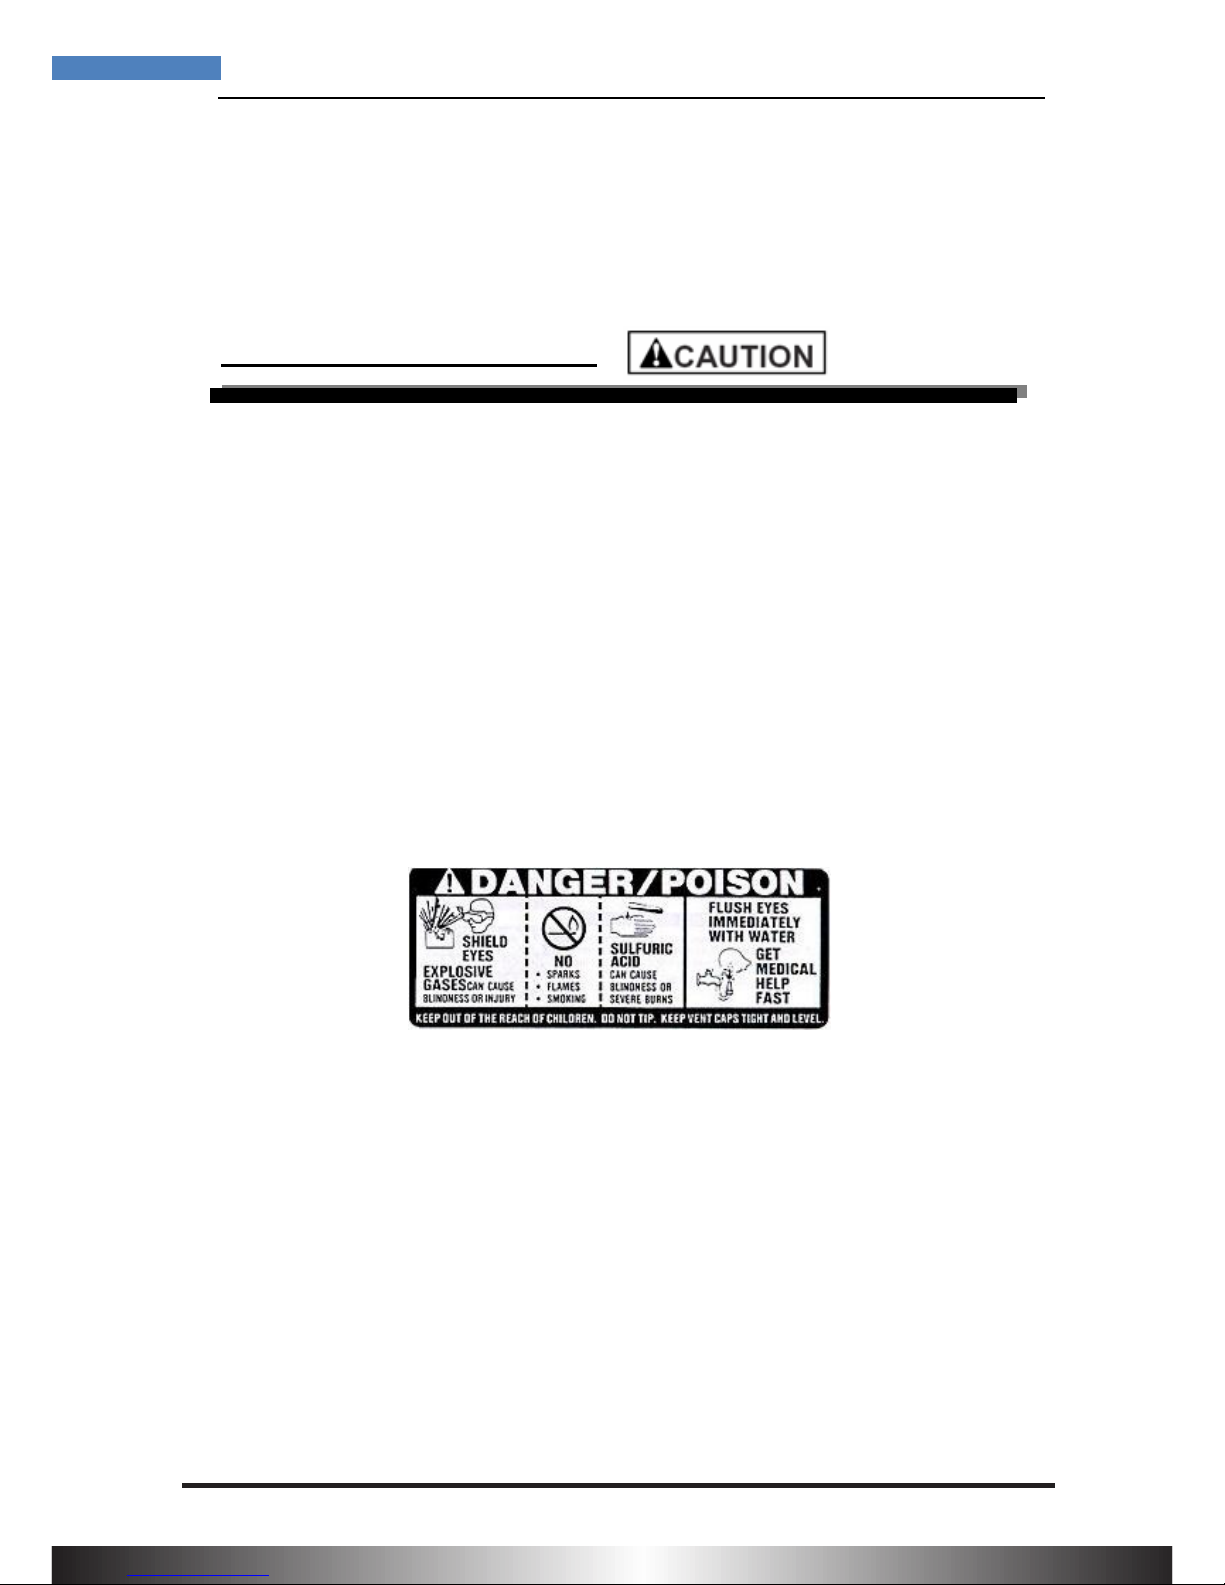
Lead-acid batteries contain a sulfuric acid electrolyte, which is a highly corrosive
poison and will produce gasses when recharged and explode if ignited. It can hurt
you badly.
When working with batteries, make sure you have plenty of ventilation, remove your
hand jewelry, watch and wear protective eyewear (safety glasses), clothing, and
exercise caution.
Do not allow battery electrolyte to mix with salt water. Even small quantities of this
combination will produce chlorine gas that can KILL you!
Whenever possible, please follow the manufacturer's instructions for testing,
jumping, installing, charging and equalising batteries.
Never disconnect a battery cable from a vehicle with the engine
running because the battery acts like a filter for the electrical system.
Unfiltered [pulsating DC] electricity can damage expensive electronic
components, e.g., emissions computer, radio, charging system, etc.
Turn off all electrical switches and components; turn off the ignition
before disconnecting the battery.
For non-sealed batteries, check the electrolyte level. Make sure it is
covering the plates, and it is not frozen before starting to recharge
(especially during winters).

BESA-12P User’s manual
-8 -
www.aetool.com
AETOOL LTD. Page 23
Do not add distilled water if the electrolyte is covering the top of the
plates because during the recharging process, it will get warm and
expand. After recharging has been completed, recheck the level.
Reinstall the vent caps BEFORE recharging, recharge ONLY in
well-ventilated areas, and wear protective goggle.
Do NOT smoke or cause sparks or flames while the battery is being
recharged because batteries give off explosive gasses.
If your battery is an AGM or a sealed flooded type, do NOT recharge
with current ABOVE 12% of the battery's RC rating (or 20% of the
ampere-hour rating).
Gel cells should be charged over a 20-hour period and never over the
manufacturer's recommended level or over 14.1 Volts DC.
Follow the battery and charger manufacturer's procedures for
connecting and disconnecting cables and other steps to minimize the
possibility of an explosion or incorrectly charging the battery.
You should turn the charger OFF before connecting or disconnecting
cables to a battery.
Do not wiggle the cable clamps while the battery is recharging,
because a spark might occur, and this could cause an explosion.
Good ventilation or a fan is recommended to disperse the gasses
created by the recharging process.
If a battery becomes hot, over 43.3 °C (110 °F), or violent gassing or
spewing of electrolyte occurs, turn the charger off temporarily or
reduce the charging rate.
When charging the battery in the car with an external MANUAL
charger, make sure that it will not damage the vehicle's electrical
system or components with high voltages.
Even if this is a remote possibility, it is best to disconnect the vehicle's
battery cables from the battery BEFORE connecting the charger.

BESA-12P User’s manual
-9 -
www.aetool.com
AETOOL LTD. Page 23
?
PP
4.0 - The Battery Electrical System Analyser
4.1 –BESA-12P
4.2 - Keypad Functions:
Figure 1
Figure 2
3
6
8
1
2
4
7
5
Red Clamp to
battery positive
(+) post.
Black Clamp to
battery negative
(-) post.
USB port for
connection
to PC.
Printer
LCD Display
Screen
Keypad
Printer
power LED
Printer Fault
indicator LED
BESA-12P User’s manual
-10 -
www.aetool.com
AETOOL LTD. Page 23
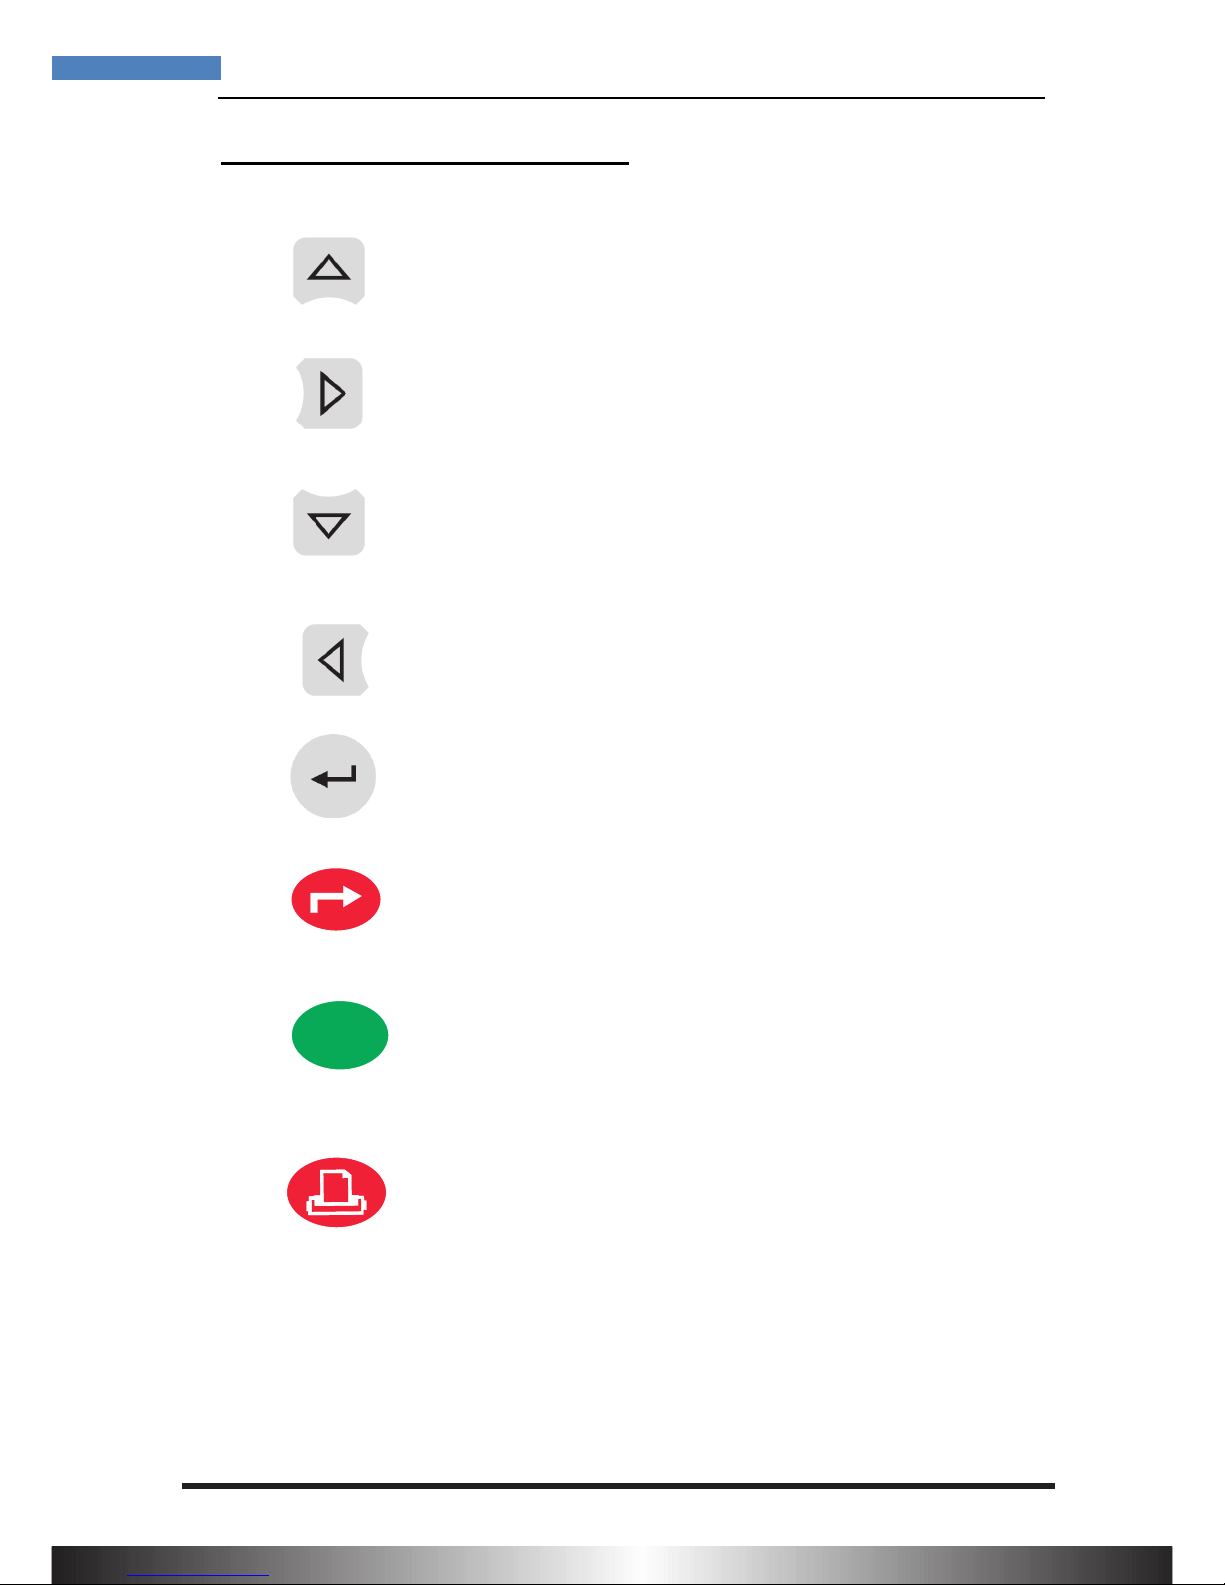
4.3 - Functions of Individual key:
1. Use this key to scroll up to the next item OR when it is in the
keying-in Battery Ratings values mode, press this key once will
increase the value by step of 5 units.
2. Use this key to shift the selection tab to the right item OR when
it is in the keying-in Battery Ratings values mode, press this
key once will increase the value by step of 100 units.
3. Use this key to scroll down to the next item OR when it is in the
keying-in Battery Ratings values mode, press this key once will
decrease the value by step of 5 units.
4. Use this key to shift the selection tab to the left item OR when it
is in the keying-in Battery Ratings values mode, press this key
once will decrease the value by step of 100 units.
5. Press this ENTER key will get into the selected function or
proceed to the next step.
6. To EXIT the function, press this key once will return back to the
previous screen.
7. This is the HELP key. Press this key will enter into the help menu
and it will explain the functions of the item you have selected in
detail.
8. Press this key to print the all the Test results on the Printer
after a test or on in View Last Test mode.
?
P
www.aetool.com
AETOOL LTD. Page 23

BESA-12P User’s manual
-11 -
www.aetool.com
AETOOL LTD. Page 23
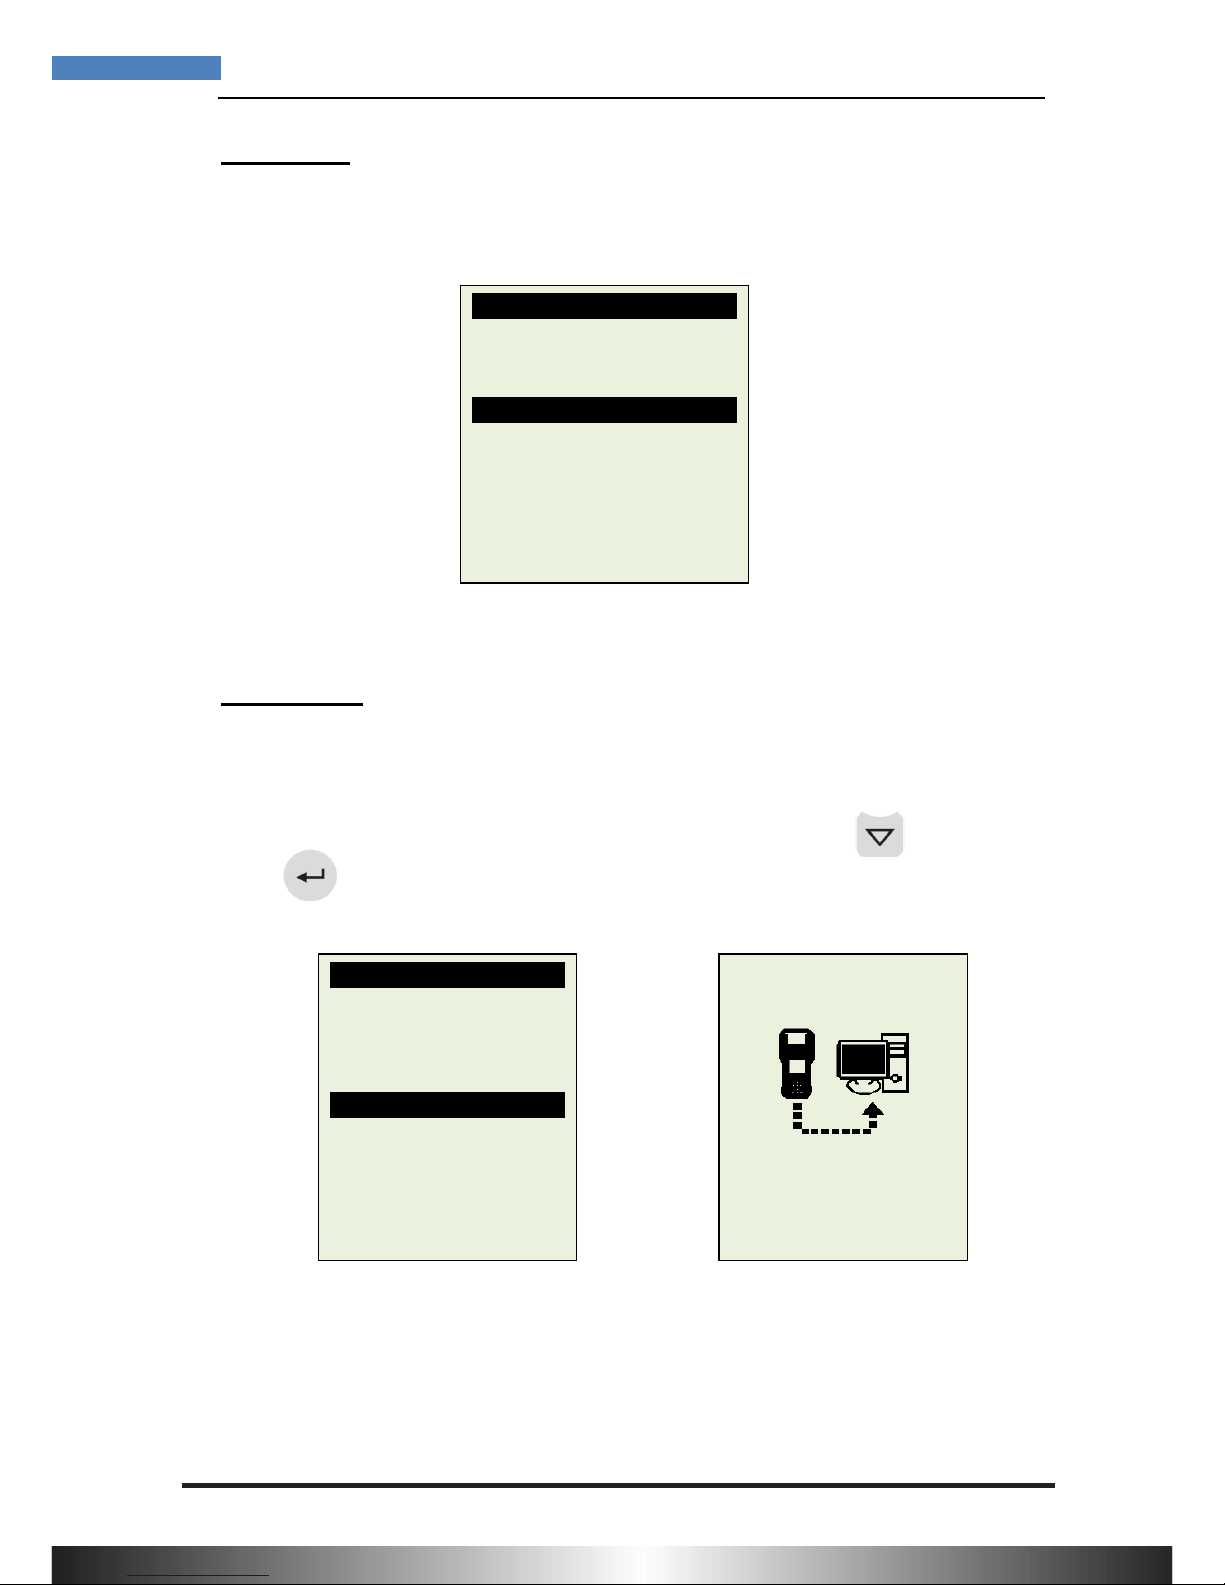
5.0 –BESA-12P Setup
5.1 Paper installation
Open the printer cover by pushing it upwards from the middle. Place the thermo
paper roll into the slot with the paper edge facing up (Fig. 4a). Make sure the paper
is about 20mm out when the printer cover is closed (Figure 4b).
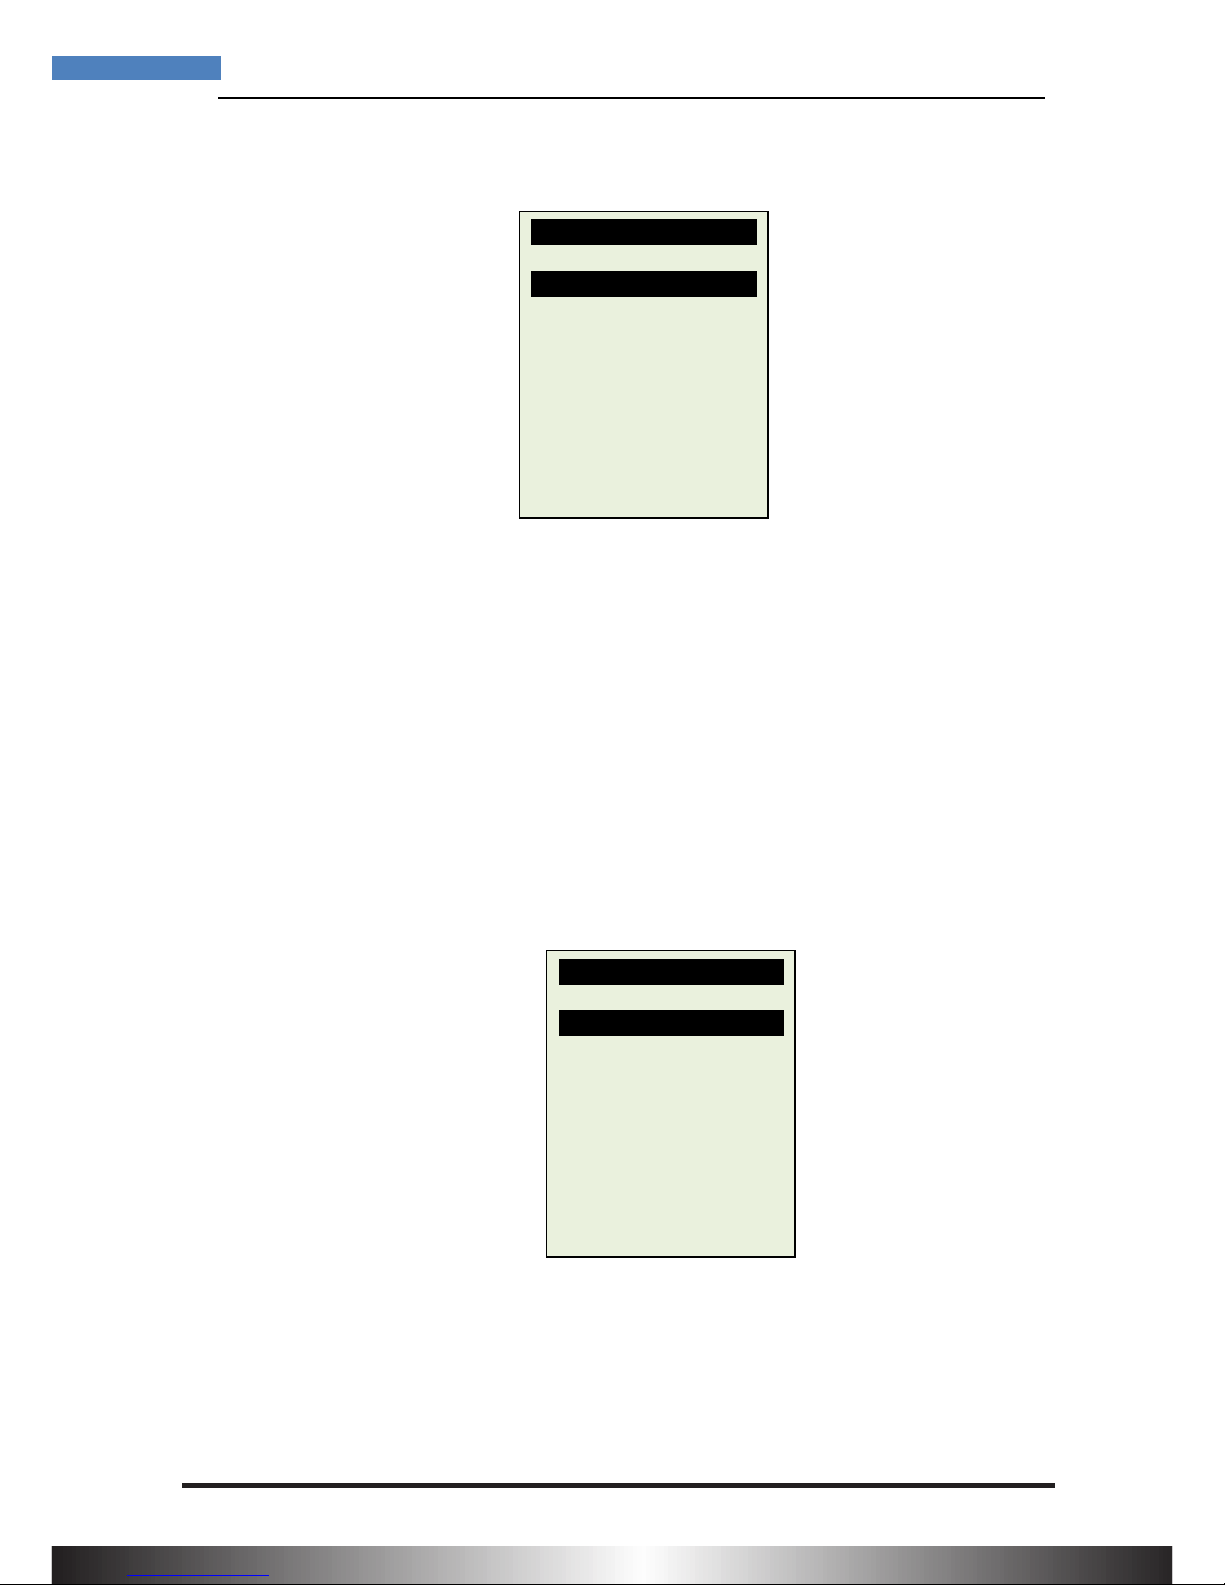
5.2 Select Display Language
To change the display language of the Analyser, this can be done while on the
wake up screen (see fig.5 below). First go to Setup Menu by pressing key
until it has been highlighted and then press key to enter.
Select Menu
New: Clear Memory
Continue Testing
View last Test
Setup Menu
[Enter] to proceed
Figure 5
Figure 4a
Figure 4b
www.aetool.com
AETOOL LTD. Page 23

BESA-12P User’s manual
-12 -
www.aetool.com
AETOOL LTD. Page 23
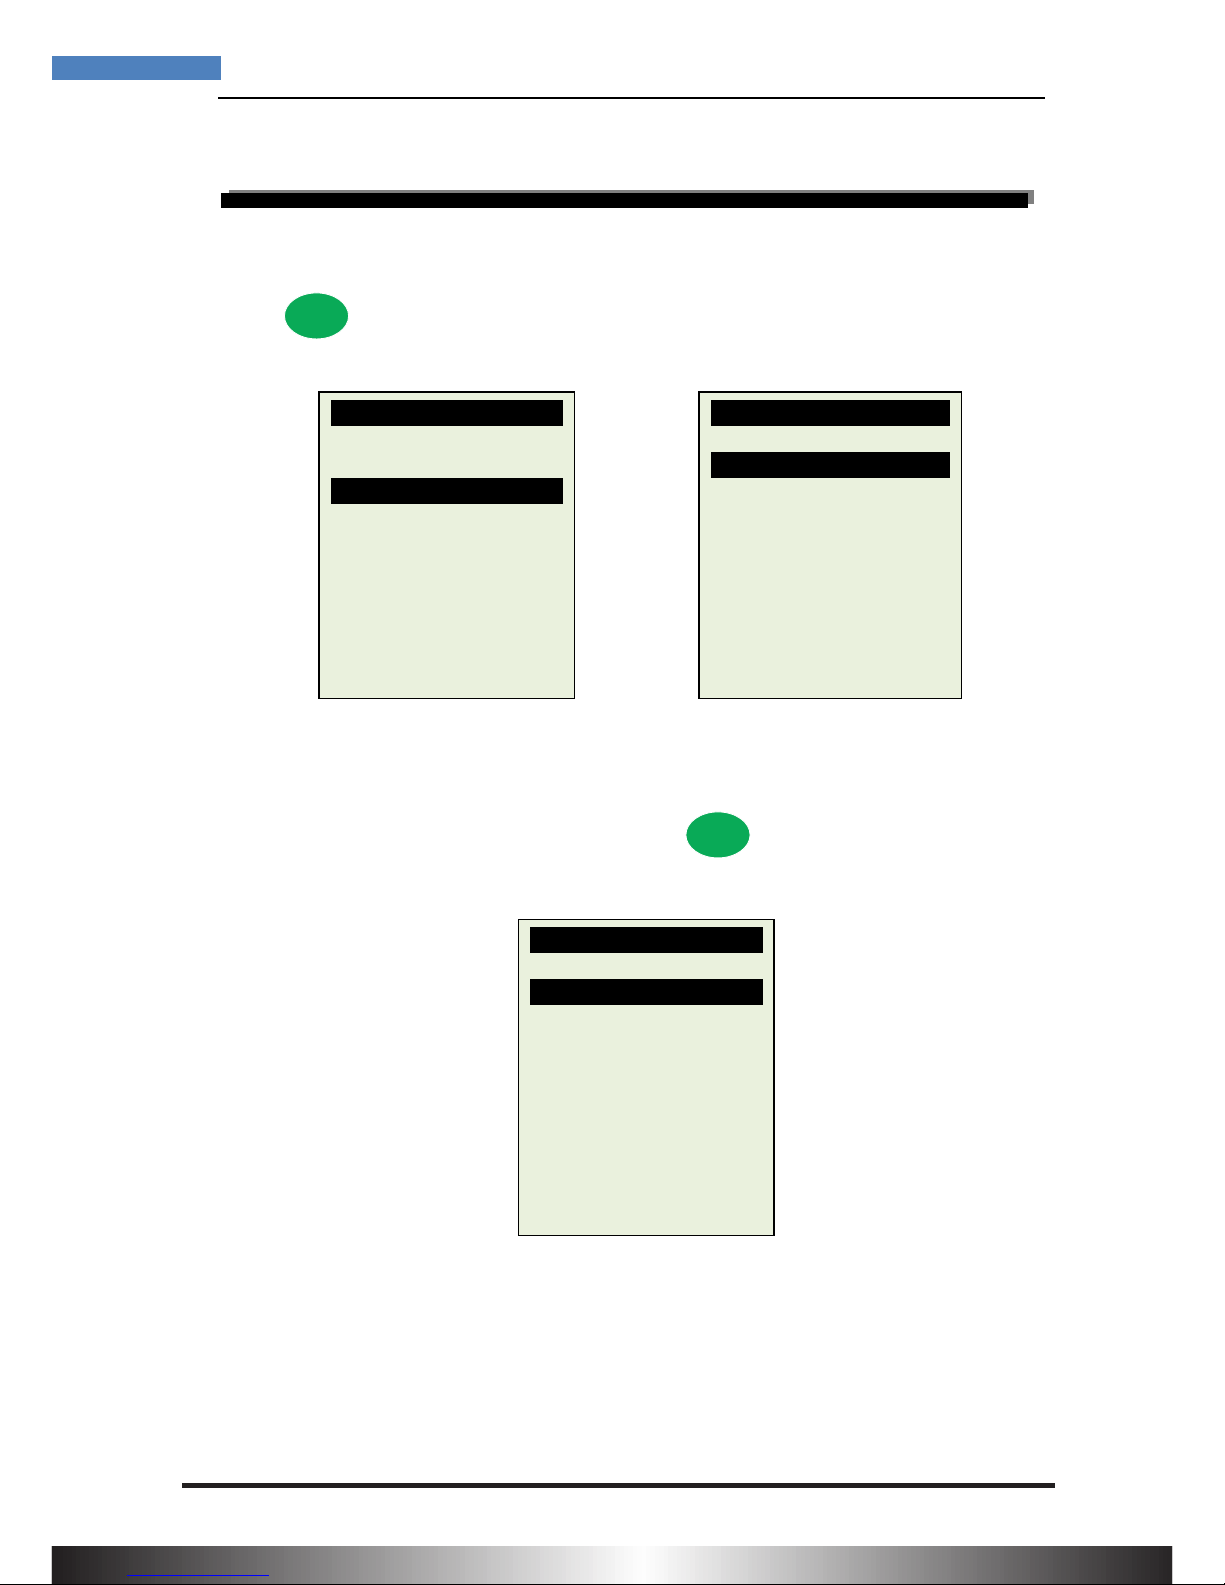
Inside the Setup Menu (Fig.6), press to gain access to the Language Menu
(Fig.7).
Select the preferred language by pressing key to scroll to the item. Then
confirming it by pressing to save. Once it had been saved, the display will
change to the language selected. Press key to exit and get back to the
Main menu screen (Fig.6) to continue.
5.3 LCD Brightness
If you find that LCD screen display is too bright or too dim and need to adjust its
contrast then select LCD Brightness from the menu (Fig. 8). Once entered, the
display will show as in Fig. 9. To increase the contrast press key and the bar
graph will move forward. Likewise to decrease, press key while in this screen.
Setup Menu
Language
LCD Brightness
Printer
PC Link
[Enter] to proceed.
[Exit] to quit.
English
Deutsch
Español
Italiano
Français
Polski
Romănă
Nederlands
Suomi
Svenska
Figure 6
Figure 7
Setup Menu
Language
LCD Brightness
Printer
PC Link
[Enter] to proceed.
[Exit] to quit.
BESA-12
Figure 8
Figure 9
BESA-12P User’s manual
-13 -
www.aetool.com
AETOOL LTD. Page 23
5.4 Printer
Selecting this [Printer] mode (Fig. 10) will initiate printing of the results of the last
tested vehicle that has been stored in the memory.
5.5 PC Link
This PC Link mode is used when you wish to connect BESA-12P to PC to print or
store the results of the last tested vehicle. Once the tester is connected to the PC
with the USB cable provided, select [PC Link] as in Fig. 11 with key and
press key will show as in Fig. 12.
Setup Menu
Language
LCD Brightness
Printer
PC Link
[Enter] to proceed.
[Exit] to quit.
Figure 10
[Exit] to quit.
Setup Menu
Language
LCD Brightness
Printer
PC Link
[Enter] to proceed. [Exit]
to quit.
Figure 11
Figure 12
BESA-12P User’s manual
-14 -
www.aetool.com
AETOOL LTD. Page 23
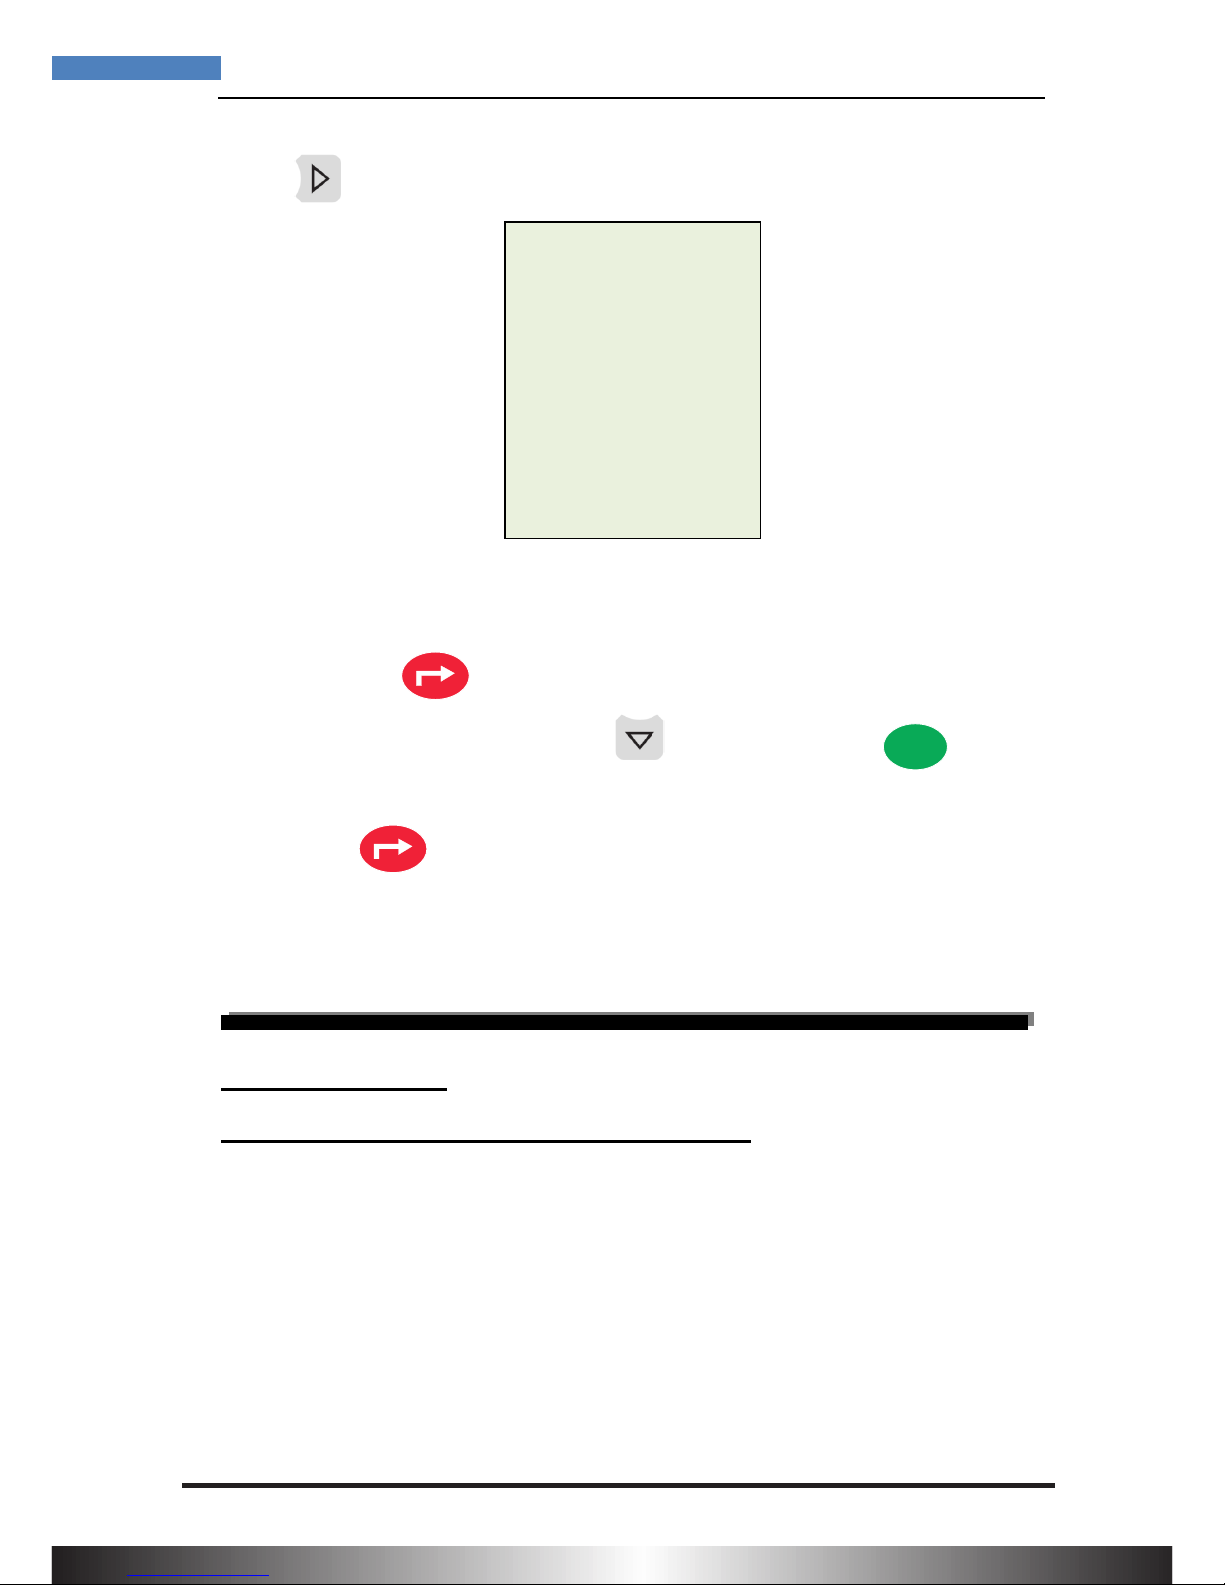
6.0 –Help Key
This selection helps you to familiarise with the usage of the BESA-12P as well as
explaining the various test functions and its results. To get into this function, just
press key at any one of the functions displayed on the menu screens as shown
below (Fig.13 and Fig 14):
EXIT
For Example:
If help is needed on “Battery Test”, then press key on this item and the display
will change to as shown (Fig 15).
Figure 13
Figure 15
Figure 14
Select Menu
New: Clear Memory
Continue Testing
View last Test
Setup Menu
[Enter] to proceed.
Select Test
Battery Test
Grounding Test
Starter Test
Alternator Test
[Enter] to proceed.
Battery Test
How to operate
Voltage
Battery ratings
Internal R.
LIFE
Press [Help] to read
[Exit] to menu.
?
?

BESA-12P User’s manual
-15 -
www.aetool.com
AETOOL LTD. Page 23
Pressing the key will scroll down to the next item “Voltage” (Fig. 16 below)
and so forth until it reaches “Life”.
To see the help text, press key again on the selected item and it will display on
the screen.
If you need to quit, just press key will go back to the main menu (Fig. 5).
Let say if you need help on “How to operate”, press key in this selection will get
into the display as shown below:
Figure 16
Figure 17
Battery Test
How to operate
Voltage
Battery ratings
Internal R.
LIFE
Press [Help] to read
[Exit] to menu.
How to operate
Operation:
Engine must be OFF.
Locate the battery.
Clamp Tester to Battery
[+] and [-] posts. Check
battery rating [CCA, SAE,
JIS, DIN, IEC, EN,
CA].Key the rating values.
The Tester will lead you
through the whole testing
process.
[Exit] to menu.
?
?
BESA-12P User’s manual
-16 -
www.aetool.com
AETOOL LTD. Page 23
Press key will scroll down to the next page to continue reading the text
(Fig. 18) below.
If you wish to continue help on rest of the item like “Voltage, Battery ratings, Internal R
and LIFE”, press key anytime will go back to the main menus (Fig. 16).
Here just select the item you want with key and then press key will enter
into the display screen with the explanation text.
To exit press key twice will go back to the main menu for you to begin testing.
(Fig.5)
7.0 - Battery Test
7.1 –Start Testing
Performing Battery Test whilst it is still in the car:
Vehicle that was running has to have its engine OFF first and then switch ON the
headlights for 30 seconds to remove the surface charge. After the headlights had
switched OFF, let the battery rest for at least 1 minute to recover before testing
commences.
The car engine and all other accessory loads must be OFF during test in order to
have accurate results. When attaching the analyser clips, make sure that the
battery posts were not oxidized or badly corroded. Clean them first before
clamping to it. Do not clamp onto the steel bolts directly which may give inaccurate
and inconsistent results.
Figure 18
posts. Check battery
rating [CCA, SAE, JIS,
DIN, IEC, EN, CA].Key
the rating values. The
Tester will lead you
through the whole
testing process.
[Exit] to menu.
?

BESA-12P User’s manual
-17 -
www.aetool.com
AETOOL LTD. Page 23
Testing on stand-alone batteries:
Clean the battery posts with a wire brush prior testing. For side post batteries,
install stud adaptors. Do not use steel bolts for better results.
1. Attach the Analyser clips onto the battery terminal posts [Red to (+) and
Black to (-)] the unit will power up and lights up the LCD display screen as
shown (Fig.19).
2. It will run through a self-test and when completed it displays the Main Menu
as shown: (Fig. 20)
Here, it will let you select your choice from the Menu:
New: Clear Memory
Selecting this item will allow the tester to clear the last tested results stored
in its memory and begin a new test.
Continue Testing
Selecting this item will allow you to continue the last test on the same car
from where you had stopped.
For example:
If you had done Battery Test and later you wish to do Alternator Test or
Grounding Test on the same car, just select this item and it will update the
results after each test in its memory so that it can be review later or to be
printed out.
Figure 19
Figure 20
BESA-12
BATTERY ELECTRICAL
SYSTEM ANALYSER
Select Menu
New: Clear Memory
Continue Testing
View last Test
Setup Menu
[Enter] to proceed.

BESA-12P User’s manual
-18 -
www.aetool.com
AETOOL LTD. Page 23
View Last Test
Here it will let you review all the test results of the last tested car. The
results stored will always be the updated ones which depend on the tests
that had been done.
Use or keys to scroll for the pages during viewing.
Examples:
3. After you have made your choice, selecting “New: Clear Memory” or
“Continue Testing” will proceed to the display below: (Fig. 23)
4. Pressing key once will scroll down to the next item if there is a need to
select it.
5. As an example (Fig.23) the selected item was on “Battery Test” and it is
being highlighted.
Figure 22
Figure 23
Figure 21
Battery: Good
Measured: 406 CCA
Rating: 630 CCA
Volts: 12.45 V
Int. R: 6.72 mOhm
Life: 76 %
Results: High Ohms
The grounding
resistance of the
engine or car chassis is
high.
Clean the cable
contacts or replace
cable if necessary.
Select Test
Battery Test
Grounding Test
Starter Test
Alternator Test
Then press [Enter].

BESA-12P User’s manual
-19 -
www.aetool.com
AETOOL LTD. Page 23
6. Press key will proceed to do the battery testing and if it has detected
any surface charge on the battery, it will start to remove and a message is
shown (Fig. 24) below.
7. If the surface charge is too great for the analyser to handle, it will prompt
you with the instructions as shown: (Fig. 25) below.
8. Wait until the surface charge removal had completed, the analyser will
advise as follows: (Fig.26) and then press key.
Figure 26
Figure 25
Figure 24
The Analyser is
removing the battery
surface charge now.
Please wait for a
moment!
Battery surface charge is
present!
Turn the ignition key to
ON position.
Switch ON the
headlights to remove
surface charge.
Battery surface charge
has been removed.
Turn ignition key to OFF
position.
Switch OFF the
headlights and then press
[Enter].
BESA-12P User’s manual
-20 -
www.aetool.com
AETOOL LTD. Page 23
9. If there is no surface charge present, then it will straight away enter into
“Select Battery” menu screen as shown in Fig. 27
10.Here, selecting SLI (Wet type) battery meant that it tests Starting, Lighting
and Ignition (SLI) batteries e.g. normal Flooded types like Wet Low
Maintenance (Pb/Ca), Wet Standard (Pb/Pb) Batteries.
If AGM (Flat/Spiral) is selected, then it will test Wet (MF) Maintenance Free
(Ca/Ca), AGM/Gel Cell VRLA (Ca/Ca) Batteries.
11.If there is no surface charge present, then it will straight away enter into
“Select Rating” menu screen as shown in Fig. 28
Figure 28
Select Rating
CCA
SAE
DIN
JIS
IEC
EN
CA
Unknown
Figure 27
Select Battery
SLI (Wet Type)
AGM (Flat/Spiral)
[Enter] to proceed
Table of contents
Other AETOOL Measuring Instrument manuals


Popular Measuring Instrument manuals by other brands


Gazelle
Gazelle G9205 user manual

UEi
UEi DMG150 instruction manual

Keysight Technologies
Keysight Technologies BT2152A Operating and service guide

Myron L
Myron L PoolPro PS6FCE quick start guide

VOLTCRAFT
VOLTCRAFT DO-400 operating manual

TSI Incorporated
TSI Incorporated Alnor CF920 Operation and service manual


