AFRISO GRM User manual

Mess-, Regel- und
Überwachungsgeräte
für Haustechnik,
Industrie und Umweltschutz
Lindenstraße 20
DE-74363 Güglingen
Telefon +49(0)7135-102-0
Service +49(0)7135-102-211
Telefax +49(0)7135-102-147
E-Mail info@afriso.de
Internet www.afriso.de
Read manual before use!
Observe all safety information!
Keep manual for future use!
09.2009 0
854.001.0253
Instruction Manual
Electronic gas and smoke detector
GRM
Control unit # 61150
Smoke sensor # 61151
Gas sensor for Methane (natural gas) # 61188A
Gas sensor for Propane-Butane (liquid gas) # 61189A

2 GRM
Contents
1About this instruction manual...................................................................................3
1.1 Structure of warning .....................................................................................3
1.2 Explanation of symbols and typeface...........................................................3
2Safety.......................................................................................................................4
2.1 Intended use.................................................................................................4
2.2 Predictable incorrect application ..................................................................4
2.3 Safe handling................................................................................................4
2.4 Qualification of personnel.............................................................................5
2.5 Modifications to the product..........................................................................5
2.6 Use of spare parts and accessories .............................................................5
2.7 Liability information.......................................................................................5
3Product description ..................................................................................................6
3.1 Scope of delivery ..........................................................................................7
3.2 Application examples....................................................................................8
4Specifications...........................................................................................................9
4.1 Approvals, tests and conformities ..............................................................11
5Transportation and storage....................................................................................11
6Installation and commissioning..............................................................................12
6.1 Installing the gas sensor.............................................................................12
6.2 Installing the smoke sensor........................................................................13
6.3 Installing the control unit.............................................................................13
6.4 Electrical connection...................................................................................15
6.5 Commissioning the device..........................................................................16
6.6 Function test ...............................................................................................17
7Operation ...............................................................................................................17
8Maintenance ..........................................................................................................17
8.1 Maintenance intervals.................................................................................17
8.2 Maintenance activities ................................................................................17
9Troubleshooting .....................................................................................................18
10 Shutting down and disposal...................................................................................19
11 Spare parts and accessories .................................................................................19
12 Warranty ................................................................................................................20
13 Copyright................................................................................................................20
14 Customer satisfaction ............................................................................................20
15 Addresses ..............................................................................................................20

About this instruction manual
GRM 3
1 About this instruction manual
This instruction manual is part of the product.
Read this manual before using the product.
Keep this manual during the entire service life of the product
and always have it readily available for reference.
Always hand this manual over to future owners or users of the
product.
1.1 Structure of warning
WARNING TERM
The type and source of danger is shown here.
Precautions to take in order to avoid the danger are shown
here.
There are three different levels of warning:
Warning term Meaning
DANGER Imminent danger!
Failure to observe the information will result in
death or serious injuries.
WARNING Possible imminent danger!
Failure to observe the information may result in
death or serious injuries.
CAUTION Dangerous situation!
Failure to observe the information may result in
minor or serious injuries as well as damage to
property.
1.2 Explanation of symbols and typeface
Symbol Meaning
Prerequisite for an activity
Activity consisting of a single step
1. Activity consisting of several steps
Result of an activity
• Bulleted list
Text Indication on a display
Highlighting Highlighting

Safety
4 GRM
2 Safety
2.1 Intended use
The gas and smoke detector GRM consists of a control unit and one
or two gas or smoke sensors.
The gas and smoke Detector GRM is only suitable for:
• Monitoring of ambient air for presence of gases or smoke
• Providing an alarm signal when a defined concentration of gas
and/or smoke in the ambient air has been exceeded
• Onward transmission of the alarm signal.
Any use other than the use explicitly stated in this instruction manual
is not permitted.
2.2 Predictable incorrect application
The control unit, the gas sensor and the smoke sensor must un-
der no circumstances whatsoever be used in the following:
• Hazardous areas (ex)
If the device is operated in hazardous areas, sparks may cause
deflagrations, fires or explosions
• Damp and wet room environments
In addition, and in order to avoid false alarms, the smoke sensor
must not be used in the following:
• Rooms in which smoking is permitted
• Rooms in which smoke, heavy dirt or dust occurs, e.g. kitchens,
work shops or barns
• In areas in which air circulation or insects could trigger false
alarms
• In close vicinity of ventilators and air conditioning units
• In the vicinity of very bright light sources
• In the vicinity of fluorescent tubes, current carrying power cables
or areas with an increased level of electro-smog.
2.3 Safe handling
This product represents state-of-the-art technology and is manufac-
tured in accordance with the pertinent safety regulations. Each unit is
subjected to a function and safety test prior to despatch.
Operate the product only when it is in perfect condition. Always
observe the instruction manual, all pertinent local and national
directives and guidelines as well as health and safety regula-
tions and directives regarding the prevention of accidents.

Safety
GRM 5
WARNING
Severe burns or death due to mains voltage in the control unit
(AC 230 V, 50 Hz).
Do not expose the control unit to water.
Interrupt the mains voltage supply before opening the control
unit or before performing maintenance and cleaning work and
make sure it cannot be switched on by accident.
Do not tamper with the control unit in any way whatsoever.
2.4 Qualification of personnel
The product may only be installed, commissioned, operated, main-
tained, shut down and disposed of by qualified, specially trained per-
sonnel.
Electrical work may only be carried out by qualified electricians in
accordance with local and national regulations.
2.5 Modifications to the product
Changes or modifications made to the product by unauthorised per-
sons may lead to malfunctions and are prohibited for safety reasons.
2.6 Use of spare parts and accessories
Use of unsuitable spare parts and accessories may cause damage
to the product.
Use only the manufacturer’s genuine spare parts and accesso-
ries (refer to chapter 11, page 19).
2.7 Liability information
The manufacturer shall not be liable for any direct or consequential
damage resulting from failure to observe the technical instructions,
guidelines and recommendations.
The manufacturer and the sales company shall not be liable for costs
or damages incurred by the user or by third parties in the use or ap-
plication of this device, particularly in case of improper use of the de-
vice, misuse or malfunction of the connection, malfunction of the de-
vice or of connected devices. The manufacturer or the sales com-
pany shall not be liable for damages resulting from any use other
than the use explicitly stated in this instruction manual.
The manufacturer shall not be liable for misprints.
Für Druckfehler übernimmt der Hersteller keine Haftung.

Product description
6 GRM
3 Product description
The gas and smoke detector GRM monitors the concentration of ex-
plosive gases, vapours and/or smoke developments in the ambient
air. If the level of permissible gas or smoke concentration is ex-
ceeded at one of the connected sensors, a visual and audible alarm
is initiated at the control unit.
Application areas are, for instance, boiler rooms, offices, storage ar-
eas or in cellars and living rooms.
Control unit
a Green pilot lamp
b Without function
c Red alarm lamp
d Mute button
e Without function
Fig. 1: Control unit
The green pilot light indicates that the instrument is operational.
When an alarm condition occurs, the red alarm lamp lights up and
the buzzer sounds. The buzzer can be muted by pressing the mute
button. For safety reasons the alarm lamp remains on during the en-
tire alarm period. If the cause for alarm has been rectified, the alarm
lamp can be extinguished by pressing the mute button for a second
time.
The alarm is initiated via one of the connected sensors.
With fault conditions such as open circuit in the sensor connection
cable, the red alarm light blinks and the buzzer sounds.
The control unit incorporates voltage-free changeover relay contacts
for the connection of additional remote alarm units with appropriate
voltage supply, e.g. visual and audible alarm units. During normal
operation the relay is energised, in an alarm condition the relay is de-
energised (fail-safe principle).

Product description
GRM 7
Gas sensor
1 Green pilot lamp
2 Yellow ’fault’ light
3 Red alarm lamp
Fig. 2: Gas sensor
The gas sensor is works pre-calibrated to methane or propane and
butane. It detects on a semi-conductor basis the concentration of
gases which are present in ambient air. The gas sensors are ad-
justed to a detection level which corresponds to 20 % of the lower
explosion limit (LEL) of the relevant gas.
The green pilot light is lit when the gas sensor is operational. The
yellow ’fault’ lamp lights up when a fault occurs on the gas sensor
side. The red alarm lamp lights up when a proper alarm occurs.
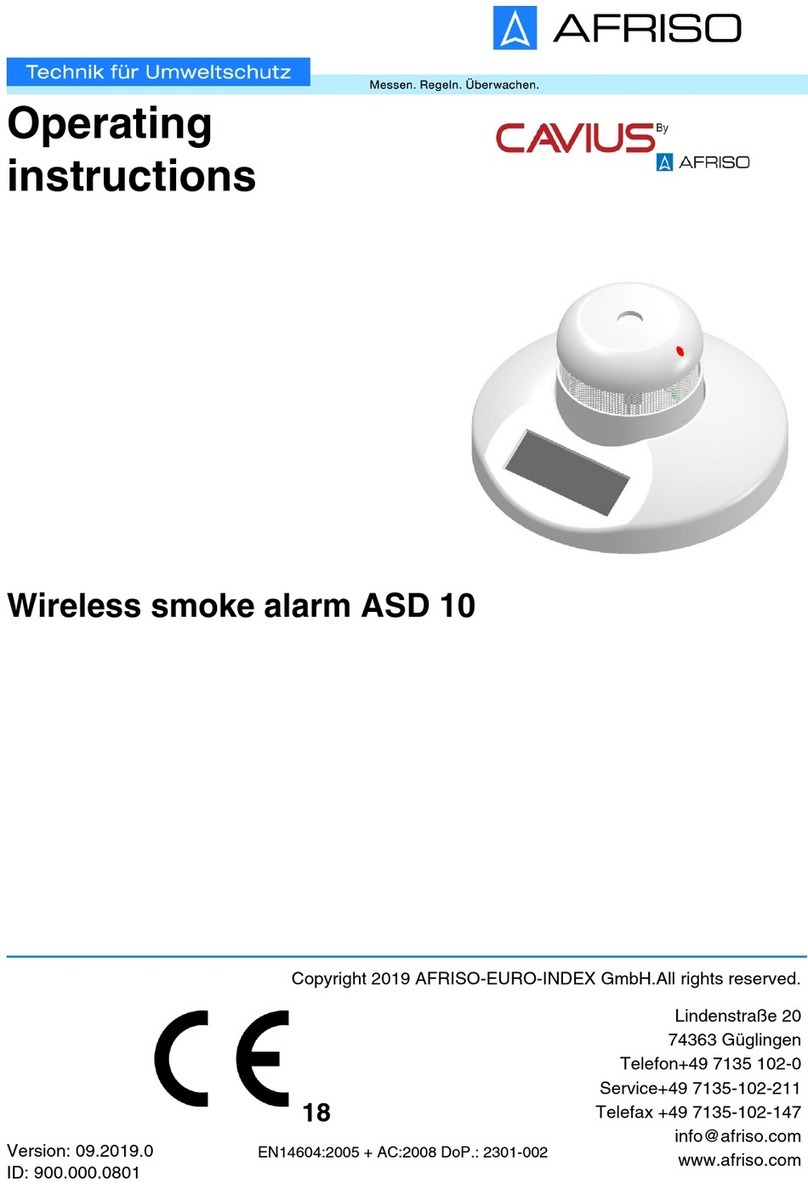
Smoke sensor
1 Red alarm lamp
Fig. 3: Smoke sensor
The smoke sensor monitors the concentration of smoke in the ambi-
ent air.
The red alarm light can be seen through the ventilation slots and
blinks approx. every 45 seconds if the gas sensor is operational. If a
proper alarm occurs, a pulsed audible alarm sounds.
3.1 Scope of delivery
The control unit is always part of the delivery. As every application
requires different sensors, no standard sensors are supplied. The fol-
lowing sensors are available:
• Smoke sensor
• Gas sensor for methane (natural gas)
• Gas sensor for propane-butane (liquified gas)
The gas and smoke sensors can be connected to the control unit in
the following combinations:
• 1 gas- and 1 smoke sensor
• 2 gas sensors
• 2 smoke sensors

Product description
8 GRM
• 1 gas sensors
• 1 smoke sensor
Sensors must be ordered separately.
This instruction manual contains all information necessary for the
safe operation of the GRM and its selectable sensors.
3.2 Application examples
1 GRM
2 AFRISO event
reporting system
3 Internet
4 Email
5 Mobile phone
6 Fax
7 Phone
Fig. 4: AFRISO event reporting system for remote reporting of leaks
Fig. 5: Control unit with mounting frame for control panel mounting;
right: control panel cutout

Specifications
GRM 9
4 Specifications
Table 1: Specifications sensors
ValueParameter
Gas sensor Smoke sensor
General
Dimensions W x H x D:
80 x 80 x 35 mm
Ø x L:
155 x 38 mm
Weight 100 g 200 g
Housing material Plastics
Humidity Max. 75 % relative humidity
Response delay After switching on: approx. 2 minutes
In operation: approx. 2 seconds
Emissions - Min. 85 dB(A), A-
valued noise level
of the audible
alarm at a distance
of three metres.
Operating temperature range
Ambient 0 °C to +40 °C
Storage 0 °C to +40 °C
Supply
Nominal voltage DC 12 V

Specifications
10 GRM
Table 2: Specifications control unit
Parameter Value
General
Dimensions (W x H x D) 100 x 188 x 65 mm
Weight 0.55 kg
Housing material Plastics ABS
Emissions Min. 70 dB(A), A-valued noise level of
the audible alarm at a distance of one
metre
Operating temperature range
Ambient 0 °C to +40 °C
Storage 0 °C to +40 °C
Supply
Nominal voltage AC 230 V ± 10 %, 50/60 Hz
Rated power 15 VA
Mains fuse T 100 mA
Switching load of output
relay
Max. AC 250 V, 2 A, resistive load
Electrical safety
Electrical safety EN 61010
Protection class II EN 60730
Protection IP 40 EN 60529
Electromagnetic compatibility (EMC)
Noise suppression EN 61000-6-3
Noise immunity EN 61000-6-2

Transportation and storage
GRM 11
Screw connections at the control unit
The centre rubber cable gland can be re-
placed by a cable gland M20.
Cable gland Cable diameter
M16 4.0-8.8 mm
M20 8.0-12.5 mm
4.1 Approvals, tests and conformities
The gas and smoke detector GRM conforms to the EMC Directive
(2004/108/EC) and to the Low Voltage Directive (2006/95/EC).
5 Transportation and storage
CAUTION
Damage to the device due to improper transportation.
Do not throw or drop the device.
CAUTION
Damage to the device due to improper storage.
Store device in a clean and dry environment.
Store device only within its permissible temperature range, refer
to chapter 4, page 9.

Installation and commissioning
12 GRM
6 Installation and commissioning
The control unit and the probe must never be installed in haz-
ardous areas.
6.1 Installing the gas sensor
Mounting position is at the height which corresponds to the
spread of the escaping gas.
a 30-40 cm
b Max. 5 m
Fig. 6: Mounting position of a methane (natural gas) gas sensor
a 30-40 cm
b Max. 5 m
Fig. 7: Mounting position of propane-butane sensor (liquified gas)
1. Loosen screw at the front of the housing und remove upper
housing part.
2. Fix gas sensor to the wall with two screws through the mounting
holes.

Installation and commissioning
GRM 13
6.2 Installing the smoke sensor
Smoke sensors in living accommodations should be mounted be-
tween living rooms and bedrooms because most house fires start in
the living area.
Mounting position is on the ceiling in the centre of the room.
The minimum distance to the walls is 60 cm.
Sensors should not be in rooms which under normal conditions
have a great amount of smoke or vapours present, e.g. kitch-
ens, humid and damp rooms, in close vicinity to ventilators or air
conditioning units or in rooms in which people smoke.
a Centre of
room
b Min. 60 cm
Fig. 8: Mounting position of a smoke sensor
1 Opening
Fig. 9: Opening at the smoke sensor
1. Flip open the smoke detector from the opening spot.
2. Fix smoke detector to the ceiling with two screws through the
mounting holes.
6.3 Installing the control unit
The control unit must be mounted to an even, rigid and dry wall
at eye level.
The control unit must be accessible and easy to oversee at all
times.

Installation and commissioning
14 GRM
The control unit must not be reached by water or splash water.
The control unit must not be installed in damp rooms.
The maximum ambient temperature at the control unit must not
be exceeded, refer to table 2, page 10.
In the case of outdoor installation, the control unit must be pro-
tected from direct atmospheric influences.
1. Open control unit.
2. Fasten control unit to the wall (Aor B).
A 1 Mount the screw to the wall.
2 Hang the control unit to the screw.
3 Fixate the control unit by screwing the lug
to the wall.
B Drill the fastening holes in the
bottom part with a Ø 5 mm drill.
Mount the bottom part to the wall
with the screws shipped with the
unit.

Installation and commissioning
GRM 15
3. Connect the unit electrically, refer to chapter 6.4, page 15.
4. Close control unit.
6.4 Electrical connection
Mains supply is disconnected and cannot be switched back on
by accident.
The maximum distance between sensor and control unit is 50 m
Ensure that the mains connecting cable is sufficiently protected
against damage, for instance, run in metal conduit.
Mains supply cable should be fused separately (max. 16 A).
Connection of sensors to control unit: use 3-core cable with a
cross section of min. 0.5 mm², e.g. bell wire YR 3 x 0.8 mm.
Mains connection should be provided via firmly installed and fixed
cable, e.g. NYM-O 2 x 1.5 mm².
1. Run the cable of the 1st sensor through the middle rubber/
screwed cable gland and connect to the middle terminal (S1).
2. Run the cable of the 2nd sensor through the right hand gland
and connect to the right hand terminal (S2).
3. Run the cable for an additional external alarm unit through the
left hand gland and connect to the left hand terminal. Polarity is
not critical.
4. Run mains supply cable through the left hand gland.
5. Connect ’Phase’ to terminal L and ’Neutral’ to terminal N.

Installation and commissioning
16 GRM
Coding plug: Connection of two sensors.
Left and right terminals are connected.
Remove black coding plug.
Coding plug: Connection of one sensor
Left terminal is connected. Right terminal is not connected.
Coding plug must be plugged in.
a Mains supply
b Relay contact for
additonal alarm
c 1. Sensor
d 2. Sensor
e Coding plug
Fig. 10: Electrical connection of control unit
Relay contact position in Alarm: COM-NC; in normal operation:
COM-NO.
CAUTION
The switching contact may be destroyed by voltage peaks when
inductive consumers are switched off.
Use commercially available standard RC combinations such as
0.1 µF/100 Ohm for inductive consumers.
6.5 Commissioning the device
Control unit and probes have been installed as per chapter 6,
page 12.
Electrical connection has been completed as per chapter 6.4,
page 15.
Probes have been connected to control unit.
Output relay has been connected (if required).
Mains connection is ready.
Flat cable is connected to printed circuit board.
Control unit has been closed with screws.

Operation
GRM 17
If all prerequisites are met, the device is ready for operation.
1. Switch on the power supply via the on-site mains fuse.
2. Perfom a function test, refer to chapter 6.6, page 17.
6.6 Function test
At the smoke sensor
Depress the test button “TEST/RESET” for three seconds until
the alarm sounds.
1 Test button “TEST/RESET”
7 Operation
After the mains supply has been switched on, the connected sensors
will be ready after approx. 2 minutes of warm-up time.
8 Maintenance
8.1 Maintenance intervals
Table 3: Maintenance intervals
When Activity
2 x per annum Vacuum clean the housings of the
sensors carefully.
8.2 Maintenance activities
Replacing the mains fuse F1
Mains voltage is interrupted and cannot be switched on by acci-
dent.
1. Open control unit, refer to chapter 6.3, page 14.
2. Open up the black, vertical safety bracket using a screwdriver:
Press down and turn by ¼ turn in anti-clockwise direction.
3. Remove insert.
4. Replace mains fuse F1, refer to table 2, page 10.
5. Place insert back into the safety bracket and close with a
screwdriver: Press down and turn by ¼ turn in clockwise direc-
tion.
6. Close control unit, refer to chapter 6.3, page 15.
7. Switch on the mains voltage.

Troubleshooting
18 GRM
9 Troubleshooting
Repair work may only be carried out by qualified, specially trained
personnel.
Table 4: Troubleshooting
Problem Possible reason Remedy
Mains supply fail-
ure.
Restore mains
supply.
Mains cable is not
connected.
Connect mains
cable.
Green pilot LED of
the control unit is not
on.
Mains fuse is de-
fect.
Replace mains
fuse.
Red alarm LED on
control unit is lit and
buzzer sounds even
though there is no
alarm condition at
the sensor.
False alarm result-
ing from dirty sen-
sors.
Carefully clean
sensors.
Coding plug in
wrong position.
Place coding plug
in right position,
see chapter 6.4,
page 15.
False alarm as a
result of an open
circuit in the cable
between control
unit and sensor.
Ensure that proper
connection is re-
stored.
Red alarm LED on
control unit blinks
and buzzer sounds
although there is no
alarm condition at
the sensor.
False alarm result-
ing from a defect
sensor.
Replace sensor.
After pressing the
mute button twice
following an alarm
condition, the red
alarm lamp stays on.
Alarm condition
still exists.
The ambient air
must be free from
gases and smoke.
Additional external
alarm does not react
during an alarm
condition.
Additional alarm
instrument is de-
fect.
Exchange addi-
tional alarm unit.

Shutting down and disposal
GRM 19
Problem Possible reason Remedy
Other malfunction. – Return the device
to the manufac-
turer.
10 Shutting down and disposal
1. Disconnect mains supply.
2. Remove the device (see chapter 6, page 11, steps in reverse
sequence).
3. To protect the environment, this device must not be disposed of
together with the normal household waste. Dispose of the de-
vice according to local directives or council guidelines.
This device consists of materials that can be reused by recycling
firms. The electronic inserts can be removed easily and are con-
structed from recyclable materials.
If you do not have the opportunity to dispose of the old device in ac-
cordance with environmental regulations, please contact us for pos-
sibilities to dispose of it or to return it.
11 Spare parts and accessories
Part Part No.
Event reporting system Phone Alarm SD1 90003
Event reporting system GSM Alarm 90002
Event reporting system EMS 220 90220
Event reporting system EMS 442 90442
Mounting frame for control unit 43521
IP54 kit with screw connection M20 43416
Mains fuse F1 (M 100 mA) 941571 0100
RC combination (0,1 µF/100 Ohm) 618 001 5100
Horn KH 1 (for dry rooms) 61011
Combination Light and Horn unit 61020
Revolving alarm light (for damp rooms and
outdoor installation)
61015
Horn HPW 2 (for damp rooms and outdoor
installation)
61012

Warranty
20 GRM
12 Warranty
The manufacturer’s warranty for this product is 24 months from date
of purchase. This warranty applies to all countries in which this pro-
duct is sold by the manufacturer or its authorised representatives.
13 Copyright
The manufacturer holds the copyright to this manual. This manual
may only be reprinted, translated, copied in part or in whole with the
prior written consent of the manufacturer.
We reserve the right to modify any specifications or alter any illustra-
tions in this manual without prior notice.
14 Customer satisfaction
Customer satisfaction is our prime objective. Please get in touch with
us if you have any questions, suggestions or problems regarding
your product.
15 Addresses
The addresses of our worldwide representatives can be found on the
Internet at www.afriso.de.
Table of contents
Other AFRISO Smoke Alarm manuals