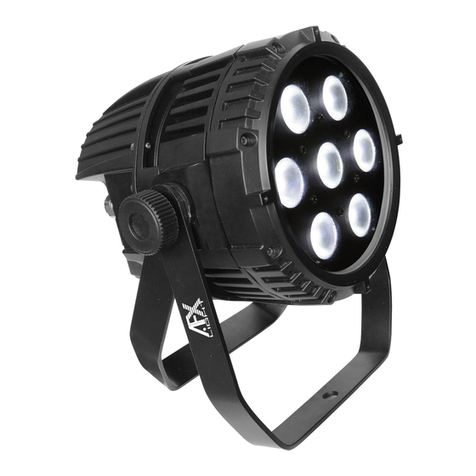
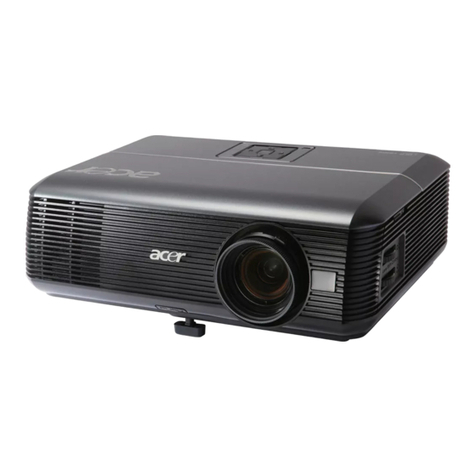
afx light IPAR 518 User manual

© Copyright LOTRONIC 2013 IPAR-518 Page 1
O
OU
UT
TD
DO
OO
OR
R
L
LE
ED
D
P
PR
RO
OJ
JE
EC
CT
TO
OR
R
P
PR
RO
OJ
JE
EC
CT
TE
EU
UR
R
A
A
L
LE
ED
DS
S
E
EX
XT
TE
ER
RI
IE
EU
UR
RE
E
IPAR518
(15-1662 )
GB‐INSTRUCTIONMANUAL
F‐MANUELD’UTILISATION

© Copyright LOTRONIC 2013 IPAR-518 Page 2
ThankyouforhavingchosenourAFXLIGHTOUTDOORLEDPROJECTOR.Foryourownsafety,pleasereadthisusermanual
carefullybeforeinstallingthedevice.
SAFETYINTRODUCTION
Ifthedevicehasbeenexposedtotemperaturechangesduetoenvironmentalchanges,donotswitchitonimmediately.
Thearisingcondensationcoulddamagethedevice.Leavethedeviceswitchedoffuntilithasreachedroomtemperature.
Itisessentialthatthedeviceisearthed.Aqualifiedpersonmustcarryouttheelectricconnection.
Makesurethattheavailablevoltageisnothigherthanstatedattheendofthismanual.
Makesurethepowercordisnevercrimpedordamaged.Ifitisdamaged,askyourdealerorauthorizedagenttoreplace
thepowercord.
Alwaysdisconnectfromthemains,whenthedeviceisnotinuseorbeforecleaningit.Onlyhandlethepowercordbyplug.
Neverpullouttheplugbytuggingthepowercord.
DISCONNECTDEVICE:WheretheMAINSplugoranappliancecouplerisusedasthedisconnectdevice,thedisconnect
deviceshallremainreadilyoperable.
Shields,lensesorultravioletscreensshallbechangediftheyhavebecomevisiblydamagedtosuchanextentthattheir
effectivenessisimpaired,forexamplebycracksordeepscratches.
CAUTION:
1.Beverycarefulduringinstallation.Sinceyouwillbeworkingwithadangerousvoltageyoucansufferalife‐threatening
electricshockwhentouchinglivewired.
2.Neverlookdirectlyintothelightsource,assensitivepersonsmaysufferanepilepticshock.
3.Pleasebeawarethatdamagescausedbymanualmodificationstothedevicearenotsubjecttowarranty.Keepawayfrom
childrenandnon‐professionals.
4.Thelightdoesn’tincludeanysparepartsforrepair,pleasecheckifallthepartsarewellinstalledandscrewsarefitted
tightlybeforeoperating.Donotusethelightwhenthecoverisopen.
GENERALGUIDELINES
Thisdeviceisonlyallowedtobeoperatedwithanalternatingcurrentofmax.100‐240VACandwasdesignedforindooruse
only.
Donotshakethedevice.Avoidbruteforcewheninstallingoroperatingit.
Whenchoosingtheinstallationspot,pleasemakesurethatthedeviceisnotexposedtoextremeheat,moistureordust.
Theminimumdistancebetweenlight‐outputfromtheprojectorandtheilluminatedsurfacemustbemorethan1meter.
Keepadistancetoanyflammableobjectsofatleast5m.
Operatethedeviceonlyafterhavingfamiliarizedyourselfwithitsfunctions.Donotpermitoperationbypersonnot
qualifiedforoperatingthedevice.Mostdamagesaretheresultofunprofessionaloperation.
Pleaseusetheoriginalpackagingifthedeviceistobetransported.
Forsafetyreasons,pleasebeawarethatallmodificationsonthedeviceareforbidden.Furthermore,anyotheroperation
mayleadtoshort‐circuit,burns,electricshock,lampexplosion,crash,etc.Ifthisdevicewillbeoperatedinanyway
differenttotheonedescribedinthismanual,theproductmaysufferdamagesandtheguaranteebecomesvoid.
GB

© Copyright LOTRONIC 2013 IPAR-518 Page 3
MOUNTING
Orientation
Thisfixturemaybemountedinanyposition,providedthereisadequateroomforventilation
Whenselectinginstallationlocation,takeintoconsiderationlampreplacementaccessandroutinemaintenance.
Safetycablesmustalwaysbeused.
Nevermountinplaceswherethefixturewillbeexposedtorain,highhumidity,extremetemperaturechangesorrestricted
ventilation.
Iftheexternalflexiblecableorcordofthislightisdamaged,itshallbeexclusivelyreplacedbythemanufacturerorhisservice
agentorasimilarqualifiedpersoninordertoavoidahazard.
Makesuretheinstallationpositionisstablebeforeyoufixthelight.Whenthelightisreversehanging,makesurethelightwill
notfallfromthetruss,usethesafetycablegothroughthetrussandbracketofthelightasasupporting,toavoidthelightto
falldown.Thereisnoentrancetotheworkareaduringmounting.Periodicallycheckifthesafetycablehasfrettedawayor
clampisloosened.Wewillnottakeanyresponsibilityfordamagescausedbyabadlyinstalledunit.
PowerSupplyandSignalCableConnection
1.MainsPowerconnection
Theexclusiveplugshouldbeusedbetweentheconnectionofunitandpower.Pleaseensurethattheratedvoltageand
frequencyareaccordancewiththepowersupply.Therequiredinputvoltageandfrequencyare:100‐240VAC
Wesuggestthateverylighthasanindependentswitchsothatyoucanturnonorturnoffthelightrandomly.
Note:thegroundwire(yellow/greendouble‐colorwire)mustbesafelyconnected,theelectricalinstallationmustbein
accordancewiththerelatedstandards
CAUTION:Wheninstallingthedevice,makesurethereisnohighlyinflammablematerialwithinadistanceofmin.5m!
2.ConnectionofSignalCable
Youcanusethe3‐pinXLRcabletoconnecttheoutputsocketofthemasterandtheinputsocketoftheslavelight.Connect
theDIGITALOUTsocketofthemasterandtheINsocketoftheslavelight,then,connecttheOUTsockettotheINsocketof
thenextlight.Ordinaltoconnectallthelightsasbelow:
IN OUT
IN OUT OUT
IN
12 3
D
M
X
I
N
D
M
X
O
U
T
Theconnectionbetweentheoutputofmasterandinputofproduct,it’savailabletousethe3pinsXLRcablewhichprovided
bythemanufacturer.SignalcablefromtheDMXoutputofthecontrollertotheinputofthefirstmasterlight,andconnectto
theDMXinputofsecondslavelightfromtheDMXoutputofthefirstmasterlight,analogously,tillconnectedalltheslave
lights,andinsertthelastconnectortotheoutputofthefinallight.(Notice:thediameterofcoreofeverycableshouldbe
0.5mmatleast,doublecoresheltercableshouldbeused).Thesignalconnectingmustusetheattached3pinsXLRcable.
Notice,alltheinternalleadwireofthe3pinsXLRcableshouldnottouchtoeachotherorconnecttotheconnector.
ADMXsignalterminatorisrecommendedonthelastunitofthechain.DMXterminatorisaXLRconnectorwitha120Ω
resistorbetweenthepin2andpin3oftheXLRconnector

© Copyright LOTRONIC 2013 IPAR-518 Page 4
INSTRUCTIONOFBUTTONS
MENUENTERUPDOWN
DESCRIPTIONOFMENU
STATFUNCTION
‐Choose [STAT] and press [ENTER] to “stat mode” ( manual mode )
‐Press [ENTER] to choose : [Red], [Green], [Blue],[Amber], [White], [Strobe]
‐Press [UP] / [DOWN] to choose the value ( 0 to 255 for level of each color and 0 to 20 for frequency of
strobe )
‐Press [MENU] back to the main menu
Key code : UP, DOWN, UP, DOWN + ENTER
UP : Use to choose operating mode, DMX address or to set
parameters
DOWN : Use to choose operating mode, DMX address or to set
parameters
ENTER : Use to validate your choice
MENU : Use to select a function or to come back to the previous
menu

© Copyright LOTRONIC 2013 IPAR-518 Page 5
AUTOFUNCTION
‐Choose [AUTO] press [ENTER] toenter I auto mode
‐Press [UP]/[DOWN] to choose the built-in program or edit program ( AT01 to AT10 programs cannot be
modified by edit function / PR01 to PR10 programs can be modified by edit function )
‐Press [MENU] Back To The Main Menu
RUNFUNCTION(DMX&M/S)
‐Choose [RUN] and press [ENTER]
‐Press [UP] / [DOWN] to choose [DMX] or [SLAV]( DMX mode or master-slave mode )
‐Press [MENU] back to the main menu
DMXFUNCTION(DMXADDRESSSETTING)
‐Choose [DMX] press [ENTER]
‐Press [UP]/[DOWN] to choose [1~512] value
PERSFUNCTION(DMXOPERATINGMODE)
‐Choose [PERS] and press [ENTER]
‐Press [UP]/[DOWN] to choose the dmx channel modes, (for details, please check on the dmx channels on
the following)

© Copyright LOTRONIC 2013 IPAR-518 Page 6
IDFUNCTION
‐Choose [ID] and press [ENTER]
‐Press [UP]/[DOWN] to choose [1~255] value
EDITFUNCTION
‐Choose [EDIT] and press [ENTER]
‐Press [ENTER] to choose the parameter values
‐Press [UP] / [DOWN] to choose program, scene or parameters values ( red [R), green [G], blue [B], white
[W], amber [A], strobe [S], time [T] and fade time [F] )

© Copyright LOTRONIC 2013 IPAR-518 Page 7
SETFUNCTION
‐Choose [SET] and press [ENTER]
‐[UPLD] : sending edit program value from current master unit to slave unit : To do it, press [ENTER] then do
the key code [UP, DOWN, UP, DOWN] and press [ENTER], light turn to yellow, means data was sending
meanwhile there will show the speed of upload, light will turn to green when finished sending, and the slave
unit will turn to yellow too when receive the data,and turn to green when finished receiving. if the slave unit
protect to yellow,it means fail receiving, please cut off the power and receive again.
‐[REST] : To load the factory setup. Press [ENTER] and do the key code : [UP, DOWN, UP, DOWN] then
press [ENTER]
‐[ID] : ID address setting, Press [ENTER], press [UP] / [DOWN] to choose [ON] to allow ID address function,
[OFF] close ID address function
‐[RGBW] : color deviation correcting setting, Press [ENTER], press [UP] /[DOWN] to choose [ON] to allow
color deviation correcting function,[OFF] not allow. the proportion of RGBW colors can be set in the menu
[CAL2]
‐[DIM] : non-linear dimming setting, Press [UP] /[DOWN] to choose : [OFF] close dim speed, [DIM1] to
[DIM9] to choose speed ( speed 1 (fast ), ….., speed94 (slow), as the speed is slower as dimming softer.
‐[DV] : Digital photography color choosen, Press [ENTER], and use [UP] /[DOWN] to choose between
[NTSC] or [PAL]

© Copyright LOTRONIC 2013 IPAR-518 Page 8
CAL1FUNCTION(WHITEBALANCEFUNCTION)
‐Choose [CAL1] and press [ENTER]
‐Press [UP] /[DOWN] to choose [WT1~11] then press [ENTER] to set up to 11 different temperature of white
color
oPress [ENTER] to choose [Red], [Green], [Blue], [White]
oPress [UP] /[DOWN] to choose value [0~255]
‐In STAG DMX mode, channel 7 is used to select between 11 temperature of white color
CAL2FUNCTION(COLORDEVIATIONCORRECTINGSETTING)
‐Choose [CAL2] then press [ENTER] to [RGBW]
‐Press [ENTER] to choose [Red], [Green], [Blue], [White]
‐Press [UP] /[DOWN] to choose the proportion of colors [128~255]
‐When the RGBW function is on ( menu SET ) and when on DMX RGB =255,255,255, the white color is the
one set in CAL2 function
KEYFUNCTION(PROTECTIONKEYSETTING)
‐Choose [KEY] then press [ENTER] ; The key code is [UP, DOWN, UP, DOWN] and press [ENTER]
‐Press [UP] /[DOWN] to choose [ON] or [OFF]

© Copyright LOTRONIC 2013 IPAR-518 Page 9
DMXCHANNELTABLE
5kindDMXchannelmode:[STAG],[AR2.d],[ARC.3],[AR3.d],[HSV]
‐STAGCHANNELMODE
CHANNELVALUEFUNCTION
1 0-255 MASTER DIMMING
2 0-255 RED(when CH9 as PR01~10,CH2 control TIME)
3 0-255
GREEN(when CH9 as PR01~10,CH3 control FADE)
4 0-255 BLUE
5 0-255 WHITE
6 0-255 AMBER
7 0-9 COLOR MACRO ( NO FUNCTION )
10-29 RED 100% / GREEN UP / BLUE 0%
30-49 RED DOWN / GREEN 100% / BLUE 0%
50-69 RED 0% / GREEN 100% / BLUE UP
70-89 RED 0% / GREEN 100% / BLUE UP
90-109 RED UP / GREEN 0% / BLUE 100%
110-129 RED 100% / GREEN 0% / BLUE DOWN
130-149 RED 100% / GREEN 0% / BLUE UP
150-169 RED DOWN / GREEN DOWN / BLUE 100%
170-200 RED 100% / GREEN 100% / BLUE 100% / WHITE 100%
201-205 WHITE ( 3200K )
206-210 WHITE ( 3400K )
211-215 WHITE ( 4200K )
216-220 WHITE ( 4900K )
221-225 WHITE ( 5600K )
226-230 WHITE ( 5900K )
231-235 WHITE ( 6500K )
236-240 WHITE ( 7200K )
241-245 WHITE ( 8000K )
246-250 WHITE ( 8500K )
251-255 WHITE ( 10000K )
8 0~9 NO STROBE
10~255 SPEED OF STROBE(255 faster)
9 0~40 NO FUNCTION
41-70 Auto 1 ( edit )
71-80 Auto 2
81-90 Auto 3
91-100 Auto 4
101-110 Auto 5
111-120 Auto 6
121-130 Auto 7
131-140 Auto 8
141-150 Auto 9
151-160 Auto 10

© Copyright LOTRONIC 2013 IPAR-518 Page 10
161-170 Prog 1
171-180 Prog 2
181-190 Prog 3
191-200 Prog 4
201-210 Prog 5
211-220 Prog 6
221-230 Prog 7
231-240 Prog 8
241-250 Prog 9
251-255 Prog 10
10 0~255 Adjust Speed of Build-in program
11 0-24 Linear dimming speed ( Dim=Off )
25-49 Non linear dimming speed ( Dim=1)
50-74 Non linear dimming speed ( Dim=2)
75-99 Non linear dimming speed ( Dim=3)
100-124 Non linear dimming speed ( Dim=4)
125-149 Non linear dimming speed ( Dim=5)
150-174 Non linear dimming speed ( Dim=6)
175-199 Non linear dimming speed ( Dim=7)
200-224 Non linear dimming speed ( Dim=8)
225-255 Non linear dimming speed ( Dim=9)
12 0 Whole ID address controlled
1-255 The same ID address controlled
‐AR2.dCHANNELMODE
CHANNELVALUEFUNCTION
1 0-255 MASTER DIMMER
2 0-255 RED
3 0-255 GREEN
4 0-255 BLUE
5 0-255 WHITE
6 0-24 Linear dimming speed ( Dim=Off )
25-49 Non linear dimming speed ( Dim=1)
50-74 Non linear dimming speed ( Dim=2)
75-99 Non linear dimming speed ( Dim=3)
100-124 Non linear dimming speed ( Dim=4)
125-149 Non linear dimming speed ( Dim=5)
150-174 Non linear dimming speed ( Dim=6)
175-199 Non linear dimming speed ( Dim=7)
200-224 Non linear dimming speed ( Dim=8)
225-255 Non linear dimming speed ( Dim=9)

© Copyright LOTRONIC 2013 IPAR-518 Page 11
‐ARC.3CHANNELMODE
CHANNELVALUEFUNCTION
1 0-255 RED
2 0-255 GREEN
3 0-255 BLUE
4 0-255 WHITE
5 0-255 AMBER
6 0-24 Linear dimming speed ( Dim=Off )
25-49 Non linear dimming speed ( Dim=1)
50-74 Non linear dimming speed ( Dim=2)
75-99 Non linear dimming speed ( Dim=3)
100-124 Non linear dimming speed ( Dim=4)
125-149 Non linear dimming speed ( Dim=5)
150-174 Non linear dimming speed ( Dim=6)
175-199 Non linear dimming speed ( Dim=7)
200-224 Non linear dimming speed ( Dim=8)
225-255 Non linear dimming speed ( Dim=9)
‐AR3.dCHANNELMODE
CHANNELVALUEFUNCTION
1 0~255 MASTER DIM
2 0-255 RED
3 0-255 GREEN
4 0-255 BLUE
5 0-255 WHITE
6 0-255 AMBER
7 0-24 Linear dimming speed ( Dim=Off )
25-49 Non linear dimming speed ( Dim=1)
50-74 Non linear dimming speed ( Dim=2)
75-99 Non linear dimming speed ( Dim=3)
100-124 Non linear dimming speed ( Dim=4)
125-149 Non linear dimming speed ( Dim=5)
150-174 Non linear dimming speed ( Dim=6)
175-199 Non linear dimming speed ( Dim=7)
200-224 Non linear dimming speed ( Dim=8)
225-255 Non linear dimming speed ( Dim=9)

© Copyright LOTRONIC 2013 IPAR-518 Page 12
‐HSVCHANNELMODE
CHANNELVALUEFUNCTION
1 0~255 H hue(0~100%)
2 0~255 S saturation (0~100%)
3 0~255 V brightness(0~100%)
4 0-24 Linear dimming speed ( Dim=Off )
25-49 Non linear dimming speed ( Dim=1)
50-74 Non linear dimming speed ( Dim=2)
75-99 Non linear dimming speed ( Dim=3)
100-124 Non linear dimming speed ( Dim=4)
125-149 Non linear dimming speed ( Dim=5)
150-174 Non linear dimming speed ( Dim=6)
175-199 Non linear dimming speed ( Dim=7)
200-224 Non linear dimming speed ( Dim=8)
225-255 Non linear dimming speed ( Dim=9)
Thefollowingpointshavetobeconsideredduringtheinspection:
Allscrewsforinstallingthedevicesorpartsofthedevicehavetobetightlyconnectedandmustnotbecorroded.
Theremustnotbeanydeformationsonthehousing,glasspane,fixationsandinstallationspots.
Theelectricpowersupplycablesmustnotshowanydamage,materialfatigueorsediments.Furtherinstructionsdepending
ontheinstallationspotandusagehavetobeadheredtobyaskilledinstallerandanysafetyproblemshavetoberemoved.
Werecommendafrequentcleaningofthedevice.Pleaseuseamoist,lint‐freecloth.Neverusealcoholorsolvents.
CAUTION:Disconnectfrommainsbeforestartingmaintenanceoperation!
CleaningandUsingFrequencyofProduct
Pleasemakesurethatthelightispoweroffbeforedismantlingormaintaining,it’sveryimportanttokeepthelightclean.
Frequentcleaningwillensuremaximumbrightnessoutput,butalsoprolongthelifetime.It’ssuggestedtousethehigh
quality,professionalglassdetergentandsoftclothtocleanthelight.It’snotallowedtousealcoholorchemicalsolvent.The
innerpartofthelightshouldbecleanedbyvacuumcleaneratleastonceayear.
Whenthelightdoesn’twork,pleasecheckifthefuseisburntoutornot.Ifitis,thesamefuseshouldbereplaced,findout
thefaultyandrestartthelight.Butpleasenotetherepairmustbehandledbyprofessional.
TECHNICALSPECIFICATIONS
DMXChannels:...........................................................................................................................4/12
Beamangle:....................................................................................................................................25°
Controlmode:...........................................................................................Auto,Master/Slave,DMX
LEDpower:...........................................................................................18x15WRGBAWLEDs5‐in‐1
Lifetimeled...................................................................................................................50000hours
IPnorm:…………………………………………………………………………………………………..………………………..……IP‐65
Workingenvironment:..........................................................................................indoor/Outdoor
Voltage:.........................................................................................................AC100‐240V/50‐60Hz
Power:.......................................................................................................................................300W
Electricproductsmustnotbeputintohouseholdwaste.Pleasebringthemtoarecyclingcentre.Askyourlocalauthoritiesoryourdealerabout
thewaytoproceed.

© Copyright LOTRONIC 2013 IPAR-518 Page 13
Nousvousremercionspourl’achatdecePROJECTEURALEDDMXAFXLIGHT.Pourvotresécurité,lisezattentivementce
manuelavantd’installerl’appareil.
CONSIGNESDESECURITEETD’UTILISATION
Sil’appareilaétéexposéàdeschangementsdetempérature,nelemettezpasimmédiatementsoustension.La
condensationquipeutseproduire,risqued’endommagerlescircuits.Attendezquel’appareilaitatteintlatempérature
ambianteavantdelemettresoustension.
Nepasbougerl’appareillorsqu’ilestenfonctionnement.Lagarantieneprendrapasenchargecetypedepannequirelève
d’unemauvaiseutilisation.
L’appareilfaitpartiedelaclassedeprotectionI.Ilestdoncprimordialqu’ilsoitreliéàlaterre.
Assurez‐vousquelatensionsecteurnedépassepascelleindiquéeàlafindecemoded’emploi.
Nejamaisfairefonctionnerl’appareilsansleverredeprotectionouavecunverrecassé.Demandezàvotrerevendeurouà
untechnicienderemplacerleverre.
Assurez‐vousquelecordond’alimentationn’estpasécraséouendommagé.Danscecas,demandezàvotrerevendeurou
untechnicienderemplacerlecordon.
Débrancheztoujoursl‘appareildusecteurlorsqu’iln’estpasutiliséouavantdelenettoyer.Netirezquesurlafiche,jamais
surlecordon.
Lorsquelecordond'alimentationouuncoupleurd'appareilestutilisécommedispositifdedéconnexion,cedispositifdoit
resterfacilementaccessible;
Siuninterrupteuromnipolaireestutilisécommedispositifdedéconnexion,l'emplacementsurl'appareiletlafonctionde
l'interrupteurdoitêtredécrite,etlecommutateurdoitresterfacilementaccessible
Desprotections,lentillesouécransultravioletsdoiventêtreremplacéslorsqu’ilssontvisiblementendommagésaupoint
qu’ilsperdentleurefficacitép.ex.pardesfissuresoudeségratignuresprofondes.
ATTENTION:
1.Soyeztrèsprudentlorsdel’installation.Puisquevoustravaillezavecdestensionsdangereuses,vouspouvezsubirunchoc
électriquegravesivoustouchezdesfilsnussoustension.
2.Nejamaisregarderdirectementdanslasourcedelumière.Ellepeutprovoquerunecrised’épilepsiechezdespersonnes
sensibles.
3.Lesdommagesrésultantdunonrespectdesinstructionsoudelamodificationdel’appareilnesontpascouvertsparla
garantie.Tenirloindesenfantsetdespersonnesnon‐qualifiées.
4.L’appareilnecontientaucunepièceremplaçable.Vérifiezsitouteslespiècessontbieninstalléesetquelesvissontbien
serréesavantlamiseenservice.Nepasutiliserl’appareillorsqueleboîtierestouvert.
F

© Copyright LOTRONIC 2013 IPAR-518 Page 14
REGLESGENERALES
Cetappareildoitêtrealimentéuniquementencourantalternatifde100‐240Vacetutiliséuniquementàl’intérieur.
Nepassecouerl’appareil.Nepasforcerpendantl’installationoul’utilisation.
Lorsduchoixdulieud’installation,assurez‐vousquel’appareiln’estpasexposéàlachaleur,l’humiditéoulapoussière.La
distanceminimumentrelasortielumineusedelalyreetlasurfaceéclairéedoitêtredeplusde1m.Respectezune
distancedesécuritéd’aumoins5mavecdesmatériauxouobjetsinflammables.
Utilisezcetappareiluniquementsivousvousêtesfamiliarisésavecsesfonctions.Nepasautoriserunepersonne
inexpérimentéed’utilisercetappareil.Laplupartdesdommagesrésultentd’unemauvaiseutilisation.
Conservezl’emballaged’originepourtouttransport.
Pourdesraisonsdesécurité,ilestinterditdemodifiercetappareildequelquesortequecesoit.Toutemanipulationnon
décritedanscemanuelpeutconduireàdescourts‐circuits,unchocélectrique,l’explosiondelalampe,unechute,etc.et
invalideraitlagarantie.
MONTAGE
Orientation
Vouspouvezinstallercetappareildansn’importequellepositionpourvuqu’ilyaitsuffisammentd’espacepourassurerune
ventilationsuffisante.
Lorsquevousinstallezl’appareil,choisissezunemplacementquipermetd’accéderfacilementàl’appareilafind’effectuer
l’entretienderoutine.
Utiliseztoujoursdescâblesdesécurité.
Nejamaisinstallerl’appareilàunendroitoùilseraexposéàlapluie,àl’humidité,auxchangementssoudainsdetempérature
ouàuneventilationinsuffisante.
Silecordonsecteurdel’appareilestendommagé,ilnedoitêtreremplacéqueparlefabricantousonagentoubienun
technicienqualifiéafind’évitertoutrisqued’électrocution.
Assurez‐vousquel’emplacementprévueststableavantd’installerleprojecteur.Assurez‐vousqueleprojecteurnepeutpas
tomberdelastructureenpassantuncâbled’acierdanslastructureetl’étrier.Personnenedoitsetrouveren‐dessousdela
zonedetravailpendantl’installation.Nousdéclinonstouteresponsabilitépourdesdommagesetblessuressurvenussuiteà
unechuteduprojecteurenraisond’unemauvaisefixation.
Connexiondel’alimentationetducâblesignal
1.Connexiondel’alimentationsecteur
Utilisezlecordonfournipourbrancherl’appareilsurlesecteur.Assurez‐vousquelatensionetlafréquencedusecteur
correspondàlatensionetlafréquenced’alimentationdel’appareil,àsavoir:100‐240Vac.Chaqueappareildoitpouvoirêtre
missousethorstensionindividuellement.

© Copyright LOTRONIC 2013 IPAR-518 Page 15
2.Connexionducâblesignal
LaconnexionentrelasortieduMaîtreetl’entréedel‘EsclavesefaitaumoyenducordonXLRà3brochesfourni.Lasortie
DMXdelaconsoledecommandedoitêtrebranchéesurl’entréeDMXdupremierMaître.BranchezlasortieDMXduMaître
surl’entréeDMXdel’Esclaveetainsidesuitejusqu’audernierEsclave.Branchezuneterminaisonsurlasortiedudernier
appareilafind’éviterdesparasites.CetterésistancedefindeligneconsisteenuneficheXLRquicomporteunerésistancede
120Ωentrelesbroches2et3.
IN OUT
IN OUT OUT
IN
12 3
D
M
X
I
N
D
M
X
O
U
T
Note:Utilisezducâbleàdoubleblindage.Lediamètreduconducteurdechaquecâbledoitêtred’aumoins0,5mm.
PANNEAUDECONTROLE
MENUENTERUPDOWN
MENUDESCRIPTION
FONCTIONSTAT(MODEMANUEL)
‐Sélectionnez [STAT] puis pressez [ENTER] pour entrer dans le mode STAT ( mode manuel )
‐Appuyez sur [ENTER] pour sélectionner soit rouge [R], soit vert [G], soit bleu [B], soit ambre [A], soit blanc
[W] ou soit le strobe [ST]
‐Appuyez sur [UP] /[DOWN] pour ajuster la valeur
‐Appuyez sur [MENU] pour revenir au menu principal
Code de sécurité : UP, DOWN, UP, DOWN + ENTER
Bouton UP : permet de sélectionner un mode de fonctionnement,
d’augmenter l’adresse DMX ou de sélectionner une
couleurs
Bouton DOWN : permet de sélectionner un mode de
fonctionnement, de diminuer l’adresse DMX ou
de sélectionner une couleurs.
Bouton ENTER : Permet de valider le choix
Bouton MODE : permet de Sélectionner un menu ou de revenir au
menu précédent.

© Copyright LOTRONIC 2013 IPAR-518 Page 16
FONCTIONAUTO(MODEAUTOMATIQUE)
‐Sélectionnez [AUTO] puis appuyez sur [ENTER] pour entrer dans le mode auto
‐Appuyez sur [UP] /[DOWN] pour sélectionner soit les programmes internes soit les programmes édités ( les
programmes AT01 à AT10 ne sont pas modifiables, les programmes PR01 à PR10 sont modifiables dans le
menu EDIT )
‐Appuyez sur [MENU] pour revenir au menu principal
FONCTIONRUN(MODEMAÎTRE‐ESCLAVE)
‐Sélectionnez [RUN] puis appuyez sur [ENTER]
‐Utilisez les boutons [UP] /[DOWN] pour choisir entre mode DMX [DMX] et mode esclave[SLAV]
‐Appuyez sur [MENU] pour revenir au menu principale
FONCTIONDMX(ADRESSEDMX)
‐Sélectionnez [DMX] puis appuyez sur [ENTER]
‐Utilisez [UP] /[DOWN] pour choisir l’adresse DMX[1~512]

© Copyright LOTRONIC 2013 IPAR-518 Page 17
FONCTIONPERS(FONCTIONNEMENTDMX)
‐Sélectionnez [PERS] puis appuyez sur [ENTER]
‐Utilisez [UP] /[DOWN] pour choisir le type de fonctionnement DMX ( voir tableau plus loin )
FONCTIONID(ADRESSEID)
‐Sélectionnez [ID] puis appuyez sur [ENTER]
‐Appuyez sur [UP] /[DOWN] pour sélectionner la valeur ID [1~255]
FONCTIONEDIT(EDITIONPROGRAMME)
‐Sélectionnez [EDIT] puis pressez [ENTER]
‐Appuyez sur [ENTER] pour choisir les paramètres
‐Utilisez les boutons [UP] /[DOWN] pour choisir le numéro de programme, la scène et la valeur ( rouge [R],
vert [G], bleu [B], ambre [A], blanc [W], strobe [S], durée [T] et durée d’enchainement [F] )

© Copyright LOTRONIC 2013 IPAR-518 Page 18
FONCTIONSET
‐Sélectionnez [SET] puis pressez [ENTER]
‐[UPLD] : Permet de charger un programme vers un projecteur esclave.Appuyez sur [ENTER] pour entrer le
code de sécurité [UP, DOWN, UP, DOWN] +[ENTER] , La lumière devient jaune ( ce qui signifie que le
données sont en cours de chargement ), La lumière redevient verte quand le chargement est terminé.
La lumière sur le projecteur led esclave devient jaune puis redevient vert quand le chargement est terminé
‐[REST] : Reset. Code de sécurité : [UP, DOWN, UP, DOWN] +[ENTER]
‐[ID] : Adresse ID, appuyez sur [ENTER] puis appuyez sur [UP] /[DOWN] pour choisir [ON] pour autoriser
l’utilisation des adresse ID ou [OFF] pour annuler la fonction ID
‐[RGBW] :Ajustement de correction des couleurs.Appuyez sur [ENTER] puis sur [UP] /[DOWN] pour
choisir [ON] pour autoriser la fonction de correction des couleurs, [OFF] pour annuler. La correction des
couleurs se fait dans la fonction CAL2
‐[DIM] : Ajustement dimmer non linéaire, Appuyez sur [UP] /[DOWN] pour choisir, [OFF] dimmer
instantannée , [DIM1] (rapide) à [DIM9] Vitesse 4 (lent)
‐[DV] : Mode photographie.Appuyez sur [ENTER] puis sur [UP] /[DOWN] pour choisir [NTSC] ou [PAL]

© Copyright LOTRONIC 2013 IPAR-518 Page 19
FONCTIONCAL1(BALANCEBLANC)
‐Sélectionnez [CAL1] puis pressez [ENTER]
‐Utilisez [UP] /[DOWN] pour choisir [White 1~11] puis appuyez sur [ENTER] pour valider
oAppuyez sur [ENTER] pour choisir le rouge[R], le vert [G], le bleu[B] ou le blanc [W]
oAppuyez sur [UP] /[DOWN] pour choisir la valeur [0~255]
‐NOTE : Quand le fonctionnement DMX est sur [STAG], le canal 7 permet d’appeler 11 niveaux de blancs.
FONCTIONCAL2(BALANCERGBW)
‐Sélectionnez [CAL2] puis appuyez sur [ENTER] pour entrer dans le menu [RGBW]
‐Appuyez sur [ENTER] pour choisir le rouge[R] , le vert [G], le bleu [B] ou le blanc [W]
‐Appuyez [UP] /[DOWN] pour choisir la proportion de couleurs [128~255] . Si la fonction RGBW du menu set
est activée, en DMX, quand les couleurs RGB sont à 255, le blanc prendra la valeur ajusté ici
FONCTIONKEY(PROTECTIONBOUTON)
‐Sélectionnez [KEY] puis appuyez sur [ENTER] ; code de sécurité : [UP, DOWN, UP, DOWN] +[ENTER]
‐Appuyez sur [UP] /[DOWN] pour choisir [ON] /[OFF]

© Copyright LOTRONIC 2013 IPAR-518 Page 20
CANAUXDMX
Ilya5modesDMX:STAG,AR2d,ARC3,AR3.d,HSV
STAG
CHANNELVALUEFUNCTION
1 0-255 MASTER DIMMING
2 0-255
ROUGE(quand CH9 est PR01~10 alors CH2 controle la durée)
3 0-255
VERT(quand CH9 est PR01~10 alors CH3 controle le temps d’enchainement)
4 0-255 BLEU
5 0-255 BLANC
6 0-255 AMBRE
7
0-9 COLOR MACRO ( NO FUNCTION )
10-29 ROUGE 100% / VERT MAX / BLEU 0%
30-49 ROUGE MIN / VERT 100% / BLEU 0%
50-69 ROUGE 0% / VERT 100% / BLEU MAX
70-89 ROUGE 0% / VERT 100% / BLEU MAX
90-109 ROUGE MAX / VERT 0% / BLEU 100%
110-129 ROUGE 100% / VERT 0% / BLEU MIN
130-149 ROUGE 100% / VERT 0% / BLEU MAX
150-169 ROUGE MIN / VERT MIN / BLEU 100%
170-200 ROUGE 100% / VERT 100% / BLEU 100% / BLANC 100%
201-205 BLANC ( 3200K )
206-210 BLANC ( 3400K )
211-215 BLANC ( 4200K )
216-220 BLANC ( 4900K )
221-225 BLANC ( 5600K )
226-230 BLANC ( 5900K )
231-235 BLANC ( 6500K )
236-240 BLANC ( 7200K )
241-245 BLANC ( 8000K )
246-250 BLANC ( 8500K )
251-255 BLANC ( 10000K )
8 0~9 NO STROBE
10~255 VITESSE DE STROBE(255 VITESSE MAX)
9
0~40 PAS DE FONCTION
41-70 Auto 1 ( edit )
71-80 Auto 2
81-90 Auto 3
91-100 Auto 4
101-110 Auto 5
111-120 Auto 6
121-130 Auto 7
131-140 Auto 8
141-150 Auto 9
Table of contents
Languages:
Other afx light Projector manuals
afx light
afx light FREEPARHEX-BL User manual
afx light
afx light PARCOB100HEX User manual
afx light
afx light MINIRGB-8 User manual
afx light
afx light IBOX-H5 User manual
afx light
afx light CLUB-WHITE450 User manual
afx light
afx light PROPAR6-WH User manual

afx light
afx light 15-1703 User manual
afx light
afx light PARCOB150WH-MKIII User manual
afx light
afx light PARCOB50WH User manual
afx light
afx light CLUB-ZOOM2810 User manual
