AG Neovo DR-24G User manual

DR-24G LCD Monitor
User Manual
www.agneovo.com

TABLE OF CONTENTS
2
Safety Information
Federal Communications Commission (FCC) Notice (U.S. Only)............................................................ 4
WEEE....................................................................................................................................................... 5
Precautions
Notice ....................................................................................................................................................... 6
Cautions When Setting Up ....................................................................................................................... 7
Cautions When Using............................................................................................................................... 8
Cleaning and Maintenance....................................................................................................................... 8
Notice for the LCD Display ....................................................................................................................... 9
Chapter 1: Product Description
1.1 Package Contents .............................................................................................................................. 10
1.2 Wall Mounting Installation Preparation............................................................................................... 11
1.2.1 Wall Mounting.......................................................................................................................... 11
1.3 LCD Display Overview ....................................................................................................................... 12
1.3.1 Front View and Keypad Buttons.............................................................................................. 12
1.3.2 Rear View................................................................................................................................ 13
Chapter 2: Making Connections
2.1 Connecting the Power ........................................................................................................................ 14
2.2 Connecting Input Source Signals ....................................................................................................... 15
2.2.1 Connecting a Computer .......................................................................................................... 15
Using VGA Cables ......................................................................................................................... 15
Using DVI Cables........................................................................................................................... 15
Using HDMI Cables........................................................................................................................ 16
Using DisplayPort Cables .............................................................................................................. 16
Using RS232 Cables...................................................................................................................... 17
Using Audio Cables........................................................................................................................ 17
2.2.2 Connecting a Video Device..................................................................................................... 18
Using Composite (CVBS) Cables .................................................................................................. 18
Using S-Video Cables .................................................................................................................... 19
Using HDMI Cables........................................................................................................................ 19
Using DisplayPort Cables .............................................................................................................. 20
Chapter 3: Using the LCD Display
3.1 Turning on the Power ......................................................................................................................... 21
3.2 Selecting the Input Source Signal ...................................................................................................... 21
3.3 Adjusting the Volume / Illuminator Function Hot Key.......................................................................... 22
3.3.1 Muting the Audio...................................................................................................................... 22
3.3.2 Illuminator Function Hot Key ................................................................................................... 22
3.4 Choosing Your Preferred Picture Settings.......................................................................................... 22
3.5 Using Picture-in-Picture (PIP) ............................................................................................................ 23
3.5.1 PIP/PBP Options ..................................................................................................................... 23
3.5.2 PIP/PBP Swap ........................................................................................................................ 24
3.6 Using FREEZE Function .................................................................................................................... 24
3.7 Using Auto Adjustment Function ........................................................................................................ 25

3
TABLE OF CONTENTS
3.8 Using ROTATE Function .................................................................................................................... 25
3.9 Locking the OSD Menu ...................................................................................................................... 26
Chapter 4: On Screen Display Menu
4.1 Using the OSD Menu ......................................................................................................................... 27
4.2 OSD Menu Tree ................................................................................................................................. 29
Chapter 5: Adjusting the LCD Display
5.1 Brightness .......................................................................................................................................... 32
5.2 Colour Temp. ...................................................................................................................................... 34
5.3 Image Setting ..................................................................................................................................... 35
5.4 Aspect Ratio ....................................................................................................................................... 38
5.5 PIP Setting ......................................................................................................................................... 39
5.6 Anti-Burn-in......................................................................................................................................... 41
5.7 OSD Setting ....................................................................................................................................... 42
5.8 Audio Setting ...................................................................................................................................... 43
5.9 System 1 ............................................................................................................................................ 44
5.10 System 2 .......................................................................................................................................... 46
5.11 EcoSmart Sensor ............................................................................................................................. 47
5.12 Input Select ...................................................................................................................................... 49
Chapter 6: Appendix
6.1 Warning Messages............................................................................................................................. 50
6.2 Supported Resolutions ....................................................................................................................... 51
6.3 Troubleshooting.................................................................................................................................. 52
6.4 Transporting the LCD Display ............................................................................................................ 54
Chapter 7: Specications
7.1 Display Specications ........................................................................................................................ 55
7.2 Display Dimensions............................................................................................................................ 56

TABLE OF CONTENTS
4
Safety Information
Federal Communications Commission (FCC) Notice (U.S. Only)
This equipment has been tested and found to comply with the limits for a Class B digital
device, pursuant to part 15 of the FCC Rules. These limits are designed to provide reasonable
protection against harmful interference in a residential installation. This equipment generates,
uses and can radiate radio frequency energy and, if not installed and used in accordance with
the instructions, may cause harmful interference to radio communications. However, there
is no guarantee that interference will not occur in a particular installation. If this equipment
does cause harmful interference to radio or television reception, which can be determined
by turning the equipment off and on, the user is encouraged to try to correct the interference by
one or more of the following measures:
• Reorient or relocate the receiving antenna.
• Increase the separation between the equipment and receiver.
• Connect the equipment into an outlet on a circuit different from that to which the receiver is
connected.
• Consult the dealer or an experienced radio/TV technician for help.
Changes or modications not expressly approved by the party responsible for compliance could
void the user’s authority to operate the equipment.
Use only an RF shielded cable that was supplied with the display when connecting this display to a computer
device.
To prevent damage which may result in re or shock hazard, do not expose this appliance to rain or excessive
moisture.
THIS CLASS B DIGITAL APPARATUS MEETS ALL REQUIREMENTS OF THE CANADIAN INTERFERENCE-
CAUSING EQUIPMENT REGULATIONS.
This device complies with Part 15 of the FCC Rules. Operation is subject to the following two
conditions: (1) this device may not cause harmful interference, and (2) this device must accept
any interference received, including interference that may cause undesired operation.

5
TABLE OF CONTENTS
WEEE
Disposal of Waste Equipment by Users in Private Household in the European Union.
This symbol on the product or on its packaging indicates that this product must not
be disposed of with your other household waste. Instead, it is your responsibility to
dispose of your waste equipment by handing it over to a designated collection point for
the recycling of waste electrical and electronic equipment. The separate collection and
recycling of your waste equipment at the time of disposal will help to conserve natural
resources and ensure that it is recycled in a manner that protects human health and the
environment. For more information about where you can drop off your waste equipment
for recycling, please contact your local city ofce, your household waste disposal service
or the shop where you purchased the product
For Private Households in the European Union.To help conserve natural resources
and ensure the product is recycled in a manner that protects human health and the
environment, we would like to bring your attention to the following:
• The crossed-out dustbin on the device or outer packaging indicates the product is
compliant with European WEEE (Waste Electrical and Electronic Equipment) Directive
• Always dispose of the old devices separately from household waste
• Batteries should be removed beforehand and disposed separately to the right
collection system
• You are responsible with regard to the deletion of personal data on old devices before
disposal
• Private households can hand in their old devices free of charge
• For more information about where you can drop off your waste equipment for recycling,
please contact your local city ofce, your household waste disposal service or the
shop where you purchased the product
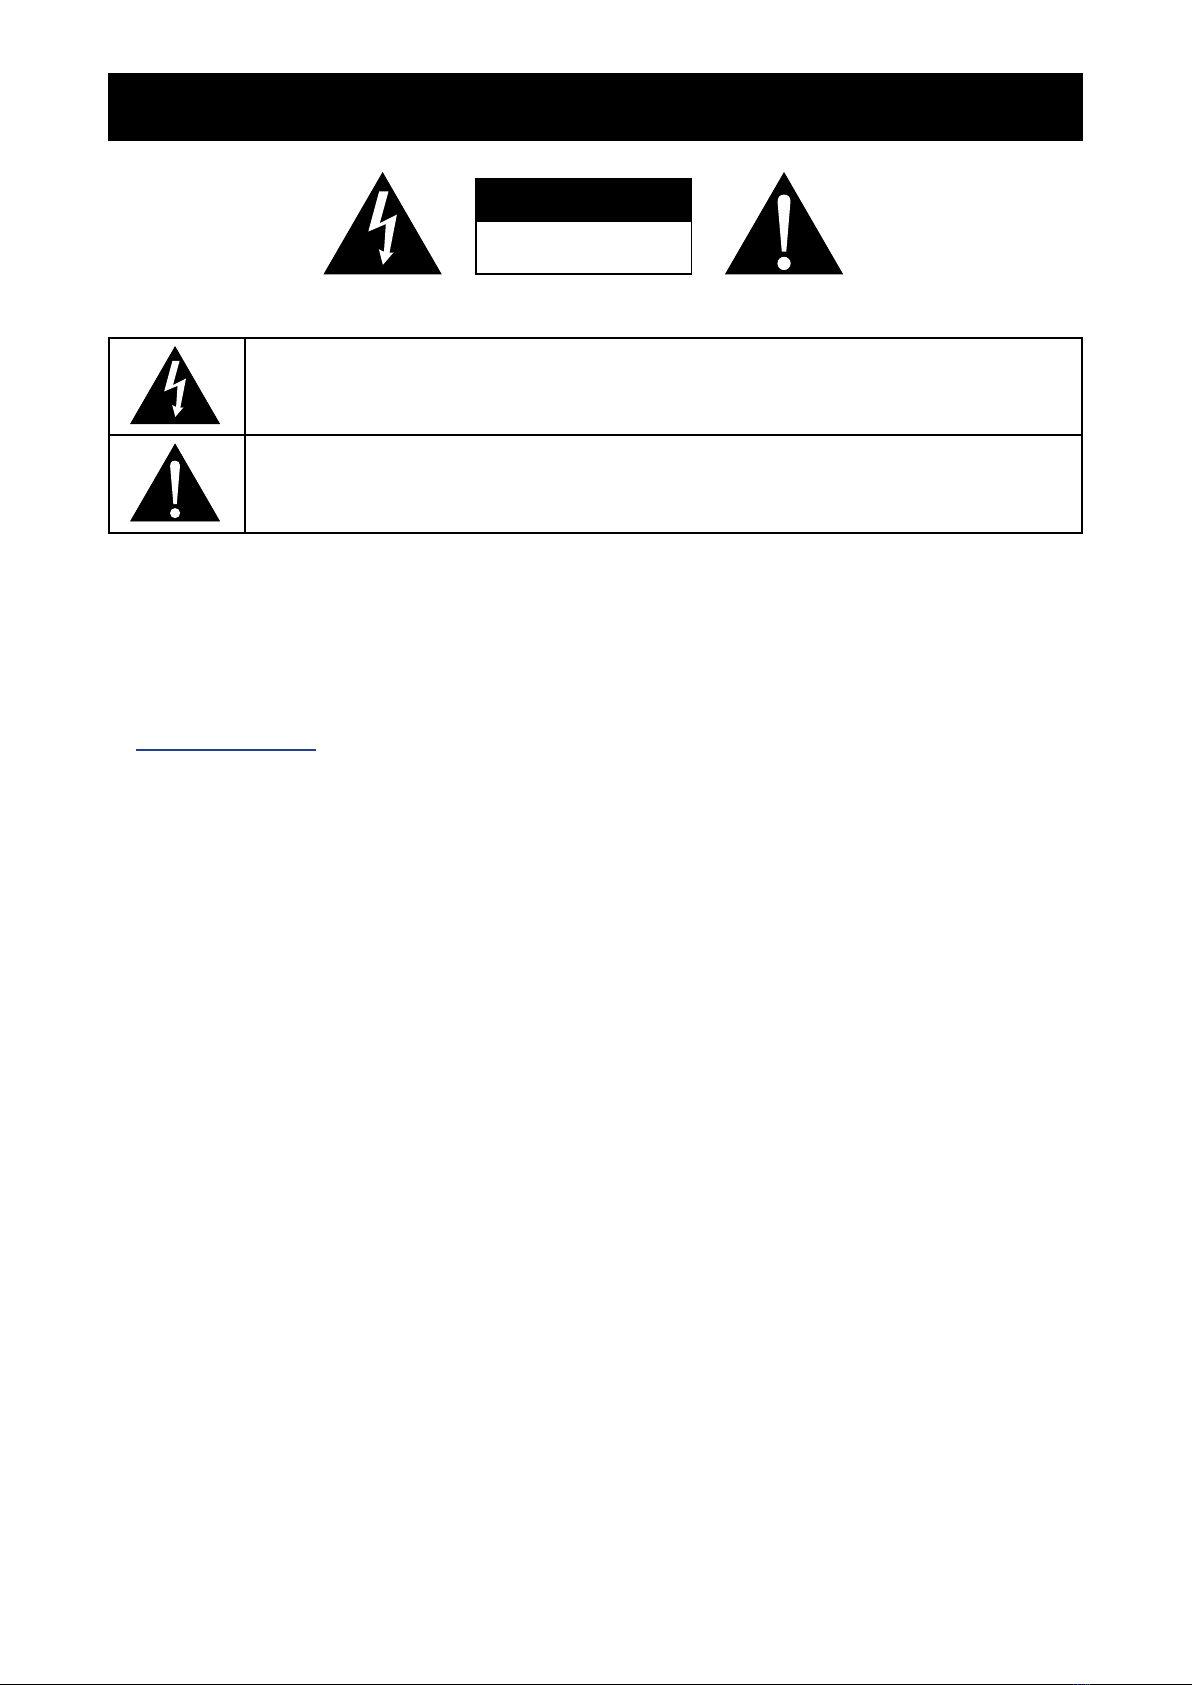
TABLE OF CONTENTS
6
CAUTION
RISK OF ELECTRIC SHOCK
DO NOT OPEN
Symbols used in this manual
This icon indicates the existence of a potential hazard that could result in personal injury or
damage to the product.
This icon indicates important operating and servicing information.
Notice
• Read this User Manual carefully before using the LCD monitor and keep it for future reference.
• The product specications and other information provided in this User Manual are for reference only. All
information is subject to change without notice. Updated content can be downloaded from our web site at
www.agneovo.com.
• To protect your rights as a consumer, do not remove any stickers from the LCD monitor. Doing so may
affect the determination of the warranty period.
Precautions
7
TABLE OF CONTENTS
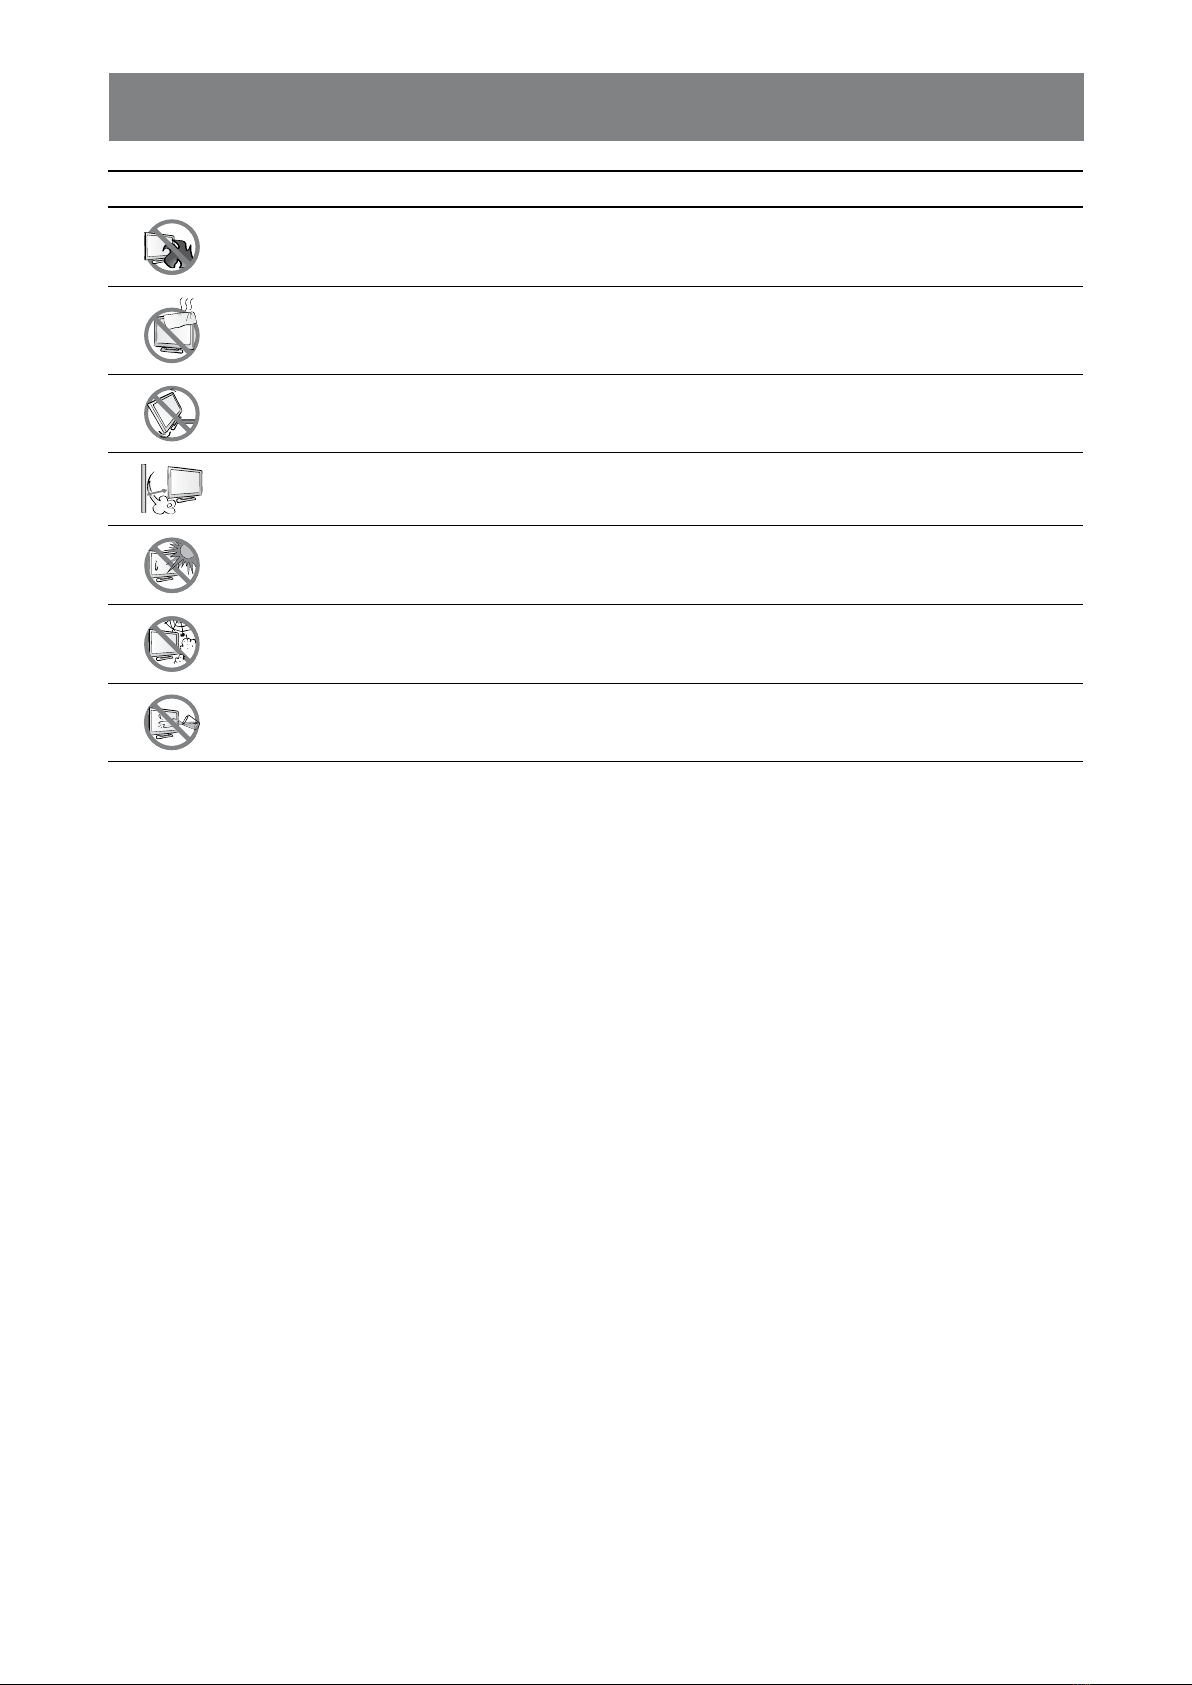
Cautions When Setting Up
Do not place the LCD monitor near heat sources, such as a heater, exhaust vent, or in direct
sunlight.
Do not cover or block the ventilation holes in the housing.
Place the LCD monitor on a stable area. Do not place the LCD monitor where it may subject
to vibration or shock.
Place the LCD monitor in a well-ventilated area.
Do not place the LCD monitor outdoors.
Do not place the LCD monitor in a dusty or humid environment.
Do not spill liquid or insert sharp objects into the LCD monitor through the ventilation holes.
Doing so may cause accidental re, electric shock or damage the LCD monitor.
8
TABLE OF CONTENTS
Cautions When Using
Use only the power cord supplied with the LCD
monitor.
The power outlet should be installed near the LCD
monitor and be easily accessible.
If an extension cord is used with the LCD monitor,
ensure that the total current consumption plugged
into the power outlet does not exceed the ampere
rating.
Do not allow anything to rest on the power cord. Do
not place the LCD monitor where the power cord
may be stepped on.
If the LCD monitor will not be used for an indenite
period of time, unplug the power cord from the
power outlet.
To disconnect the power cord, grasp and pull by the
plug head. Do not tug on the cord; doing so may
cause re or electric shock.
The mains plug or appliance coupler is used as
the disconnect device, the disconnect device
shall remain readily operable. Always completely
disconnect the power cord set from your product
whenever you are working or cleaning on it. Do not
make connections while the power is on, because
a sudden rush of power can damage sensitive
electronic components.
Do not unplug or touch the power cord with wet
hands.
Warning:
Unplug the power cord
from the power outlet and
refer to qualied service
personnel under the following
conditions:
♦When the power cord is
damaged.
♦If the LCD display has been
dropped or the housing has
been damaged.
♦If the LCD display emits smoke
or a distinct odor.
Warning:
Ceiling mount or mount
on any other horizontal
surface overhead are not
advisable.
Installation in contravention of
the instructions may result in
undesirable consequences,
particularly hurting people and
damaging property. Users who
have already mounted the
display on the ceiling or any
other horizontal surface overhead
are strongly advised to contact
AG Neovo for consultations and
solutions to help ensure a most
pleasurable and fullling display
experience.
Cleaning and Maintenance
Disconnect this equipment from any AC outlet before cleaning.
Do not use liquid or spray detergents for cleaning.
Use a damp cloth. Keeping to clean your monitor by monthly.
The LCD monitor comes with NeoVTM Optical Glass.
Use a soft cloth to clean the glass surface and the
housing. The monitor can be cleaned using a cloth
moistened with 95% ethyl alcohol.
Do not rub or tap the surface of the glass with sharp
or abrasive items such as a pen or screwdriver. This
may result in scratching the surface of the glass.
Do not attempt to service the LCD monitor yourself,
refer to qualied service personnel. Opening or
removing the covers may expose you to dangerous
voltage or other risks.

9
TABLE OF CONTENTS
Notice for the LCD Monitor
In order to maintain the stable luminous performance, it is recommended to use low brightness setting.
Due to the lifespan of the lamp, it is normal that the brightness quality of the LCD monitor may decrease
with time.
When static images are displayed for long periods of time, the image may cause an imprint on the LCD
monitor. This is called image retention or burn-in.
To prevent image retention, do any of the following:
• Set the LCD monitor to turn off after a few minutes of being idle.
• Use a screen saver that has moving graphics or a blank white image.
• Switch desktop backgrounds regularly.
• Adjust the LCD monitor to low brightness settings.
• Turn off the LCD monitor when the system is not in use.
Things to do when the LCD monitor shows image retention:
• Turn off the LCD monitor for extended periods of time. It can be several hours or several days.
• Use a screen saver and run it for extended periods of time.
• Use a black and white image and run it for extended periods of time.
When the LCD monitor is moved from one room to another or there is a sudden change from low to high
ambient temperature, dew condensation may form on or inside the glass surface. When this happens, do
not turn on the LCD monitor until the dew disappears.
Due to humid weather conditions, it is normal for mist to form inside the glass surface of the LCD monitor.
The mist will disappear after a few days or as soon as the weather stabilizes.
There are millions of micro transistors inside the LCD monitor. It is normal for a few transistors to be
damaged and to produce spots. This is acceptable and is not considered a failure.
TABLE OF CONTENTS
10
1.1 Package Contents
When unpacking, check if the following items are included in
the package. If any of them is missing or damaged, contact your
dealer.
Quick Start Guide
Power cord
Note:
♦The pictures are for reference
only. Actual items may vary
upon shipment.
VGA cable
Power adapter
DR-24G
www.agneovo.com
DR-24G_Quick Guide_V010
Quick Start Guide
DR-24G LCD Monitor
LCD Monitor
Audio cable
Note:
Must use only the supplied power
adapter:
♦ADAPTER TECH
Model no.: ATM065T-P240
Rating: 24V/2.71A
Chapter 1: Product Description
Warranty card
11
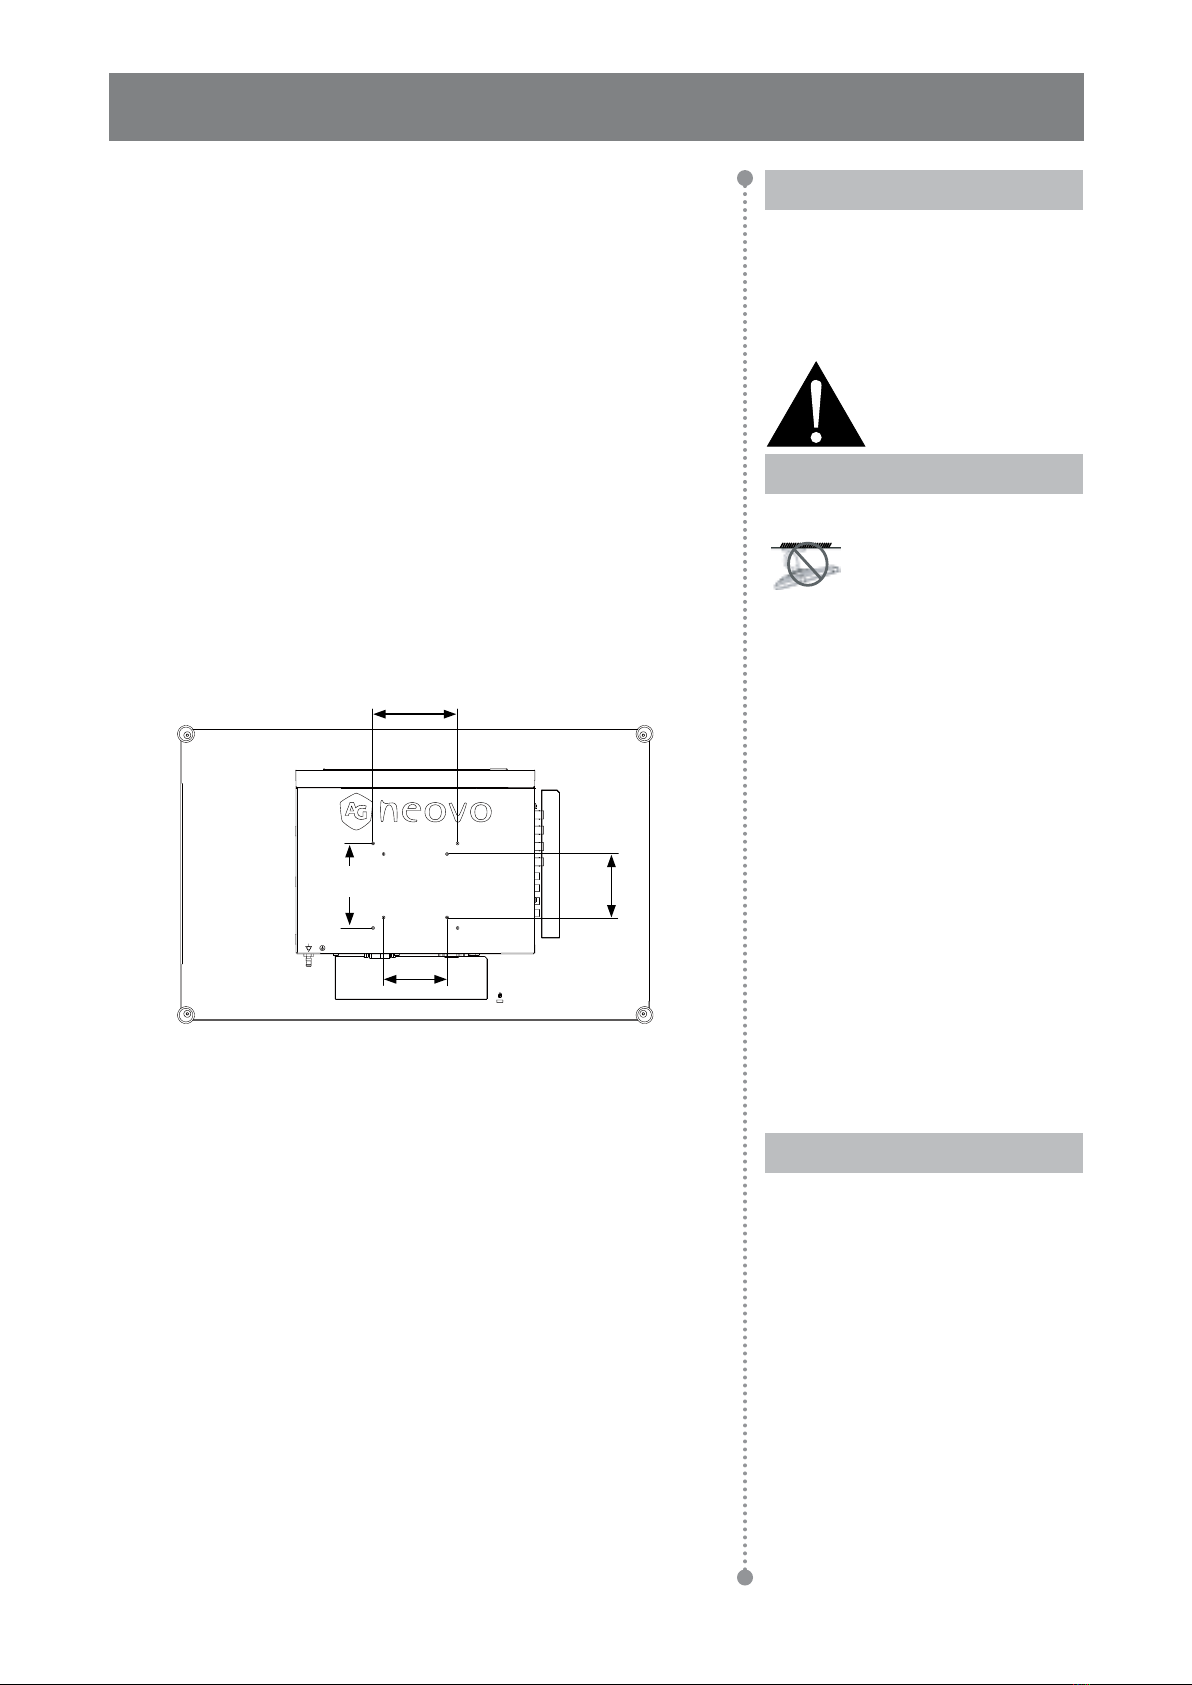
TABLE OF CONTENTS
1.2 Wall Mounting Installation Preparation
1.2.1 Wall Mounting
1Remove the base stand.
See procedures below.
2Wall mount the LCD display.
Screw the mounting bracket to the VESA holes at
the rear of the LCD display.
100
mm
75
mm
100
mm
75
mm
Note:
Take measures to prevent the
LCD display from falling down
and lessen possible injury and
damage to the display in case of
earthquakes or other disasters.
♦Use only the 75 x 75 mm and
100 x 100 mm wall mount kit
recommended by AG Neovo.
♦Secure the LCD display on a
solid wall strong enough to bear
its weight.
Note:
To protect the glass panel, place a
towel or soft cloth before laying the
LCD display down.
Warning:
Ceiling mount or mount
on any other horizontal
surface overhead are not
advisable.
Installation in contravention of
the instructions may result in
undesirable consequences,
particularly hurting people and
damaging property. Users who
have already mounted the
display on the ceiling or any
other horizontal surface overhead
are strongly advised to contact
AG Neovo for consultations and
solutions to help ensure a most
pleasurable and fullling display
experience.

12
TABLE OF CONTENTS
1.3 LCD Display Overview
1.3.1 Front View and Keypad Buttons
53 64 871 2
1AUTO
Hot Key: Auto Adjustment/Rotate
• For VGA input signal source, press to
perform auto adjustment.
• Press for 3 seconds to enable the Rotate
function.
• When OSD menu is ON, press to close the
OSD menu or exit a submenu.
2LEFT
Hot Key: Audio Volume Adjustment
• Press to display the volume bar. Then press
the LEFT key to decrease the volume.
• When OSD menu is ON, press to select an
option or adjust the settings.
3RIGHT
Hot Key: Screen Freeze
• Press to activate the screen freeze function.
To deactivate, press any key except for the
Power key.
• When the volume bar appears, press to
increase the volume.
• When OSD menu is ON, press to select
and option, adjust the settings, or enter the
submenu.
4UP
Hot Key: PIP/PBP Select
• Press repeatedly to select PIP/PBP option
(PIP → PBP → OFF).
• When OSD menu is ON, press to select an
option or adjust the settings.
5DOWN
Hot Key: PICTURE MODE Select
• Press repeatedly to select PICTURE MODE
option (STANDARD → VIDEO→ sRGB).
• When OSD menu is ON, press to select an
option or adjust the settings.
• When PIP is ON, press to swap the PIP
main and sub picture.
6MENU
Press to display/hide the OSD menu.
7SOURCE
Press to select the input signal source.
8POWER and LED Indicator
• Press to turn the power on or off.
• Indicate the operating status of the LCD
display:
- Lights Green when the LCD display is
turned on.
- Lights Amber when the LCD display is in
standby mode.
- Lights Off when the LCD display is turned
off.
13
TABLE OF CONTENTS
1.3.2 Rear View
AUDIO INDVIDC IN HDMI DisplayPort VGA
S-VIDEO
COMPOSITE-1
AUDIO
IN
L
R
IN
OUT
COMPOSITE-2
IN
OUT
AUDIO
OUT
USB (SERVICE)
RS232
L
R
1DC IN
Connect with the supplied power adaptor.
2DVI
Connect DVI signals input.
3HDMI
Connect HDMI signals input.
4DisplayPort
Connect DisplayPort signals input.
5VGA
Connect VGA signals input.
6AUDIO IN
Connect audio signals input (3.5 mm Stereo
Audio Jack).
7S-VIDEO
Connect S-Video signals input.
8COMPOSITE-1/COMPOSITE-2 IN
Connect Composite (CVBS) signals input.
9COMPOSITE-1/COMPOSITE-2 OUT
Connect Composite (CVBS) signals output.
10 AUDIO IN
Connect audio signals input (RCA Stereo
Audio Jack).
11 AUDIO OUT
Connect audio signals output (RCA Stereo
Audio Jack).
12 USB (SERVICE)
Connect USB 2.0 for service.
13 RS232
Connect RS232 input from external
equipment.
14 GROUNDING STUD
Connect to a proper earth ground.
1 2 3 4 5 6
7
8
9
8
9
12
13
10
14
11
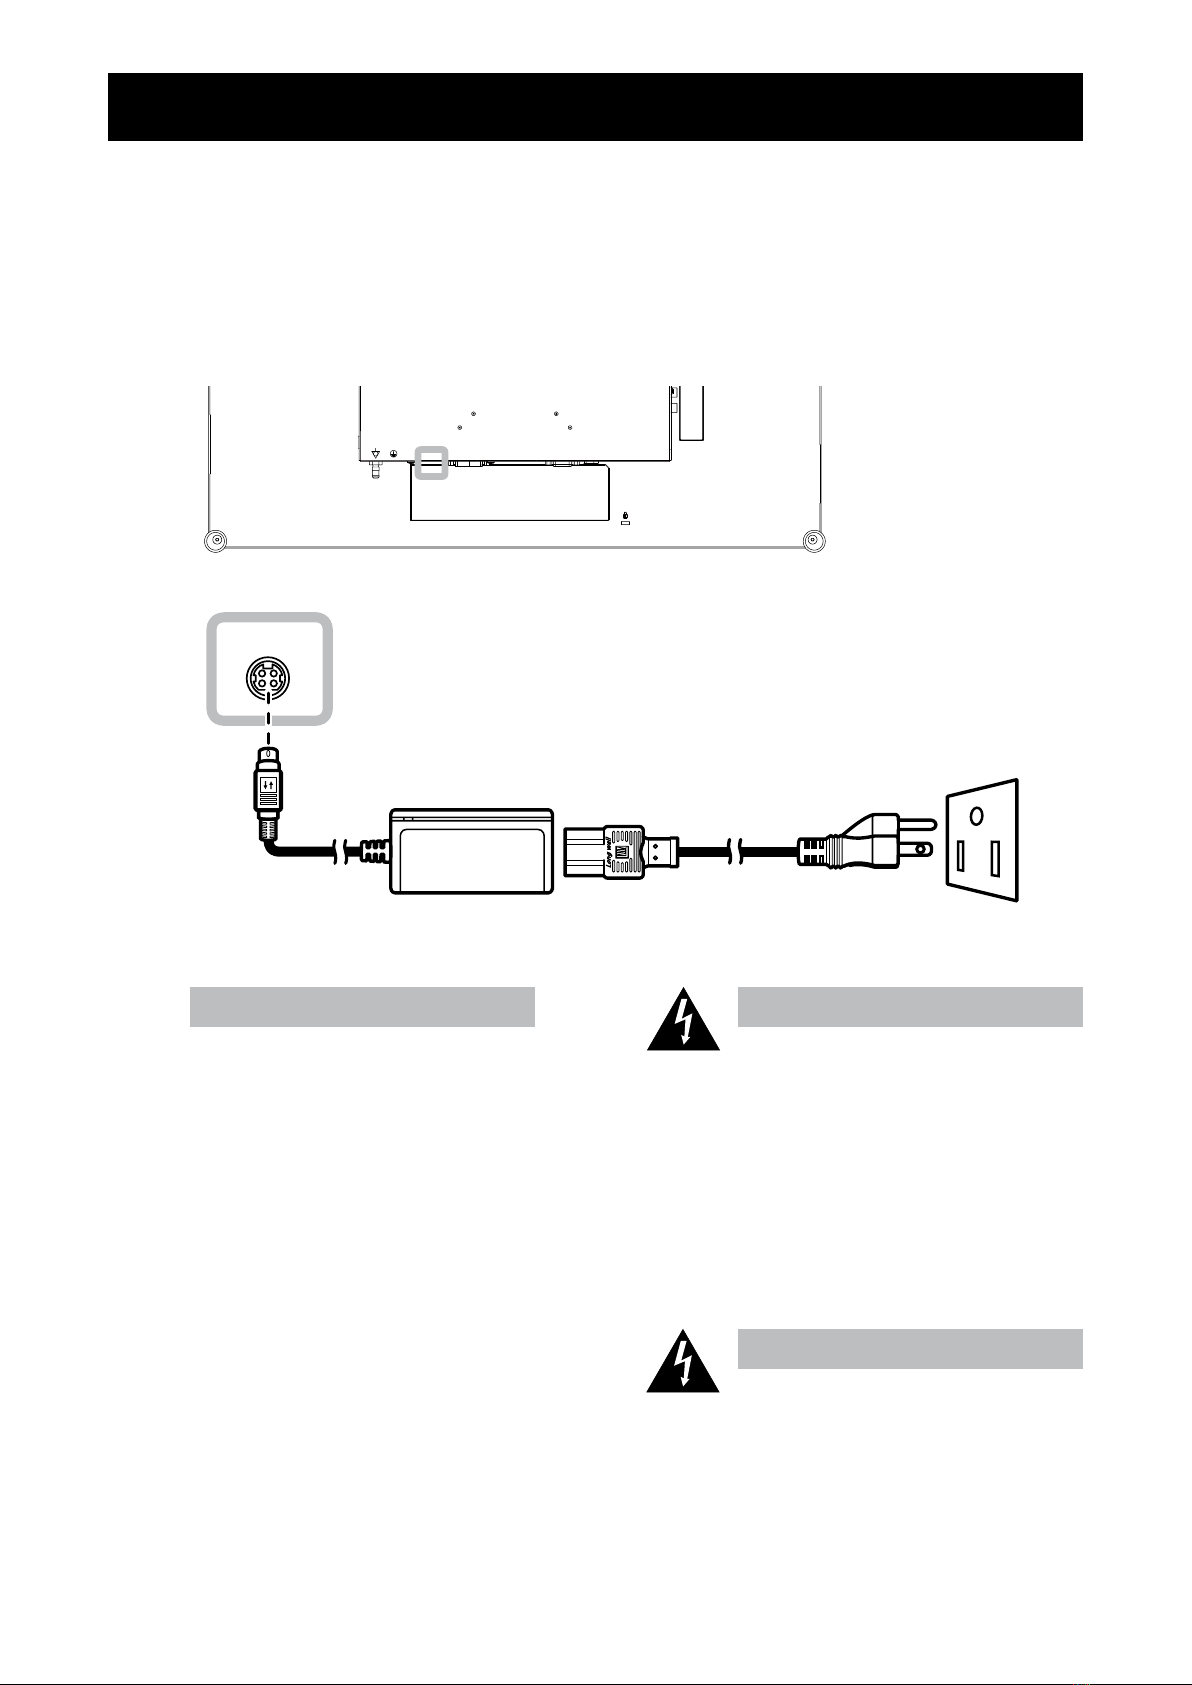
TABLE OF CONTENTS
14
2.1 Connecting the Power
1Connect the power cord to the power adapter.
2Connect the power adapter to the DC power input at the rear of the LCD monitor.
3Connect the power cord plug to a power outlet or a power supply.
DC IN
Caution:
♦Make sure that the LCD display is
not connected to the power outlet
before making any connections.
Connecting cables while the power
is ON may cause electric shock or
personal injury.
Caution:
♦When unplugging the power cord,
hold the power cord by the plug
head. Never pull by the cord.
Chapter 2: Making Connections
Note:
♦When removing the power supply,
please make sure the plug is
unlocked.

15
TABLE OF CONTENTS
2.2 Connecting Input Source Signals
2.2.1 Connecting a Computer
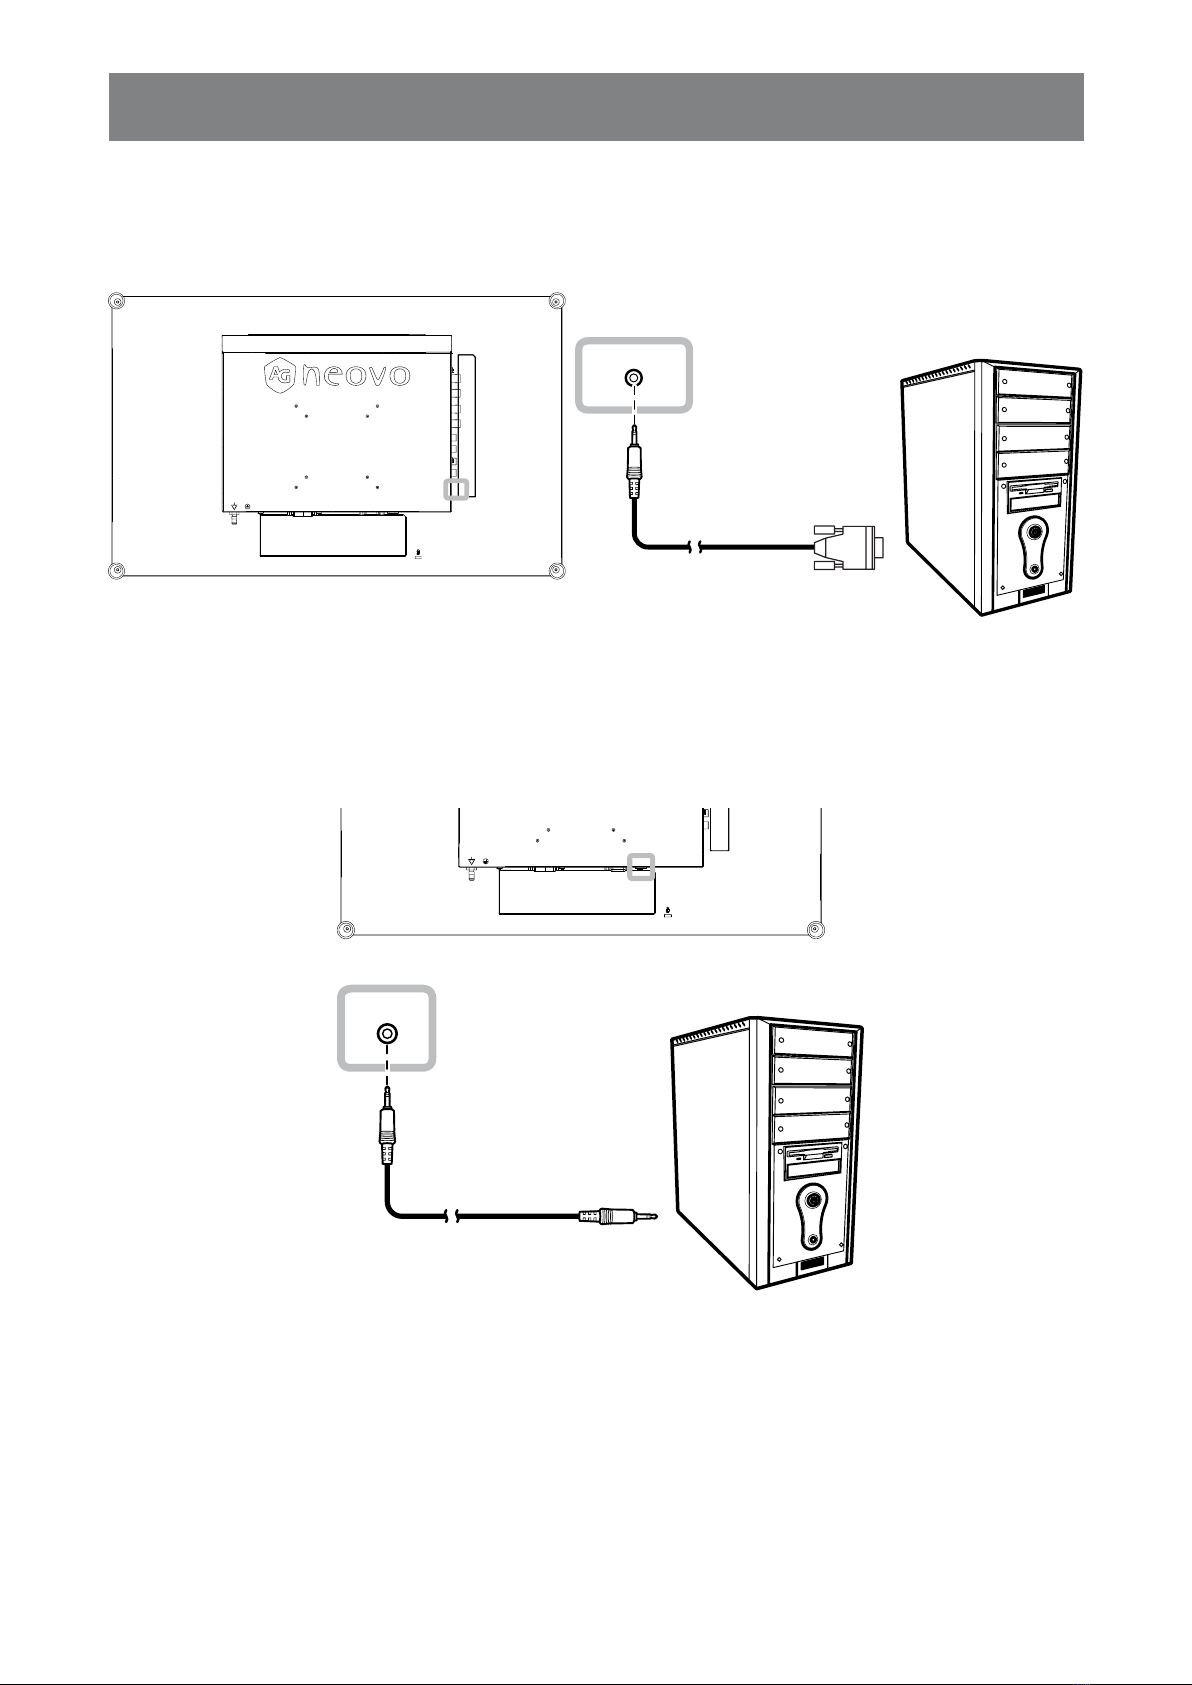
Using VGA Cables
Connect one end of a VGA cable to the VGA connector of the LCD display and the other end to the VGA
connector of the computer.
VGA
Using DVI Cables
Connect one end of a DVI (DVI-D) cable to the DVI connector of the LCD display and the other end to the DVI
connector of the computer.
DVI
16
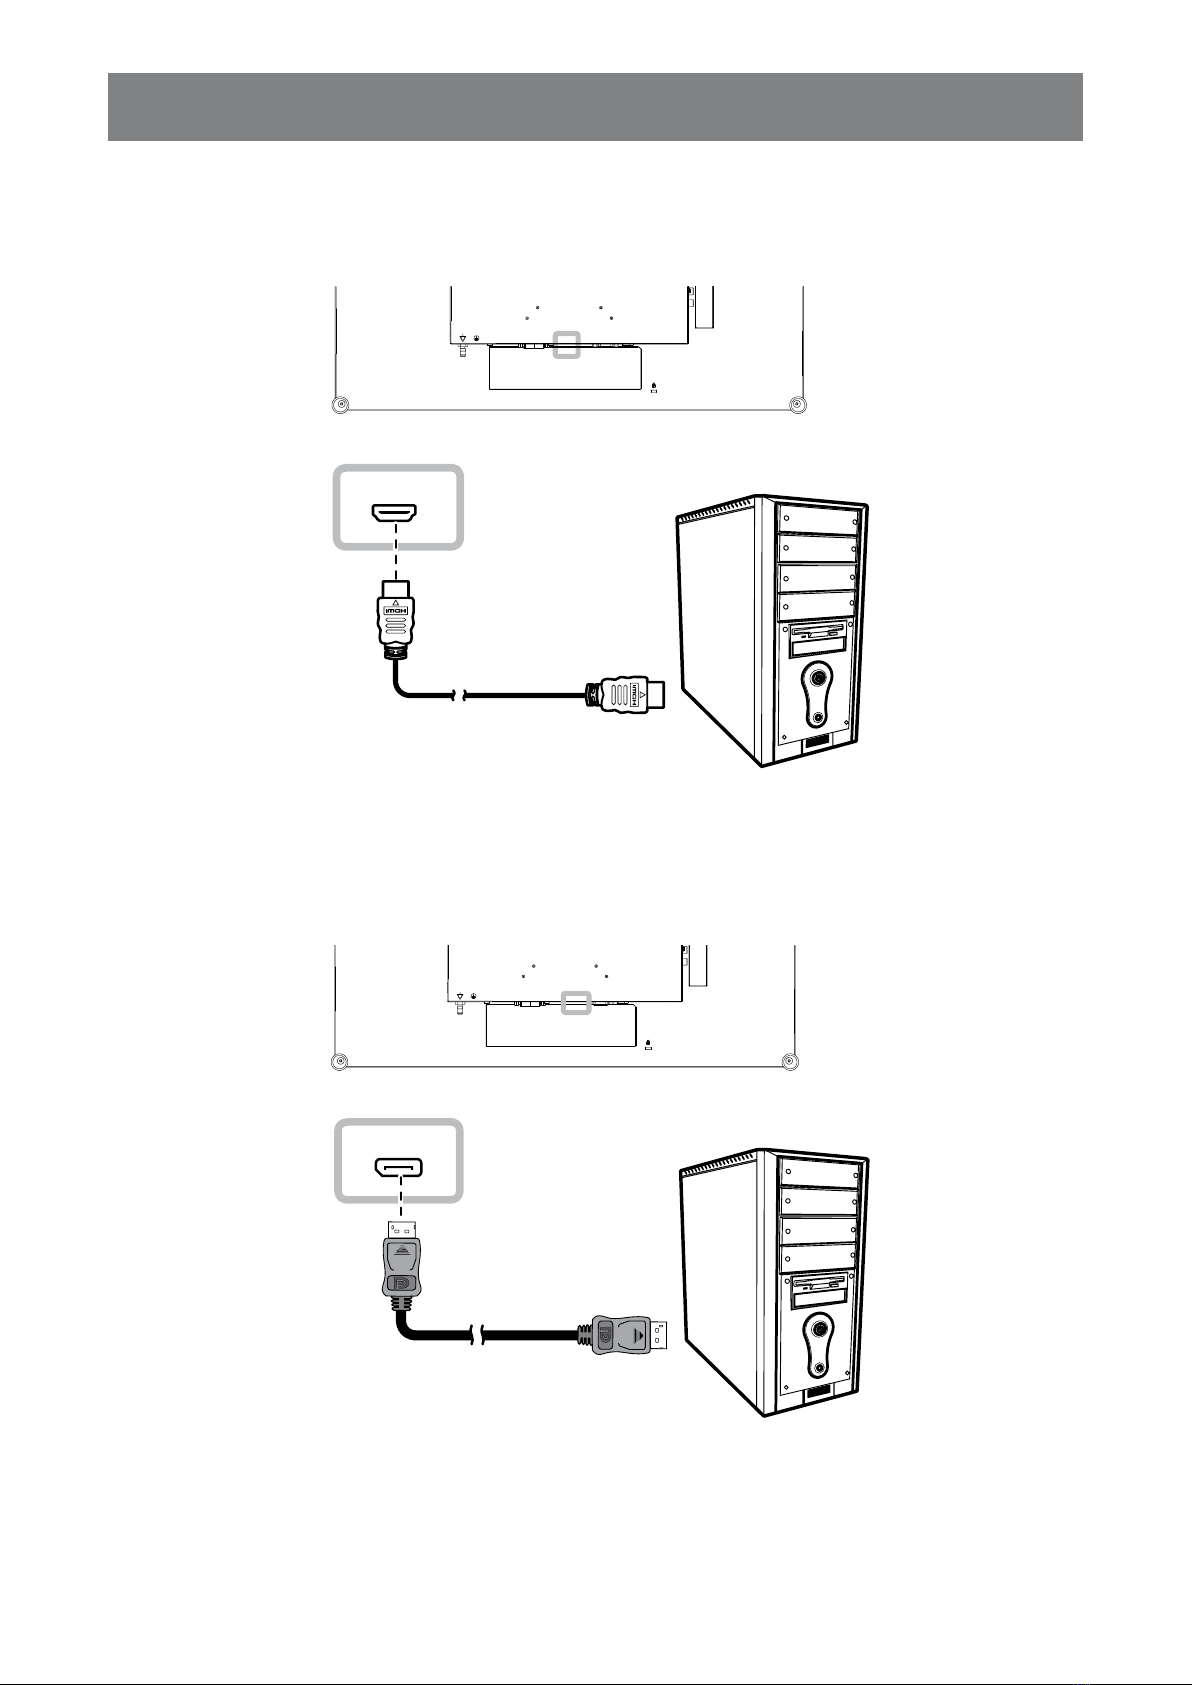
TABLE OF CONTENTS
Using HDMI Cables
Connect one end of an HDMI cable to the HDMI connector of the LCD display and the other end to the HDMI
connector of the computer.
HDMI
Using DisplayPort Cables
Connect one end of a DisplayPort cable to the DisplayPort connector of the LCD display and the other end to
the DisplayPort connector of the computer.
DisplayPort
17
TABLE OF CONTENTS
Using RS232 Cables
Connect one end of an RS232 cable to the RS232 connector of the LCD display and the other end to the
RS232 connector of the computer.
RS232
Using Audio Cables
Connect one end of an audio cable to the AUDIO IN connector at the rear of the LCD display and the other
end to the audio out connector of the computer.
AUDIO IN

18
TABLE OF CONTENTS
2.2.2 Connecting a Video Device
Using Composite (CVBS) Cables
Connect one end of a Composite (CVBS) cable to the COMPOSITE 1 / COMPOSITE 2 IN connector of the
LCD display and the other end to the Composite (CVBS) connectors of your device.
For audio input, connect an RCA cable to the AUDIO IN connectors of the LCD display and the audio out
connector of your device.
For video looping, connect one end of a Composite (CVBS) cable to the COMPOSITE 1 / COMPOSITE 2
OUT connector of the LCD display and the other end to the COMPOSITE 1 / COMPOSITE 2 IN connector of
the additional display.
COMPOSITE-1
AUDIO
IN
L
R
IN
COMPOSITE-2
IN
COMPOSITE-1
AUDIO
IN
L
R
IN
OUT
COMPOSITE-2
IN
OUT
AUDIO
OUT
L
R
or

19
TABLE OF CONTENTS
Using S-Video Cables
Connect one end of an S-Video cable to the S-VIDEO connector of the LCD display and the other end to the
S-VIDEO connector of your device.
For audio input, connect an RCA cable to the AUDIO IN connectors of the LCD display and the audio out
connector of your device.
AUDIO
IN
L
R
S-VIDEO
Using HDMI Cables
Connect one end of an HDMI cable to the HDMI connector of the LCD display and the other end to the HDMI
connector of your device.
HDMI
20
TABLE OF CONTENTS
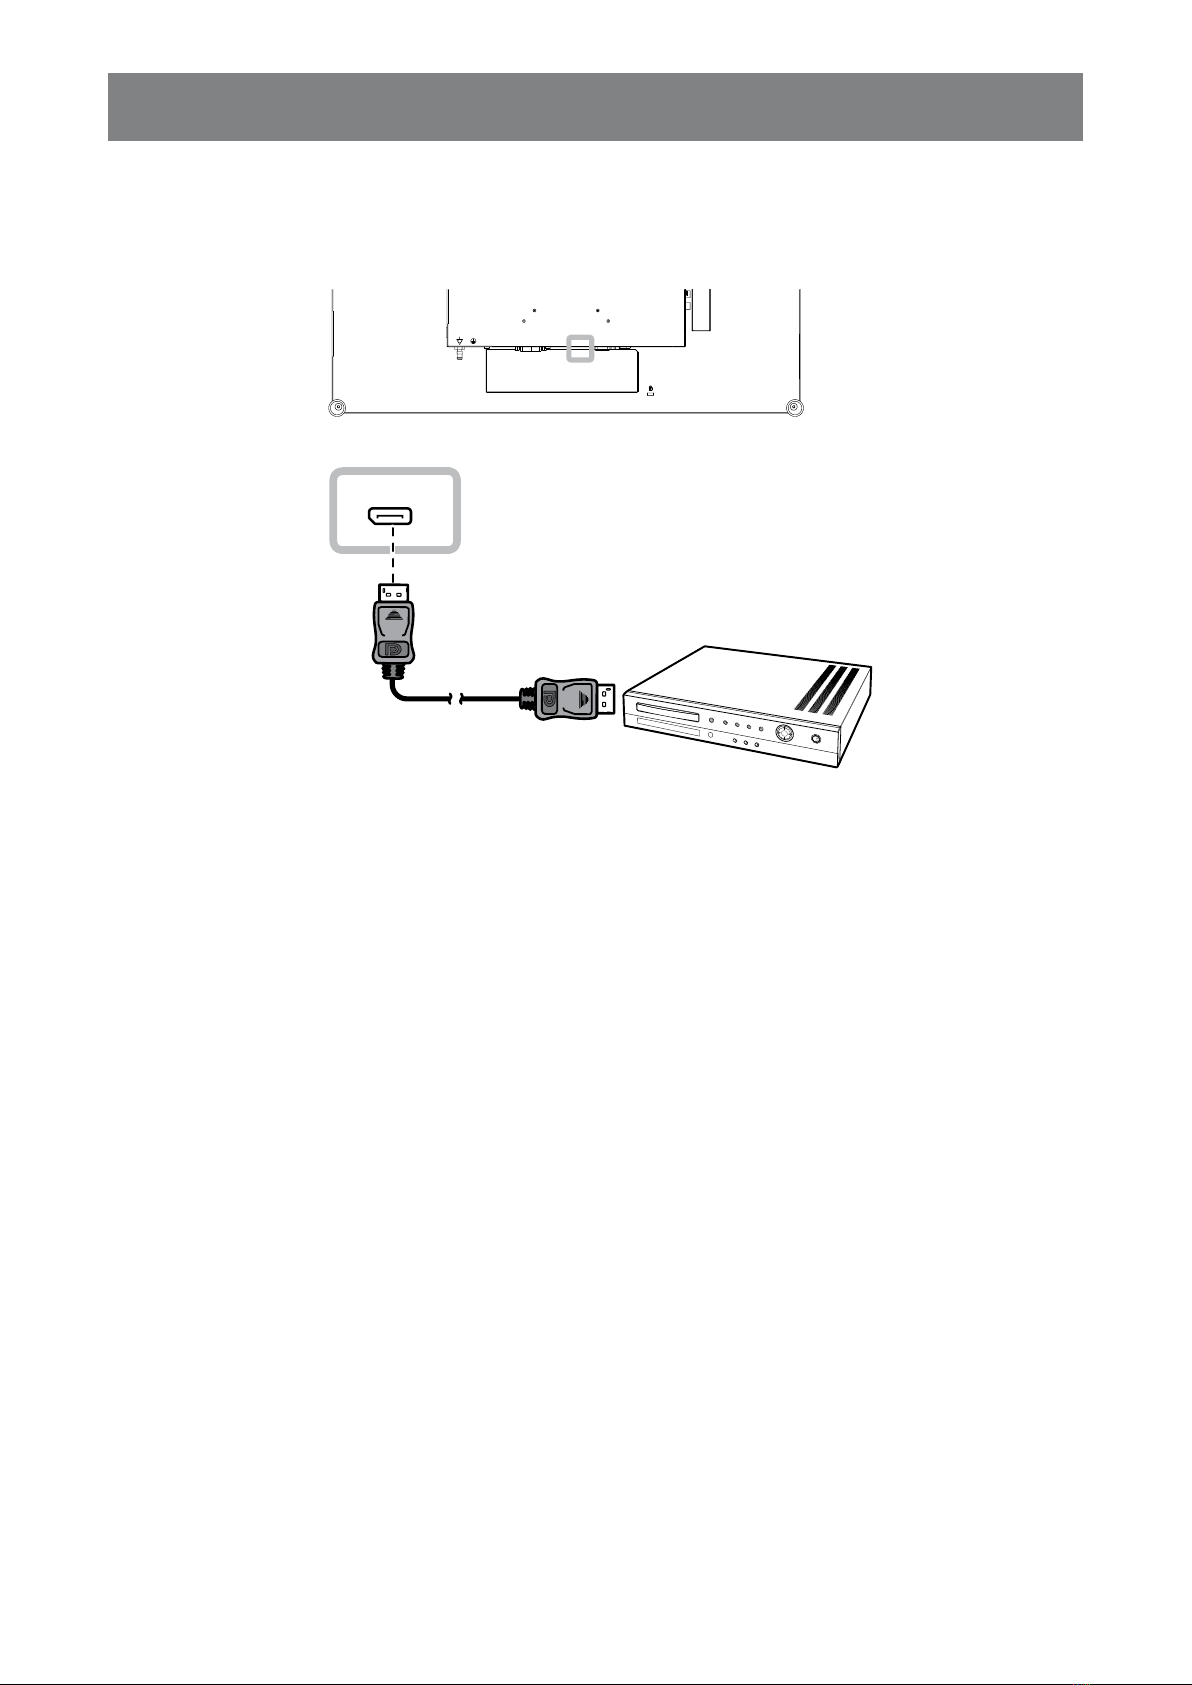
Using DisplayPort Cables
Connect one end of a DisplayPort cable to the DisplayPort connector of the LCD display and the other end to
the DisplayPort connector of your device.
DisplayPort
Other AG Neovo Monitor manuals

AG Neovo
AG Neovo TX-32 User manual

AG Neovo
AG Neovo TX-15 User manual

AG Neovo
AG Neovo RX-Series User manual

AG Neovo
AG Neovo E-W22 User manual

AG Neovo
AG Neovo QD-75 User manual

AG Neovo
AG Neovo SX-15 User manual

AG Neovo
AG Neovo X-22E User manual

AG Neovo
AG Neovo TM-22 User manual

AG Neovo
AG Neovo SX-19 User manual

AG Neovo
AG Neovo H-W22 User manual

AG Neovo
AG Neovo TS-15C User manual

AG Neovo
AG Neovo FM-27 User manual

AG Neovo
AG Neovo PS-55 Owner's manual

AG Neovo
AG Neovo X-W19 User manual

AG Neovo
AG Neovo K-19 User manual

AG Neovo
AG Neovo SC-17 User manual

AG Neovo
AG Neovo L-W27 User manual

AG Neovo
AG Neovo S-18 User manual

AG Neovo
AG Neovo E-17 User manual

AG Neovo
AG Neovo F-15 User manual


