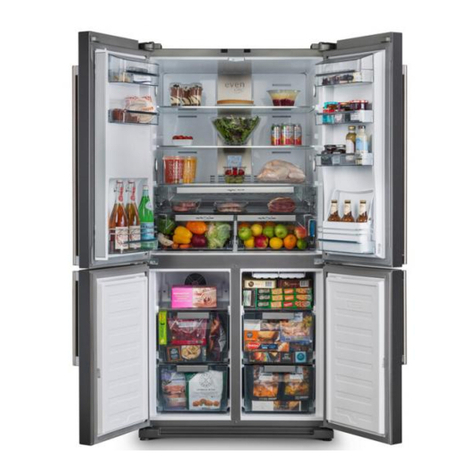
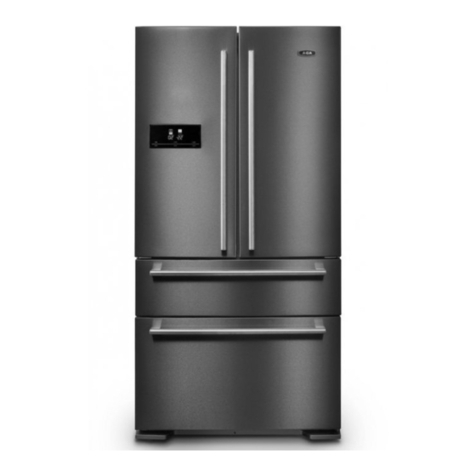
AGA ASXS21 Manual

Fridge/Freezer
ASXS21
User Guide
&
Installation & Service Instructions
Due to our policy of continual improvement, we reserve the right to change specications without prior notice.
U111352-03

1. Before You Start 1
Safety 1
Electrical Safety 3
UKCA / CE Declaration of conformity 4
Disposal of your old appliance 4
Packaging and the Environment 4
2. About Your Refrigerator 6
About the Fresh Food Compartment 7
General Features of Your Appliance 7
General notes: 8
Even-circ 8
Using the appliance 8
Shelves 8
Accessories 9
Ionizer / Range Fresh 9
About the Freezer Compartment 9
3. Using the Control Panel 11
Touch Display Prevention (Safe Mode) 12
Operating Your Fridge Freezer 12
4. Food Storage Tips 19
Food storage 19
Tips on Storing Fresh Food 20
Tips on Freezing Food 21
5. Food Storage Table 22
6. Cleaning and Maintenance 24
Defrosting 24
Cleaning 24
When not in use 24
7. Troubleshooting 25
Tips for saving energy 26
8. Installation 27
Installation warnings 27
Door removal and access 28
Positioning Your Appliance 34
Electrical Supply Connection 35
9. Kick plate 36
Removing the kick plate 36
Assembly of the kick plate 37
10. Circuit Diagram 38
11. Technical Data 39
12. Warranty/After Sales Service 45
Contents

1
• Before you plug the appliance into the
mains, clean the inside of the appliance
using warm water and bicarbonate of soda,
then dry thoroughly.
• Check that no parts of the appliance are
damaged, especially parts of the cooling
system, pipes or leads. If damage has
occurred, DO NOT install the appliance;
you should contact a qualified service
engineer or return the appliance to its
place of purchase.
• If the accessories inside the appliance have
been disturbed during transit, reposition
them in accordance with the instructions.
• Make sure that the electrical supply to your
plug socket is correct for this appliance
– the required information is on the data
badge of the appliance.
• Once the appliance is installed, cleaned
and dry, it is ready to be plugged in and
switched on.
Safety
n The data badge is located inside the
appliance (refrigeration compartment).
n WARNING: Use potable (drinking) water
with this appliance.
n WARNING: Keep this appliance clear of
any obstruction.
n DO NOT damage the refrigerant circuit.
If it does become damaged, DO NOT use
the appliance.
n WARNING: DO NOT use mechanical
devices (such as hairdryers) to defrost
this appliance.
n If your appliance uses R600a as a
refrigerant (this information will be
provided on the label of the cooler) you
should take care during transportation
and installation to prevent the cooler
elements from being damaged. R600a is
an environmentally friendly and natural
Icon Type Meaning
WARNING Serious injury or death risk
Dangerous voltage risk
FIRE Fire risk
CAUTION Injury or property damage risk
IMPORTANT Operating the system correctly
RISK OF ELECTRIC
SHOCK
1. Before You Start
Thank you for buying this appliance. We hope
that it provides a stylish yet practical solution
to your cooling needs. We hope that this
handbook supplies you with all the information
you require. If there is anything you are unsure
of please contact us (see ‘Warranty’ section for
Customer Care’s details).
n WARNING: This appliance must be
earthed.
n Please leave the appliance to stand
for at least six hours. This will allow
the cooling system to settle following
transportation.
n Always make sure a qualied person
installs this appliance.
n This appliance is designed for domestic
use only. Using it for any other purpose
could invalidate any warranty or liability
claim.
n Children aged from 3 to 8 years are
allowed to load and unload refrigerating
appliances. Children are not expected to
perform cleaning or user maintenance
of the appliance, very young children
(0-3 years old) are not expected to
use appliances, young children (3-8
years old) are not expected to use
appliances safely unless continuous
supervision is given, older children (8-
14 years old) and vulnerable people can
use appliances safely after they have
been given appropriate supervision
or instruction concerning use of the
appliance. Very vulnerable people are
not expected to use appliances safely
unless continuous supervision is given.

2
gas, but it is explosive. In the event
of a leak due to damage of the cooler
elements, move your appliance away
from open ames or heat sources and
ventilate the room where the appliance
is located for a few minutes.
• When replacing old appliances, make
sure that you have disabled any locking
mechanisms before disposal – it may
even be best to remove the appliance
door completely to prevent children from
becoming trapped inside the appliance.
• The appliance must be connected to the
power supply safely. Loose connections,
broken plugs and bare wires are a safety
hazard. Make sure that all connections are
sound.
• Before undertaking any routine
maintenance or minor repairs, disconnect
the appliance from the electrical supply.
• DO NOT touch cold surfaces of the
appliance while it is in use as this will cause
hands to stick to them leading to freezer
burns.
• When moving the appliance take care not
to damage the leads, pipes or condenser
unit. Should these parts become damaged,
contact a qualified service engineer.
• Effervescent liquids (fizzy drinks) should
never be frozen. These liquids expand
during freezing and this may lead to
the bottles/containers shattering or
exploding.
• Foods that are intended to be defrosted or
cooked first, such as breads or meats, must
not be eaten in their frozen state.
• If food looks or smells strange, DO NOT
attempt to eat it. If in doubt throw it
away. Spoiled food can be harmful to your
health.
• Never use sharp, metal implements to
scrape ice off the surface of this appliance.
Only use implements, which are fit for this
purpose (such as plastic scrapers) and use
carefully to avoid damaging the lining of
the appliance.
• The cooling system contains refrigerant
and oils, all of which are harmful to health
if leaked. Should leakage occur, disconnect
the appliance and ventilate the room it is
installed in. Take care to ensure that you
DO NOT get any coolant near to, or in,
your eyes. Contact a service engineer or
arrange to have the appliance removed.
DO NOT use the appliance under any
circumstances.
n WARNING: Keep ventilation openings, in
the appliance enclosure or in the built-in
structure, clear of obstruction.
n WARNING: DO NOT use mechanical
devices or other means to accelerate
the defrosting process, other than those
recommended by the manufacturer.
n WARNING: DO NOT use electrical
appliances inside the food storage
compartments of the appliance, unless
they are of the type recommended by
the manufacturer.
n WARNING: DO NOT damage the
refrigerant circuit.
n WARNING: In order to avoid any hazards
resulting from the instability of the
appliance, it must be xed in accordance
with the following instructions: If your
appliance uses R600a as a refrigerant
(this information will be provided on
the label of the cooler) you should
take care during transportation and
installation to prevent the cooler
elements from being damaged. R600a is
an environmentally friendly and natural
gas, but it is explosive. In the event
of a leak due to damage of the cooler
elements, move your appliance away
from open ames or heat sources and
ventilate the room where the appliance
is located for a few minutes.

3
While carrying and positioning the appliance,
DO NOT damage the cooler gas circuit.
DO NOT store explosive substances such as
aerosol cans with a ammable propellant in
this appliance.
This appliance is intended to be used in
household and domestic applications only.
If the socket does not match the appliance
plug, it must be replaced by the manufacturer,
a service agent or similarly qualied persons in
order to avoid a hazard.
A specially grounded plug has been connected
to the power cable of your appliance. This
plug should be used with a specially grounded
socket of 13 amperes. If there is no such socket
in your house, please have one installed by an
authorised electrician.
This appliance can be used by children
aged from 8 years and above and persons
with reduced physical, sensory or mental
capabilities or lack of experience and
knowledge if they have been given supervision
or instruction concerning use of the appliance
in a safe way and understand the hazards
involved.
Children shall not play with the appliance.
Cleaning and user maintenance shall not be
made by children without supervision.
If the supply cord is damaged, it must be
replaced by the manufacturer, an authorised
service agent or similar qualied persons, in
order to avoid a hazard.
This appliance is not intended for use at
altitudes exceeding 2000 m.
Electrical Safety
n WARNING: When positioning the
appliance, ensure the supply cord is not
trapped or damaged.
n WARNING: DO NOT locate multiple
portable socket-outlets or portable
power supplies at the rear of the
appliance.
n DO NOT use plug adapter.
ArtNo.000-0001
Warning triangle WARNING; RISK OF FIRE / FLAMMABLE MATERIALS
• The plug must be accessible after
installation.
• The operating voltage for your appliance is
220-240 V at 50Hz.
• Connections to the mains supply should be
in accordance with local regulations.
• Insert the plug into a socket with an
efficient ground connection. If the socket
has no ground contact or the plug does
not match, we recommend you consult a
qualified electrician for assistance.
• The appliance MUST be connected with a
properly installed fused socket. The power
supply (AC) and voltage at the operating
point must match with the details on the
name plate of the appliance (the name
plate is located on the inside left of the
appliance).
• The appliance must be plugged into an
earthed socket.
• The plug MUST be accessible after the
appliance has been positioned.
• The appliance is supplied with a standard
three-pin plug, of which the one for
grounding should never be removed.
• Hold the plug, not the electrical cable,
when unplugging the appliance.
• Make sure that the appliance does not trap
the electric cable.
• DO NOT step on the cable.

4
• Avoid damage to the electric cable when
moving the appliance.
UKCA / CE Declaration of conformity
• We declare that our products meet the
applicable European Directives and UK
Directives, Decisions and Regulations and
the requirements listed in the standards
referenced.
Disposal of your old appliance
ArtNo.000-0019
Do not bin logo
The symbol on the product or on its
packaging indicates that this product
may not be treated as household
waste. Instead it shall be handed over
to the applicable collection point for
the recycling of electrical and electronic
equipment. By ensuring this product is
disposed of correctly, you will help prevent
potential negative consequences for the
environment and human health, which could
otherwise be caused by inappropriate waste
handling of this product. For more detailed
information about recycling of this product,
please contact your local city oce, your
household waste disposal service or the shop
where you purchased the product.
Packaging and the Environment
ArtNo.000-0019
Do not bin logo
Packaging materials protect your
machine from damage that may occur
during transportation. The packaging
materials are environmentally friendly
as they are recyclable. The use of recycled
material reduces raw material consumption
and therefore decreases waste production.
Notes:
• Please read the instruction manual
carefully before installing and using your
appliance. We are not responsible for the
damage occurred due to misuse.
• Follow all instructions on your appliance
and instruction manual, and keep this
manual in a safe place to resolve the
problems that may occur in the future.
• This appliance is produced to be used in
homes and it can only be used in domestic
environments and for the specified
purposes. It is not suitable for commercial
or common use. Such use will cause the
guarantee of the appliance to be cancelled
and our company will not be responsible
for the losses to be occurred.
• This appliance is produced to be used in
houses and it is only suitable for cooling
/ storing foods. It is not suitable for
commercial or common use and/or for
storing substances except for food. Our
company is not responsible for the losses
to be occurred in the contrary case.

5
To avoid contamination of food, please
respect the following instructions:
• Opening the door for long periods
can cause a significant increase of the
temperature in the compartments of the
appliance.
• Clean regularly surfaces that can come in
contact with food and accessible drainage
systems
• Store raw meat and fish in suitable
containers in the refrigerator, so that it is
not in contact with or drip onto other food.
• Two-star frozen-food compartments are
suitable for storing pre-frozen food, storing
or making ice cream and making ice cubes.
• One-, two- and three-star compartments
are not suitable for the freezing of fresh
food.
• If the refrigerating appliance is left empty
for long periods, switch off, defrost, clean,
dry, and leave the door open to prevent
mould developing within the appliance.
During Usage
• Do not connect your fridge freezer to the
mains electricity supply using an extension
lead.
• Do not use damaged, torn or old plugs.
• Do not pull, bend or damage the cord.
• Do not use plug adapter.
• This appliance is designed for use by
adults. Do not allow children to play with
the appliance or hang off the door.
• Never touch the power cord/plug with wet
hands. This may cause a short circuit or
electric shock.
• Do not place glass bottles or cans in the
ice-making compartment as they will burst
when the contents freeze.
• Do not place explosive or flammable
material in your fridge. Place drinks with
high alcohol content vertically in the fridge
compartment and make sure their tops are
tightly closed.
• When removing ice from the ice-making
compartment, do not touch it. Ice may
cause frost burns and/or cuts.
• Do not touch frozen goods with wet
hands. Do not eat ice-cream or ice cubes
immediately after they are removed from
the ice-making compartment.
• Do not re-freeze thawed frozen food.
This may cause health issues such as food
poisoning.

6
A. Fridge compartment
B. Freezer compartment
Zone-1 / Zone-2
1. Egg holder
2. Fridge compartment
shelves
3. Door top shelf covers
4. Door shelves
5. Door bottle shelves
6. Chiller (breakfast)
compartment
7. Crispers
8. Ice box trays
9. Freezer top basket
10. Freezer bottom basket
11. Adjustable Feet
12. Even-Circ™
13. Ionizer™
11
A
2
4
4
1
4
4
6
9
10
7
57
8
33
10
9
B
13
12
2. About Your Refrigerator
Fig. 2.1
Features include:
• Touch Screen Electronic
Display
• Superior Internal
Illumination (soft glow)
• Fresh Zone with Self-
Close
• Super Quick Freeze &
Cool
• Economy Mode for
Energy Saving
• Levelling Feet
• Ionizer™
• Range Fresh™
• qDrink
• Child lock
• Holiday mode
• Night sensor
• Screensaver
Zone 1 Zone 2

7
L
2
4
3
5
E
E
6
J
KK
M
J
7
8H
I
1A
n This appliance is not intended to be used as a built-
in appliance.
About the Fresh Food
Compartment
It is recommended to leave storage space between the
foods for good cold air circulation. The temperatures in the
refrigerator are slightly warmer near the top and colder near
the base. Suggestions for storage (Fig. 2.2):
1. Eggs, butter, cheese, etc.
2. Cooked meats, sausage, etc.
3. Drinks and all kinds of bottled foods.
4. Meat, poultry, sh and raw foods.
5. Pickled foods, drinks or cans.
6. Flour foods, cans, dairy, etc.
7. Fruits, vegetables or salads.
8. Tins, cans, condiments, etc.
General Features of Your Appliance
1. The cooler and freezer compartments have separate
air circulation systems due to our new No-Frost
technology. This ensures that no odours pass between
compartments, and vegetables remain fresh for longer
periods.
2. The energy ecient fan maintains air circulation by
running independently of the compressor. Thus, a
uniform and balanced air circulation is created between
cooler shelves.
3. Through specic air conduit design, the fans distribute
cold air from multiple vents on all shelves in the cooler.
4. By special patented application, display edges and
corners form a smooth surface against the door and
ensure a perfect aesthetic appearance. The touch-
operated electronic panel allows easy access of
temperature controls and provides an aesthetically even
view.
5. The appliance contains LEDs which gradually illuminate,
rather than sudden bright lights. The LEDs reach 100%
brightness within a few seconds after the door is
opened.
6. A telescopic rail is used in the chiller compartment to
ensure that the chiller operates easily and quietly.
7. The chiller door includes a self-closing function to avoid
slamming or being left open.
Fig. 2.2

8
warm air warm air
warm air
warm air warm air
cold air
cold air
cold air cold air cold air
cold air cold air
cold air
cold air
cold air
General notes:
Fresh Food Compartment (Fridge): Most ecient use of
energy is ensured in the conguration with the drawers in the
bottom part of the appliance, and shelves evenly distributed,
position of door bins does not aect energy consumption.
Freezer Compartment (Freezer): Most Ecient use of
energy is ensured in the conguration with the drawers and
bins are on stock position.
Even-circ
Even-circ, prevents fresh food losing moisture. This
technology ensures that air circulates evenly throughout the
fridge compartment, this helps prevent food from drying out.
Fresh food then maintains its texture and taste of food by
preventing any humidity loss.
Using the appliance
Lighting
When the product is plugged in for the rst time, the interior
lights may turn on 1 minute late due to opening tests.
Information on No-Frost Technology (Fig. 2.3)
No-frost refrigerators have a dierent operating system to
static refrigerators. In normal (static) fridges, the humidity
entering the fridge due to opening the door and the
humidity inherent in the food causes ice to form in the freezer
compartment.
To remove the frost and ice from the freezer compartment,
it is required to periodically switch the fridge o and place
frozen food in a separate cooled container.
The situation is completely dierent in Nofrost fridges. A
built-in fan blows dry and cold air evenly into the cooler
and freezer compartments. The cold air disperses uniformly
between the shelves, ensuring all your food is cooled evenly,
thus preventing humidity and icing to occur.
Therefore, your No-frost fridge allows ease of use, in addition
to its huge capacity and stylish appearance.
Shelves
The height of the cantilever shelves can be adjusted to t
your storage needs.
n When opening or closing the dairy bin, please take
care not to trap your ngers (Fig. 2.4).
Fig. 2.3
ArtNo.600-0001 - Dairy bin
Fig. 2.4
warm air
cold air
cold air cold air
cold air
warm air
warm air
warm air warm air
cold aircold air
cold aircold air cold aircold air

9
Accessories
Vegetable Bowl and Chiller (Breakfast) (Fig. 2.5)
This compartment can be used as a chiller compartment,
where food can be kept at 0°C. Frozen food can be kept in this
compartment to defrost. Meat and/or clean sh (in plastic
bags or packets), which will be consumed within 1 to 2 days,
can also be stored here.
Water freezes at 0°C, but food containing salt or sugar freezes
at colder temperatures.
Do not put food to be frozen or iceboxes in this
compartment.
Crisper Air Setting button (Fig. 2.6)
Turn the air adjustment knob between the crisper and chiller
to the open position when the crisper is full. Food in the
crisper will remain fresh for a longer period of time.
Ionizer / Range Fresh
Ethylene gas is emitted by some fruits and vegetables and
causes the fresh groceries to start ripening. When this gas is
produced in an enclosed environment, it is re-absorbed by
the fruit and vegetables and further accelerates the aging
process.
This fridge freezer provides two dierent solutions to this
naturally occurring problem:
Ionizer (Fig. 2.7)
Ionizer spreads negative ions which neutralize particles of
unpleasant smell and dust in the air.
By removing these particles from the air in the refrigerator,
Ionizer improves air quality and eliminates odours.
Range Fresh (Fig. 2.8)
Range Fresh Preserver helps to remove ethylene gas
(a bioproduct released naturally from fresh foods) and
unpleasant odors from the crisper.
It must be regenerated once a year under a full day sunlight
for 24 hours, for example on a window sill.
To regenerate the lter, remove the casing of the lter box by
pulling it in the direction of the arrow (Fig. 2.9).
The lter should not be washed with water or in any
detergent.
About the Freezer Compartment
Ice tray (Fig. 2.9)
Hold the icebox from the front and pull it toward you to
remove it.
Fill the icebox with water and replace it. Ice will be ready after
approximately 2 hours. Extract the icebox to serve the ice.
When replacing the icebox after lling it with water, make
sure it is positioned horizontally. If it is tilted, water inside the
icebox may spill onto the basket.
B
A
Fig. 2.5
A. Chiller Breakfast B. Crispers
Ionizer
Fig. 2.8
Fig. 2.9
Ionizer
Range Fresh Preserver
Fig. 2.6
Fig. 2.7

10
Note: Do not pull the freezer drawers with too much force as
food may fall out. Do not overpack the drawer otherwise food
will fall out when opening too fast.
n Make sure that the two sides of the shelf are in level
positions otherwise food may drop o.
The shelves will not pull out accidentally when you remove
foodstu from the appliance.
The freezer compartment is used for freezing fresh food, for
storing frozen food, and for making ice cubes.
If the freezer door has been left open for a long time or not
closed properly, frost will form and can prevent ecient air
circulation. To resolve this, unplug the freezer and wait for it
to defrost. Clean the freezer once it has fully defrosted.
Remove baskets, covers, and so on, to increase the storage
volume of freezer.
The freezer volume stated on the label is the volume without
baskets, covers, and so on.
n IMPORTANT
Do not refreeze thawed food. It may pose a danger to your
health and cause problems such as food poisoning.
Do not put warm food in the deep freeze compartment until
it has completely cooled. It will thaw already frozen food,
which may then rot.
When purchasing frozen food, make sure it has been stored
under appropriate conditions and the packaging is not
damaged.
Do not purchase frozen food if the packaging shows signs of
humidity or if it has a foul odour. The food may not have been
stored correctly and may have gone rotten.
The storage life of frozen food depends on the room
temperature, the thermostat setting, how often the door is
opened, the type of food, and the length of time required to
transport the product from the shop to your freezer. Always
follow the instructions printed on the packaging and never
exceed the maximum storage life indicated.
NOTE: Remove frozen food from the freezer the day before
consumption, and put in the bottom compartment of
the refrigerator. This helps reduce the temperature in the
refrigerator, which in turn saves energy. If the frozen food
defrosts in an open area, energy loss will occur.
NOTE: If you attempt to open the freezer door immediately
after closing it, you will nd that it will not open easily. This
is normal. Once equilibrium has been reached, the door will
open easily.

11
88
88
eco
mode q drink s.saver
°c -88°c
-88°c
sc sf
zone 1 zone 2
min
cooler
!
6
8
9
16
17
11
12
13
14
7
11810 152 3
54
19
User controls
LCD Display
Fig. 3.1
Using the Control Panel
1. Fridge compartment temperature indicator
2. Left freezer compartment temperature indicator
3. Right freezer compartment Temperature indicator
4. Super cool mode light
5. Super freeze mode light
6. qDrink alarm timer
7. qDrink light
8. Economy mode
9. Holiday mode
10. Night sensor
11. Child lock
12. Low voltage warning
13. Alarm
14. Screensaver button
15. Zone 2 (right freezer) button
16. Mode button
17. Cooler button
18. qdrink mode button
19. Zone 1 (left freezer) button
The values on the screen indicate temperature values
specied by the consumer.
Standby display is protected against faulty contact.
You must touch any key on the display before you can
make an action. After 2 seconds, as in this case, the beep
tone will sound and the display can be used. Wait for 20
seconds at the end of the process and the display will
return to Standby mode.
3. Using the Control Panel
LCD Display
User Controls

12
03
mode q drink s.saver
°c -23 °c
-23°c
sc sf
zone 1 zone 2
05 min
cooler
03
mode q drink s.saver
°c -23 °c
-23°c
zone 1 zone 2
05 min
cooler
Step 1. If you accidently pressed the q drink wait for the
wine glass symbol to ash 4x. Press the q drink whilst the
timer digits ashes.
Step 2. The timer digits and wine glass symbol will ash
and then disappear.
Cancel q drink mode
Touch Display Prevention (Safe Mode)
The touch display is protected from accidental touch. To
activate a feature, press any of the user controls for more than
2 seconds this will deactiviate the protection. If no button
is pressed within 20 seconds, the display will return to safe
mode.
The display will advise the user that screen safe mode has
been disabled by emitting a double beep.
Operating Your Fridge Freezer
qDrink mode Beverage cooling
The q drink mode is used to cool drinks within an adjustable
time frame (05, 10, 15, 20, 25 or 30 minutes). While using the
q drink mode beverages can be stored in the freezer.
n Important: “q drink” mode should not be confused
with cooling.
Adjust the time according to the temperature of the
bottles before you put them in the zone 1or zone 2 freezer
compartments. For example, the time may initially be set for
5 minutes. If your drinks have not cooled suciently after this
time, you may set a further 5 or 10 minutes cooling time.
n While this mode is active, you MUST check the
temperature of the bottles regularly.
NOTE: This will not adjust the freezer temperature
Set the qDrink mode Beverage cooling
NOTE: At times the qDrink button will emit two beeps, if the
controls has not been previously activated
NOTE: qDrink will function if Zone 1 is set to work as a chiller.
03
mode q drink s.saver
°c -23 °c
-23°c
zone 1 zone 2
cooler
Flashes 4x
03
mode q drink s.saver
°c -23 °c
-23°c
zone 1 zone 2
05 min
cooler
03
mode q drink s.saver
°c -23 °c
-23°c
sc sf
zone 1 zone 2
25 min
cooler
NOTE: Disable screen safe mode.
Step 1. Press the q drink to activate the mode.
Step 2. Whilst the wine glass symbol is ashing continue
to incrementally press the q drink button to change the
cooling time.
NOTE: q drink time can only be set when the wine glass symbol ashes.
Step 3. Once the desired time has been set, stop pressing
the q drink button.
NOTE: When the bottles are cool enough, they MUST be removed
from the freezer otherwise they may burst.
Flashes 4x
03
mode q drink s.saver
°c -23 °c
-23°c
zone 1 zone 2
23 min
cooler
Step 4. The timer digits will continue to ash. Once the
time has elapsed, q drink mode will emit an audible alert.

13
SF, SUPERFREEZE (Freezer compartment)
Purpose
• To freeze prepared foods.
• To freeze fresh food quickly to retain freshness.
• Large food shop, this mode ensure food is frozen quickly
and therefore retains nutrients and taste.
• High quality meat/fish, again by quickly freezing the
produce nutrients are retained and taste is preserved
To set the Super-Freeze for Zone 1 (left freezer) (Fig. 3.2)
Incrementally press the‘zone1’button until ‘SF’ shows on the
display. A beep will sound to conrm the mode is active.
To set the Super-Freeze for Zone 2 (right freezer) (Fig. 3.3)
Incrementally press the‘zone2’button until ‘SF’ shows on the
display. A beep will sound to conrm the mode is active.
Super-freezing mode will automatically deactivate after 24
hours or once the freezer compartment temperature sensor
reaches the correct temperature.
n For super freezing, zone1 compartment should be
selected preferably.
SC, SUPER-COOL (Fridge compartment)
Purpose
• To cool and store a large quantity of food in the fridge
compartment.
• To quickly cool drinks.
• Large food shop, this mode ensure food is cooled
quickly and therefore retains nutrients and taste.
To set Super-Cool for cooler / fridge cabinet (Fig. 3.4)
Incrementally press the‘cooler’ button until ‘SC’ shows on the
display. If no button is pressed while‘SC’ is displayed, a beep
will sound to conrm the mode is active.
Super-cooling mode will automatically deactivate after 4 to 6
hours, depending on the ambient temperature, or when the
cooler compartment reaches a suciently low temperature.
02
mode q drink s.saver
°c -SF°c
-22°c
sc sf
zone 1 zone 2
cooler
02
mode q drink s.saver
°c -22°c
-SF°c
sc sf
zone 1 zone 2
cooler
SC
mode q drink s.saver
°c -22°c
-22°c
sc sf
zone 1 zone 2
cooler
Fig. 3.2
Fig. 3.3
Fig. 3.4
NOTE: Disable screen safe mode.

14
mode q drink s.saver
-23 °c
-23°c
zone 1 zone 2
cooler
mode q drink s.saver
-23 °c
zone 1 zone 2
cooler
03
mode q drink s.saver
°c -23°c
zone 1 zone 2
cooler
Fig. 3.5 Fridge compartment will switch o.
Fridge compartment and Zone 2 will switch o.
Zone 1 freezer will switch o.
Fig. 3.6
Fig. 3.7
Switching zones off (Fridge / Freezer)
A combination of cooling/freezing zones can be disabled
as required. The button combination should be applied for
greater than 5 seconds.
Switching zones on
Each disabled zones can be reinstated by repeating the
process as described above.
NOTE: Disable screen safe mode.
Turn off Night Sensor
Repeat operation as above.
SCREEN SAVER (s.saver)
This mode saves energy by switching o all control panel
lighting when the panel is left inactive. Once activiated the
screensaver mode will switch on after 10 seconds. When the
screensaver is active, only the s.saver icon is illuminated.
To activate (Fig. 3.8) the screensaver, press and hold the
‘s.saver’ button for 3 seconds. A single beep will advise the
user that the function is set.
To deactivate (Fig. 3.8) the screensaver, press and hold the
‘s.saver’ button for 3 seconds. A single beep will advise the
user that the function is set.
NOTE: Screensaver function is cancelled if the power is cycled
o, on.
88
mode q drink s.saver
°c -88°c
-88°c
zone 1 zone 2
cooler
88
mode q drink s.saver
°c -88°c
-88°c
zone 1 zone 2
cooler
Step 1. Press and hold the mode and s.saver for 3 seconds.
Step 2. The night sensor indicator will appear.
Night sensor
This night sensor function saves energy by switching
the lights inside the refrigerator o if there is sucient
illumination in the room. To activate follow Step 1 and Step 2.
02
mode q drink s.saver
°c -22°c
-22°c
zone 1 zone 2
cooler
Hold for 3
seconds
Fig. 3.8
Hold for 3
seconds
NOTE: Disable screen safe mode.

15
Economy (eco) Fig. 3.9
eco
During periods of less frequent use (door opening)
or absence from home, such as a weekend holiday,
eco program can provide optimum temperature
whilst saving power.
In order to activate eco mode, press the [mode] button until
“eco” symbol and “E” illuminate.
Whilst in eco mode, the temperatures for both the fridge and
freezer compartment are 4°C for fridge and -18 °C for freezer.
Cancel Economy (eco)
In order to deactivate eco mode, press the [mode] button
until “eco” symbol and “E”are no longer visible.
Holiday Fig. 3.10
Holiday mode is to be used if the device is to be
left for an extended period. During Holiday mode
only the freezer compartment remains active.
Benets: save on electricity bills when away from
home.
It is represented by an umbrella and sun. If the cooler
compartment is not to be used for some time, such as during
a holiday, activate holiday mode. To activate holiday mode,
press the mode button until the holiday mode symbol and ‘H’
are illuminated.
Holiday mode will be active for these congurations (Table
3.1).
WHILST IN HOLIDAY MODE, ALL FOOD SHOULD BE
REMOVED FROM THE FRIDGE COMPARTMENT AS THIS
WILL BE TURNED OFF.
Whilst in holiday mode, the freezer temperature will default
to -18°C for freezer.
Cancel Holiday
To activate holiday mode, press the mode button until the
holiday mode symbol and ‘H’ are no longer visible.
Door open alarm function
If either the fridge or freezer door is left open for more than 2
minutes, the appliance will beep.
Active
mode
Cooler Zone
(Fridge)
Freezer Zone 1
(Left)
Freezer Zone
2 (Right)
Holiday Turns o Remains on Remains on
Holiday Turns o Turns o if set as
chiller
Remains on
Holiday Turns o Zone 1 set to OFF
by user
Remains on
Table 3.1
00
eco
mode q drink s.saver
°c e °c
00°c
zone 1 zone 2
cooler
00
mode q drink s.saver
°c h °c
00°c
zone 1 zone 2
cooler
Fig. 3.9
Fig. 3.10
NOTE: Disable screen safe mode.

16
Setting Zone Temperatures
Cooler (COOLER)
The cooler mode is used for setting the temperature of the
cooler compartment. Press the cooler button to set the
temperature to 1, 2, 3, 4, 5, 6, 7 or 8 °C.
Freezer / Cooler 1 (ZONE 1)
To use the zone 1 compartment as a freezer, press the
‘zone1’button to set the temperature of the bottom-left
compartment to -14, -15, -16, -17, -18, -19, -20, -21, -22, -23 or
-24 °C.
Freezer (ZONE 2)
Press the ‘zone2’ button to set the temperature of the
bottom-right compartment to -14, -15, -16, -17, -18, -19, -20,
-21, -22, -23 or -24 °C.
Refer to Table 3.2 Setting Super-cool and Superfreeze
Table
ZONE 1 (left freezer)
To set the freezer to chiller
To use the bottom-left compartment as a cooler, press
and hold the ‘zone 1’ button for 3 seconds. Then, set the
temperature to 1, 2, 3, 4, 5, 6, 7 or 8 °C (Fig. 3.11).
Food should only be stored if the cabinet temperature is
at required storage temperature.
To set the chiller to freezer
To use the ‘zone 1’ compartment as a freezer, press the‘zone1’
button for 3 seconds to set the temperature of the bottom-
left compartment to -16, -17, -18, -19, -20, -21, -22, -23 or -24
°C (Fig. 3.12).
Food should only be stored if the cabinet temperature is
at required storage temperature.
ZONE 2 (right freezer)
Press the ‘zone 2’ button until display show -16°C. To set the
temperature of the bottom-right compartment to -16, -17,
-18, -19, -20, -21, -22, -23 or -24 °C (Fig. 3.13).
02
mode q drink s.saver
°c -02°c
-22°c
sc sf
zone 1 zone 2
cooler Hold for 3
seconds
02
mode q drink s.saver
°c -20°c
-22°c
sc sf
zone 1 zone 2
cooler
02
mode q drink s.saver
°c -22°c
-18 °c
sc sf
zone 1 zone 2
cooler
Hold for 3
seconds
Fig. 3.11
Zone 1 freezer to chiller. NOTE: Disable screen
safe mode.
Zone 1 freezer to chiller. NOTE: Disable screen
safe mode.
NOTE: Disable screen safe mode.
Cooler / Fridge Zone 1 Zone 2
SUPER-COOL SUPERFREEZE FREEZE
COOL SUPERFREEZE SUPERFREEZE
Table 3.2 Setting Super-cool and Superfreeze Table
Fig. 3.12
Fig. 3.13

17
Child lock
Child lock can be activated to prevent any
accidental or unintentional changes being made
to the appliance settings.
To activate (Fig. 3.14) the child lock, press and hold the
cooler and zone 2 buttons simultaneously for 3 seconds.
While child lock is active, no changes can be made to settings
as the buttons will be inactive. The lock symbol will be
displayed.
To deactivate (Fig. 3.14) the child lock, press and hold the
cooler and zone 2 buttons simultaneously for 5 seconds.
Alarm
n If an alarm light illuminates, you must contact an
authorised service.
If the ‘s.saver’ button is pressed when there is an alarm
sounding and an exclamation mark on the display, the alarm
sound will switch o. The exclamation mark will continue to
show on the electronic display panel until the error is xed.
02
mode q drink s.saver
°c -22°c
-22°c
sc sf
zone 1 zone 2
cooler
Fig. 3.14Setting the Child lock

18
Climate class and meaning:
Your Appliance is Climate Class T/SN
• T (tropical): This refrigerating appliance is intended to
be used at ambient temperatures ranging from 16 °C to
43 °C.
• ST (subtropical): This refrigerating appliance is
intended to be used at ambient temperatures ranging
from 16 °C to 38 °C.
• N (temperate): This refrigerating appliance is intended
to be used at ambient temperatures ranging from 16 °C
to 32 °C.
• SN (extended temperate): This refrigerating appliance
is intended to be used at ambient temperatures ranging
from 10 °C to 32 °C.
• NOTE: If the ambient temperature is higher than 42 °C,
the compartment temperature cannot be set to -23 °C
or -24 °C. It can only be set to -16°C, -17°C, -18 °C, -19 °C,
-20 °C, -21 °C or -22 °C.
Using a Freezer Compartment as a
Cooler Compartment
The bottom left compartment on the appliance can be used
either as freezer or as a cooler.
Press and hold the [zone 1] button for 3 seconds to change
the bottom-left compartment from a freezer to a cooler.
n IMPORTANT: If the Zone1 compartment will be
converted from a freezer to a cooler:
• Empty the food from the Zone1 compartment and leave
the door closed for four hours. Then food can be placed
in the compartment.
• Baskets and/or shelves removed from the compartment
should be re-fitted.
Similarly, in order to utilize any of bottom compartments
used as cooler as freezers again, press and hold the related
compartment button for 3 seconds.
n IMPORTANT: If the Zone1 compartment will be
converted from cooler to freezer:
• Empty the food from the Zone1 compartment and leave
the door closed for two hours. Then food can be placed
in the compartment.
• When the zone 1 compartment is used as a cooler
and the appliance is switched to Holiday or Economic
setting, the zone 1 compartment will keep on running
as cooler.
Temperature Adjustment Warnings
• It is not recommended that you operate your fridge in
environments colder than 10°C in terms of its efficiency.
• Do not start another adjustment while you are already
making an adjustment.
• Temperature adjustments should be made according
to the frequency of door openings, the quantity of food
kept inside the fridge and the ambient temperature in
the location of your fridge.
• In order to allow your fridge to reach the operating
temperature after being connected to mains, do not
open the doors frequently or place large quantities of
food in the fridge. Please note that, depending on the
ambient temperature, it may take 24 hours for your
fridge to reach the operating temperature.
• A 5 minute delay function is applied to prevent damage
to the compressor of your fridge when connecting or
disconnecting to mains, or when an energy breakdown
occurs. Your fridge will begin to operate normally after
5 minutes.
This manual suits for next models
1
Table of contents
Other AGA Refrigerator manuals

AGA
AGA ADXD21 Manual

AGA
AGA 61ARA 115V Installation instructions

AGA
AGA ML24RF Manual

AGA
AGA MARVEL 60RDE Manual

AGA
AGA Premium Series User manual

AGA
AGA APRO36FD User manual

AGA
AGA P R E M I U M S E R I E S User manual

AGA
AGA R2 User guide

AGA
AGA Marvel AMPROFD23D Technical manual

AGA
AGA RANGEmaster RSXS19 Deluxe Series Manual