6
Use & Care Guide
from floor to underside of bracket will be 68-3/4
(174.6 cm) min to 69-1/4 (176 cm) max. Mark wall
where studs are located. Fasten anti-tip bracket
to the wall.
Subflooring or floor coverings (i.e. carpet, tile, wood
floors, rugs) may make your opening smaller than
anticipated.
Some clearance may be gained by using the level-
ing procedure under Leveling.
IMPORTANT:
Corner Installations Classic: To al-
low door to open 90 degrees, corner installations
must allow 4” (10 cm) space between wall and
refrigerator on hinge side. Filler wood strip recom-
mended for aesthetics.
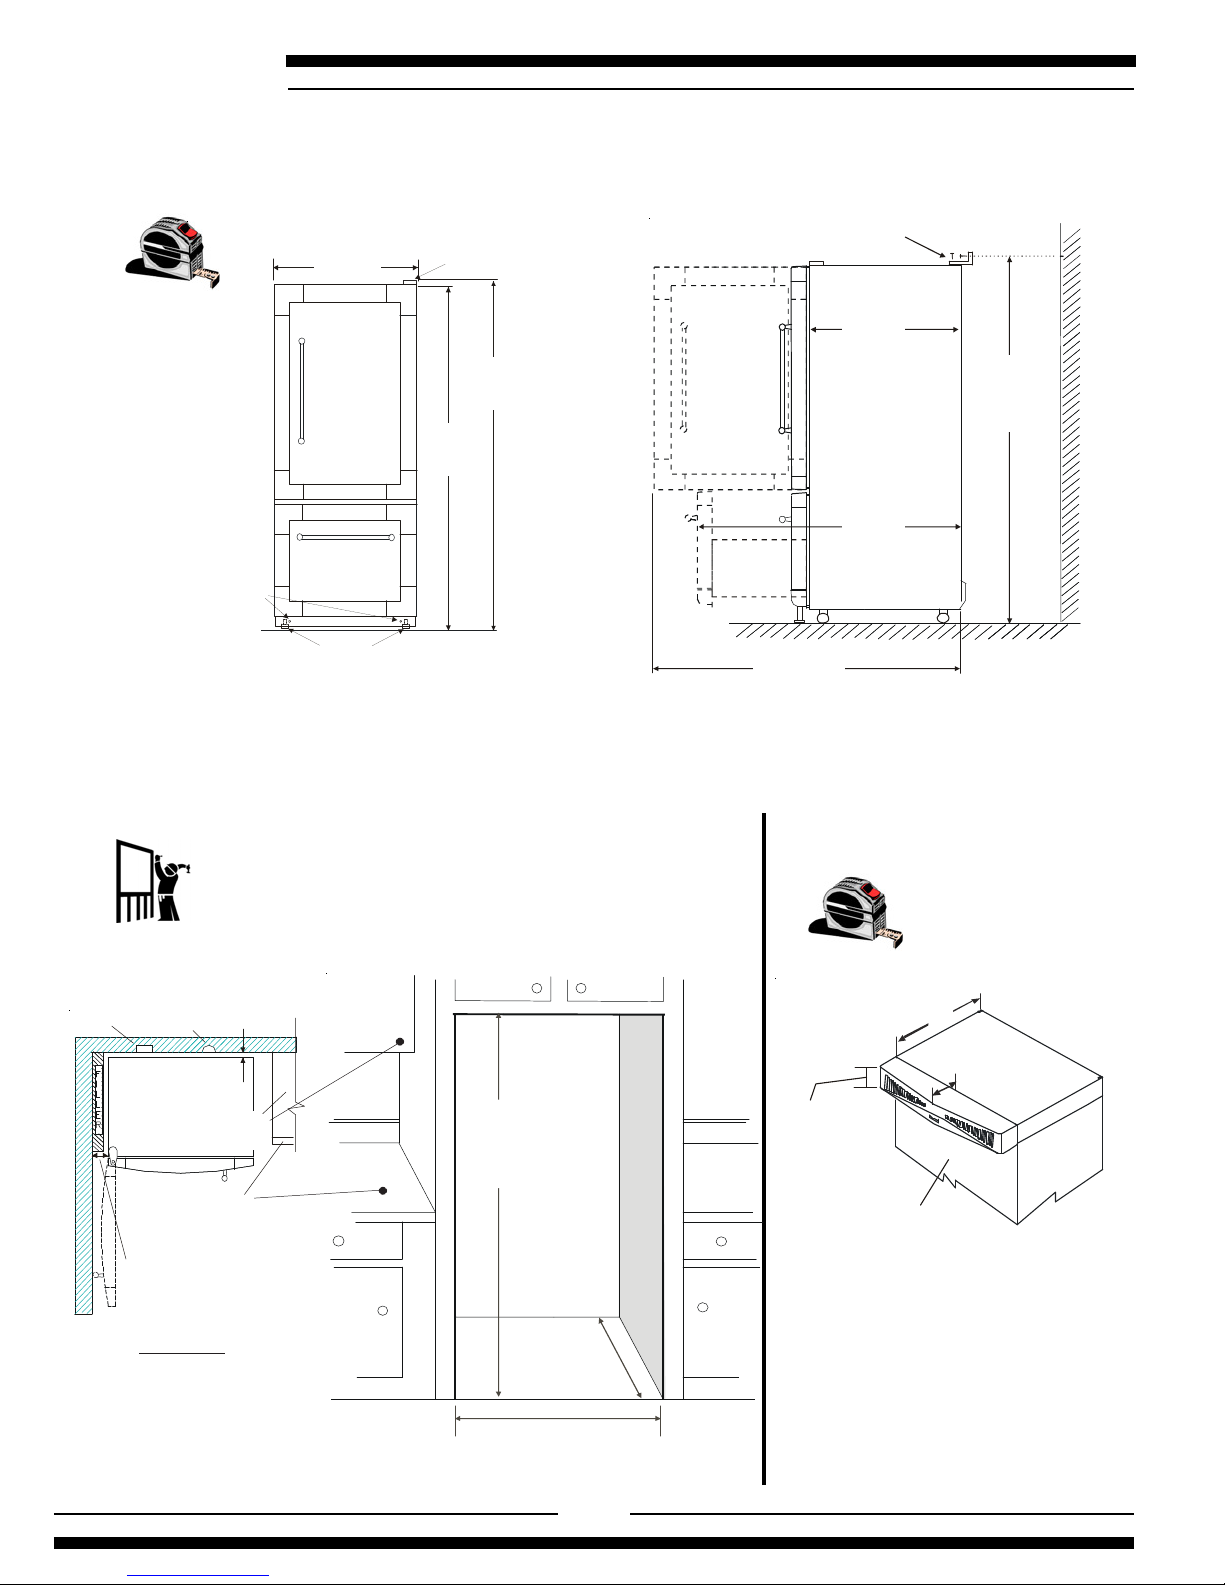
Measuring the Opening
30” Legend
(see page 11 #3065 diagram)
If refrigerator is to be installed into a recess verify
and use the following dimensions
1.) Cut out height for refrigerator, where the top
of the refrigerator is completely covered: 67” (171
cm) - space provides the necessary gap above
the refrigerator for tool access to fasten anti-tip
bracket (see details below)
2.) Cut out width for refrigerator’s main body: 30”
(77 cm)
3). Max. cut-out depth: 27 1/2” (70 cm)
When installing your refrigerator, measure carefully.
Allow ½” space at top and ½” space behind the
machine compartment cover (located in the rear) for
proper air circulation.
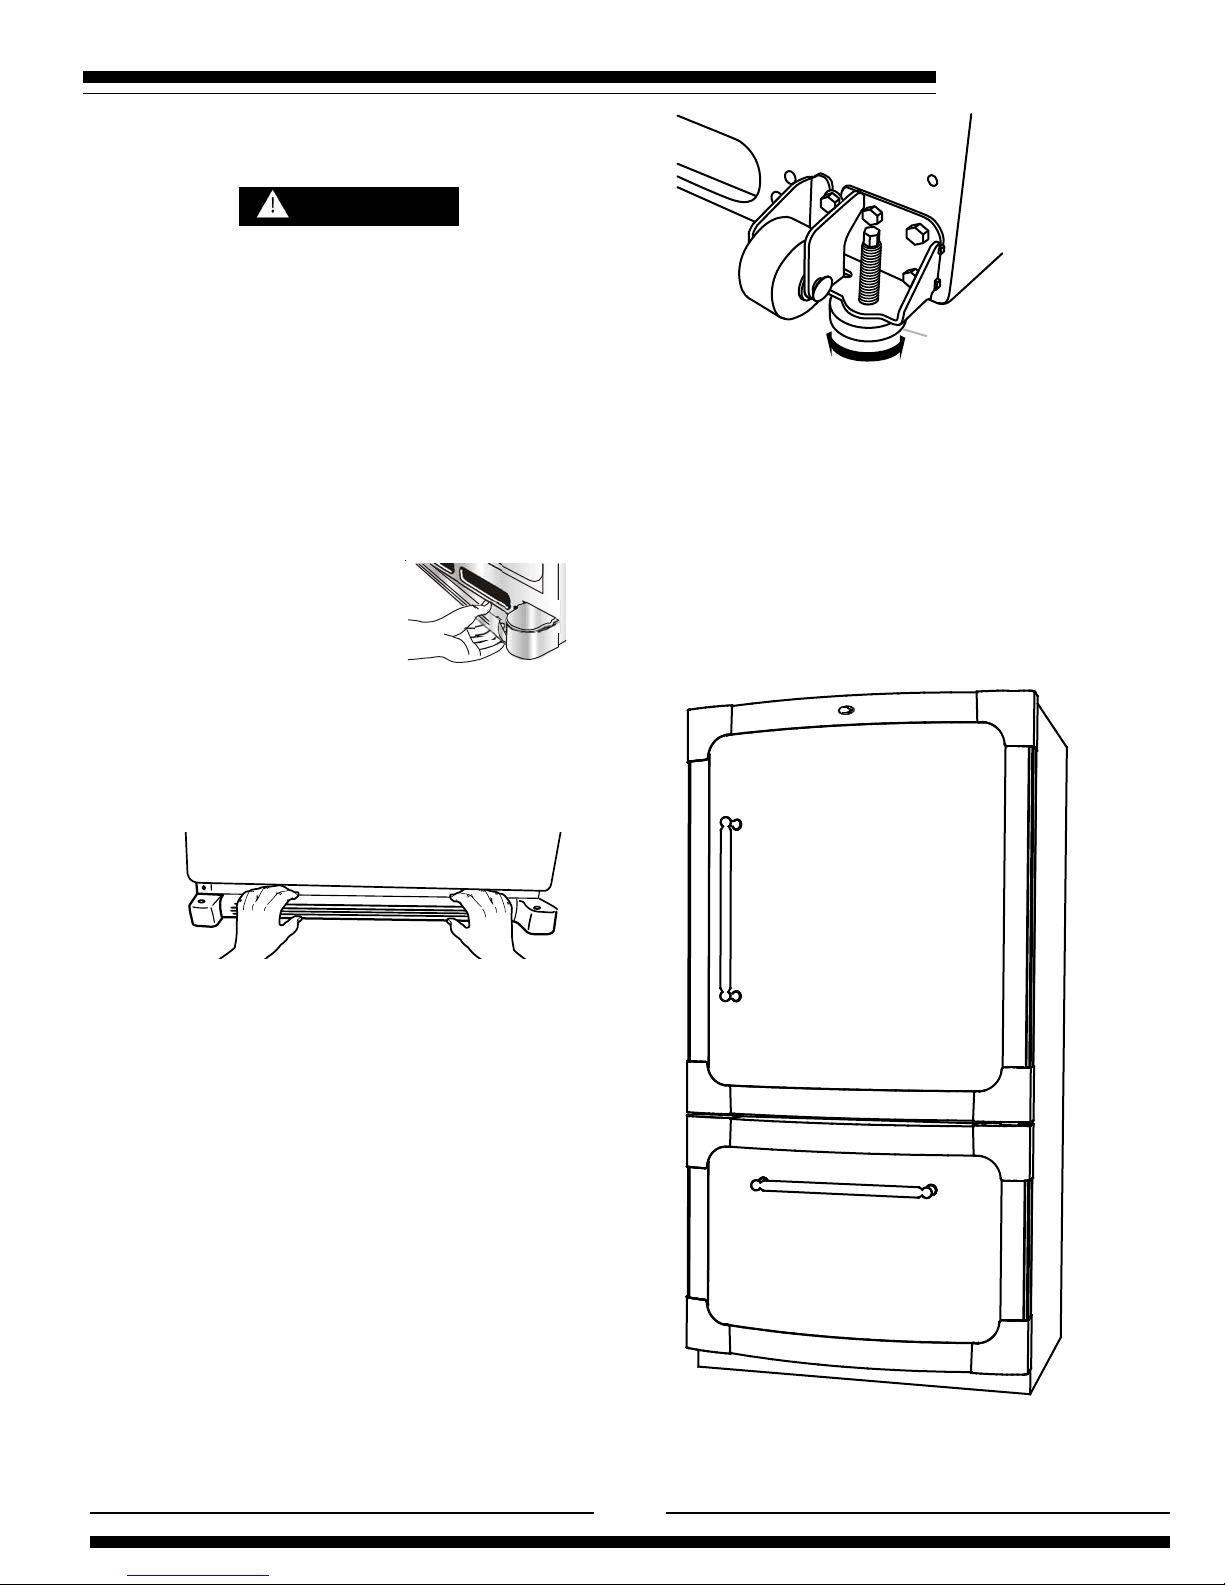
Anti-Tip Bracket: Every refrigerator includes an
antitip bracket which must be properly installed
to prevent the refrigerator from tipping forward
should downward pressure be applied with
both doors open. To fasten bracket to the wall,
distance from floor to underside of bracket will be
66-1/4” (169 cm) max. Mark wall where studs are
located. Fasten anti-tip bracket to the wall.
Subflooring or floor coverings (i.e. carpet, tile, wood
floors, rugs) may make your opening smaller than
anticipated.
Some clearance may be gained by using the leveling
procedure under Leveling.
IMPORTANT:
Corner Installations Legend: To al-
low door to open 90 degrees, corner installations
must allow 3” (7.6 cm) space between wall and
refrigerator on hinge side. Filler wood strip recom-
mended for aesthetics.
Measuring the Opening
36” Legend
(see page 12 #3165 diagram)
If refrigerator is to be installed into a recess verify
and use the following dimensions
1.) Cut out height for refrigerator, where the top of
the refrigerator is completely covered: 70” (177.8
cm) - space provides the necessary gap above
the refrigerator for tool access to fasten anti-tip
bracket (see details below)
2.) Cut out width for refrigerator’s main body: 36
½”
(93 cm)
3.) Max. cut-out depth: 24 1/2” (62 cm)
When installing your refrigerator, measure care-
fully. Allow ½” space at top and ½” space behind the
machine compartment cover (located in the rear) for
proper air circulation.
AntiTip Bracket: Every refrigerator includes an
anti-tip bracket which must be properly installed
to prevent the refrigerator from tipping forward
should downward pressure be applied with both
doors open. To fasten bracket to the wall, distance
from floor to underside of bracket will be 68-3/4
(174.6 cm) min to 69-1/4 (176 cm) max. Mark wall
where studs are located. Fasten anti-tip bracket
to the wall
Subflooring or floor coverings (i.e. carpet, tile, wood
floors, rugs) may make your opening smaller than
anticipated.
Some clearance may be gained by using the leveling
procedure under Leveling.
IMPORTANT :
Corner Installations Legend: To al-
low door to open 90 degrees, corner installations
must allow 4” (10 cm) space between wall and
refrigerator on hinge side. Filler wood strip recom-
mended for aesthetics.