AGFA ePhoto CL 30 Clik! User manual

ePhoto CL30 Clik!™
User’s Guide
abc

Trademark s 2
Trademarks
Agfa and the Agfa rhombus are trademarks of Agfa-Gevaert AG.
PhotoGenie, PhotoWise and ePhoto CL30 Clik! are trademarks of
Ag fa-Ge vae rt N.V.
Clik!™ disk and IomegaWare™ are registred trademarks of Iomega Corporation.
DPOF is a trademark of Fuji Photo Film Corporation, Ltd.
Duracell ULTRA is a registered trademark of Duracell, Incorporated.
The Clik! 40 brand block and Iomegaware are trademarks of Iomega Corporation.
Other products or company names are trademarks or registered trademark s o f
their respective holders.
Copyright © 2000 Agfa-Gevaert N.V.
All rights reserved.
All software and hardware described in this document are subject to change
without any notice.

Regulat ion Complianc e 3
Regulation Compliance
FCC Information Test
FCC Warning: This equipment meets the limits for a Class B digital devic e ,
pursuant to Part 15 of FCC Rules. Only the power pack and cable supplied with
the camera should be used. Operation with other power packs and cables is lik e ly
to result in interference to radio and TV reception and could void the user’s
authorization to operate this equipment.
This device complies with Part 15 of the FCC Rules. Operation is subject to th e
following two conditions:
1. This device may not cause harmful interference.
2. This device must accept any interference received, including interference
that may cause undesired operation.
Changes or modifications not expressly approved by the manufacturer may vo id
the user’s authority to operate this equipment.
The limits for a Class B digital device, pursuant to Part 15 of the FCC Rules, are
designed to provide reasonable protection against harmful interference in a
residential installation. This equipment generates, uses and can radiate radio
frequency energy and, if not installed and used in accordance with the
instructions, may cause harmful interference to radio communications. However,
there is no guarantee that interference will not occur in a particular in s t allat i o n . If
this equipment does cause harmful interference to radio or television reception,
which can be determined by switching the equipment off and on, the user is
encouraged to try to correct the interference by one or more of the follo win g
measures:
þ Reorient or relocate the receiving antenna.
þ Increase the separation between the equipment and receiver.
þ Connect the equipment into an outlet on a circuit different from that to which
the receiver is connected.
Canadian Radio Interference Regulations Statement
This Class B digital device meets all the requirements of the Canadian
Interference-Causing Equipment Regulations.
Cet appareil numérique de la Classe B respecte toutes les exigences du
Réglement sur le matériel brouilleur du Canada.

Regulat ion Complianc e 4
CE Declaration of conformity according to ISO/IES
Guide 22 and EN 45014
This equipment complies with the requirements of the Low Voltage Direct iv e
73/23/ECC, 93/68/ECC standards: EN 60950: 1995/A3.
This equipment complies with the requirements of the EMC Directive
89/336/ECC
Standards: EN 50081-1-EN55022 class B
EN 50082-1-EN61000-4-2, EN61000-4-3, EN610004-4

Warrant y 5
Warranty
Agfa warrants this product to be free from defects of material and workmanship
for one (1) year from the date of purchase. During the warranty period, A g f a will
repair or replace, at its option, the product at no charge to the customer. The
replacement unit may be a re-manufactured unit or a unit of equal or greater
functionality. After one (1) year, Customer shall pay for all parts, labor and
se rv ice .
Agfa warrants that software products will conform to published specif icat io n s in
effect at the time of delivery for 90 days after purchase. Customer acknowledges
that the Software may have inherent defects because of its complexity. The
warranty applies only to the media on which the software is recorded.
If a unit is replaced during the warranty period, the original warrant y sh all re main
in effect until the end of the one (1) year period or shall be 30 days, whichever is
longer.
This warranty is transferable with new owner notification to Agfa.
This warranty shall not apply if the customer:
þ Abuses or modifies Product or Software.
þ Operates the system in an environment with excessive dirt, moisture,
chemical fumes, extremes of temperature or other improper conditions. The
camera is not impermeable to water, dust or sand.
þ Supplies other Software or Interfacing.
þ Uses any adapter other than the included Agfa ePhoto AC adapter.
Warranty service is excluded if the serial number of the product has been
tampered with or removed.
v Note: Please check the Iomega warranty documentation for the warranty on
the Iomega Clik!™ disk.
Caution: The parties agree that all other warranties, express or implied,
including warranties of fitness for a particular purpose, merchantability and non-
infringement, are excluded.

Cont ent s 6
Contents
In trodu ct ion . . . . . . . . . . . . . . . . . . . . . . . . . . . . . . . . . . . . . . . . . . . . . . . . . . . .. . . . . . . . . . . . . . . . . 9
Chap te r 1 — Ge tting to K now yo ur C ame ra . . . . . . . . . . . . . . . . . . . . . . . . . . . . . . . 1 0
Ab o u t Clik!™ Disks ................................................................................ 14
In sertin g or Remo ving a Clik!™ Disk .................................................... 1 4
Clik!™ Disk Cap acity......................................................................... 15
Clik!™ Disk Co n d itions ..................................................................... 1 5
Ab o u t Batteries .................................................................................... 16
In stalling the Batteries ..................................................................... 16
Battery Conditio n s........................................................................... 1 7
Tip s fo r Savin g Battery Life ............................................................... 1 7
Ab o u t Camera Co ntrols .......................................................................... 18
Mod e Switch................................................................................... 1 8
LCD Switch .................................................................................... 1 8
EasyPilo t B u tto n ............................................................................. 18
Sh u tter B u tto n ................................................................................ 1 9
Status Display................................................................................. 19
Chap te r 2 — Re co rd in g Imag e s in Re co rd Mo de . . . . . . . . . . . . . . . . . . . . . . . . 2 0
Chan g in g Basic Settin g s ........................................................................ 21
Chan g in g a Basic Setting .................................................................. 2 1
Resolu tion ..................................................................................... 2 2
Flash ............................................................................................. 23
Digital Zoo m ................................................................................... 23
Fo cus............................................................................................ 24
Preview ......................................................................................... 25
Alb u m ........................................................................................... 25
Chan g in g A d van ced S e ttings .................................................................. 2 6
Chan g in g an Advan ced S e tting .......................................................... 26
Tip s on Using the Ad van ced Men u ...................................................... 26
Ad van ced S e tting s Icons .................................................................. 27
QuickRe vie w .................................................................................. 27
Se lftimer........................................................................................ 27
Exposure ....................................................................................... 28
White Point .................................................................................... 28
External Flash................................................................................. 29

Cont ent s 7
Au to matic ...................................................................................... 30
Vid e o Ou t ...................................................................................... 30
Prefe rences ................................................................................... 3 0
Date & Time .................................................................................... 31
Vo lu me .......................................................................................... 3 2
Lan g u age ...................................................................................... 32
Chap te r 3 — Wo rking with Imag e s in P lay Mo de . . . . . . . . . . . . . . . . . . . . . . . . . 3 3
Using Sin g le -Imag e View ........................................................................ 34
Scrolling through the Images in Single-Image View................................ 3 4
Deletin g Imag e s in Single-Image View ................................................. 34
Lockin g /Un locking Imag e s in Single-Image View ................................... 35
Zo o min g in o n an Imag e in S in g le -Imag e View ....................................... 3 6
Prin tin g Images in Single-Image View .................................................. 36
Displayin g In fo rmation in S in g le -Imag e Vie w ......................................... 38
Using Mu lti-Imag e View .......................................................................... 3 9
Vie wing Imag e s in Mu lti-Image View .................................................... 39
Deletin g Imag e s in Mu lti-Image View ................................................... 3 9
Lockin g /Un locking Imag e s in Mu lti-Image View...................................... 40
Prin tin g Images in Mu lti-Imag e V ie w .................................................... 41
Alb u m Se ttings in Mu lti-Imag e View .................................................... 42
Chap te r 4 — Watch in g Imag e s on TV . . . . . . . . . . . . . . . . . . . . . . . . . . . . . . . . . . . . . . 4 4
Chan g in g the Type of Video Stand ard....................................................... 44
Watchin g Imag e s on TV .......................................................................... 4 5
Chap te r 5 — Downlo ading Imag e s to your P C. . . . . . . . . . . . . . . . . . . . . . . . . . . . 4 6
Activatin g Drive Mode ............................................................................ 4 6
Activatin g Camera Mode ......................................................................... 4 6
Downloading Images with the Clik!™ TWAIN Driver using Agfa PhotoWise
So ftware (Came ra Mode)......................................................................... 47
More Informatio n ............................................................................. 4 8
Downloading Images using IomegaWare™ Software (Drive Mode) ................... 48
More Informatio n ............................................................................. 4 8
App e ndix A — Care and Main te nance . . . . . . . . . . . . . . . . . . . . . . . . . . . . . . . . . . . . . 4 9
Came ra................................................................................................ 49
AC Ad apter .......................................................................................... 49
Batteries ............................................................................................. 5 0
Clik!™ Disks ......................................................................................... 50
Cont ent s 8
App e ndix B — Tro uble sh ootin g . . . . . . . . . . . . . . . . . . . . . . . . . . . . . . . . . . . . . . . . . . . . 5 1
App e ndix C — Came ra S pe cifications . . . . . . . . . . . . . . . . . . . . . . . . . . . . . . . . . . . . . 5 4
Glossary . . . . . . . . . . . . . . . . . . . . . . . . . . . . . . . . . . . . . . . . . . . . . . . . . . . . . . . . . . . . . . . . . . . . . . . . . 5 9

I nt roduc t ion 9
Introduction
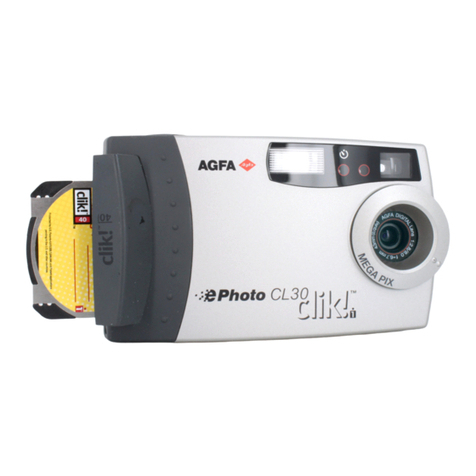
Your ePhoto CL30 Clik!™ records high quality digital images and stores them on
a 40 MB Clik!™ disk. You just have to point and click to record images. Using the
EasyPilot button you can easily and quickly change the camera settings.
To read more on your Agfa product, visit: http://www.agfa.com
The CL30 Clik!™ is more than a conventional camera because you can:
þ Check the camera settings on the status display.
þ Frame images with the optical viewfinder or color LCD screen.
þ Record images and immediately review them on the color LCD screen or on
TV .
þ Store images on a removable, reusable 40 MB Clik!™ disk.
þ Immediately decide whether you want to keep or delete the image you
recorded.
þ Immediately load images into a computer, print them, use them on the Web,
attach them to e-mails, ...
þ Transfer your images to a computer using a fast USB connection (this
requires a computer and an operating system compatible with the USB
interface).
þ Record images in black and white text mode and use the documents in an
electronic database and with OCR software.
þ Organize your images into albums on your Clik!™ disk.
þ Tag your images to be printed on a minilab that supports DPOF™ (Digital
Print Order Format)or on a printer that supports DPOF.

Chapter 1 — Getting to Know your Camera 10
Chapter 1 — Getting to Know your
Camera

Chapter 1 — Getting to Know your Camera 11
1. AC P owe r Adap te r Inpu t P ort
To connect your camera to a power supply using the included AC power
adapter.
2. V ide o P ort
To connect your camera with a video cable to the video port of your
television set or VCR.
3. USB Po rt ( )
To connect your camera with a USB cable to your computer to download
images.
4. Built-in Flash
With 4 settings: automatic, fill-in, red-eye and off.
5. S e lftime r Ind icator
A red light indicates that the selftimer is activated.
6. Auto-fo cus Le ns
f=6.7 mm (equivalent to 43 mm)
7. Re mo vable Le n s Ring
With 37 mm thread mount.
8. Tripo d Mount
To mount the camera on a tripod.
9. Batte ry Compartme nt
To insert 4 AA batteries (Alkaline, NiMH or Lithium).

Chapter 1 — Getting to Know your Camera 12

Chapter 1 — Getting to Know your Camera 13
1. Color L CD scre e n
To frame images or to preview recorded images.
To select options from the Record or Play menu (a row of icons).
2. E asyP ilot B utton
To scroll through the menu options (by turning the button) and select
options (by clicking the button).
3. O ptical V ie wfinde r
To frame images. Use the Optical Viewfinder instead of the color LCD to
conserve battery power.
4. Gre e n Action Ind icator
A steady green light indicates that the camera is ready. The Green Action
Indicator blinks when the camera processes an image or when the flash is
charging.
5. Re d Actio n Indicator
A red steady light indicates that no Clik!™ disk is inserted or that th e C li k! ™
d i sk is f u ll .
6. S tatus Display
To get information on the memory disk, batteries, the number of images
remaining and the camera settings.
7. S hu tte r B utton
To record an image.
8. Clik!™ Drive
To insert or remove a 40 MB Iomega® Clik!™ disk.
9. LCD S witch :
To select an LCD option: L CD O N: to switch on the color LCD screen
LCD O FF: to switch off the color LCD screen
P C: to connect the camera to a computer
10. Mode S witch:
To select a mode: RE C: to record images
O FF : to switch off the camera
P LAY: to preview or manage recorded images

Chapter 1 — Getting to Know your Camera 14
About Clik!™ Disks
The ePhoto CL30 Clik!™ stores all images on removable 40 MB Clik!™ disks.
v Note: The ePhoto CL30 Clik!™ only accepts 40 MB Clik!™ disks, where 1 MB
= 1 million bytes.
Inserting or Removing a Clik!™ Disk
1. Open the Clik!™ drive door.
2. To in se rt a d is k: in se rt t h e Clik ! ™ d isk u n t il it clicks t wice .
-o r-
To remove a disk: push the Clik!™ disk until you hear a click,
then release it.
Take care to insert the Clik!™ disk with rounded edge
first and label side up to the camera front.
3. Close the Clik!™ drive door.

Chapter 1 — Getting to Know your Camera 15
Clik!™ Disk Capacity
Your camera comes with one 40 MB Clik!™ disk. The storage capacity depends on
the resolution of the images. For more information, refer to Chapter 2:
“Recording Images in Record Mode” .
v Note: Clik!™ disks can store images in any combination of resolutions up to
40 MB capacity, where 1 MB = 1 million bytes.
Clik!™ Disk Conditions
Ce rt ain Clik ! ™ d is k conditions are indicated on the color LCD and on the Status
Dis p lay f ro m t ime t o t ime .
On the Status Display, you see a disk icon . When the icon is flashing, it
indicates that:
þ No Clik!™ disk has been inserted.
þThe 40 MB Clik!™ disk is unreadable. A message appears asking if you wan t
to reformat the disk. To reformat the disk, click the EasyPilot button , s cro ll it
to select “Yes” and then click it to start the reformatting process.
v Note: Selecting “Yes” erases all images stored on the Clik!™ disk.
þ The Clik!™ disk is full. To record more images, do one of the following:
o Insert a new Clik!™ disk.
o Lower the resolution (for more information, refer to “Resolution” in
Chapter 2).
o Transfer the images to your computer and delete the images on the
Clik ! ™ d is k.
o Delete some or all of the images (for more information, refer to “ Deleting
images” in Chapter 3).

Chapter 1 — Getting to Know your Camera 16
About Batteries
For best results, use AA batteries of the following types:
þ Duracell ULTRA® Alkaline (average images per charge: 100).
v Note: Your camera comes with 4 Duracell ULTRA® Alkaline batteries.
þ NiMH (average images per charge: 150)
v Note: If you buy rechargeable NiMH batteries, see to it they have a
minimum capacity of 1200 mAh.
þ Lithium (average images per charge: 200)
v Note: Extend battery life by using the included AC adapter to power the
camera indoors.
Installing the Batteries
Your ePhoto CL30 Clik!™ camera comes with 4 AA Alkaline batteries.
v Note: You can also use NiMH or Lithium batteries.
1. Unlock the battery compartment door.
2. Slide the door of the battery compartment in the direction of the arrow.
Insert 4 appropriate batteries. See to it that the pole-marks on the batteries
(+ and -) correspond to those on the battery compartment.
3. Slide the door back into place and lock it.

Chapter 1 — Getting to Know your Camera 17
Battery Conditions
The Status Display always indicates the status of the battery. Segments
disappear as power is used.
Fu ll Hal f -f u l l E mp t y
A flashing icon indicates that the batteries are empty. You can still use the
camera with the AC power adapter until you have replaced the batteries.
v Note: With a full battery pack you can view or work with images in Play mode
for approximately one hour or record an average number of 100 images in
Record mode.
Tips for Saving Battery Life
In order to extend battery life use following tips:
þ Whenever possible use the included AC Adapter instead of the batteries.
þ Use the optical viewfinder instead of the LCD to frame images.
þ When recording more than one image, do not switch on and off the camera
too often. After one minute of inactivity the camera enters sleep mode and
the LCD automatically switches off.

Chapter 1 — Getting to Know your Camera 18
About Camera Controls
Mode Switch
Use the Mode switch to switch the camera ON (in Record or Play Mode) or O FF.
Slide the Mode switch to select:
þ REC: to switch on the camera and record images.
þ OFF: to switch off the camera.
þ PLAY: to switch on the camera and manage stored images.
When the ePhoto CL30 Clik!™ is not connected to a computer:
þ The camera will enter sleep mode after one minute of inactivity (to switch the
LCD back on, click the EasyPilot button).
þ The camera will shut down automatically after 10 minutes of inactivity
(to switch the camera back on slide the mode switch OFF and ON again).
When the ePhoto CL30 Clik!™ is connected to a computer it will not enter sleep
mode.
LCD Switch
Slide the LCD switch to switch the color LCD screen ON or OFF. Slide the s wit c h
to PC when you connect the camera to a computer.
EasyPilot Button
Use the EasyPilot button to navigate through the menus and select a menu
option:
þ Dis p lay: click the EasyPilot button to display a menu.
þ S cro ll: turn the EasyPilot button to move from one menu option to another.
þ Select: click the EasyPilot button to select the highlighted icon.

Chapter 1 — Getting to Know your Camera 19
Shutter Button
Use the Shutter button to lock the camera focus and to record an image:
þ Press the Shutter button halfway to lock the camera focus.
þ Press the Shutter button all the way to record an image.
v Note: The camera sets the autofocus, so there may be a slight delay before
the image is recorded.
Status Display
Using icons, the Status Display shows information on your camera and the
settings you selected. The icons displayed on the Status Display are s imilar t o
the menu options you selected. For more information on the settings, refer to
Chapter 2.
Example of a Status Display:
Following settings could be displayed on the Status Display:
þ Number of images that can still be taken at the current resolution setting;
þ Status of the batteries
þ Status of th e Clik! disk
þ Resolution setting
þ Flash setting
þ Focus setting
þ Exposure setting
þ Selftimer setting
þ External flash setting

Chapt er 2 — Rec ording I mages in Rec ord Mode 20
Chapter 2 — Recording Images in
Record Mode
Like a conventional camera, the ePhoto CL30 Clik!™ has an optical viewfinder.
You can also frame the image on the color LCD. Before you record images , make
sure to install the batteries and insert a Clik!™ disk.
v Note: To extend battery life use the optical viewfinder instead of the color
L C D.
To re co rd imag e s:
1. Slide the Mode switch to REC.
v Note: If you want to view the image on the color LCD, slide the LCD
switch to ON. The LCD briefly displays the Agfa logo before it acts as a
viewfinder.
2. Select your settings (for more information refer to “Changing Basic Settings”
further in this chapter).
3. Frame the image using the optical viewfinder or the color LCD.
4. In case you want to lock the focus: press the Shutter button halfway to lock
the focus.
5. Press the Shutter button all the way down to record the image.
The camera processes the image. The Green Action Indicator on the back o f
the camera blinks. If the color LCD is on, the recorded image appears on the
LCD. After a few seconds, the live image reappears on the LCD and the
camera is ready to record a new image.
v Note: If the QuickReview option is on, the color LCD displays menu options
while the image is built-up on the LCD (for more information refer to
“QuickReview” further in this chapter).
Table of contents
Other AGFA Digital Camera manuals

AGFA
AGFA ePhoto ePHOTO 1280 User manual

AGFA
AGFA ePhoto 1680 User manual

AGFA
AGFA ePhoto CL20 User manual

AGFA
AGFA ePhoto CL30 User manual

AGFA
AGFA Silette Manual

AGFA
AGFA ePhoto CL50 User manual

AGFA
AGFA ePhoto CL30 User manual

AGFA
AGFA ePhoto CL18 User manual

AGFA
AGFA ePhoto CL30 User manual

AGFA
AGFA Silette User manual

AGFA
AGFA ePhoto CL 15 Smile User manual

AGFA
AGFA sensor 505-D User manual

AGFA
AGFA ePhoto CL34 User manual

AGFA
AGFA Automatic 66 User manual

AGFA
AGFA ISOLA 6x6 User manual

AGFA
AGFA DC-530i User manual

AGFA
AGFA Billy Clack User manual

AGFA
AGFA ePhoto 780 User manual

AGFA
AGFA Karat 36 User manual

AGFA
AGFA AgfaPhoto WP8000 User manual