Agrimate AM 530 PRO 2S User manual


2
SAFETY INSTRUCTION
SAFETY INSTRUCTION
PARTS IDENTIFICATION
TECHNICAL DATA
EXPLANATION OF TERMS
ATTACHMENT SETTING UP
EXAMPLE OF FUEL MIXING
STARTING, STOPPING
OPERATION
MAINTENANCE
FAULTY LOCATION
CONTENTS
1 Notes when using the nylon-cutting head and the cutting blade.
1 The grass trimmer was designed to cut grass and small soft vegetal. Never use the trimmer for any other
purpose.
2 The nylon-cutting head that meet the trimmer rotation rate requirements. Use nylon cords designated for the
nylon cutting head.
3 After starting the engine, pull the throttle speed lever gradually. The engine speed increase and the nylon
cutting head or cutting blade will start rotating.
4 When the throttle lever is released, the engine goes back to idle speed automatically.
5 Operate the unit at full throttle while cutting, best fuel efficiency is obtained by releasing the throttle when
swinging back after cut.
6 The blade rotates counterclockwise. For best performance and to minimize being stuck by debris, move the
blade from right to left while advancing on your work.

3
2 Notes when using the unit
1 Wear close fitting, tough work clothing that will provide protection, such as long slacks or trousers.
Safety work shoes, heavy duty gloves, head protector(helmet), a safety face shield, or safety goggles for eye
protection and a good grade of ear plugs or other sound barriers for hearing protection.
2 Prequel in a safe place. Open fuel cap slowly to release any pressure which may have formed in fuel tank. To
prevent a fire hazard, move at least 3 meters from fueling area before starting.
3 Comply with all fire prevention regulations.
4 Turn off the unit before setting it down.
5 Always hold unit firmly with both hands, the thumb and fingers encircling the handles.
6 Keep all screws and fasteners tight. Never operate your equipment when it is improperly or not completely and
securely assembled.
7 Keep handles dry, clean and free of fuel mixture.
8 Keep cutting-head as close to ground as practical. Avoid hitting small objects with cutting-head. Never cut or
trim on a hill or slope, etc., if there is the slight chance of slipping, sliding or losing firm footing.
9 Check area you will be trimming for debris that may be struck or thrown during operation.
10 Keep all parts of your body and clothing away from cutting-head when starting or running engine. Before
starting engine, make sure cutting-head will not come in contact with any obstacle.
11 Stop engine before examining cutting line.
12 Store equipment away from possible ignition sources, such as gas-powered heaters, clothes dryers, or oil-fired
furnaces, portable heaters, etc.
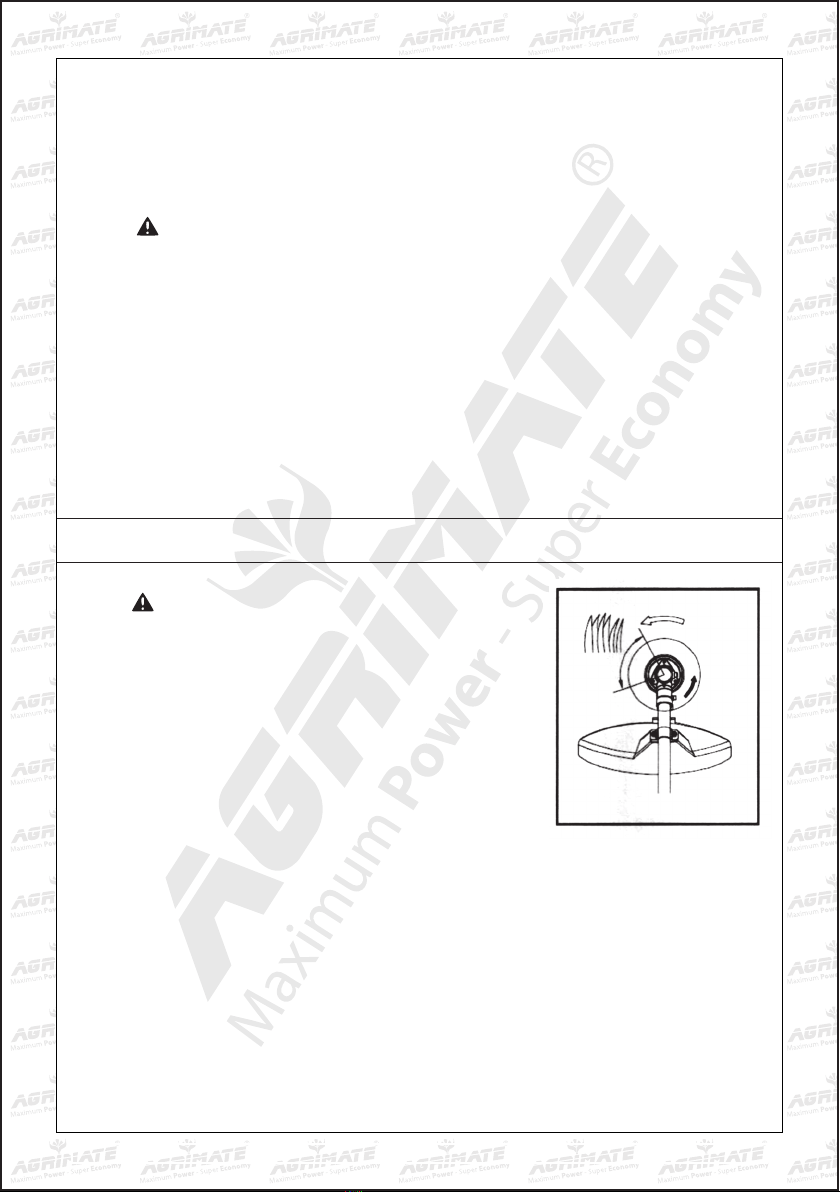
13 Always keep the debris shield, cutting-head and engine free of debris build-up.
14 Operation of equipment should always be restricted to mature and instructed individuals.
15 Waning: the exhaust gases is toxic.
16 Emergency stopping procedure. When it is necessary to stop engine immediately, move the switch to stop
position.
17 This unit has a clutch, routines for checking that the cutting attachment stops turning when the engine idles.

4
PARTS IDENTIFICATION

5
1 Fuel tank 2 Recoil starter 3 Air cleaner
4 Carburetor 5 Spark plug 6 ON-OFF Switch
7 Handle 8 Hanger 9 Safe mark
10 Gear box 11 Cutting attachment guard 12 Cutting tool
13 Muffler 14 Throttle trigger 15 Wrench
16 Inner hexagon spanner 17 Hexagon wrench 18 Owner manual
19 Shoulder belt 20 Throttle trigger lockout

6
TECHNICAL DATA
EXPLANATION OF TERMS
Engine
(Ceramics
plating
cylinder)
Model VB52
Ignition CDI
Fuel Mixture of gasoline and 2 stroke oil
Oil 2 stroke oil (grade: JASO-FC)
Spark plug L7T
Carburetor Diaphragm type
Power/speed KW/rpm 1.55/7500
Displacement cc 51.7
Volume (fuel tank) L 0.9L
Speed
Idle speed rpm 3800
Working speed rpm 7500
Maximum speed rpm 11000
Electronic gap mm 0.6-0.7
Mass kg 7.5 ± 0.08
Dimension (length x width x height) mm 1830 x 598 x 430
Transmission Drive Centrifugal clutch
Gear ratio 15:20
Standard attachments Wrench, hexagon wrench, inner hexagon
spanner
1 Brush cutter The trimmer with a saw blade, for cutting weeds, shrubs and bushes.
2 Grass trimmer The trimmer with a grass trimmer head, for cutting weeds, grass and soft similar
soft shrubs.
3 Cutting attachment General terms for saw blade and grass trimmer heads.
4 Idling Minimum stable speed with the carburetor adjusted to the manufactory.
5 Throttle lock Device to adjust to an intermediate opening degree temperately to facilitate
starting the engine.
6 Quick release mechanism Device to allow the operator to halt operation and disengage brush cutter in
an emergency.
7 Throttle trigger lock out Device to protect the throttle trigger from operation in advertently before it is
released manually

7
ATTACHMENT SETTING UP
1 Double-hand handles
Insert right and left handles into handle joint
Adjust handle joint to most comfortable position for user.
Adjust handle to suitable angle.
Lock tight bolt
2 Throttle wire and lead wire mounting
1 Pass the throttle wire through adjust screw.
2 Move the carburetor swivel toward the attachment.
3 Fit the tip (thick portion) of the throttle wire into the
ground hole in the swivel.
4 Adjust the play on the throttle wire at 1-2mm by
throttle wire adjust nut.
3 Cutting attachment guard mounting
1 Insert screw into the taped holes on the additional
guard and tighten the nuts with washers from guard.
2 Set the holder guard, cover bracket in this order as
shown in
3 Insert screw from over the cover bracket into the holes
through spring washers and then tighten the screws.
4 Cutting blade mounting
Turn the machine upside down, and you can replace the cutting head easily.

8
For blade cutting attachment
1 Match the hole in the side of the cutting
attachment guard with the hole in the side
of the fear box.
2 Screw the cutting blade securely.
3 Mount the shaft nut on the blade cutting
attachment head.
4 Remove the blade cutting attachment
tightening nut and cup washer from gear
box.
5 Insert the upper clamp and lower clamp
into the gear box.
6 Then insert the hexagon wrench in the
holes to stop moving the clamp.
7 Tighten the blade cutting head counterclockwise with hand into the gear box.
5 Shoulder belt
Adjust the strap length so that the cutter blade
will be kept parallel with the ground.
In an emergency, pull the release belt Strongly
upward, and you can detach the machine from
you. Be extremely cautions maintain control
of the machine at this time. Do not allow the
machine to be deflected toward you or anyone
in the work vicinity.
EXAMPLE OF FUEL-MIXING (50:1)
2 stroke oil (grade: JASO-FC)
Gasoline 2 stroke oil WARNING
1 Use a container mix gasoline with 2 stroke engine oil. Do not mix
them in the fuel tank directly. Wipe off split fuel immediately.
2 Do not use old mixed fuel because it has deteriorated and
adversely affect the engine.
3 Do not smoke during fuel mixing fuels.
1L 20 CC
4L 80 CC
5L 100 CC
10L 200 CC

9
STARTING, STOPPING
1 Before starting the engine
Check for loose screws and nuts and fill with proper mixed fuel. For
safety, please place the engine on stable ground with engine stand
(fuel tank) and the guard down.
2 To start a cold engine
1 Push the priming pump 7-10 times. Fig1
2 Hold the handle and push the throttle lever to the low speed
position.Fig2
3 Fully close the chock lever. Fig3
4 While holding the brush cutter firmly by hand at the shaft
assembly near the engine. Pull the starter strongly. Fig4
5 When ignition is heard, reset the chock and pull the starter.
6 Warm up the engine for about 3 minutes.
7 When the engine has started at the initial ignition open the
choke lever gradually.
8 If it is a Fig 5 type throttle lever, Hold the handle and depress
the throttle trigger to the end. Release the throttle trigger
while pushing the throttle lock bottom on the handle. Set the
switch to ON position. In the direction opposite to the arrow
mark with OFF. Fig2
3 When the engine has been warmed up
1 Fully open the chock lever.
2 Follow steps 8-2 starting a cold engine.
If the engine does not start, repeat step 2, procedure for starting
a cool engine.
CAUTION
1 After starting the engine, accelerate and decelerate the engine
several times by opening and closing the throttle trigger to
remove air from the carburetor.
2 Air in the carburetor cause poor acceleration or engine
stoppage.
3 Re-fuel before the fuel is used up, starting the engine after
using up the fuel is very difficult.

10
OPERATION
CAUTION
Before starting trimming, check that all the safety devices are provided.
The cutting head is fixed securely, the alter wrench has been removed.
1 Wear shoulder belt and hold brush cutter handle to start operation.
2 Perform this cutting work by sawing the brush cutter in half-circles
from right to left.
3 To slant the blade cutting attachment downward and toward the
cutting side. Take care not to drag the head on the ground.
4 After starting the engine, warm it up about 3 minutes and gradually increase the speed.
4 Stopping
Do not suddenly stop the engine when operation at high speed.
Gradually release the throttle trigger and idle the engine before setting the ON-OFF Switch to stop.
CAUTION
Do not operate the engine at high speed with no load on the cutting attachment. Especially when the engine is new.
When operated at high speeds with no load, the speed will accelerate to an excessively high that might harm the engine.
5 When the engine does not start
If the engine does not start or flames flow back through the muffler even though you have pulled the starter many times.
Remove and check the spark plug.
1 If the spark plug is dry, no fuel has been fed into the cylinder. Check the fuel pipe and carburetor.
2 Clean or replace the spark plugs if they are wet or dirty.
3 If fuel has overflowed into the tank case, remove the spark plugs. Open throttle and pull the starter 2 or 3 times to
remove excess fuel from the crank case.

11
MAINTENANCE
CAUTION
The brush cutter was designed to cut weeds, grass and similar soft vegetation. Never use the trimmer for any other
application.
1 Cleaning air cleaner
An air cleaner had cogitation the fuel will be thicker.
lowing out and causing the engine to stop.
Wash the cleaner as required.
Replace the cleaner when it became dirty.
2 Lubricating the gear box with grease
The gear box has a greasing port . Remove the greasing
ports screw and feed grease into port.
Supply grease to the gear box through the grease port
every 30 hours. Fig.
3 Checking gear box mounting screws
Loose fixing screws are very dangerous even though they have covers to prevent them from coming off. Be sure to check
them before operating the brush cutter. Tight the screws securely with the hexagon wrench provided with the brush cutter.
4 Spark plug
The Spark plug have a standard electrode-to-electrode distance of 0.6 to 0.7 mm.
The Spark plug electrodes are dry and drown under optimum conditions. Clean as necessary. Use spark plug designated
for the engine.
5 Fuel strainer cleaning
The fuel has a fuel strainer at its end (in the fuel tank) to prevent foreign matter such as sand from entering the carburetor.
Clean the strainer as required because the pump cannot suck up fuel if the strainer is clogged, which would cause the
engine to stop, replace the felt strainer if it is clogged or damaged.
6 Adjusting throttle cable
Adjust the throttle cable length with the adjusting nut. If the cutting head rotates even after you have released your hand
from the throttle trigger to idle the engine. Adjust the throttle cable length.
7 Carburetor
CAUTION
The engine has been adjusted before shipment. In the case of engine trouble, contact your dealer because the engine
trouble is not caused by a faulty carburetor only. An engine that is not adjust properly will damage not only the carburetor
but also the engine itself.
8 Cleaning muffler
Cleaning muffler carbon after 50 hours of operation as below:
1 Remove the muffler guard and muffler.
2 To prevent carbon from enter the cylinder, pull the starter to turn the crankshaft, blocking the exhaust opening with the
piston.

12
3 Scream carbon from the cylinder exhaust opening with wood, taking care not to damage the surface.
4 Screw the muffler and muffler guard together securely.
5 Be sure to ask your dealer for cleaning the muffler periodically.
9 Storing
When shutting down your brush cutter for a long time, store it properly as shown below. So that it will operate normally
when you need it. The brush cutter may not start smoothly if stored improperly.
1 Drain all fuel from the fuel tank and carburetor.
2 Remove the spark plug and addition a few drops of oil into the spark plug hole. Then pull the starter gently confirm that
oil film covers engine inside and tighten the spark plug.
3 clear dirt or dust from the cutter blade and outside of engine, wipe them with a oil-immersed cloth and keep the
machine at a dry place.
10 MAINTENANCE SCHEDULE
Before operation Engine assembly
Screws and nuts
Cutting tool
Fuel tank
Visual inspection for damage and tightness
Check for general condition and security
After each refueling Throttle lever Safety
lock key Stop-switch
Functional check Functional check Functional
check
Daily Air filter
Cooling air duct
Cutting tool Idling
speed
To be cleaned
To be cleaned
Check for damage and sharpness
Inspection (cutting tool must not move)
Weekly Spark plug
Muffler
Inspection,replace if necessary
Check and if necessary clean the opening
Quarterly Suction plug
Fuel tank
To be replaced
To be replaced
Shutting down
procedure
Fuel tank
Carburetor
Empty fuel tank
Operate until engine runs out of fuel

13
Fault System Observation Cause
Engine not
starting or under
difficulties
Ignition system
Ignition spark existing Fault in fuel supply or compression
system, mechanical defect
No ignition spark
Stop-switch operated, wiring fault or
short circuit, spark plug or connector
detective, ignition module faulty
Fuel supply Fuel tank filled
Incorrect chock position, carburetor
defective, suction head dirty, fuel
supply line bent or interrupted
Compression Inside of engine
Cylinder bottom gasket defective,
crankshaft seals damaged, cylinder or
piston rings defective
Mechanical fault
Starter not engaging Broken starter spring, broken parts
inside of the engine
Warm start problems Tank filled
Ignition spark existing
Carburetor contaminated, have it
cleaned
Engine starts
but dies immediately Fuel supply Tank filled
Incorrect idling adjustment, suction
head or carburetor contaminated
Fuel tank vent defective, fuel supply
line interrupted, cable or stop-switch
faulty
Insufficient performance
Several system may
simultaneously be
affected
Engine idling
Air filter contaminated, carburetor
contaminated, muffler clogged,
exhaust duct in the cylinder clogged
FAULT LOCATION


Table of contents
Popular Cutter manuals by other brands

Cedima
Cedima CF 22 E Safety, operating and maintenance instructions

Koike Sanso Kogyo
Koike Sanso Kogyo IK-70 Operation manual

Southwire
Southwire MAXTerm SCU6-B Operator's manual

Fry Factory
Fry Factory AFC-50 instruction manual

Ferm
Ferm TCM1011 Original instructions

Westfalia
Westfalia 83 65 68 instruction manual