aidapt VA168 User manual

EN
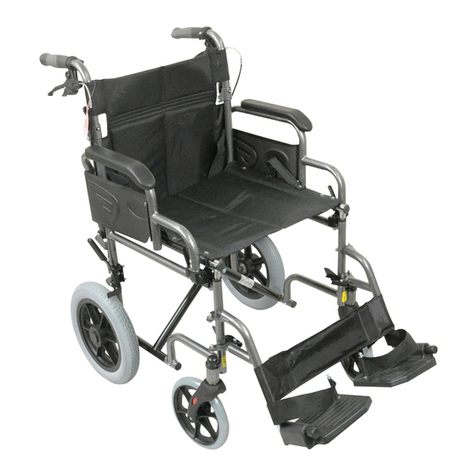
Lightweight Self Propelled Aluminium Wheelchair
VA168
Assembly and Operating nstructions

Assembly and Operating Instructions Ver. 2 11/12 (2288)
2
READ BEFORE USE
Before using your new Wheelchair, you and each person that may assist you in its
use should take time to read this manual and follow all instructions.
INTRODUCTION
Thank you for purchasing your wheelchair from Aidapt. This model has been
designed to help you gain independence and meet your particular requirements.
Throughout the manufacturing process, great care has been taken; the
components have been selected by quality and inspections carried out to ensure
you get full satisfaction from our product, including B EN12183 2009.
CONTENTS
Introduction and table of contents Page 2
afety ummary Page 3
Assembly and Use Page 4-7
General Description Page 8-10
Routine checks and Maintenance Page 11
pecifications Page 12
Guarantee Page 12
PLEASE NOTE:
Your Wheelchair has a unique identification serial number. This is located on the
main cross brace below the seat canvass and should be used in all correspondence.
Write your serial number here for future ref: ………………………………………
Model VA168 can be wheeled by the person sitting in the wheelchair and also
feature pram handles for assistance pushing.
The maximum user weight is 115 kg; under no circumstances should this be
exceeded
Before each use please take the time to check your Wheelchair for any lose parts.
Any modification to this product without the express permission from Aidapt will
invalidate your guarantee.

Assembly and Operating Instructions Ver. 2 11/12 (2288)
SAFETY SUMMARY
The following recommendations are made for the safe use of the wheelchair.
NOTE: Do not assemble or use this equipment without irst reading and
understanding this instruction manual.
If you cannot understand the instructions, please contact Aidapt, a Healthcare
Professional or a Dealer before installing this equipment.
•Before using this product, care must be taken to ensure that fitments are
secure, the castors/wheels are in good working order, the wheelchair is
properly balanced and all wheels must be in contact with the floor at all times
during use.
•For safe operation, the following points must be remembered:
i. Always observe the limits regarding reaching objects, leaning back,
tilting and use of manual brakes, tyres and weights limits. These are
dealt with under the section headed Assembly and Use.
ii. The footplates are designed only to support the feet while in the
seated position. DO NOT TAND ON THE FOOT PLATE .
iii. DO NOT U E YOUR WHEELCHAIR A A TRAN PORT EAT IN A
VEHICLE.
iv. The upholstery meets the flammability requirements of the California
Bureau of home furnishings technical bulletin 117. Care should be
exercised near open flames or burning cigarettes.
v. WARNING: urface areas of your Wheelchair can increase when the
wheelchair is exposed to external sources of heat (eg. sunlight).
•Please now refer to the section on Assembly and use.

Assembly and Operating Instructions Ver. 2 11/12 (2288)
4
ASSEMBLY
1. First remove all contents from the box.
2. To open the wheelchair, push seat rails and press downwards until the
chair is fully opened taking care to keep fingers clear of moving parts
(Fig. 1).
Note: The seat rails must be ully engaged in the seat rame support brackets
be ore sitting down.
Fig. 1

Assembly and Operating Instructions Ver. 2 11/12 (2288)
5
3. To close the wheelchair, take the centre of the seat fabric at the front and
back edges and lift (Fig. 2).
Fig. 2
Note: When opening and closing your Wheelchair please keep ingers well away
rom any possible entrapment areas.
The only part of the Wheelchair that can be adjusted are the leg rests. Ideally your
knees should be at 90 degrees with the seat. If you are not sure please contact a
healthcare professional or your local Wheelchair dealer for advice.

Assembly and Operating Instructions Ver. 2 11/12 (2288)
6
USE
WARNING: The centre o balance is a ected by a change in posture body position
or weight distribution.
Many activities require the wheelchair owner to reach, bend and transfer into and
out of the wheelchair. These movements will cause a change to normal balance,
centre of gravity and weight distribution of the wheelchair.
The design of your wheelchair enables it to remain stable for normal everyday
usage if used correctly in accordance with the recommendations in this manual.
1. Reaching/bending orward
Move the wheelchair as close as possible to the object you wish to reach.
Position the front castors so that they are extended as far forward as possible.
Fully engage the wheel locks on the rear wheels. Only reach out to take what
is within arm’s length in normal sitting position. Only the arms should extend
beyond the seat of the wheelchair.
2. Reaching/bending backwards
Move the wheelchair as close as possible to the object you wish to reach.
Reach back only as far as your arm will extend without changing your seating
position. Do not lean over the top of the back upholstery as this could change
your centre of gravity and may cause you to tip over.
3. Reaching/leaning sideways
Move the wheelchair as close as possible to the object you wish to reach.
Rotate the front castors to a line in the direction you will be reaching. Fully
engage the wheel locks on the rear wheels. Do not shift your weight or sitting
position towards the object you are reaching as it may cause the wheelchair to
tip over.
4. Trans erring
Before attempting to transfer in and out of the wheelchair, every precaution
should be taken to ensure the gap between the two seats is as small as
possible. Be certain that the wheel locks are on to prevent the wheels moving.
Turn both castors in the direction of the seat to which you wish to move. Lift
up the footplates and fold back the supports to the side. Do not stand on the
footplates. It is imperative that the actual transfer procedure be supervised by
a certified health care professional until the wheelchair owner is familiar with
the procedure.
5. Negotiating Obstacles

Assembly and Operating Instructions Ver. 2 11/12 (2288)
7
5.1 Forwards
The wheelchair should be tilted by the helper until the front castors have
passed over the kerbs. Move the wheelchair forward until the rear wheels
touch the kerb and gently lower the front castors over the pavement.
Push the lift until the rear wheels have mounted the kerb. The wheelchair
should not be lifted by the handles alone.
5.2 Backwards
The wheelchair should be positioned so that the rear wheels are against
the kerb. The helper should then tilt the wheelchair backwards and then
pull the chair until the rear wheels mount the kerb. The front castors
should only be lowered to the ground when the wheelchair has been
pulled sufficiently away from the kerb.
5.3 Upward and Downward slopes
Always go straight up and down slopes to avoid the possibility of the
wheelchair overturning. Avoid steep slopes, which may cause instability.

Assembly and Operating Instructions Ver. 2 11/12 (2288)
8
GENERAL DESCRIPTION
The following diagram shows details of the wheelchair terminology used in this
manual.
VA168: Lightweight Sel Propelled Aluminium
Wheelchair

Assembly and Operating Instructions Ver. 2 11/12 (2288)
9
GENERAL DESCRIPTION ctd.
1. Backrest
There are two types of backrest fitted to the wheelchair, either fixed or
adjustable. The adjustable backrest can be folded down by means of a locking
mechanism fitted to both sides of the lower part of the backrest pillars. To fold
the backrest down, push on both of the black plastic levers, then pull back and
down on the top part of the backrest. To return to the original, reverse the
procedure, making sure the mechanisms are locked securely.
2. Handles
The handles are designed for the helper to propel the wheelchair. They must
not be used solely for lifting the wheelchair over obstructions or kerbs (see
negotiating obstacles)
3. Armrest
PVC pads are fixed onto the armrest for comfort and can be replaced as spare
parts.
4. Seat Upholstery
Periodically check the upholstery for signs of tears or sagging. Replace
immediately if the seat is damaged. Remember: the seat upholstery is the
primary weight – supporting material.
5. Footplates
The footplates are intended as a foot support only when you are sitting in the
wheelchair. On no account should you stand on the footplates. The heel loops
or calf straps (if fitted) can be used to secure the position of the feet. The
footplate assemblies can be adjusted in height by loosening the nut of the
base of the adjustment tube, positioning the plate at the required height and
tightening the nut to secure the assembly.
The footplate supports cannot be adjusted but are moveable from the
wheelchair. They can be swung away to the outside of the wheelchair. To carry
out this procedure, press the release lever and swing the support to the
outside of the wheelchair. If the support is to be removed, lift it upwards. To
re-fit and return to the original position, reverse the above procedure.
6. Castor and bearing
The front wheels have solid puncture proof tyres. These should be checked at
regular intervals to monitor any wear. Wheelchairs become difficult to steer
and propel when surfaces have worn flat. It is recommended that both front
tyres are replaced at the same time to avoid one side of the wheelchair from
being higher than the other.
The wheel is secured to the castor fork by an axle bolt and axle nut.
Periodically, this bolt and nut should be checked and tightened if necessary to


Assembly and Operating Instructions Ver. 2 11/12 (2288)
10
allow a snug but free spinning fit. The castor fork swivel allows the wheelchair
to be steered. An adjustment locknut is located under the castor cap. If the
locknut is too tight, the wheelchair will be difficult to steer.
7. Wheel lock assembly
These are used to hold the wheelchair in a stationary position, and are fitted
on either side of the wheelchair. They should not be used when the
wheelchair is moving or to slow it down. They should always be applied
together.
To operate, push the brake lever forward towards the front of the wheelchair.
This will immobilize the wheelchair. To release the brake, move the lever
towards the rear of the wheelchair.
8. Cross Bar
Operation of the cross brace permits the wheelchair to be opened and closed
easily. It should be inspected at regular intervals for signs of wear and
bending.
9. Folding Backrest Device
Push down the hinge to fold down the backrest. Automatically lock when pull
up the backrest handle. This device is to enhance the storage feature.
10. Quick Release Wheels
To aid transportation, the rear wheels can be removed by pushing the middle
section of the wheel and pulling to release. To refit, reverse the procedure.
Always make sure the wheels are fully connected before use.
11. Tyre pressure and in lation
For Wheelchairs that are fitted with pneumatic tyres they should be inflated
with a manual operated pump. Under no circumstances should a powered or
compressed air pump be used. The tyre pressure should be tailored for
optimum user comfort and ease of Wheelchair use. We recommend a tyre
pressure of 35psi (241KpA) for comfort. However, do not exceed the maximum
tyre pressure stated on the side wall of the tyre. This may differ slightly
between tyres, but is typically:
•65 psi (487 KpA) for 24” self-propel wheels
•40 psi (275 KpA) for 12½” transit wheels

Assembly and Operating Instructions Ver. 2 11/12 (2288)
11
ROUTINE CHECKS AND MAINTENANCE
1. Upholstery
Upholstery should be routinely cleaned with a mild soap and water solution.
Never use paint remover or thinners on upholstery.
2. Metal Parts
Clean all metal parts with a wax compound such as car wash to maintain
finish. Do not use any obtrusive cleanser that will scratch the finish on the
chair.
3. Cross Brace
Periodically lubricate the centre bolt on the cross brace with light machine oil.
4. Tyres and Wheels
Examine tyres regularly for wear and replace as necessary. olid tyres should
be replaced when they become loose on the rim or cracks appear which
expose the mounting wire groove. For pneumatic tyres, check tyre pressure is
even and correct. Check that the wheels run freely and that quick release axles
are correctly locked.
If your wheelchair is fitted with pneumatic tires and you have a puncture
please take your wheelchair to the nearest dealer or bicycle repair center
5. Castors
Check periodically that the bolt and nut securing the wheel to the castor fork
is tight and allows a snug but free spinning fit.
6. Brakes
Regularly check for effective operation and there is no wear or signs of play.
7. General
Always check before use that the wheelchair folds and unfolds correctly and
that movement both backwards and forwards is in a straight line.
8. Servicing
We recommend your wheelchair is fully serviced every twelve months. For
parts and service information please contact Aidapt Bathrooms Limited
(details on the back page).
Your Wheelchairs has been made from the finest materials and tested to
B EN 12183:1999 for your complete piece of mind and the expected service
life of your wheelchair is 5 years+.
6. Recycling o your Wheelchair
Once the wheelchair has reached its expected service life you can contact
Aidapt, which is a WEEE registered company, for disposal.

Assembly and Operating Instructions Ver. 2 11/12 (2288)
12
SPECIFICATIONS
Model VA168
Overall Height (un olded) (mm) 940
Net weight (kg) 15
Maximum User Weight (kg) 115
Maximum User Weight (stones) 18
Seat size (WxD) (mm) 460x400
Additional in ormation Quick release rear wheels
GUARANTEE
This product is warranted to be free of defects in materials and workmanship for a
period of 5 years on the frame and 12 months on all other parts.
The warranty is subject to the following conditions:
1. The purchaser shall complete the registration form below and send it to
Aidapt Ltd within 14 days of purchase of the product, together with a copy
of the sales invoice/receipt.
2. If any defect or fault is discovered, the supplier and/or Aidapt Ltd should
be notified immediately.
3. Aidapt Ltd will not be responsible for damage caused by misuse, natural
wear and tear, defective assembly or installation by the purchaser or their
agent, defective treatments, unauthorised alteration to the equipment or
use of unsuitable spares.
4. The purchases statutory rights under the Consumer Protection Act are not
affected.
Aidapt Bathrooms Ltd, Lancots Lane, Sutton Oak, St Helens, WA9 3EX
Telephone: +44 (0) 1744 745 020 • Fax: +44 (0) 1744 745 001 • Web: www.aidapt.co.uk

FR
Chaise roulante légère en aluminium
automotrice
VA168
Notice de montage et d'utilisation

Notice de montage et d'utilisation Ver. 2 11/12 (2288)
14
À LIRE AVANT UTILISATION
Avant l'utilisation de votre nouvelle chaise roulante, vous et toute personne qui pourrait vous aider dans
son utilisation devez prendre le temps de lire ce manuel et de suivre toutes les instructions.
INTRODUCTION
Merci d'avoir acheté chez Altai France votre chaise roulante. Ce modèle a été conçu pour vous aider à
renforcer votre indépendance et satisfaire vos e igences particulières. Une attention particulière a été
apportée lors du procédé de fabrication; les composants ont été sélectionnés selon leur qualité et des
inspections ont été effectuées afin d'assurer votre entière satisfaction concernant notre produit, dont la
conformité à la norme BS EN12183 2009.
TABLE DES MATIÈRES
Introduction et table des matières Page 14
Mesures de sécurité Page 15
Assemblage et utilisation Page 16-19
Description générale Page 20-22
Vérifications de routine et maintenance Page 23
Spécifications Page 24
Garantie Page 24
VEUILLEZ NOTER :
Votre chaise roulante présente un numéro d'identification unique. Celui-ci est situé sur le croisillon au-
dessous du siège et doit être utilisé dans toute correspondance.
Veuillez écrire votre numéro de série ici pour une réf future : …………………………………….
Le modèle VA168 peut être actionné par la personne assise sur la chaise roulante mais est aussi
caractérisé par des poignées pour le poussage assisté.
Le poids limite de l'utilisateur est de 115 kg; en aucune circonstance ce poids ne doit être excédé
Avant chaque utilisation, veuillez prendre le temps de vérifier votre chaise en cas de pièces déserrées.
Toute modification de ce produit sans la permission e presse de Altai France annulera votre garantie.

Notice de montage et d'utilisation Ver. 2 11/12 (2288)
15
MESURES DE SÉCURITÉ
Les recommandations suivantes visent une utilisation sécurisée de la chaise roulante.
NOTE: Ne pas assembler ou utiliser cette é uipement sans avoir au préalable lu et compris cette
notice d'utilisation.
Si vous ne comprenez pas les instructions, veuillez contacter Altai France, un professionnel de santé ou
un fournisseur avant d'installer cet équipement.
•Avant l'utilisation de ce produit, une attention particulière doit être accordée assurant que les
attaches sont sécurisées, que les roulettes/roues fonctionnent correctement, que la chaise
roulante est correctement équilibrée et que toutes les roues sont en contact avec le sol, tout
le temps de l'utilisation.
•Pour un fonctionnement sécurisé, il est important de se rappeler les points suivants:
i. Toujours observer les limites pour atteindre un objet, se pencher en arrière, le
basculement et l'utilisation des freins, des roues et les limites de poids. Ces points
sont traités sous la section Assemblage et utilisation.
ii. Les repose-pieds sont conçus uniquement pour soutenir les pieds dans la position
assise. NE PAS SE METTRE DEBOUT SUR LES REPOSE-PIEDS.
iii. NE PAS UTILISER LA CHAISE ROULANTE EN TANT QUE SIÈGE DE TRANSPORT DANS
UN VÉHICULE.
iv. Le revêtement répond au e igences d'inflammabilité du bulletin technique 117
du Bureau of Home Furnishings de Californie. Il est important de faire attention
lorsque utilisé à pro imité de flammes ou de cigarettes allumées.
v. AVERTISSEMENT : Les surfaces de votre chaise roulantes peuvent augmenter
lorsque la chaise roulante est e posée à des sources e ternes de chaleur (par
e emple, le soleil).
•Veuillez maintenant vous reporter à la section Assemblage et utilisation.

Notice de montage et d'utilisation Ver. 2 11/12 (2288)
16
ASSEMBLAGE
1. Tout d'abord, retirez du colis tout son contenu.
2. Pour ouvrir la chaise roulante, poussez les rails du siège et appuyez jusqu'à ce que la chaise
soit complètement dépliée en faisant attention de tenir vos doigts éloignés des parties en
mouvement (Fig. 1).
Note : Les rails doivent être engagés dans les attaches de support du cadre du siège avant de
s'asseoir.
Fig. 1

Notice de montage et d'utilisation Ver. 2 11/12 (2288)
17
3. Pour plier la chaise roulante, prenez le centre du tissu du siège sur les bords arrière et devant
(Fig. 2).
Fig. 2
Note : En ouvrant et fermant votre chaise roulante, veuillez garder vos doigts éloignés des zones de
piège.
La seule pièce de la chaise roulante qui peut être ajustée sont les repose-pieds. Idéalement, vos genou
doivent être positionnés à 90 degrés par rapport à votre siège. En cas de doute, veuillez contacter un
professionnel de santé ou le fournisseur local de votre chaise roulante.

Notice de montage et d'utilisation Ver. 2 11/12 (2288)
18
UTILISATION
AVERTISSEMENT : Le centre d'é uilibre est affecté par un changement de posture ou une distribution
du poids.
De nombreuses activités requièrent que l'utilisateur de la chaise roulante doive atteindre un objet, se
penche et se déplace depuis ou vers la chaise roulante. Ces mouvements amènent un changement de
l'équilibre normal, du centre de gravité et de la distribution du poids de la chaise roulante.
La conception de votre chaise roulante permet de la garder stable pour une utilisation normale
quotidienne si utilisée correctement conformément au recommandations de ce manuel.
1. Se pencher en a ant
Approchez la chaise roulante le plus possible de l'objet que vous voulez atteindre.
Positionnez les roulettes avant de façon à ce qu'elles soient étendues aussi loin que possible.
Engagez complètement les verrous des roues sur les roues arrière. Penchez-vous uniquement
pour atteindre ce qui est à portée de main en position assise normale. Les bras uniquement
doivent s'étendre au-delà du siège de la chaise roulante.
2. Se pencher en arrière
Approchez la chaise roulante le plus possible de l'objet que vous voulez atteindre. Penchez-
vous en arrière pour atteindre un objet seulement aussi loin que votre bras peut s'étendre
sans changer votre position assise. Ne vous penchez pas sur le dessus du revêtement arrière,
cela pouvant modifier votre centre de gravité et vous faire basculer.
3. Se pencher sur les côtés
Approchez la chaise roulante le plus possible de l'objet que vous voulez atteindre. Faîtes
pivoter les roulettes avant en ligne dans la direction que vous voulez atteindre. Engagez
complètement les verrous des roues sur les roues arrière. Ne déplacez pas votre poids ou
votre position assise vers l'objet que vous voulez atteindre, cela pouvant faire basculer la
chaise roulante.
4. Transfert
Avant d'essayer de vous déplacer depuis ou vers la chaise roulante, toutes les précautions
doivent être prises afin d'assurer que l'écart entre les deu sièges est aussi étroit que possible.
Assurez-vous que les verrous des roues sont activés afin d'empêcher la chaise de bouger.
Tourner les deu roulettes en direction du siège vers lequel vous voulez vous déplacer. Levez
les repose-pieds plier les supports sur le côté. Ne vous mettez pas debout sur les repose-
pieds. Il est impératif que la procédure de transfert soit supervisée par un professionnel de
santé certifié jusqu'à ce que le détenteur de la chaise roulante soit familier avec la procédure.

Notice de montage et d'utilisation Ver. 2 11/12 (2288)
1
5. Contourner des obstacles
5.1 À l'avant
La chaise roulante doit être inclinée par l'assistant jusqu'à ce que les roulettes
avant aient passé les bordures. Poussez la chaise roulante en avant jusqu'à ce que
les roues arrière touchent la bordure et abaissez les roulettes avant avec
précaution sur le trottoir. Poussez la chaise jusqu'à ce que les roues arrières aient
monté la bordure. La chaise roulante ne doit pas être soulevée par les seules
poignées.
5.2 À l'arrière
La chaise roulante doit être positionnée de manière à ce que les roues arrière
soient contre la bordure. L'assistant doit ensuite incliner la chaise roulante en
arrière puis tirer la chaise jusqu'à ce que les roues arrières montent la bordure. Les
roulettes avant doivent être abaissées sur le sol seulement lorsque la chaise
roulante est suffisamment éloignée de la bordure.
5.3 Descentes et montées
Dans les montées et les descentes, allez toujours tout droit afin d'éviter la
possibilité de renversement de la chaise roulante. Évitez les pentes raides pouvant
causer une instabilité.

Notice de montage et d'utilisation Ver. 2 11/12 (2288)
20
DESCRIPTION GÉNÉRALE
Le diagramme suivant présente en détail la terminologie de la chaise roulante utilisée dans ce manuel.
VA168 : Chaise roulante légère en aluminium automotrice
Table of contents
Languages:
Other aidapt Wheelchair manuals

aidapt
aidapt VA169 User manual

aidapt
aidapt VB502 User manual

aidapt
aidapt VA166 Programming manual

aidapt
aidapt Medina VR127 Manual

aidapt
aidapt VB540S Programming manual

aidapt
aidapt Lenham VR231 Manual

aidapt
aidapt VB499SAL Manual

aidapt
aidapt VA134S Manual

aidapt
aidapt VA165SILVER User manual

aidapt
aidapt VP179N Programming manual

aidapt
aidapt VA136SB Manual

aidapt
aidapt VG887K Programming manual

aidapt
aidapt VR130 Manual

aidapt
aidapt VA136ST Manual

aidapt
aidapt VB499 Manual

aidapt
aidapt VR166S Manual

aidapt
aidapt VA115 Manual

aidapt
aidapt VA126S Programming manual

aidapt
aidapt VA165SILVER User manual

aidapt
aidapt VA129C Programming manual