manuals.online logo
Brands
  1. Home
  2. •
  3. Brands
  4. •
  5. AIRFRAMES ALASKA
  6. •
  7. Tent
  8. •
  9. AIRFRAMES ALASKA ARCTIC OVEN GREAT NUNATAK User manual

AIRFRAMES ALASKA ARCTIC OVEN GREAT NUNATAK User manual

TENT BODY AND POLE SET UP
- Open the tent pole bag and put together the 2 center poles (each pole has 4 sections). All
sections are designed the same, with the exception of the bottom section. The bottom section of
the poles will come preassembled with an adjustable pole and rubber stabilizer foot. Once you
have the center poles assembled, slip rubber gaskets onto the top of the poles and set aside.
- Use the remaining pole pieces to assemble the ridge pole, and set aside.
- Unfold the tent body and lay it out flat on top of footprint accessory. (Footprint sold separately.)
- Stake down the four corners of the body and each side firmly. Stretch the corners as tight and as
square as possible. Properly staking out your tent is very important with tension tents, make sure
you have the correct stakes for the terrain and season you are camping in. We supply Heavy Duty
Tent Stakes, but ice screws or snow stakes may be used during frozen winter months.
- Put the two halo’s together. They will make two square pole configurations.
- Unzip the front door of the tent body to stand on the nylon floor.
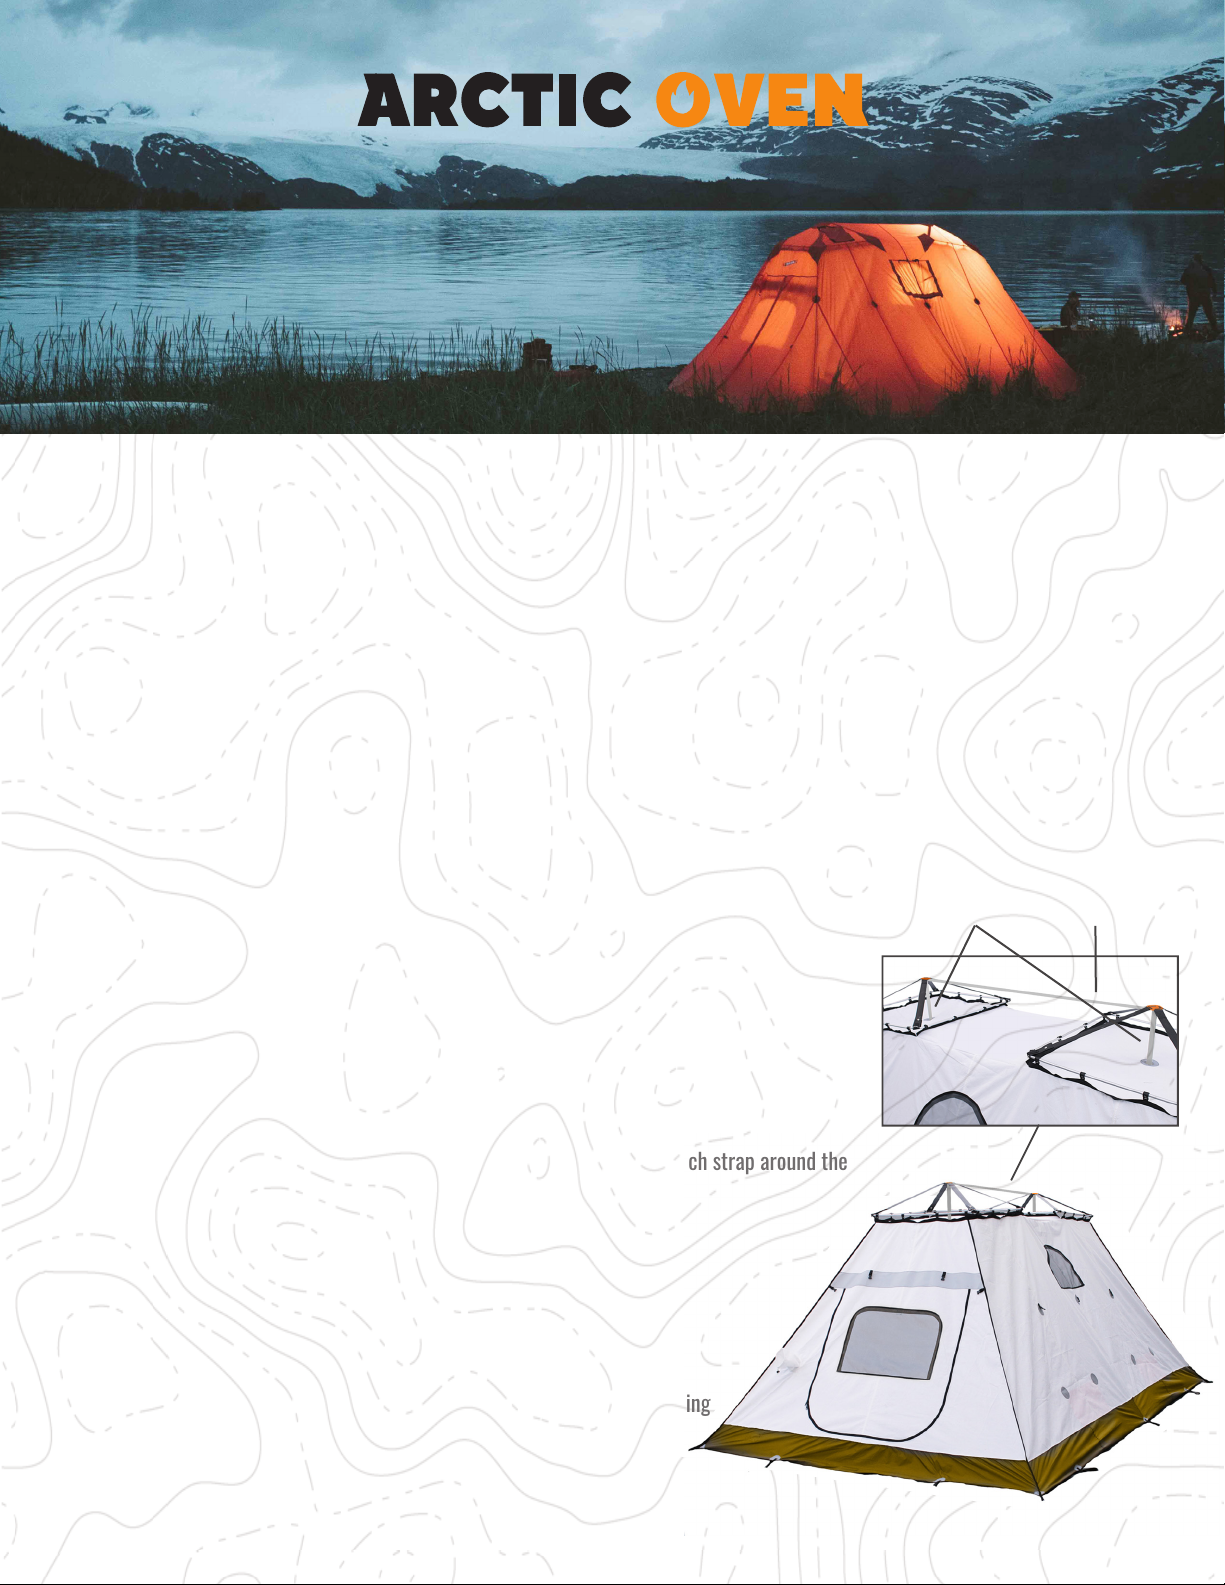
- Attach each spider’s four straps to the corners of the square halos. Wrap each strap around the
halo ring, connect Velcro and snap into corners of halo.
- Attach the square halo poles to the clips on top of the tent body.
- Install the ridge pole in between the two spiders as seen in the picture.
- Pull the tent fly over the tent body, straightening as needed. Make sure you
position the fly so the stove jack is over the stove opening on the tent body.
- Clip the fly into the Vapex body with provided buckles around the tent.
- Slide the main poles through the door openings and slip the orange spider tubing
into the center poles through the openings in the tent.
- Continue to lift up the tent until you can land the poles in the center of
reinforcements sewn into the floor and adjust the tension of the tent by
adjusting the leg in the bottom pole.
The Great Nunatak is the perfect base camp tent when traveling deep into the
backcountry. Boasting huge space for gear and sleeping capacity, the Nunatak
allows for big adventures in those hard-to-reach places. With the implementation
of aviation engineering and learnings from advanced field testing, we’ve created
the most versatile hot tent line on the market.
1Tent Fly
1Vapex Body
2Center Poles
1Ridge Pole
2Rubber Gaskets, Lift Kit
1Tent Pole Bag
2Spiders With Straps
2 Square Halo Frames
1Large Stu Sack
28 HD Tent Stakes
Tent Parts IncludedARCTIC OVEN GREAT NUNATAK
GREAT NUNATAK
Visual of tent after tent body and pole set up.
Halo, spider, and
ridge pole setup.
Ridge PoleCenter Poles
TENT FLY SET UP CONTINUED
- Once the tent has been set up you will need to adjust the fly on the frame of the tent.
- Evenly pull out the fly around the tent, and line up the top of the tent reinforced corners with halo corners.
- Stake out ALL of the loops on the bottom of the fly around the perimeter.
- Make sure the fly remains centered on the square halo rings as you stake it out.
- Line up the ventilation tubes at the front and rear of the tent. Leave the tubes open at all times, especially when using any
form of heat source inside the tent.
- Now you can attach your high wind tie-outs on all of the guy-out points around the tent. We recommend using our high-wind
tie-out package for a simple and reliable guy-out solution.
- When using a stove, unzip the ceiling of the tent body, roll back and clip the flap out of the way for the stove pipe installation.
BEFORE YOU INSTALL THE TENT FLY:
- If you are planning to use a stove inside of the tent, you will need to cut out the opening for the stove pipe on the silver
square material (silica) at the peak of the tent fly. There are “guide stitches” sewn in circles on the silica square that
correspond with common stove pipe sizes (See photo below).
- Remove the stove jack cover flap by peeling it from the Velcro.
- Determine how big the stove jack opening needs to be based on the size of your stove pipe.
- Fold the silica square in half and cut out the stove jack on the inside of the guide stitches sewn into the silica material.
KNOW BEFORE YOU GO
It is highly recommended that you set up your tent BEFORE going into the field to familiarize yourself with the instructions.
This tent model was designed to be set up by one person.
Stove Jack
Final tent setup.
[email protected] 907.331.4480 @arcticoven
Center Pole (x2) Ridge Pole
Halo (x2)
Spider (x2)

Popular Tent manuals by other brands

Palram Nancy 2050 manual

Palram

Palram Nancy 2050 manual

Reimo ADRIA ACTION AIR 391 manual

Reimo

Reimo ADRIA ACTION AIR 391 manual

Eureka Tundraline Assembling instructions

Eureka

Eureka Tundraline Assembling instructions

Dometic HUB operating manual

Dometic

Dometic HUB operating manual

Bunker Hill Security LITE owner's manual

Bunker Hill Security

Bunker Hill Security LITE owner's manual

Khyam Michigan Erection Instructions

Khyam

Khyam Michigan Erection Instructions

Coleman DURANGO 2000000143 installation manual

Coleman

Coleman DURANGO 2000000143 installation manual

Eureka OTC manual

Eureka

Eureka OTC manual

Coleman 2000007822 Setup instructions

Coleman

Coleman 2000007822 Setup instructions

E-Z UP INSTANT SHELTER owner's manual

E-Z UP

E-Z UP INSTANT SHELTER owner's manual

Skandika Nordland 6 Setup & maintenance

Skandika

Skandika Nordland 6 Setup & maintenance

Snow Peak Land Breeze Pro Air Duo product manual

Snow Peak

Snow Peak Land Breeze Pro Air Duo product manual

Alice's Garden KIOSK TRTPHOUSE250 manual

Alice's Garden

Alice's Garden KIOSK TRTPHOUSE250 manual

Boutique Camping ADVENTURE ATTACHING YOUR TENT PROTECTOR instruction manual

Boutique Camping

Boutique Camping ADVENTURE ATTACHING YOUR TENT PROTECTOR instruction manual

Palram Aquila 2050 manual

Palram

Palram Aquila 2050 manual

Ozark Trail W790S.3 Assembly instructions

Ozark Trail

Ozark Trail W790S.3 Assembly instructions

Dancover TentZing CT168300 manual

Dancover

Dancover TentZing CT168300 manual

Grand Canyon Parks 5 manual

Grand Canyon

Grand Canyon Parks 5 manual

manuals.online logo
manuals.online logoBrands
  • About & Mission
  • Contact us
  • Privacy Policy
  • Terms and Conditions

Copyright 2025 Manuals.Online. All Rights Reserved.