Airless DP6825 User manual

DP-airless Page1of22
Operating Instruction
Product model: DP6825,6830,6835 diaphragmpumpsprayer
DP6825 DP6830,6835
Pleasereadandkeep thismanual,Readcarefullybeforeattemptingtoassemble,install,operateormaintainthe
productdescribed. Protectyourselfandothersbyobservingallsafetyinformation. Failuretocomplywithinstructions
couldresult inpersonalinjuryand/orpropertydamage!Retaininstructionforfuturereference.

DP-airless Page2of22
Tableof Contents
Warnings...................................................................................................................3-5
Component Identification ..........................................................................................6-7
TechnicalData..............................................................................................................8
Operation......................................................................................................................9
Set up..........................................................................................................................10
Start up........................................................................................................................11
SPRAYINGTECHNIQUE............................................................................................. 12-13
Install Tip& GuardonSprayGun................................................................................13
TipSelection...........................................................................................................14-15
Cleanup..................................................................................................................16-18
Troubleshooting......................................................................................................19-21
Explodedview.........................................................................................................22
Appendices
Repair -Displacement pump

DP-airless Page3of22
Warnings
The followingwarningsareforthe setup, use,grounding,maintenance,and repairofthisequipment. Theexclamation
point symbol alertsyoutoageneral warning and the hazardsymbolsrefertoprocedure-specificrisks. When
thesesymbolsappearinthebodyofthismanual, referbacktotheseWarnings.Product-specifichazardsymbolsand
warningsnotcovered in thissectionmayappearthroughoutthebodyofthismanualwhereapplicable.
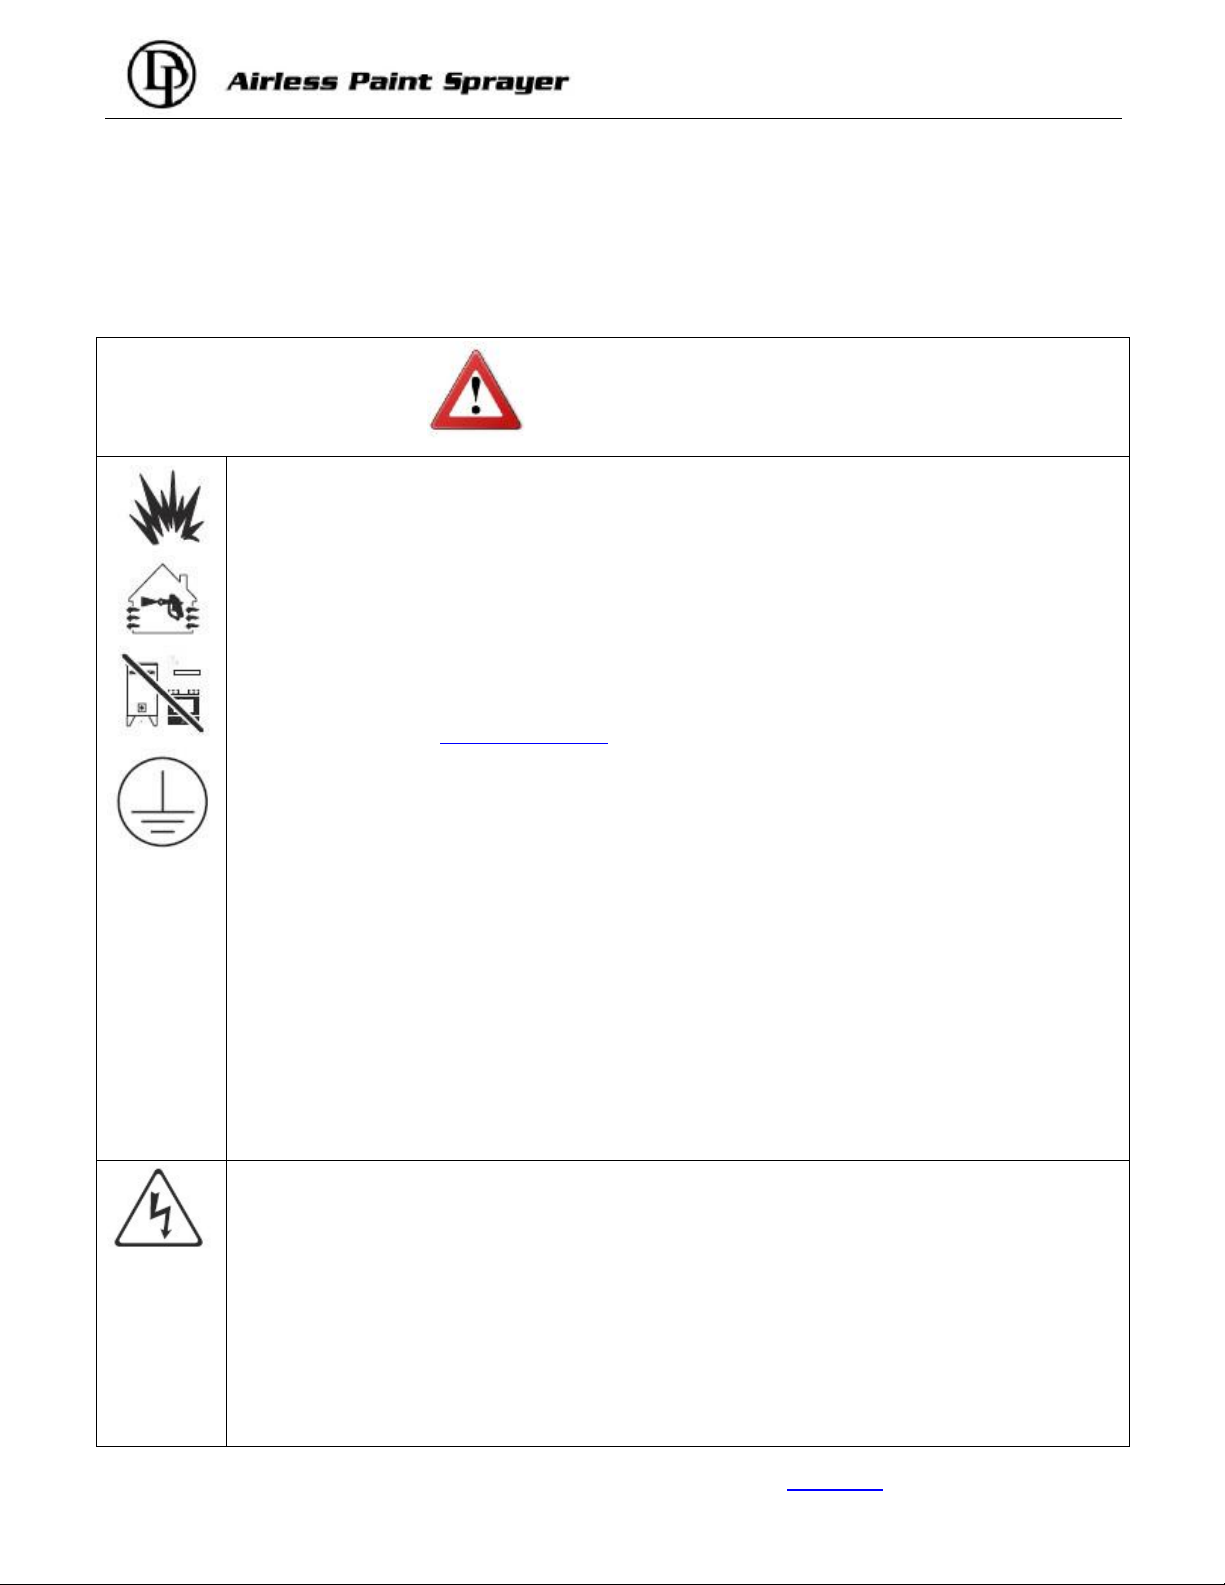
WARNING
FIREANDEXPLOSIONHAZARD
Flammable fumes,suchassolvent andpaintfumes,in workareacan igniteorexplode. Tohelpprevent
fireandexplosion:
Donotsprayflammableorcombustiblematerialsnearanopenflameorsourcesofignition suchas
cigarettes,motors,andelectricalequipment.
Paint orsolventflowingthroughtheequipmentisable toresultinstaticelectricity.Staticelectricity
createsarisk offireorexplosionin the presenceofpaintorsolvent fumes.Allpartsofthespray
system,includingthepump,hoseassembly,spraygun, andobjectsin andaround the sprayareashall
be properlygrounded toprotectagainststaticdischarge andsparks. UseDINO-POWERconductiveor
groundedhigh-pressure airless paintsprayer hoses.
Verifythat allcontainersand collectionsystemsaregroundedtoprevent staticdischarge.
Connecttoagroundedoutletand usegroundedextensionscords.Donotusea3-to-2adapter.
Donotuseapaintorasolvent containinghalogenatedhydrocarbons.
Keepsprayarea well-ventilated.Keep agoodsupplyoffreshairmovingthroughthearea.Keeppump
assemblyinawell ventilated area.Donotspraypumpassembly.
Donotsmokein the sprayarea.
Donotoperatelight switches, engines, orsimilarsparkproducing productsin the sprayarea.
Keepareaclean andfreeof paint orsolventcontainers,rags,andotherflammablematerials.
Knowthecontentsofthepaintsandsolventsbeing sprayed.Read all MaterialSafetyDataSheets
(MSDS) and containerlabelsprovidedwiththepaintsand solvents. Followthepaint andsolvents
manufacturersafetyinstructions.
Fireextinguisherequipment shallbe presentandworking
Sprayergeneratessparks. Whenflammable liquid isusedin ornearthesprayerorforflushingor
cleaning, keep sprayerat least 20feet(6m)awayfromexplosivevapors.
ELECTRICSHOCK HAZARD
Thisequipmentmust be grounded.Impropergrounding,setup, orusage of the systemcancauseelectric
shock.
Turnoff anddisconnectpowercordbeforeservicingequipment.
Useonlygrounded electricaloutlets.
Useonly3-wireextensioncords.
Ensureground prongsareintact on powerandextensioncords.
Donotexposetorain.Storeindoors.

DP-airless Page4of22
SKININJECTIONHAZARD
High-pressuresprayisable toinjecttoxinsintothebodyand causeseriousbodilyinjury.Intheevent that
injectionoccurs,get immediatesurgicaltreatment.
Donotaimthegun at,orsprayanypersonoranimal.
Keephandsand otherbodypartsawayfromthedischarge.Forexample, donottrytostop leaks with
anypartofthebody.
Always usethenozzletipguard. Donotspraywithout nozzle tipguardinplace.
UseDP-AIRLESSnozzle tips.
Usecaution whencleaning andchangingnozzletips. Inthecasewherethenozzle tipclogswhile
spraying, followthePressureRelief Procedureforturningoff theunitandrelieving the pressure
beforeremovingthenozzletip toclean.
Donotleavethe unitenergizedorunderpressurewhileunattended.Whentheunitisnotin use,turn
offtheunit andfollowthe PressureReliefProcedureforturning off theunit.
Check hosesandpartsforsignsof damage.Replaceanydamagedhosesorparts.
Always engagethetriggerlock whennotspraying. Verifythetriggerlockisfunctioning properly.
Verifythatallconnectionsaresecurebeforeoperatingtheunit.
Knowhowtostoptheunitandbleed pressurequickly. Bethoroughlyfamiliarwiththecontrols.
PRESSURIZEDALUMINUMPARTSHAZARD
Useoffluidsthatareincompatible withaluminuminpressurizedequipmentcan causeseriouschemical
reactionand equipment rupture. Failuretofollowthiswarning canresultindeath, seriousinjury,or
propertydamage.
Donotuse1,1,1-trichloroethane,methylenechloride,otherhalogenatedhydrocarbon solventsor
fluidscontainingsuchsolvents.
Manyotherfluidsmaycontainchemicalsthat canreactwithaluminum.Contact yourmaterialsupplier
forcompatibility.
EQUIPMENTMISUSEHAZARD
Misusecancausedeathorseriousinjury.
Always wearappropriategloves, eyeprotection,andarespiratorormaskwhenpainting.
Donotoperateorspraynearchildren.Keepchildrenawayfromequipment atalltimes.
Donotoverreachorstandon anunstable support. Keep effectivefootingand balanceatall times.
Stayalertandwatchwhatyou aredoing.
Donotleavethe unitenergizedorunderpressurewhileunattended.Whentheunit isnotin use,turn
offtheunit andfollowthe PressureReliefProcedureforturning off theunit.
Donotoperatetheunitwhenfatiguedorundertheinfluenceofdrugsoralcohol.
Donotkinkorover-bend thehose.
Donotexposethe hosetotemperaturesortopressuresinexcessofthosespecifiedbyus.
Donotusethe hoseasastrengthmembertopull orlifttheequipment.

DP-airless Page5of22
MOVINGPARTSHAZARD
Movingpartscanpinch,cut oramputatefingersandotherbodyparts.
Keepclearofmovingparts.
Donotoperateequipmentwithprotectiveguardsorcoversremoved.
Pressurized equipmentcan startwithoutwarning.Beforechecking, moving, orservicingequipment,
followthe PressureReliefProcedureanddisconnectallpowersources.
BURN HAZARD
Equipmentsurfacescanbecomeveryhotduringop
eration.Toavoidsevereburns,donottouch
hot qui hot
equipment. Waituntil equipmenthascooledcompletely.
TOXICFLUIDORFUMESHAZARD
Toxicfluidsorfumescan causeseriousinjuryordeathif splashedin the eyesoronskin,inhaled, or
swallowed.
Pleasepayattentiontoknowthe specifichazardsofthefluidsbeforespraying.
Storehazardousfluidin approved containers,and disposeofit accordingtoapplicableguidelines.
PERSONALPROTECTIVEEQUIPMENT
Youmust wearappropriateprotectiveequipment whenoperating, servicing, orwhenintheoperatingarea
oftheequipmenttohelpprotect youfromseriousinjury,includingeyeinjury, hearingloss, inhalation of
toxicfumes, andburns.Thisequipmentincludesbutisnot limited to:
Protectiveeyewear, andhearingprotection.
Respirators,protectiveclothing, andglovesasrecommendedbythe fluidandsolvent manufacturer.
MACHINEMAINTENANCE
Cleaningthemachine,partseverytimeafterfinished thepaintwork.
The hydraulicoilshould bechangedafter300hoursworks.
The diaphragmshould be changedaftereach400 hoursworks.
The screwsconnectingthefrontpumpand therearpumpshouldbetighteneddiagonally.
Pleasecheck everypartshavescrewonthe machine verytightlybeforeusingmachine.Especiallythe
suctiontubeandhighpressurehose.
Pleasenoticethattheinletvalve,outletvalve,diaphragm,areeasilybrokenparts,ifthe machinehas
worked manytimes, andthemachinehavesomeproblemaboutthepressure,suction,pleasechange
themfirst,thencheckagain.

DP-airless Page6of22
Component Identification
15(1)1310 311
1 HandleCarrymachine.
2 Pressuregage Easyforyoutoreadthepressureyou respraying.
3 Prime/Sprayvalve InPRIMEposition(pointing down)directsfluidtoprime
tube.
InSPRAYposition (pointingforward)directspressurized
fluidtopainthose.
Automatically relievessystempressureinoverpressure
situations.
4 Primetube Drainsfluidinsystemduringpriming and pressurerelief.
5 Suction tube Drawsfluidfrompaintpailintopump.(thetube mustbe
screwed tightly otherwiseairenterinside,sothepressure
can tbereached yourdesiredhighpressure.)
6 Suction filter Prevent the grainsinthefluidtobesuckedintothe pump.

DP-airless Page7of22
7 Motor Makethe powerformachine.
8 Oilcover Preventthe oil leaked out.(pleasechangethe46#
hydraulicoilinside after300 hoursusing)
9 On-off switch TurnssprayerON andOFF.
10 ** Outletvalve The valvecontrolthefluidgoing out of thepump
11 Pressureregulator Increases(clockwise)anddecreases(counter-clockwise)
fluidpressureinpump,hose, and spraygun.
12 HoseConnector Connectthehighpressurehosewithairless spraygun.
13 ** Inletvalve The valvecontrolthefluidsucking intothepump
14 Belt Toreducethe powerfromMotor,andsupplythe rightpower
tothemachine.
15(1)
**DiaphragmMovedbythepistoninside, and pumpout thefluid.
15 High pressurehose Transportshigh-pressurefluidfrompumptospraygun.
16 ** Tipguard/ Safetyguard Reducesriskof fluidinjectioninjury.
17 ** Sprayguntip •Atomizesfluidbeingsprayed,formsspraypatternand
controlsfluidflowaccordingtoholesize.
•Reverseunclogsplugged tipswithout disassembly.
18 Guntriggersafetylever/lock Preventsaccidentaltriggering ofspraygun.
(pleaselockthespraygunwhennotusing/repair/cleanetc)
19 Airless spraygun Dispensesfluid.
20 Gunfluidinletfitting Threadedconnection forpaint hose.
(thepartsmarkedwith** areeasilywornparts.)

DP-airless Page8of22
TechnicalData
Modelnumber. DP6825 DP6830 DP6835
Type Electric&diaphragm
Electric&diaphragm
Electric&diaphragm
Pressurecontrolling Mechanical Mechanical Mechanical
Power1100w 1500w 1500w
Max.pressure(bar) 250bar/3630psi 250bar/3630psi 250bar/3630psi
Max.delivery(L/min) 2.5L/min 3.0L/min 3.5L/min
Max.tipsize(inch) 0.021”0.025”*1or0.015"*2
0.029”*1or0.017"*2
Max.hoselength (m) 60m 60m 90m
Hoseoperating
pressure 250bar/3630psi 250bar/3630psi 250bar/3630psi
Hoseexploded
pressure 800bar/11620psi 800bar/11620psi 800bar/11620psi
ElectricMotor Inductionmotor
(brushless) Induction motor
(brushless) Inductionmotor
(brushless)
Motorspeed(rpm) 2880 rpm 2880rpm 2880 rpm
Spraying distance (cm)
40-50cm 40 -50cm 40-50cm
Paint viscosityMedium(less than
120s) MediumtohighMediumtohigh
bothwater-based&
oil-based? YesYesYes
Netweight 31.50KGS 44KGS 47KGS
Grossweight 33.50KGS 46KGS 50KGS
Cartonsize 51x33.5x56 cm 64x56x75cm 64x56x75 cm
Contentsinpackage Airlesspaintsprayer
,
airless spraygunwith
517tip,1/4*15mhose,
repairkit, manual.
Airless paintsprayer,
one airless spraygun
with525 tip,one
1/4*15mhose,45cm
extensionpole,repair
kit, manual.
Airless paintsprayer, two
airless sprayguns(529
tips), two 1/4*15mhoses,
two 45cmextension
poles,repairkit,manual.
(Thestandardpackagedoesn tincludealltheeasilywornparts,buthasdiaphragminside.Inletvalve/ Outletvalve
/extension poleareavailableifyou payextracost)

DP-airless Page9of22
Operation
TriggerLock
Alwaysengage thetriggerlock whenyoustopspraying
toprevent the gunfrombeing triggeredaccidentallyby
handorifdroppedorbumped.
PressureRelief Procedure
Followthis PressureReliefProcedure wheneveryou
stopsprayingandbeforecleaning,checking, servicing,
ortransporting equipment.
1.TurnpowerswitchOFFandunplug
powercord.
2.TurnPrime/SprayvalvetoPRIME
torelievepressure.
3.Holdgunfirmlytosideofpail.
Triggerthegun torelieve
pressure.
4. Engagetriggerlock.
NOTE: LeavePrime/SprayvalveinthePRIMEposition
untilyouarereadytosprayagain.
If yoususpectthespraytiporhoseisclogged orthat
pressurehasnot beenfullyrelieved afterfollowingthe
stepsabove,VERYSLOWLYloosen tipguardretaining
nut orhoseendcouplingtorelievepressuregradually,
thenloosencompletely. Clearhoseortipobstruction.
ReadUncloggingSprayTipinstructionsinthe Sprayer
orGunOperationmanual.

DP
-
airless
Page
10
of
22
Setup
1.Preparethepaint accordingtothe
manufacturer srecommendations
Thisisprobablyoneofthe mostimportantsteps
towardtrouble-freespraying!
Removeanyskinthatmayhaveformed on the
top ofthe paint.Ifnecessary,thinthe paint.
Finally, strainthe paint throughafinenylon mesh
filterbag(availableatmostpaintdealers)to
removeparticlesthatcouldclog thespraytip
2. Unscrewtipandguard
assemblyfromgun.
3. Uncoilhoseand
connectoneend
togun.Usetwo
wrenchestotighten
securelyandtightly.
4. Connect otherendofhosetosprayer.
5.Check thehydraulicoil level.Unscrewthe
cover7#, Theoilshouldbe 10mm fromthe top ofthe
plate.If the oilislow,fillasnecessarylowviscosity
hydraulic oil (#46hydraulicanti-wearingoil);
Installbackthe7# cover.[DP6825/6830/
6835:1.0L(10mm distancetothetop level)]
6.ChecktheelectricalserviceBesurethe
electricaloutletisproperlygrounded.Youcanuse
up to100 foot(30m)of3wire,extensioncord.
Longerextension cordsmayaffectthe sprayer
performance.Usemoresprayhose,notlonger
extensioncords
7. Pluginthesprayer. FirstbesuretheON/OFF
switchisOFF andthepressurecontrolvalveis
turned
fully
counterclockwise.Plugthe
sprayer
intoa
grounded outletthatisatleast3mawayfromthe
sprayareatoreducethechanceofasparkigniting,
sprayvaporsordustparticles.
Pressureregulatorvalve
Clockwise:stronger/ Higherpressure
Counterclockwise:weaker/Lowerpressure
(ForitemDP6825/ DP6825B/DP6830/ DP6835)

DP-airless Page11of22
Startup
1. Firstbe suretheON/OFF switchisOFF.
2. AdjustPressureRegulatorValve9#counter
clockwisetolowestpressure.
3. Placethesuctionhose3#intothe coating
barrel.
4. PullupthePrimeSprayValve2#into A:
Primeposition.(see picturebelow)
5. Placethe suctionhose3#
intothecoatingbarrel.
6. Plugsprayerinagrounded
cablesocket.
7. SwitchON the machine。
8. TurnthePressureRegulator
Valve9# clockwise,till thefluidis circulating
intheprimetube(4#)
9. TurnpowerswitchOFF.
10.Transfersuctiontube topaintpail and
submergesuctiontube
inpaint.
11.TurnpowerswitchON.
12. When you seepaintcomingoutofprime
tube:
(1). Point gun intowastepail.
(2). Unlockguntriggerlock.
(3). Pullandholdguntrigger.
(4). TurnPrime/Sprayvalveto B:SPRAY
position.
13. Continue totriggergun intowastepailuntil
youseeonly paintcomingout ofgun.
14. Releasetrigger. Engage triggerlock.
15. Transferprimetube topaintpailandclip
primetube tosuctiontube.

DP-airless Page12of22
SPRAYING
SPRAYING TECHNIQUE
1. Thekeytoagoodpaintjobisan even coatingovertheentiresurface.Withspraypainting,thisis
donebyusingevenstrokes,withyourarmmovingataconstantspeedandkeeping the sprayguna
constantdistancefromthesurface.
2. Asmuchaspossible,keep thespraygun atrightanglestothesurface.Thismeansmovingyour
entirearmbackandforthratherthanjust flexing yourwrist.
30cm
3. Keepthespraygunperpendiculartothesurface,otherwiseone endofthepatternwillbe thicker
thantheother.Rightwaytospray
Approximately
10 to12 Inches
Rightway
Wrong
4. Inmostcases,the best sprayingdistance is10 to12inches(25-30cm)betweenthespraytipand
thesurface.
5. The spraygunshouldbetriggered off at the end ofeachstrokeandonagainatthebeginning ofthe
next. Thisavoidspaint buildupattheendofthestrokewhichmayresultinrunsand sags.Triggering
atthe endof the strokealsosavespaint and resultsinabetterlookingjob. (Seepicturebelow)
ApproximateWork
10 to 12 Inches
Even Steady
Stroke
StartstrokeEnd stroke
6. The
correct speed
for
moving
the gunwill allowafull,wetcoating tobe
appliedwithoutrunsorsags.
Lapping
eachstrokeabout40%overthe
previous
stroke
produces
uniformpaintthickness.Sprayinginauniform
patternalternatelyfromrighttoleft andthenlefttoright, providesa
professionalfinish.(See pictureonthe right)
Onewaytodothisistopointthespraytipattheedgeofthe laststroke
beforetriggeringthe gunon.

DP-airless Page13of22
7. Whentakingashortbreakfrompainting(upto1hr.),lockthesprayguntriggerOFF,reducepressure
toitsminimum(zero)setting and setthe unitto A: Primeposition.Turnsprayeroff andunplug.
RefertoPressureReliefProcedure.
8. Forinteriorcorners,suchason abookcaseorinsideacabinet,
aimtheguntowardthe centerofthecornertospray. Bydividingthe
spraypatternthisway, theedgesonbothsidesaresprayedevenly.
Install Tip&GuardonSprayGun
1. Engagetriggerlock.
2. Verifytipandguardpartsareassembled in
ordershown.
3. Usetiptoalign seat Tip mustbepushedin
guardallthewayintoguard
4. Screwtipandguardassemblyon
gun.Tightenretainingnut.
gasket
guard
tip

DP-airless Page14of22
TipSelection
SelectingTipHoleSize
Tipscomeinavarietyofholesizesforspraying a
rangeoffluids.Yoursprayerincludesan 0.017 in
(0.43mm)tipormaybe0.019”(0.48mm)foruse
inmost sprayingapplications.
Usethe following
tabletodeterminetherange ofrecommendedtip
holesizesforeachfluidtype. If youneed atip
otherthan theone supplied,seethe Reversible
TipSelectionChart
HINTS:
•Asyou spray,the tipwearsandenlarges.
Starting withatipholesizesmallerthanthe
maximumwillallowyou tospraywithinthe rated
flowcapacityof thesprayer.
•Maximumtipholesizessupported bythe
sprayer:
–DP6825: 0.021inch.
–DP6830 : 0.025 inch.
–DP6835 : 0.029 inch(onegun)
0.017inch(twoguns)
ChoosingtheCorrect Tip
Considercoating andsurfacetobe sprayed.
Makesureyouusebest tipholesizeforthat
coatingandbest fanwidthforthatsurface.
TipHoleSize
Tipholesizecontrolsflowrate-theamount of
paint that comesout ofthe gun.
HINTS:
•Uselargertipholesizeswiththickercoatings
andsmallertipholesizeswiththinnercoatings.
•Maximumtipholesizessupportedbysprayer:
–DP6825 :0.021 inch.
–DP6830 : 0.025inch.
–DP6835 : 0.029inch(one gun)
0.017 inch(twoguns)
•Tipswearwithuseand needperiodic
replacement.
FanWidth
Fan widthisthe sizeof thespraypattern, which
determinesthearea covered witheachstroke.
Narrowerfansdeliverathickercoat, andwider
fansdeliverathinnercoat.
HINTS:
•Select afanwidthbest suitedtothe surface
being sprayed.
•Widerfansallowprovidebettercoverage on
broad,open surfaces.
•Narrowerfansprovidebettercontrolonsmall,
confinedsurfaces.
CoatingsTipHoleSize Stains Enamels Primers
InteriorPaintsExteriorPaints
0.015in.(0.38mm) PPPP
0.017in.(0.43mm) PPP
0.019in.(0.48mm) PPP
0.021in.(0.53mm) P
0.023in.(0.58mm) P
0.025in.(0.63mm) P

DP-airless Page15of22
Understanding TipNumber
Thelastthreedigitsoftipnumbercontaininformationaboutholesizeand fanwidthon surfacewhengun is
held12 in. (30.5cm)fromsurfacebeingsprayed.
Lasttwodigits=tipholesizeinthousandsofaninch
ReversibleTipSelectionChart
FanWidth-Inches
OrificeSize
(inches) 4–6
Fan 6–8
Fan 8–10
Fan 10 –12
Fan 12 –14
Fan
FlowRate(gpm)
Application
.011 211 311 411 0.12
.013 213 313 413 513 613 0.16
StainorLacquer
.015 215 315 415 515 615 0.22 Oil BasePaint
.017 217 317 417 517 617 0.25
.019 219 319 419 519 619 0.33
.021 321 421 521 621 0.41
LatexPaint
/Acrylic/Enamel.
.023 523 623 0.49
.025 525 625 0.57
Heavy Latex
Importantthingsto knowabouttipwear
It'simportanttoreplacea tipwhen itbecomesworn,this ensuresyou''ll havea precisespraypattern,
maximumproductivityand a qualityfinish.Whentipwears,the hole(orifice)sizeincreasesandspray
patternwidthdecreases.
Tiplifevariesbycoating,Extendtiplifebyspraying atthe lowest
pressurethatbreaksup(atomizes)the coatingintoacomplete
spraypattern.
Recommend tipreplacement
Latex: After4000~5000㎡

DP-airless Page16of22
CLEANUP
Aswithallsprayequipment, yoursprayermust becleanedproperlyorit will not operateproperly.
Clogged valvesandfiltersarethemostcommon causesofproblems.If followed,theseguidelineswill
insuretroublefree performancefromyoursprayer.
1. Lockthegunandreducethepressure.Turn
the sprayertoprimeAandshutitoff. Unplug
sprayer.Leavethesuction set inthepaint. Refer
topressurerelief procedure
2. Removesuctiontube frompaintand holdit
aboveabucketofwaterorsolvent. Leavethe
returntubeaimedintothe paint bucket.
3. SetPRESSURECONTROLKNOB counter
clockwisebacktominimumpressure.Trigger
gun torelievepressureandlockgun.
4. IncreasePRESSURECONTROLKNOB
clockwisetoabout1/3to1/2maximumpressure.
Thiswilldrawthe remaining paintinthesuction
tubethrough the pumpand downthereturntube
intothepaintbucket.
5. Placesuctiontube andreturntubein
containerof waterorcompatiblesolvent.
6. Removespraytipandguard,washer,andlet
soakinwarmwaterorappropriatesolvent.
7. Increasepressuretoabout1/2maximum
pressureandletcirculatefor2-3minutestoflush
paintoutofthe pump,suctiontubeandreturn
tube.
8. Tosavepaint left inthehose,carefully trigger
the gun (withspraytipremoved)againstthe
insideofthepaintcontainer.Reduce
PRESSURECONTROLKNOBtozero,then
turnPRIMINGKNOBtoSPRAYB
Save PaintBackTo PaintCan
9. .IncreasePRESSURECONTROLKNOBagain
untilpaintstartstoflowintothebucket. Assoon
asthe waterorsolventstartstocomeintothe
bucket, releasethe trigger.
10. Changetoclean waterorsolventand
continuecirculatingforanother5minutesto
thoroughlycleanthehose,pumpand spraygun.
11. ReducepressureandturntoprimeA..
Triggergun. Lockgun andshutsprayeroff.
12.Removespraygunfrompainthose,using
twoadjustablewrenches.Removefilter
housingfromgun.Placegunand filterassembly
intoacontainerofwaterorsolventtosoak.
Coverpaintcontainerandset itaside.
13.Cleanspraytipandgun filterwithasoft brush.
Reassemblespraytipincleaning position.
(Arrowpointstobackofthegun.)

DP-airless Page17of22
14. Attachpainthosetogun,tighten withtwo
wrenches
15.Turntheunitonand unlockguntrigger. Turn
toSprayBandpointguntoside ofcleaning
bucket.
16.Triggergun andgradually turn pressureknob
clock- wise to1/2pressure.Continue for
approximately 30seconds
17..Releaseandlocktrigger,reducepressure,
turntoprimeA. Turnunitoff.
18. Removetipassembly.Raisethesuction set
abovethecleaningsolution.Turnuniton,turn
tosprayincreasepressureandallowsuction
tubetorun dry.
19. Removelargesuction tubefrominletvalve,
Seeandpointgunintocleaningbucket,
Reducepressureabout1/2,unlockguntrigger
gun untilhoseispumpeddry.
20. Lockgun,reducepressureandturn
Prime/SprayKnob toprimeA
21. Layunitbackonhandlesoinletvalveis
facingupward.Cleanthreadsofinletvalve
withadampcloth.Fillinletvalvewithlight
householdoil.Slowlyincreasepressureto
distributethe oilthroughthepump.Turn
Prime/SprayKnobfromprimeAtosprayBto
distributeoil.Replacelarge suctiontubetoinlet
valve.
22. TurnPrime/SprayKnobtoprimeA,
reducepres-sure,shutsprayeroff. Unplug
sprayer.RefertoPressureRelief.
23. Removeandcleansuctionsetfilterinclean
waterorsolventwithsoftbrush.Reassemble.
24. Wipe entireunit, hoseand gun withadamp
clothtoremoveaccumulated paint.
CLEANING VALVES
Followtheseprocedureswhen encountering
problemsindicated inthetroubleshooting
section.
Removing andCleaningInletValve
1. Besuresprayerisoff.
2. Usinga27 millimetersocketorboxend
wrench, removetheinletvalveassembly.

DP-airless Page18of22
Remove
Inlet Valve
3. Testmovementofthevalvebypushingonit
fromthe open end ofthe valvehousingwiththe
eraserend ofapencilorascrewdriver.Itshould
moveabout1/16inch.If itdoesn'tmove,itis
probably full ofdrypaintorotherdebrisand
shouldbe cleanedorreplaced.
4. Thoroughlyclean the valveassemblywith
solvent andbrush
5. Aproperly seated valvefilledwithwaterand
heldvertically willnotdripoutthebottomofthe
valve.Ifyouhaveproperly cleanedthe valve
and waterdripsoutthebottom,thevalveisworn
and needstobereplaced
6. Install cleanedornewvalveinthepumpblock
and then fillthevalvewithlight oilorsolvent.
7. Ifnoneoftheabovestepswork,see
Troubleshooting.
Cleaningand Servicing Outlet Valve
It maybeoccasionally necessaryto remove and
clean theoutletvalveorreplacenormalwear
partsinsidethevalve.
Outletvalve
Ifpossible,leavethecopperwasherunderthe
capinplace.Atleastbesuretoreplaceitwith
the samesideup.(Thetopwillshowtheimprintof
theendcap,whilethebottomshouldbeperfectly
flat tomatchseatinthepumpcasting.)See Paint
PumpAssembly。
MachineMainterance
Cleaningthemachine,partseverytimeafterfinished thepaint work.
Replacethe46# hydraulic oilinsidethe rearpumpbodyafter300hoursofworkto
reduceequipment wear.
The diaphragmshouldbe changedaftereach400 hoursworks.
The screwsconnectingthefrontpumpand therearpumpshouldbetighteneddiagonally.
Pleasecheck everypartshavescrewonthe machineverytightlybeforeusingmachine.Especiallythesuction tube
andhighpressurehose.
Pleasenoticethattheinletvalve,outletvalve,diaphragm,areeasilybrokenparts,ifthemachine hasworkedmany
times,andthemachinehavesomeproblemaboutthepressure,suction, pleasecheck themfirst,thencheckagain
Cleanthemotorcoolingfanprotectionguardandthefinned motorcasingperiodicallytoensurethemaximum
cooling.

DP-airless Page19of22
.Troubleshooting
Problem Cause Solution
Pressureissetatzero
pressure. Turnpressurecontrolknobclockwise
toincreasepressuresetting.
Motororcontrolisdamaged. Pleasecontactwithyoursupplieror
Ningbo Dino-powerMachineryCo.,ltd
directly.
Electricoutlet isnot providing
power.
•Tryadifferent outlet orplug in
somethingthat you knowisworking
totestoutlet.
•Reset buildingcircuitbreakeror
replacefuse.
Extension cordisdamaged. Replaceextensioncord.
Sprayerelectric cordis
damaged. Checkforbrokeninsulation orwires.
Replaceelectric cordif damaged.
Powerswitchisonand
sprayerisplugged in, but
motordoesnotrun,and
pumpdoesnotcycle.
Paint and/orwaterisfrozen or
hardenedinpump. Unplug sprayerfromoutlet. If frozen
do NOTtrytostartsprayeruntilitis
completely thawedoryoumay
damagethemotor,controlboard
and/ordrivetrain.
MakesurepowerswitchisOFF.
Placesprayerinawarmareafor
severalhours. Then pluginpower
cordandturn sprayerON. Slowly
increasepressuresettingtoseeif
motorwill start.
If paint ishardened insprayer,pump
packings,valves,drivetrainor
pressureswitchmayneedtobe
replaced.Pleasecontact withyour
supplierorcontact withusdirectly.

DP-airless Page20of22
Problem Cause Solution
Unitwillnotprimeorhaslost
prime ReprimeUnit
Nopaint. Suctiontube not
totally immersedinpaint Immersesuctiontubeinpaint
Suctionset filterclogged. Cleanfilter.
Hopperscreenclogged Cleanscreen.
Suctiontubelooseat inletvalve
Cleanconnectionandtighten
Inletvalvestuck Cleaninletvalve
Outletvalvestuck. Cleanoutletvalve
Replaceanywornparts.
Sprayerstartsupbutdoes
not drawinpaint.
Inletvalvewornordamaged. Cleanorreplace
Pumpis not primed. Primepump.
Inlet screenisclogged . Cleandebrisoff inlet screen and
makesuresuction tubeisimmersed
influid.
Suctiontubeisnot immersed in
paint. Makesuresuction tubeisimmersed
inpaint.
Suctiontubeisleaking. Tightensuction tubeconnection.
Inspect forcracksorvacuumleaks. If
cracked ordamaged,replacesuction
tube.
Prime/SprayValveiswornor
obstructedwithdebris. Cl
eanthevalveorreplaceanewone.
Pumpcyclesbutdoesnot
builduppressure.
Pumpcheckballisstuck. Removeoutletfitting andcleanoutlet
checkball.
Pressureissettoolow. SlowlyturnPressureControlKnob
clockwisetoincreasepressure
settingwhichwillturnmotoronto
buildpressure.
Spraytipis clogged. Unclogspraytip
Fluidfilterisclogged. Cleanorreplacefluidfilter
Spraygun fluidfilterisclogged.
Cleanorreplacegunfluidfilter,
Pumpcycles,butpaint only
dribblesorspurtswhen
spraygun istriggered.
Spraytipis toolarge orworn. Replacetip.
This manual suits for next models
1
Table of contents
Other Airless Paint Sprayer manuals
Popular Paint Sprayer manuals by other brands

Graco
Graco 226-185 Instructions-parts list

DeVilbiss
DeVilbiss JGA-510 Service bulletin

Herth+Buss
Herth+Buss ELPARTS AirClean Operating instruction

Larson Electronics
Larson Electronics IND-MD-DF-ESF-R2-SP0017 instruction manual

Campbell Hausfeld
Campbell Hausfeld HV2100 Operating instructions and parts manual

HARDI-EVRARD
HARDI-EVRARD ALPHA PLUS 3500 Operating and maintenance manual