manuals.online logo
Brands
  1. Home
  2. •
  3. Brands
  4. •
  5. AirLive
  6. •
  7. Network Router
  8. •
  9. AirLive N450R User manual

AirLive N450R User manual

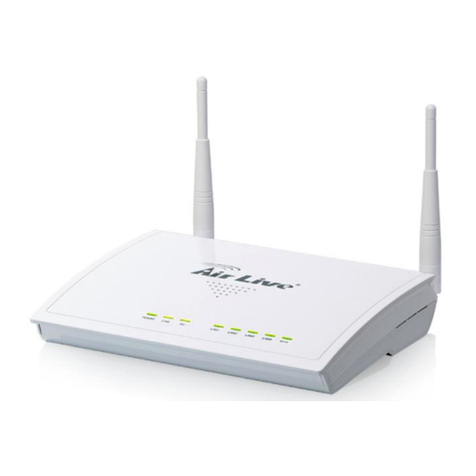
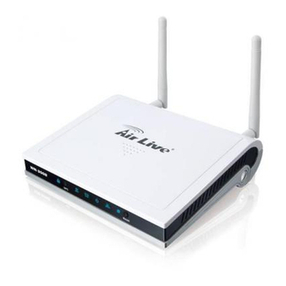
AirLive N450R
3T3R Wireless-N Dual Band Gigabit Router
Quick Setup Guide
Declaration of Conformity
We, Manufacturer/Importer
Declare that the product
3T3R Wireless-N Dual Band Gigabit Router
AirLive N450R
is in conformity with
the ErP Directive 2009/125/EC.Energy-Related Products Directive 2009/125/EC
(recasts and supersedes 2005/32/EC), the R&TTE Directive of 99/5/EC,
the Council Directive of 2004/108/EC, Low Voltage Directive of 2006/95/EC .
Clause
Manufacturer/Importer
Description
OvisLink Corp.
5F, No.6, Lane 130, Min-Chuan Rd., Hsin-Tien Dist.,
New Taipei City 231, Taiwan
■
■CE marking
Signature:
Name:Albert Yeh
Position/ Title : Vice President
Place : Republic of China (Taiwan) Date:2011/10/13
EN 301 893 V1.5.1:2008 Broadband Radio Access Network(BRAN); 5GHz high performance RLAN;
Harmonized EN Covering essential requirements of Article 3.2 of the
R&TTE Directive.
■EN 300 328 V1.7.1:2006 Electromagnetic compatibility and Radio spectrum matters (ERM);
Wideband transmission equipment operating in the 2.4GHz ISM band And
using spread spectrum modulation techniques; Part 1: technical
Characteristics and test conditions Part2:Harmonized EN covering
Essential requirements under article 3.2 of the R&TTE Directive
■EN 301 489-1 V1.8.1:2008 Electromagnetic compatibility and Radio spectrum Matters (ERM);
■EN 301 489-17 V2.1.1:2009 Electromagnetic compatibility(EMC) standard for radio equipment And
services; Part 17:Specific conditions for Wideband data and HIPERLAN
equipment
■EN 62311:2008 Assessment of electronic and electrical equipment related to human )
exposure restrictions for electromagnetic fields (0 Hz ~ 300 GHz)
■ErP COMMISSION REGULATION (EC) No 1275/2008 of 17 December 2008
■EN 60950-1:2006+ A11:2009+
A1:2010 , IEC 60950-1:2005+A1
Safety for information technology equipment including electrical Business
equipment
Regulatory Approvals
FCC Statement
This equipment has been tested and found to comply with the limits for a Class B
digital device pursuant to Part 15 of the FCC Rules. These limits are designed to
provide reasonable protection against harmful interferences when the equipment is
operating in a commercial area. This equipment generates, uses and may radiate radio
frequency energy, and if not installed in accordance with the user guide, may cause
interference in the transmission of radio communications. If operating in a residential
area, it is probable this equipment will cause harmful interference, in which case the
user will be required to try to correct this interference using his own means.
CE Marking Warning
This is a Class B product. In a domestic environment this product may cause radio
interference in which case the user may be required to take adequate measures.
CE Statement
This product complies with the 99/5/EEC directives, including the following safety and
EMC standards:
EN 301 893 V1.5.1:2008
■
Broadband Radio Access Network(BRAN); 5GHz high performance RLAN;
Harmonized EN Covering essential requirements of Article 3.2 of the R&TTE
Directive.
EN 301 489-1 V1.8.1:2008
■
Electromagnetic compatibility and Radio spectrum Matters (ERM);
EN 301 489-17 V2.1.1:2009
■
Electromagnetic compatibility(EMC) standard for radio equipment And services; Part
17:Specific conditions for Wideband data and HIPERLAN equipment
EN 62311:2008
■
Assessment of electronic and electrical equipment related to human ) exposure
restrictions for electromagnetic fields (0 Hz ~ 300 GHz)
EN 60950-1:2006+ A11:2009+ A1:2010 , IEC 60950-1:2005+A1
■
Safety for information technology equipment including electrical Business equipment
ErP
■
COMMISSION REGULATION (EC) No 1275/2008 of 17 December 2008
EN 300 328 V1.7.1:2006
■
Electromagnetic compatibility and Radio spectrum matters (ERM); Wideband
transmission equipment operating in the 2.4GHz ISM band And using spread
spectrum modulation techniques; Part 1: technical Characteristics and test
conditions Part2:Harmonized EN covering Essential requirements under article
3.2 of the R&TTE Directive
HR
OvisLink Corp. izjavljuje da je ovaj uređaj u
skladu sa neophodnimpreporukama i ostalim
važnim odredbama Directive 1999/5/EC.
RO
OvisLink Corporation declara ca acest
dispozitiv este în conformitate cu cerintele
esentiale si alte prevederi relevante ale
Directivei 1999/5/EC
ID
OvisLink Corporation menyatakan bahwa
perangkat ini telah sesuai dengan persyaratan
utama dan ketentuan terkait lainnya direktif
1999/5/EC.
Directive 1999 / 5 / EC
This equipment may be used in AT, BE, CY, CZ, DK, EE, FI, FR, DE, GR, HR, HU, ID, IE, IT,
LV, LT, LU, MT, NL, PL, PT, SK, SI, ES, SE, GB, IS, LI, NO, CH, BG, RO, TR
Tested To Comply
With FCC Standards.
FOR HOME OR OFFICE USE
OvisLink Corporation declares that this device is in
compliance with the essential requirements and
other relevant provisions of directive 1999/5/EC.
P1
Quick Setup Guide
Česky
CZ
Default Settings:
Login Web Management to Configure N450R
IP: 192.168.1.254
Subnet mask: 255.255.255.0
Username: admin
Password: airlive
Default SSID for 2.4GHZ radio: airlive2.4
Default SSID for 5GHZ radio: airlive5g
1. Please install the antennas into N450R.
2. Connect your PC to any LAN port by RJ-45 Ethernet cable.
3. Connect the power jack to the power port.
4. Push the power on button on the rear panel of N450R.
5. Wait for about 1 minute for N450R to boot.
6. Please set your PC’s network card to “Obtain an IP & DNS address
automatically” or you can set to “192.168.1.x” (Same subnet as N450R)
7. Type http://192.168.1.254 (The default IP address of N450R) into the web
browser to login the Web Management.
8. After entering the Web Management, please perform the Setup Wizard and
follow the instructions which given by the Wizard to complete the
configuration.
Please make sure to install the antennas first before power-on. Otherwise, the
radio might be damaged.
* Noticed, the USB port 1 is for USB storage and the USB port 2 is for 3G USB
dongle. For more information, please read the instruction manual on the CD.
English
EN
Español
ES
Deutsch
DE
Hrvatska
HR
Ελληνικός
GR
Tovární nastavení:
Konfigurace N450R
IP: 192.168.1.254
Maska podsítě: 255.255.255.0
Uživatelské jméno : admin
Heslo : airlive
Tovární SSID pro frekvenci 2.4 GHz je : airlive2.4
Tovární SSID pro frekvenci 5 GHz je : airlive5g
1. Nainstalujte antény na N450R.
2. Připojte Váš počítačk routeru pomocí LAN kabelu.
3. Připojte elektrickou energii.
4. Zapněte N450R pomocí tlačítka na zadní straněrouteru.
5. Počkejte, než router nastartuje.
6. Prosím, nastavte síťovou kartu počítače na získávání IP adresy automaticky,
nebo nastavte IP adresu na “192.168.1.x”
7. Napište http://192.168.1.254 do webového prohlížeče
8. Po vstupu do webového managementu nastavte zařízení pomocí pomocníka
nebo ručně– toto vyžaduje pokročilé znalosti nastavení sítěa bezpečnosti.
Prosím, ujistěte se, že máte nainstalované antény ještěpřed zapnutím routeru.
Jinak může dojít k poškození zařízení.
* Důležité : USB port 1 je pro USB úložištědat a USB port 2 je pro 3G dongl. Pro
více informací si přečtěte návod na přiloženém CD.
Voreinstellungen:
Anmeldung an der Web-Verwaltung zur Konfiguration des N450R
IP: 192.168.1.254
Subnetzmaske: 255.255.255.0
Benutzername: admin
Passwort: airlive
Voreingestellte SSID des 2.4GHz Senders: airlive2.4
Voreingestellte SSID des 5GHz Senders: airlive5g
1. Bitte installieren Sie die Antennen am N450R.
2. Verbinden Sie den PC mit einem LAN-Port per RJ-45 Ethernet Kabel.
3. Schließen Sie die Strombuchse an den Netzanschluss.
4. Betätigen Sie den An/Aus Taster auf der Rückseite des N450R
5. Warten Sie ca. 1 Minute, bis der für N450R gestartet ist.
6. Bitte stellen Sie Ihre PC-Netzwerkkarte auf "IP- & DNS-Serveradresse
automatisch beziehen" oder stellen Sie manuell auf eine IP im 192.168.1.x
ein (im Subnetz des N450R)
7. Geben Sie http://192.168.1.254 (die IP-Adresse des N450R) in den
Webbrowser ein, um sich zur Anmeldeseite zu verbinden
8. Nach der Anmeldung führen Sie bitte den Setup-Assistenten aus und
befolgen die Anweisungen, die Ihnen durch den Assistenten gegeben
werden. Danach ist die Konfiguration abgeschlossen
Stellen Sie sicher, dass Sie die Antennen vor dem Einschalten installieren.
Andernfalls könnten die Sender beschädigt werden.
* HINWEIS: Der USB-Port 1 ist für USB-Storage und der USB-Anschluss 2 ist für
einen 3G USB-Dongle vorgesehen. Für weitere Informationen lesen Sie bitte
das Handbuch auf der mitgelieferten CD.
Configuración por default:
Login de administrador de web para la configuración del N450R
IP: 192.168.1.254
Subnet mask: 255.255.255.0
Nombre del usuario: admin
Contraseña: airlive
SSID por default para radio de 2.4GHZ: airlive2.4
SSID por default para radio de 5GHZ: airlive5g
1. Instalar la antena en el N450R.
2. Conectar su PC a un puerto LAN con el cable RJ-45 Ethernet.
3. Conectar el el adaptador de corriente al puerto de corriente.
4. Pulsar el botón de encendido del N450R en el panel trasero.
5. Esperar 1 minuto para reiniciar el N450R.
6. Fijar la tarjeta de red de su PC en “Obtain an IP & DNS address automati-
cally” o fijarlo en “192.168.1.x” (Igual subnet que el N450R)
7. Tipear http://192.168.1.254 (default IP) en el navegador de web para entrar
al administrador de web.
8. Luego entrar al administrador de web, realizar el Setup Wizard y seguir las
instrucciones del Wizard para completar la configuración.
Favor de instalar la antena antes de encender el equipo, de lo contrario, dañará
la radio.
* El puerto USB port 1 es para almacenamiento del USB y el puerto 2 es para el
conector USB de 3G. Para mayor información, leer el manual de instrucciones
en el CD.
Προεπιλεγμένες ρυθμίσεις:
Είσοδος στο Web Management για τις ρυθμίσεις του N450R
IP: 192.168.1.254
Subnet mask: 255.255.255.0
Όνομα Χρήστη: admin
κωδικός πρόσβασης: airlive
Προεπιλεγμένο SSID για συχνότητα 2.4GHZ: airlive2.4
Προεπιλεγμένο SSID για συχνότητα 5GHZ: airlive5g
1. Εγκαταστήσετε τις κεραίες τουN450R.
2. Συνδέστε τον υπολογιστή σας σε οποιαδήποτε θύρα LAN με καλώδιο
δικτύου RJ-45.
3. Συνδέστε την υποδοχή ρεύματος στη θύρα τροφοδοσίας.
4. Πιέστε το κουμπί τροφοδοσίας στο πίσω μέρος του N450R.
5. Περιμένετε για περίπου 1 λεπτό για να εκκίνηση το N450R.
6. Ορίσετε την κάρτα δικτύου του υπολογιστή σας για να “Αποκτήσετε μια
διεύθυνση IP & DNS αυτόματα” ήμπορείτε να ρυθμίσετε την " 192.168.1.x "
( ίδιο υποδίκτυο με N450R )
7. Πληκτρολογήστε http://192.168.1.254 (Ηπροεπιλεγμένη διεύθυνση IP του
N450R ) στο πρόγραμμα περιήγησης για να συνδεθείτε στο Web
Management.
8. Αφού εισέλθετε στο Web Management, εκτελέστε τον Οδηγό εγκατάστασης
και ακολουθήστε τις οδηγίες για να ολοκληρωθεί ηδιαμόρφωση.
Παρακαλώ βεβαιωθείτε ότι έχετε εγκαταστήσει πρώτα τις κεραίες πριν από την
τροφοδοσία. Διαφορετικά, μπορεί να κατεστράφη το ασύρματο.
* Παρατηρήσει, η1ηθύρα USB είναι για αποθήκευση και η2ηθύρα USB είναι
για 3G USB dongle. Για περισσότερες πληροφορίες, διαβάστε το εγχειρίδιο
χρήσης στο CD.
Početne postavke:
Login Web Management za konfiguraciju N450R
IP: 192.168.1.254
Subnet mask: 255.255.255.0
Korisničko ime: admin
Lozinka: airlive
Zadan SSID za 2.4GHZ radio: airlive2.4
SSID za 5GHZ radio: airlive5g
1. Instalirajte antene na N450R.
2. priključite vaš PC na LAN port sa RJ-45Ethernet kabelom.
3. Priključite utičnicu napajanja 220V u mrežni priključak.
4. Pritisnite dugme za uključenje na stražnjem panelu uređaja N450R.
5. Pričekajte oko 1 min da N450R dođe u radni režim.
6. Postavke vaše mrežne kartice stavite u “Obtain an IP & DNS address
automatically” ili možete postaviti “192.168.1.x” (isti subnet kao N450R)
7. Utipkajte http://192.168.1.254 ( početna IP adresa N450R) u web preglednik
kako bi ušli u Web Management.
8. Nakon što ste ušli u Web Management, molim da pokrenete Setup Wizard i
slijedite instrukcije kako bi završili konfiguraciju.
Molim da istalirate antene prije uključenja uređaja. U suprotnom uređaj bi se
mogao uništiti.
* Napomena, USB port 1 je za USB memoriju, a USB port 2 za 3GB dongle. Više
informacija možete naći u priručniku na CD-u.
AirLive N450R
3T3R Wireless-N Dual Band Gigabit Router
P2
Alapértelmezett beállítások:
Belépés az N450R felhasználói felületére:
IP-cím: 192.168.1.254
Alhálózati maszk: 255.255.255.0
Felhasználói név: admin
Jelszó: airlive
A 2,4 GHz-es működési frekvencián az alapértelmezett SSID: airlive2.4
Az 5 GHz-es működési frekvencián az alapértelmezett SSID: airlive5g
1. Szerelje fel az antennákat az N450R-re.
2. Csatlakoztassa az eszközt Ethernet kábellel a számítógép egy szabad LAN portjához.
3. Dugja be a hálózati áram kábelét.
4. Nyomja meg az N450R bekapcsoló gombját.
5. Várjon, amíg az N450R elindul (kb. 1 perc).
6. A PC hálózati kártyáját állítsa be úgy, hogy az IP-címet és a DNS-kiszolgáló címét
automatikusan kérje. Alternatív megoldásként kézzel is beállíthatja az adatokat, ebben az
esetben az IP-cím 192.168.1.X legyen, az alhálózati maszk pedig 255.255.255.0.
7. A kezelőfelülethez való belépéshez gépelje be a böngészőcímsorába: http://192.168.1.254
(ez az N450R alapértelmezett IP-címe).
8. Miután belépett a kezelőfelületre, kérjük, kövesse a varázsló utasításait, amelyek
végigvezetnek az N450R üzembe helyezésének valamennyi, még szükséges lépésén.
Kérjük, hogy az antennákat azelőtt szerelje fel, mielőtt bekapcsolja a készüléket.
Ellenkezőesetben az eszköz meghibásodhat.
* Figyelem, az 1-es számú USB csatlakozót használja adattárolók csatlakoztatásához, a 2-es
számú csatlakozót pedig 3G modemekhez. További információkat a telepítőCD-n lévő
felhasználói kézikönyvben talál.
Magyar
HU
Bahasa
ID
Português
PT
Polski
PL
Slovensky
SK
România
RO
Русский
RU
Konfigurasi Awal :
Login Web Management untuk mengkonfigur N-450R
IP: 192.168.1.254
Subnet mask: 255.255.255.0
Username: admin
Password: airlive
SSID standar untuk Radio 2,4Ghz : airlive2.4
SSID standar untuk Radio 5Ghz : airlive5g
1. Silakan memasang antenna pada unit N-450R
2. Hubungkan PC Komputer anda ke salah satu port LAN dengan menggunakan kabel LAN
3. Hubungkan colokan power input ke lubang power
4. Nyalakan tombol power yang terdapat pada panel depan
5. Silakan menunggu 1 menit untuk unit N-450R selesai booting
6. Silakan memilih setting“Obtain an IP & DNS address Automatically”pada LAN Card pada
PC anda atau anda dapat melakukan konfigurasi setting manual seperti
“192.168.1.x”subnet mask 255.255.255.0
7. Ketik 192.168.1.254 (IP address awal dari N-450R) melalui web browser untuk login ke
dalam Web Management.
8. Setelah memasuki Web Management, silakan menjalankan “Setup Wizard”dan ikutin
langkah-langkah yang diberikan oleh Wizard untuk menyelesaikan konfigurasi.
Silakan memastikan untuk memasang antenna terlebih dahulu sebelum menyalakan
unit, jika tidak akan merusak fungsi radio.
* Catatan, USB Port1 adalah untuk USB Storage, USB Port2 adalah untuk USB 3G Dongle,
Untuk keterangan lebih lanjut silakan membaca buka manual yang tercantum di dalam CD.
Standardowe Ustawienia:
Zarządzanie I konfiguracja N450R przez WWW
IP: 192.168.1.254
Maska podsieci: 255.255.255.0
Użytkownik: admin
Hasło: airlive
Domyślne SSID dla nadajnika 2,4Ghz: airlive2.4
Domyślne SSID dla nadajnika 5Ghz: airlive5g
1. Zainstaluj anteny w N450R.
2. Podłącz komputer PC do któregokolwiek portu LAN kablem RJ-45 typu Ethernet.
3. Podłącz wtyczkęzasilania do urządzenia.
4. Wciśnij przycisk “power” na tylnym panelu urządzenia N450R.
5. Poczekaj około minuty ażurządzenie będzie gotowe do pracy.
6. Proszęustaw we właściwościach połączenia karty sieciowej “Pobierz adres IP oraz DNS
automatycznie” lub przypisz ręcznie adres IP wg schematu “192.168.1.x” (w tej samej
podsieci co N450R)
7. Wpisz http://192.168.1.254 (Domyślny adres IP urządzenia N450R) w oknie przeglądarki
internetowej by dostaćsiędo panelu zarządzania.
8. Po zalogowaniu siędo Routera uruchom kreatora konfiguracji “Setup Wizard” I postępuj
zgodnie ze wskazówkami kreatora by dokończyćkonfiguracjęroutera.
Zainstaluj najpierw dostarczone anteny zanim podłączysz zasilanie urządzenia. W innym
przypadku możesz spowodowaćuszkodzenie nadajnika radiowego.
* Uwagi, port USB 1 jest portem dla urządzeńpamięci masowych , port USB 2 służy do
podłączania modemów 3G USB. Więcej informacji znajdziesz na dołączonym dysku CD.
Definições por Defeito:
Login Gestor Web para Configurar o N450R
IP: 192.168.1.254
Máscara Subrede: 255.255.255.0
Username: admin
Password: airlive
SSID Padrão para o rádio 2.4GHZ: airlive2.4
SSID Padrão para o rádio 5GHZ: airlive5g
1. Por favor instale as antenas no N450R.
2. Conecte o seu PC a qualquer porta LAN por cabo RJ-45Ethernet.
3. Conecte o jack de power à porta do power.
4. Pressione o botão do power no painel traseiro do N450R.
5. Aguarde cerca de 1 minuto para o N450R arrancar.
6. Por favor configure a placa de rede do seu PC para “Obter um endereço IP & DNS
automaticamente” ou você pode definir para “192.168.1.x” (Mesma sub-rede que
N450R)
7. Digite http://192.168.1.254 (O endereço IP por defeito do N450R) no explorador web
para fazer o login no Gestor Web.
8. Após entrar no Gestor Web, execute por favor o Setup Wizard (Assistente de
Configuração) e siga as instruções dadas pelo Wizard para completar a configuração.
Por favor certifique-se de instalar primeiro as antenas antes de o ligar. Caso contrário, o
rádio poderá ficar danificado.
* Note, a porta USB 1 é para armazenamento USB e a porta USB 2 é para 3G USB dongle.
Para mais informações leia por favor o manual de instruções no CD.
Setari implicite:
Etapele instalarii si configurarii N450R
IP: 192.168.1.254
Subnet mask: 255.255.255.0
Utilizator: admin
Parola: airlive
SSID implicit pentru frecventa 2.4GHz: airlive2.4
SSID implicit pentru frecventa 5GHz : airlive5g
1. Va rugam sa instalati antenele la N450R.
2. Conectati PC-ul la orice port LAN prin cablu ethernet cu mufa RJ-45.
3. Conectati mufa de alimentare.
4. Apasati butonul de pornire aflat in partea din spate a N450R.
5. Asteptati aproximativ 1 minut pentru initializarea N450R.
6. Va rugam sa setati placa de retea a PC-ului ca “Obtain an IP & DNS address
automatically” sau o puteti seta ca “192.168.1.x” (aceiasi sub retea ca N450R)
7. Tastati http://192.168.1.254 (adresa IP implicita a N450R) in navigatorul web pentru
a va autentifica in interfata de web management.
8. Dupa ce ati accesat interfata de management va rugam sa executati expertul de
configurare si sa urmati instructiunile pentru a completa configurarea.
Va rugam sa va asigurati ca ati instalat antenele inainte de pornire. In caz contrar
modulul radio se poate deteriora.
* Important, portul 1 USB este pentru dispozitivele de stocare si portul 2 USB este pentru
dispozitivele USB 3G.. Pentru mai multe informatii, va rugam sa consultati instructiunile de
pe CD.
Настройки по умолчанию:
Войдите вВеб Менеджмент для настройки N450R
IP: 192.168.1.254
Маска подсети: 255.255.255.0
Имя пользователя: admin
Пароль: airlive
SSID для 2.4Ггц аудио по умолчанию: airlive2.4
SSID для 5Ггц аудио по умолчанию: airlive5g
1. Пожалуйста, установите антенны вN450R.
2. Подключите Ваш ПК клюбому LAN порту используя RJ-45Ethernet кабель.
3. Подключите шнур питания вразъем питания.
4. Нажмите кнопку питания на задней панели N450R.
5. Подождите 1 минуту для перезагрузки N450R.
6. Пожалуйста, разрешите сетевой карте Вашего ПК “Получить IP & DNS адрес
автоматически” или Вы можете ввести самостоятельно “192.168.1.x” (Идентично
маске подсети)
7. Введите http://192.168.1.254 (Идентично IP адресу по умолчанию) встроку ввода
Вашего браузера для входа вВеб Менеджмент.
8. После входа вВеб Менеджмент, пожалуйста, запустите Мастер Установки и
следуйте инструкциям до окончания настройки.
Пожалуйста, установите антенны до включения питания. Впротивном случае,
радиосвязь может быть повреждена.
* Обратите внимание, первый USB порт для USB флешки, второй USB порт для 3G
USB заглушки. Для дополнительной информации, пожалуйста, обратитесь к
руководству пользователя доступном на CD.
Predvolené nastavenia:
Pre konfiguráciu N450R sa prihláste do web manažmentu:
IP: 192.168.1.254
Maska podsiete: 255.255.255.0
Prihlasovacie meno: admin
Heslo: airlive
Predvolené SSID pre 2,4 GHz vysielač: airlive2.4
Predvolené SSID pre 5 GHz vysielač: airlive5g
1. K N450R pripojte antény.
2. Ku ktorémukoľvek LAN portu pripojte pomocou sieťového Ethernet káblu s ukončením
RJ-45 počítač.
3. Do napájacieho portu pripojte napájací kábel.
4. Na zadnej strane N450R stlačte tlačidlo napájania.
5. Počkajte približne 1 minútu, kým sa N450R spustí.
6. Na počítači nastavte sieťovú kartu tak, aby si obstarala IP a DNS adresy automaticky,
alebo ich môžete nastaviťna „192.168.1.x“ (rovnaká podsieť).
7. Pre prístup do web manažmentu zadajte do prehliadaču internetu adresu
http://192.168.1.254 (predvolená IP adresa N450R).
8. Po prihlásení do web manažmentu spustite sprievodcu nastavením (Setup Wizard) a
postupujte podľa inštrukcií.
Pred prvým spustením sa uistite, že sú antény pripojené. Inačmôže dôjsťk poškodeniu
vysielačov.
* Poznámka: USB port 1 je na pripojenie USB disku a USB port 2 je na pripojenie 3G
USB modemu. Viac informácií nájdete v manuáli na priloženom CD.
Other manuals for N450R

1

Other AirLive Network Router manuals

AirLive DS-100 v2 User manual

AirLive

AirLive DS-100 v2 User manual

AirLive Ether-FSH2400N User manual

AirLive

AirLive Ether-FSH2400N User manual

AirLive Ether-FSH2400RS User manual

AirLive

AirLive Ether-FSH2400RS User manual

AirLive WN-220R User manual

AirLive

AirLive WN-220R User manual

AirLive AC-1200R User manual

AirLive

AirLive AC-1200R User manual

AirLive GW-300R User manual

AirLive

AirLive GW-300R User manual

AirLive GPON ONU-CATV User manual

AirLive

AirLive GPON ONU-CATV User manual

AirLive A.DUO User manual

AirLive

AirLive A.DUO User manual

AirLive Ether-FSH24 User manual

AirLive

AirLive Ether-FSH24 User manual

AirLive WT-2000ARM User manual

AirLive

AirLive WT-2000ARM User manual

AirLive Live-5G User manual

AirLive

AirLive Live-5G User manual

AirLive Ether-GSH8TW v2 User manual

AirLive

AirLive Ether-GSH8TW v2 User manual

AirLive WN-301R User manual

AirLive

AirLive WN-301R User manual

AirLive ARM-204 User manual

AirLive

AirLive ARM-204 User manual

AirLive GW-300RNAS User manual

AirLive

AirLive GW-300RNAS User manual

AirLive IP-1000R Operating instructions

AirLive

AirLive IP-1000R Operating instructions

AirLive ARM-201E User manual

AirLive

AirLive ARM-201E User manual

AirLive VoIP 400 Series User manual

AirLive

AirLive VoIP 400 Series User manual

AirLive WN-300R User manual

AirLive

AirLive WN-300R User manual

AirLive VoIP SIP Series User manual

AirLive

AirLive VoIP SIP Series User manual

AirLive AC-1200R User manual

AirLive

AirLive AC-1200R User manual

AirLive WN-300ARM-VPN User manual

AirLive

AirLive WN-300ARM-VPN User manual

AirLive ETHER-FSH2402NT User manual

AirLive

AirLive ETHER-FSH2402NT User manual

AirLive POE-FSH804 User manual

AirLive

AirLive POE-FSH804 User manual

Popular Network Router manuals by other brands

Billion BIPAC 5102 Series user manual

Billion

Billion BIPAC 5102 Series user manual

LevelOne FBR-1416 user manual

LevelOne

LevelOne FBR-1416 user manual

Asco 5100 Series installation manual

Asco

Asco 5100 Series installation manual

Seeley MagIQtouch installation manual

Seeley

Seeley MagIQtouch installation manual

Black & Decker KW1600 Original instructions

Black & Decker

Black & Decker KW1600 Original instructions

ANTAIRA LNX-1202G-SFP Series user manual

ANTAIRA

ANTAIRA LNX-1202G-SFP Series user manual

Asus DSL-N11 quick start guide

Asus

Asus DSL-N11 quick start guide

Atlantis Land A02-RA241-W54 user manual

Atlantis Land

Atlantis Land A02-RA241-W54 user manual

Korenix JetNet 7850G-2XG user manual

Korenix

Korenix JetNet 7850G-2XG user manual

Edimax AR-7084A user manual

Edimax

Edimax AR-7084A user manual

TP-Link TD-8816B user guide

TP-Link

TP-Link TD-8816B user guide

nilan Compact S CTS 602 user manual

nilan

nilan Compact S CTS 602 user manual

D-Link DSL-1500G user guide

D-Link

D-Link DSL-1500G user guide

D-Link DIR-X1860 user manual

D-Link

D-Link DIR-X1860 user manual

InHand IR900 Series quick guide

InHand

InHand IR900 Series quick guide

TECOM AW4038 user manual

TECOM

TECOM AW4038 user manual

Proscend 6200-2W user manual

Proscend

Proscend 6200-2W user manual

Bay Networks BayStack ARN Routers none Installation and operating guide

Bay Networks

Bay Networks BayStack ARN Routers none Installation and operating guide

manuals.online logo
manuals.online logoBrands
  • About & Mission
  • Contact us
  • Privacy Policy
  • Terms and Conditions

Copyright 2025 Manuals.Online. All Rights Reserved.